
Think of a roof inspection report as a complete health check-up for the single most important protective layer of your home. It’s a detailed document that breaks down the roof’s current condition, what it’s made of, and pinpoints any repairs that are needed now or in the near future. Simply put, it's like a medical chart for your roof, giving you the vital signs you need to make smart decisions.
Why Your Roof Inspection Report Is So Important
Getting a multi-page document packed with technical jargon can feel a bit overwhelming, but taking the time to understand your roof inspection report is absolutely critical. This isn’t just a simple pass-or-fail test; it’s a practical guide for protecting your entire property. The report acts as a professional, unbiased record of your roof's condition at a specific moment, turning vague worries into a clear, actionable plan.
At its heart, the report is designed to spot potential weak points before they spiral into disasters. A small problem, like a single cracked shingle or a failing seal around a vent, can quickly turn into a major leak. That leak can then lead to thousands of dollars in water damage, dangerous mold growth, and even structural rot. This report is your early warning system.
A detailed roof inspection report replaces guesswork with facts. It provides the photographic evidence and expert analysis needed to make sound financial decisions, whether you're negotiating a home purchase, filing an insurance claim, or budgeting for future maintenance.
What the Report Empowers You to Do
This document is a powerful tool. Just like a homeowner might get a comprehensive electrical safety inspection to uncover hidden wiring dangers, a roof report brings to light issues that are totally invisible from the ground. That knowledge gives you some serious leverage.
With a professional report in hand, you can:
- Negotiate with Confidence: Whether you’re buying or selling a home, the report gives you a factual basis for negotiating the price or requesting specific repairs before closing.
- Strengthen Insurance Claims: After a storm, a report from a certified inspector is credible, third-party proof of damage. This can make a huge difference in getting your claim approved quickly and fairly.
- Plan Proactive Maintenance: It helps you sort out what needs to be fixed immediately versus what you can plan for down the road, allowing you to budget effectively and get the most life out of your roof.
Ultimately, this document is more than just paper; it's a roadmap to preserving the safety and value of your property. For professional assessments in South Florida that deliver this clarity, you can learn more about our inspection process. By understanding its components, you can confidently translate its findings into a smart action plan.
![]()
Breaking Down Key Report Components
A professional roof inspection report isn't just a simple pass/fail summary. Think of it more like a detailed health check-up for your home's most important protector. Each section tells a part of your roof's story, from its overall condition to the small, often-overlooked details that can lead to big problems.
Understanding how to read this document is key to making smart decisions. Let's walk through the critical sections you'll find in any thorough report and translate what the inspector is really telling you about your roof's health.
The Foundation: Structural Integrity
Long before an inspector even sets foot on your shingles, they’re looking at what’s holding everything up. The roof's underlying structure is its skeleton, and if it's not sound, nothing else matters. Even brand-new, top-of-the-line shingles will fail if the foundation is compromised.
This part of the report focuses on two key areas:
- Decking: This is the wood surface (usually plywood or OSB) that the shingles are nailed to. The inspector is hunting for dark stains, soft spots, or any sign of rot. These are dead giveaways that water has already breached the outer layers.
- Trusses and Rafters: These are the bones of your roof's frame. Any cracks, sagging, or signs of stress here are major red flags that could threaten the stability of the entire roof.
An issue found in this section isn't just a roofing problem; it's a structural problem for your entire home. It needs to be taken seriously.
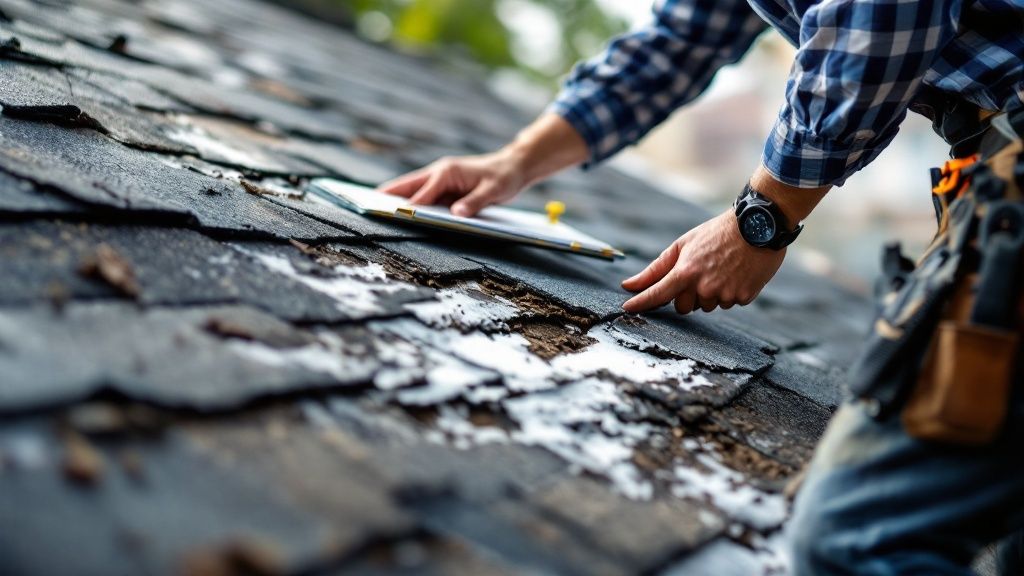
The Protective Shield: Roofing Material Condition
This is the part of the report most homeowners jump to first, and for good reason. It’s a deep dive into the condition of the primary material—whether that’s asphalt shingles, tiles, or metal panels—that stands between your home and the elements. The health of this layer directly tells you how much life your roof has left.
An inspector will get specific here. For an asphalt shingle roof, they'll note things like granule loss, which is basically the roof's protective sunscreen wearing off. They'll also photograph any shingles that are cracked, curling up at the edges, or missing entirely. For tile roofs, they're looking for cracked or slipped tiles. On a metal roof, it's all about rust, corrosion, and loose fasteners.
To make things clear, inspectors often use a simple rating system like 'Good,' 'Fair,' or 'Poor' to classify each component. 'Fair' might suggest the material is aging but still doing its job, while 'Poor' is a clear warning that failure is on the horizon and replacement should be your top priority.
This kind of detailed analysis is getting more and more precise. The drone inspection market, for instance, is projected to hit USD 889.2 million by 2035, largely because technologies like AI and 3D mapping give us a startlingly accurate picture of a roof's condition. You can read more about the advancements in roof inspection technology on factmr.com.
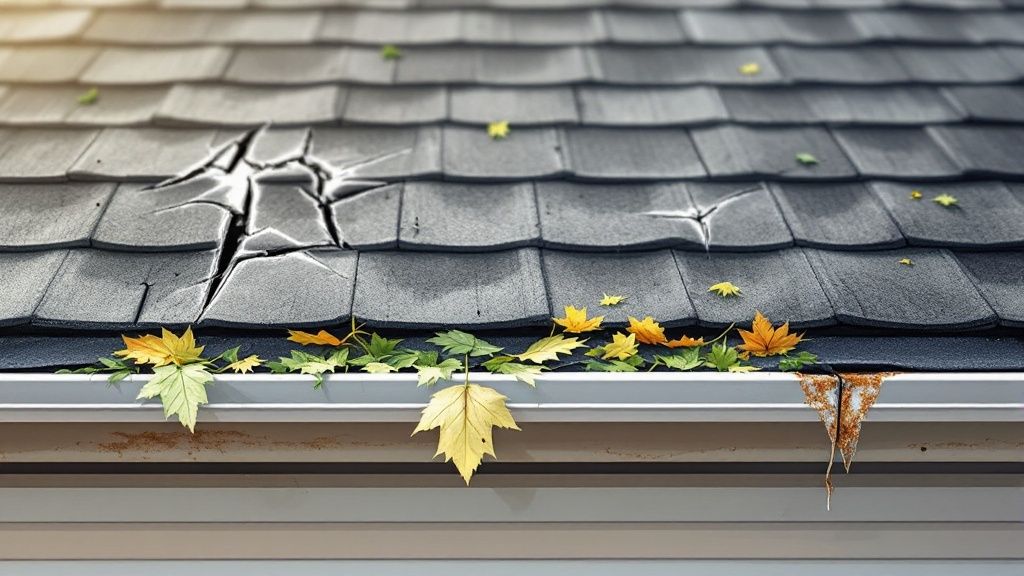
The Unsung Heroes: Flashing, Gutters, and Penetrations
While the shingles get all the glory, it’s the smaller, less glamorous components that are often the real source of leaks. These are the critical transition points and drainage systems where even a tiny failure can let water in.
A good inspector will obsess over these details:
- Flashing: Those metal strips around chimneys, skylights, and vents are crucial. The report will tell you if the flashing is rusted, loose, or if its sealant has dried out and cracked, creating a direct path for rainwater.
- Gutters and Downspouts: A gutter system that works properly is vital for moving water away from your home's foundation. The report will note if your gutters are clogged with leaves, pulling away from the fascia, or sloped incorrectly.
- Roof Penetrations: Any pipe or vent that sticks through your roof is a potential weak spot. The inspector checks the rubber "boots" or seals around these penetrations for cracks and decay, which are common culprits for leaks.
It's amazing how often a persistent attic leak traces back to something as small as a cracked seal around a plumbing vent. This section of the report is invaluable for catching those hidden vulnerabilities before they turn into a catastrophe.
To give you a clearer picture, here’s a quick summary of what each part of the report covers and why it’s so important.
Standard Sections of a Roof Inspection Report
| Report Section | What It Covers | Why It's Important |
|---|---|---|
| Structural Integrity | Condition of decking, trusses, and rafters. | Forms the foundation of the entire roofing system; a failure here compromises the whole structure. |
| Roofing Material | Wear and tear on shingles, tiles, or metal panels (e.g., granule loss, cracks, rust). | Determines the remaining lifespan of the roof and its ability to shed water effectively. |
| Flashing & Sealants | Condition of metal strips around chimneys, vents, and skylights. | Prevents leaks at the most vulnerable transition points on the roof. |
| Drainage System | State of gutters, downspouts, and scuppers. | Ensures water is properly directed away from the roof and the home's foundation. |
| Penetrations | Seals around plumbing vents, exhaust fans, and other protrusions. | Identifies common and often-hidden sources of water intrusion before they cause major damage. |
| Overall Assessment | A summary of findings, life expectancy estimate, and repair/replacement recommendations. | Provides a clear, actionable plan based on the inspector's expert evaluation. |
Ultimately, a detailed report empowers you with the knowledge to act proactively, saving you from the stress and expense of emergency repairs down the road.
Cracking the Code: A Plain-English Guide to Roofing Jargon
Let's be honest, a roof inspection report can feel like it's written in a foreign language. It's packed with technical terms that can leave you scratching your head, making it tough to have a real conversation with a contractor about what your home actually needs.
Think of it this way: you wouldn't go to a doctor's appointment without wanting to understand the diagnosis. The same goes for your roof. Knowing the lingo is your key to asking smart questions and making decisions you can feel confident about. This section is your personal translator, turning confusing industry-speak into simple, practical knowledge.
By the time you're done here, you won't just know what the inspector wrote—you'll understand why it matters for the long-term health of your home.
The Roof's Armor and Bones
Most of the terms you’ll run into describe the main layers that shield your home from the elements. Each one has a specific job, and they all have to work together perfectly.
-
Decking (or Sheathing): This is the wood foundation of your roof, usually made of plywood or similar panels. Think of it as the skeleton that everything else is built on. If your report says the decking is soft, rotting, or stained, that’s a major red flag—it means the skeleton is weak, putting the whole system at risk.
-
Underlayment: Tucked between the decking and your shingles is a water-resistant barrier. This is your roof’s hidden layer of waterproofing. It’s the crucial backup plan, the second line of defense if a shingle gets blown off in a storm.
-
Shingles/Tiles/Panels: This is the part you see from the street—the visible "armor" of your roof. The report will get specific about its condition, noting things like granule loss. For an asphalt shingle, granule loss is like the protective top layer of your skin wearing away, leaving it vulnerable to sun and weather damage.
Getting these basic terms down helps you picture how your roof works as a complete system, protecting your home from the top down.
Where Leaks Love to Start: Joints and Edges
Leaks almost never happen in the middle of a perfectly good shingle. They start at the seams, edges, and anywhere something pokes through the roof. That's why your inspection report will zero in on these vulnerable spots.
Flashing is probably the single most important part of preventing leaks. Think of it as a custom-fit raincoat for all your roof's joints—around chimneys, vents, and skylights. If that raincoat is rusty, cracked, or installed wrong, water has a direct ticket into your home.
Here are a few other key terms you'll definitely see:
-
Soffit: This is the finished surface on the underside of your roof's overhang. It’s not just for looks; it's essential for attic ventilation, helping control temperature and prevent moisture from building up. A damaged soffit is an open invitation for pests and can lead to poor air circulation.
-
Fascia: This is the long, straight board that runs along the roof's lower edge, right where the gutters hang. It’s like the trim around a window frame—it gives the roof a finished look while protecting the underlying wood structure from the weather.
-
Efflorescence: If you have a tile roof, this word might pop up. It refers to a white, chalky powder that can appear on the surface of the tiles. While it’s often just a cosmetic issue caused by salt deposits, it can sometimes be a sign that the tiles are absorbing too much water.
Once you understand these specific terms, you can pinpoint exactly where a problem is and why the inspector is making a certain recommendation. Your report will transform from a confusing document into a clear, actionable roadmap for protecting your home.
Interpreting Photos and Diagrams
If the written part of a roof inspection report is the diagnosis, then the photos and diagrams are the hard evidence. They turn abstract roofing terms into something you can actually see, giving you a clear picture of what the inspector found.
Think of this section as your personal visual tour of the roof’s health. Each image is a chapter in the story, and learning to read them with a critical eye is what separates a quick glance from a true understanding of your roof’s condition.
What to Look for in Close-Up Shots
The close-up shots are all about the details. An inspector uses these to zero in on specific, localized problems that would be completely invisible from the ground. These are the photos that reveal the true texture and condition of your roofing materials.
When you’re flipping through these images, be on the lookout for:
- Cracked or Blistering Shingles: A crack is an obvious welcome mat for water. Blistering, which looks like little bubbles on the shingle’s surface, is a dead giveaway that moisture or heat is trapped, signaling that the material is starting to fail.
- Nail Pops: This happens when a roofing nail starts to push its way back up through a shingle. It might seem small, but it breaks the watertight seal and creates a direct path for water to sneak underneath.
- Improperly Installed Flashing: Pay close attention to photos of the areas around chimneys, vents, and skylights. If you see gaps, rust, or sealant that’s cracking and pulling away, you’re looking at one of the most common sources of leaks. You can see an example of what this looks like in this photo.
These detailed shots provide the undeniable proof you’ll need if you’re dealing with an insurance claim or negotiating repairs with a contractor.
Reading the Story in Wide-Angle Views
While close-ups pinpoint specific flaws, the wide-angle shots tell the bigger story. They provide the context, revealing systemic issues or patterns of wear that might point to a more widespread problem. This is how you grasp the overall health of your roof.
From these broader views, you can often spot:
- Algae or Moss Growth: Those dark streaks or green fuzzy patches, especially on the north-facing slopes, mean your roof is holding onto too much moisture. Over time, this growth can literally eat away at your roofing materials.
- Water Ponding: For flat or low-slope roofs, any photo showing standing water 24-48 hours after it rains is a major red flag. It points to a serious drainage issue that can lead to heavy, costly structural damage if ignored.
- Widespread Granule Loss: A wide shot might reveal large, dark patches where the protective granules on your shingles have worn away. This exposes the underlying asphalt to the sun's harsh UV rays, drastically shortening the roof's lifespan.
The demand for this kind of detailed visual evidence is why the global residential roof inspection market is projected to grow from USD 0.22 billion to USD 0.56 billion by 2033. Homeowners increasingly rely on this visual data for property upkeep and investment protection, as you can discover in more detail about residential roof inspection services on businessresearchinsights.com.
Understanding Roof Diagrams
Finally, you’ll probably find a simple diagram or an aerial sketch of your roof’s layout in the report. This isn’t just a doodle; it’s a map that ties all the inspector’s findings to a specific location on your roof.
Inspectors use symbols and notes on these diagrams to mark the exact spots where they found issues. This is incredibly helpful because it allows you to visualize where the problems are in relation to the rest of your house.
If the report mentions a leak source above the master bedroom, the diagram will point to the precise flashing or section of shingles that’s causing it. This makes it so much easier to have a clear, productive conversation with a roofing contractor about the exact scope of work that needs to be done.
Turning Your Report Into an Action Plan
Getting a detailed roof inspection report can feel a bit like a doctor handing you a complex medical chart for your house. You have the information, but what’s next? This is where the report truly comes to life—transforming from a simple document into a powerful tool for making smart decisions. The goal is to move from just knowing the issues to creating a clear, prioritized plan that protects your property and your wallet.
Think of it like sorting your findings into three simple buckets. This approach keeps things from getting overwhelming and makes sure the most critical problems get handled first. It’s all about turning professional analysis into a practical to-do list that safeguards your investment.
Prioritizing Repairs And Maintenance
The first step is to categorize every single thing the inspector noted. Let's be honest, not all findings are created equal. A missing shingle is a much bigger deal than a gutter that just needs a good cleaning. By sorting issues based on how urgent they are, you can put your resources where they’ll do the most good.
Your action plan should have three main categories:
- Urgent Repairs: These are the red flags—the absolute, non-negotiable top priorities. This bucket is for active leaks, significant structural damage, or large patches of missing shingles that leave your home wide open to water damage. These problems need a qualified contractor, and they need one now.
- Recommended Maintenance: Think of these as important but not "hair-on-fire" urgent. This list usually includes things like cleaning out clogged gutters, trimming back tree branches that are scraping the roof, or resealing flashing that’s just starting to show its age. Tackling these proactively will keep them from becoming urgent (and expensive) repairs later on.
- Future Watch-List Items: This category is for things that aren’t a problem today but will need attention in the next few years. This could be shingles that are getting close to the end of their lifespan but are still holding up, or minor granule loss that just signals normal aging. Keeping an eye on these helps you budget for future projects, like a full roof replacement.
This visual breaks down the essential, recurring tasks that will likely pop up on your maintenance plan.
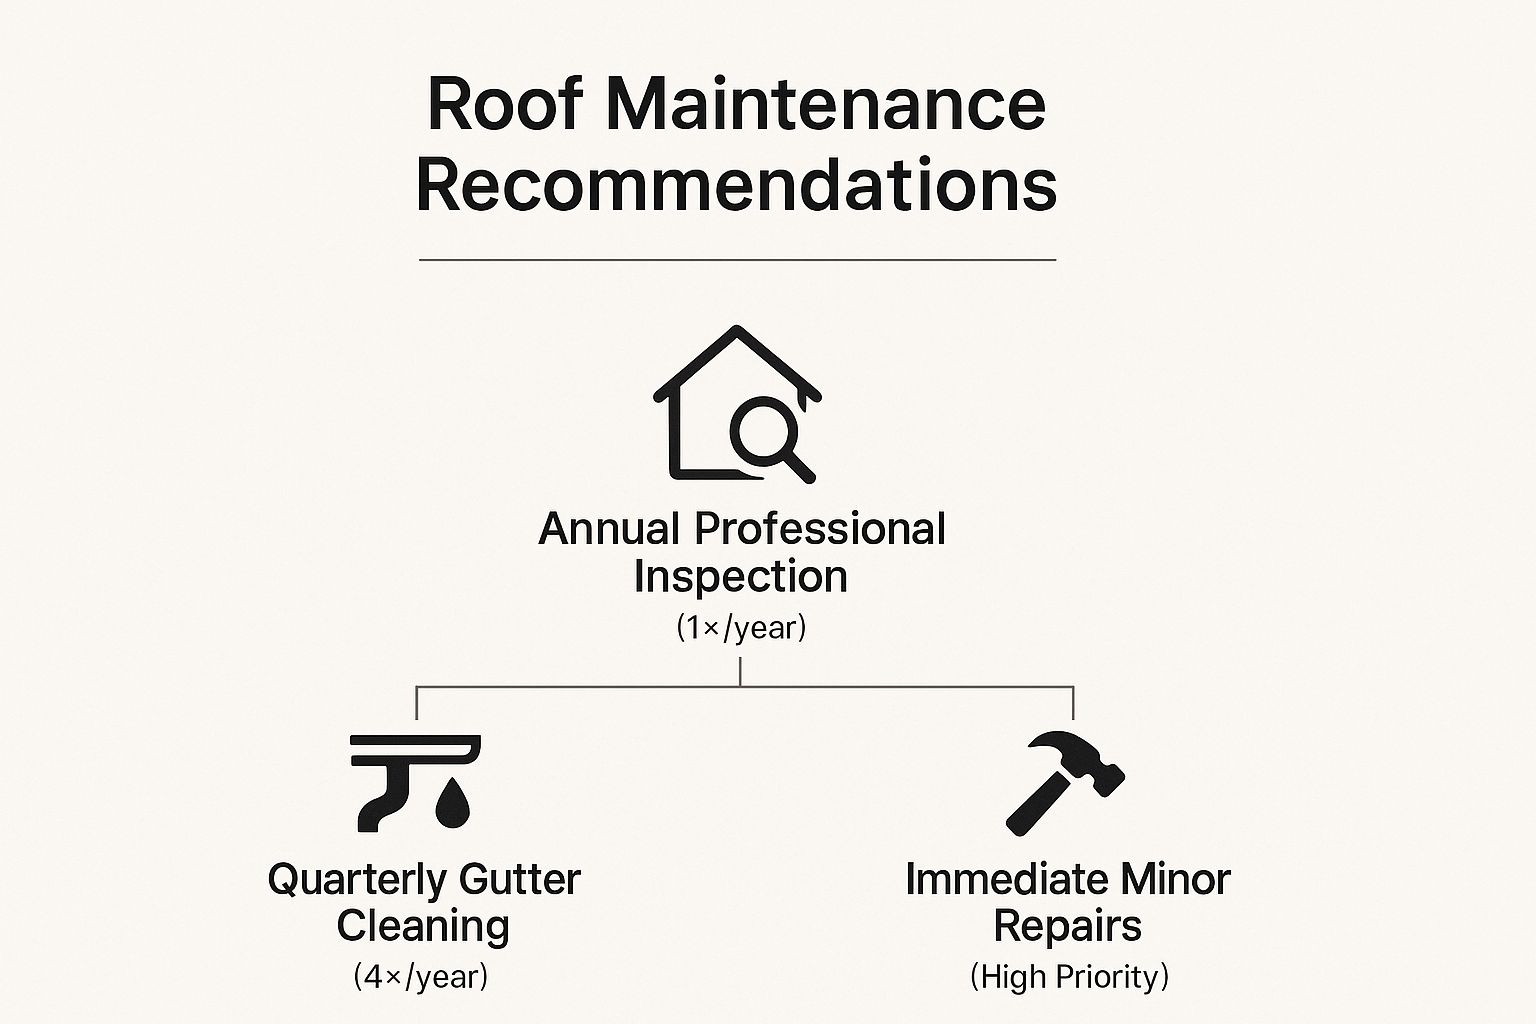
This simple hierarchy shows how a mix of professional oversight and your own routine upkeep is the foundation of a healthy roof.
Sorting your report's findings is the key to making smart, cost-effective decisions. The table below provides a simple framework to help you categorize and act on the recommendations from your inspector.
| Priority Level | Examples of Issues | Recommended Action |
|---|---|---|
| High (Urgent) | Active leaks, major storm damage, exposed decking | Call a qualified roofer immediately for emergency repairs. |
| Medium (Soon) | Loose flashing, cracked shingles, clogged gutters | Schedule repairs within the next few weeks to prevent damage. |
| Low (Watch List) | Minor granule loss, signs of aging, cosmetic stains | Monitor during seasonal checks and budget for future work. |
By breaking it down this way, you can address the most pressing threats first while planning for the future, turning what might feel like a crisis into a manageable project.
Getting Fair Contractor Quotes
Once you have your priorities straight, your roof inspection report becomes your best friend for getting accurate quotes from contractors. Instead of just vaguely describing a problem, you can hand them a precise scope of work, complete with photos and the exact location of the damage. This ensures every contractor is bidding on the very same repairs, which leads to fair, apples-to-apples pricing.
When you reach out for quotes, give the contractors the relevant sections of your report. This clarity gets rid of the guesswork and helps you steer clear of bids that are way too high or suspiciously low because the job was misunderstood.
This kind of detailed planning is becoming the norm as homeowners get more proactive. In fact, the roof inspection services market, currently valued at USD 2.5 billion, is projected to hit USD 4.2 billion by 2033. This surge shows a major trend toward preventative property care.
Leveraging The Report For Negotiations And Claims
Finally, your action plan is more than just a repair schedule; it's a powerful negotiation tool. If you're in the process of buying a home, the report provides concrete evidence to ask the seller for concessions or a price cut to cover necessary repairs.
For current homeowners, this document is gold when you have to file an insurance claim after a storm. It gives you objective, third-party proof of damage that can seriously strengthen your case. You can check out various preventive maintenance schedule templates to see how a formal plan is structured. This same principle of documented, planned action is what gives your report its authority. Following a structured approach is how you translate your report into actionable steps here.
Of course. Here is the rewritten section, crafted to sound like an experienced human expert and match the provided examples.
Common Questions About Roof Inspection Reports
Even with a detailed report in hand, it’s normal to have questions. This document is packed with information, but knowing how to apply it in the real world can feel a little tricky. Think of this as your go-to FAQ, where we cut through the jargon and give you straight answers to the questions we hear most often from homeowners, buyers, and sellers.
We’re moving from theory to action here. These are the questions that pop up after you’ve finished reading, designed to help you figure out what to do next with total confidence.
How Often Should I Get a Professional Roof Inspection?
This is easily one of the most important questions we get, and the answer really depends on your specific situation. For a standard asphalt shingle roof that’s in good shape, most pros recommend a professional inspection every two years. This regular check-up lets an expert spot small problems, like cracked sealant or a few loose shingles, before they turn into major headaches.
However, some roofs need a closer watch:
- Older Roofs: If your roof is over 15 years old, an annual inspection is a smart move. Materials naturally break down over time, and a yearly check-in helps you accurately track its remaining life and plan for an eventual replacement without any surprises.
- Harsh Weather Areas: Live in a place that gets hurricanes, hail, or heavy snow? You should also get your roof looked at every year. The constant battering from extreme weather can speed up wear and tear in ways you just can't see from the ground.
- Post-Storm Assessment: It is absolutely critical to schedule an inspection after any big weather event, like a hailstorm or a storm with high winds. Even if you don’t see any obvious damage, there could be hidden impacts or lifted shingles that make your roof vulnerable right away.
And finally, if you're buying a home, a fresh roof inspection report is non-negotiable. It’s the only way to get a current, unbiased assessment of the roof's health before you sign on the dotted line.
What’s the Difference Between a Free Estimate and a Paid Inspection?
Getting this right is key to making a smart decision. While they might sound alike, a free estimate and a paid inspection are two completely different things. The easiest way to think about it is this: a free estimate is a sales tool, while a paid inspection is a diagnostic tool.
A free estimate usually comes from a roofing contractor. Their main goal is to give you a price for a specific job, like a small repair or a full roof replacement. The focus is entirely on the cost of a solution, not a deep dive into the overall health of your entire roofing system.
A paid roof inspection report, on the other hand, is a complete, unbiased health check-up performed by a certified inspector. Their job isn’t to sell you a new roof; it's to give you a detailed, factual account of your roof's current condition, backed by photos and professional recommendations.
An estimate tells you what one project will cost. A proper inspection report tells you the condition of every part of your roof, giving you the power to make strategic decisions about maintenance and future repairs.
Can I Use This Report for an Insurance Claim?
Yes, and you absolutely should. A professional, third-party roof inspection report is one of the strongest pieces of evidence you can have when filing an insurance claim, especially after storm damage. It provides objective, time-stamped proof that gives your case a ton of credibility.
Here’s why it works so well:
- Objective Proof: The report is from an unbiased expert, not someone who benefits from the outcome of the claim.
- Detailed Evidence: It’s loaded with clear photos of the damage—like hail impacts, wind-lifted shingles, or bent flashing—which is hard for an adjuster to argue with.
- Justifies Scope of Work: The detailed findings help justify the full extent of the necessary repairs, making sure you get a fair settlement that covers all the damage, not just the most obvious spots.
Handing a professional report to your insurance adjuster can make the whole claims process smoother. It shows you’ve done your homework and gives them the clear, factual evidence they need to process your claim correctly.
What Are Some Red Flags in a Roof Report?
While most inspectors are pros, it’s always smart to read a roof inspection report with a critical eye. A good report should feel like a clear, objective diagnosis—not a high-pressure sales pitch.
Keep an eye out for these potential red flags:
- Vague Language Without Proof: A report that makes big, scary claims like "significant damage noted" without showing you specific, high-resolution photos to prove it is a major concern. Every single finding should be backed up with clear visual evidence.
- Immediate Push for Full Replacement: Be wary if the report jumps straight to recommending a full—and costly—roof replacement on a relatively young roof (under 15 years old) without explaining in detail why targeted repairs aren't a good option.
- Obvious Conflict of Interest: The biggest red flag of all is when the inspector is also the contractor who is aggressively trying to get you to sign a contract for the work right then and there. An inspection should feel like a doctor giving you a diagnosis, not a sales meeting. A good inspector’s job is to inform you, not to line up their next construction project.
A quality roof inspection report should leave you feeling empowered with knowledge and confident enough to get multiple quotes from reputable contractors for any work that’s recommended.
When you need a roof inspection report you can trust, turn to the experts at Paletz Roofing and Inspections. With over 30 years of experience serving South Florida, we provide detailed, unbiased assessments to help you protect your investment. Contact us today to schedule your professional roof inspection.