The storm has passed, the yard is a mess, and your first instinct is to look up at the roof and hope everything is fine. In South Florida, that quick look can be misleading. A roof can survive the night without an active leak and still carry wind damage that shows up later, usually at the worst possible time, during the next hard rain or the next named storm.
That's why a smart storm damage roof inspection isn't just about spotting what blew off. It's about checking the roof system, the drainage path, and the inside of the home in a calm, safe order. For homeowners in Broward, Miami-Dade, and Palm Beach counties, that approach matters because high wind damage often hides in lifted tabs, shifted tiles, stressed flashing, and subtle moisture intrusion long before water starts dripping from a ceiling.
Table of Contents
- Your Safety-First Post-Storm Roof Checklist
- Identifying Damage on Different South Florida Roofs
- How to Document Roof Damage for Insurance Claims
- When to Call a Professional for Your Roof Inspection
- What to Expect from a Certified Paletz Inspection
- Frequently Asked Questions About Storm Damage
Your Safety-First Post-Storm Roof Checklist
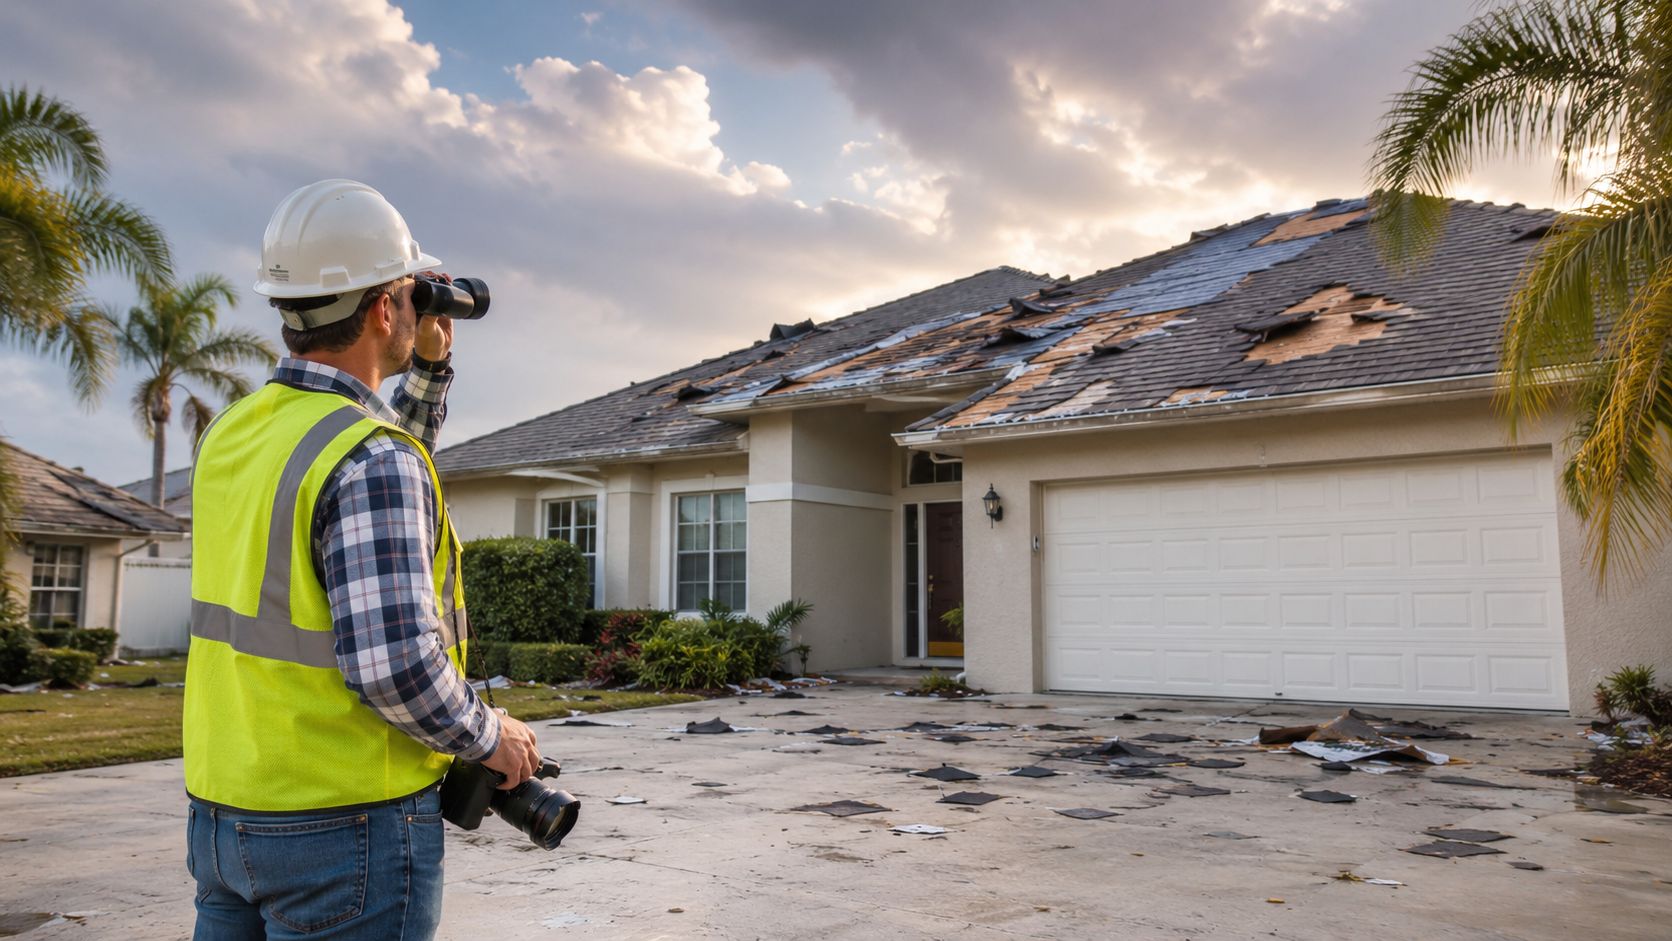
The first rule after a storm is simple. Don't get on the roof. Wet surfaces, loose materials, and hidden soft spots turn a basic check into a fall risk fast. The safest homeowner inspection starts from the ground and ends inside the house.
Industry guidance on post-storm roof inspection recommends a layered sequence. Start with a ground-level 360° exterior scan, then look for damage on roof coverings and edges, then check gutters and downspouts, and finish inside at the attic and ceilings for leaks, staining, mold, or daylight penetration, as outlined in this post-storm inspection sequence.

Start outside and stay on the ground
Walk the full perimeter of the house slowly. Don't just glance up. Look at the yard, fence line, driveway, patio, and landscaping beds for roofing material that may have landed away from the house.
Use binoculars if you have them. They help you inspect from a safe distance without climbing a ladder, especially on steep or wet roof surfaces.
Here's the order that works best:
- Start with a full walk-around. Look for fallen shingles, broken tile pieces, metal fragments, bent vents, detached gutter sections, and fresh debris impacts on the home's exterior.
- Check roof edges. Eaves and ridges often show wind damage first. Look for lifted shingle tabs, crooked tile lines, exposed underlayment, or anything that looks out of pattern.
- Inspect drainage components. Gutters and downspouts tell a story after a storm. Watch for separation at fasteners, dents, clogs, and granule buildup.
- Study trim and transitions. Soffits, fascia, wall flashing, and valleys often take wind-driven rain before the main field of the roof shows obvious distress.
- Photograph anything unusual. Wide shots first, then closer shots from the ground.
Practical rule: If you have to lean, climb, or balance to see it, it's no longer a homeowner inspection. Stop there.
Move inside before you assume the roof is fine
A lot of South Florida storm damage shows up indoors first. Wind can loosen materials without tearing them off, then the next rain pushes moisture into the attic, insulation, or ceiling assembly.
Check the attic with a flashlight if you can access it safely. Look for damp insulation, dark wood staining, active drips, a musty odor, mold-like growth, or tiny points of daylight. Then walk every room and look up, especially near exterior walls, around vents, skylights, and ceiling transitions.
Use this indoor checklist:
- Ceilings and walls. Look for yellowing, brown rings, bubbling paint, or fresh texture changes.
- Attic framing. Check for moisture trails on rafters or roof decking.
- Insulation. Compressed or damp insulation often means water entered recently.
- Air quality clues. A new musty smell after a storm usually deserves follow-up.
- Floor protection. If you find active drips, move belongings and place containers underneath, but don't open ceilings or start exploratory demolition until the source is assessed.
What doesn't work is a quick glance from the driveway followed by waiting a week to see what happens. By then, evidence can fade and moisture can spread beyond the original entry point.
Identifying Damage on Different South Florida Roofs
Not all storm damage looks the same. A shingle roof fails differently than a tile roof. A metal roof shows impact and movement differently than a flat system. If you know what your roof type tends to do in South Florida weather, your initial observations become much more useful.

Shingle roofs
On asphalt shingle roofs, homeowners usually notice the obvious damage first. Missing shingles, creased tabs, and exposed patches stand out from the ground.
The harder part is spotting wind uplift that hasn't turned into a leak yet. A shingle can remain in place after a storm but lose its seal or sit slightly raised. Once that happens, the next strong wind event has a much easier time peeling it back.
Common signs include:
- Granules in gutters or on the ground. That sand-like material can signal impact or wear from storm action.
- Lifted or curled tabs. Look for uneven lines or corners that don't sit flat.
- Cracks and creases. These often show up after wind bends the shingle beyond what it can flex.
- Exposed nail line or underlayment. Even a small bare area needs prompt attention.
Tile roofs
Tile roofs are common across South Florida, and they can fool homeowners because damage doesn't always read clearly from the yard. A cracked tile may still sit in place. A shifted tile may create a gap that's hard to catch unless the light hits it right.
Watch for broken corners, chipped edges, displaced rows, and pieces in the yard that match the roof color. Also look for inconsistent shadow lines. If one section looks slightly lifted or out of alignment, that usually means movement occurred.
On tile roofs, the visible broken piece is often only part of the problem. The underlayment and attachment points may need just as much attention.
Metal roofs
Metal roofs usually shed water well, but post-storm inspection still matters. Flying debris can dent panels, scratch protective finishes, or stress fasteners and seams.
Look for dents, punctures, scuffs that cut through the finish, loose trim, and panel separation at joints. On standing seam systems, even small distortions can matter if they affect how panels lock together. Corrosion risk increases when coatings are damaged and left exposed.
If you want a quick visual reference for common roof conditions, this roof damage image guide helps homeowners compare what they're seeing with typical storm-related problems.
Flat and low-slope roofs
Flat roofs need a different mindset. The issue isn't always what blew off. Sometimes it's what stayed on the roof after the storm.
Commercial roofing guidance notes that flat or low-slope roofs are especially vulnerable when ponding water remains for more than 48 hours, because standing water can speed membrane deterioration and leaks. The same guidance recommends inspections twice a year and after major weather events, which you can review in this commercial roof storm damage guidance.
For homeowners and property managers, the warning signs include:
| Roof type | Storm signs to watch for | Why it matters |
|---|---|---|
| Modified bitumen or membrane | blisters, tears, punctures, pulled seams | water can enter below the surface and spread |
| Coated flat roof | cracks, impact marks, worn coating patches | exposed areas weather faster after the storm |
| Drainage zones | clogged scuppers, backed-up drains, edge overflow marks | poor drainage turns one storm into an ongoing leak risk |
| Low spots | water that still hasn't drained away | ponding stresses the roof system and shortens service life |
What doesn't work on flat roofs is assuming no leak means no problem. In South Florida, lingering water and membrane stress often show up later, not immediately.
How to Document Roof Damage for Insurance Claims
Good documentation can keep a claim from turning into a dispute over what happened, where it happened, and when it happened. The goal isn't to take random photos. The goal is to build a clear record that another person can follow without you standing beside them explaining it.

Capture the big picture first
Start outside. Take overview photos of each side of the house, the roofline from multiple angles, the yard, fallen branches, detached materials, and any exterior water entry points. Then move to mid-range photos and close-ups.
Video helps when movement matters. If a shingle flutters in the wind, a gutter section hangs loose, or water is actively entering, a short video often explains the condition better than a still image.
Use a simple order:
- Date everything. Keep storm-date notes with your photos from the start.
- Shoot wide before close. Begin with full elevations, then narrower views, then damage detail.
- Cover inside and outside. If water entered, document the roof-related exterior issue and the interior result.
- Keep original files. Don't overwrite or heavily edit your first images.
For homeowners who want a stronger eye for interior warning signs, this guide on how to identify water damage during home inspections is useful for spotting the kinds of stains and material changes that are easy to overlook in the first day after a storm.
Build a file an adjuster can follow
The cleanest claim files are organized by location, not by phone camera order. Create folders by roof slope, room, or exterior side of the house. Label photos in plain language, such as “front elevation gutter separation” or “guest bedroom ceiling stain near window.”
Commercial roofing guidance also stresses documenting damage with photos, videos, and detailed reports for insurance claims and repair planning. That recommendation is part of this roof inspection documentation reference, which is a good reminder that evidence should be systematic, not rushed.
The strongest documentation answers three questions fast: what was damaged, where it was damaged, and what changed after the storm.
Include a written log with the storm date, weather observations, rooms affected, visible roof symptoms, and any temporary steps you took to protect the home. If you spoke to your insurance carrier, note the date, time, and claim contact information.
What doesn't help is mixing unrelated old photos with new storm photos, or taking only extreme close-ups with no context. Adjusters need both detail and orientation.
When to Call a Professional for Your Roof Inspection
Some situations don't need debate. If you see interior water staining, roofing materials in the yard, or anything that looks shifted, separated, or newly exposed, it's time to stop treating it like a watch-and-wait issue.
A roofing-industry guide recommends a professional inspection within 24–48 hours after a storm because hidden water intrusion can escalate into structural damage, mold, and other moisture-related health risks. That timing guidance is explained in this post-storm roof inspection window.
Clear signs you shouldn't wait on
Use this as a simple decision guide.
- If you see ceiling stains or active drips, call. Interior symptoms mean the roof system may already be allowing water past the outer surface.
- If you find shingles, tiles, or metal pieces on the ground, call. Detached material is a direct sign the system took a hit.
- If your gutters contain heavy granule loss, call. That often points to shingle distress that needs closer review.
- If flashing, soffits, fascia, or roof edges look bent or loose, call. These transitions are common storm entry points.
- If ponding remains on a flat section long after the storm, call. Drainage failure can turn into membrane damage quickly.
Why fast action matters financially
Homeowners sometimes delay because they don't want to overreact. That instinct is understandable. The problem is that delay can make a small repair less clear, more expensive, and harder to document.
A roof doesn't need a dramatic hole to justify a professional storm damage roof inspection. In South Florida, the more common problem is partial failure. Materials loosen, seals break, attachments shift, and then a later rain event pushes the damage deeper into insulation, decking, drywall, or framing.
If you're deciding whether the issue is serious enough, the presence of uncertainty is usually the answer. Get it inspected before weather and time erase the evidence.
What to Expect from a Certified Paletz Inspection
Most homeowners feel better once they know what the inspection involves. A professional visit should be methodical, documented, and easy to follow. It shouldn't feel mysterious, and it shouldn't leave you guessing what was checked.
One option in South Florida is Paletz Roofing and Inspections, which provides roof inspections as part of its residential and commercial roofing services. The important point isn't the logo. It's that any certified inspection should go beyond a surface glance and produce documentation you can use.

What happens on site
A proper inspection starts with safety. The inspector evaluates access conditions, roof pitch, moisture, debris, and visible instability before deciding how to inspect different sections.
Then the inspection widens. Expect review of the roof covering, penetrations, flashings, valleys, edges, drainage components, and any visible exterior storm effects. If conditions warrant, the attic and interior leak indicators should also be reviewed.
For storm damage assessment, a strong inspection process uses test squares. Training on advanced storm assessment recommends inspecting representative 10×10 foot sections on each slope and documenting each test square with at least six photos per square. That method supports later claims review and helps reduce disputes, as described in this test-square roof damage documentation method.
What you receive after the inspection
The value of the inspection is in the findings and the way they're organized. Homeowners should expect clear notes, location-specific photos, and a straightforward explanation of what appears cosmetic, what is repairable, and what may affect roof performance in the next storm.
A useful report usually includes:
- Roof area identification. Which slope, section, or elevation shows damage.
- Photo evidence. Overview images plus detail shots tied to written observations.
- Condition notes. Material movement, cracks, impact marks, drainage issues, or interior symptoms.
- Recommended next steps. Monitoring, repair, mitigation, or further claim-related documentation.
If emergency mitigation is needed, that should be explained separately from the inspection findings so you understand what protects the home now versus what fixes the underlying problem later.
What works is a report that an owner, adjuster, or property manager can read without translation. What doesn't work is a vague statement that “storm damage is present” with no mapped locations, no supporting images, and no record of how the damage was counted.
Frequently Asked Questions About Storm Damage
Can I tarp the roof myself
Usually, no. After a storm, the roof may be wet, unstable, or partially detached in places you can't see from the ladder. Even a one-story home can become dangerous fast when you add slick surfaces, wind, and damaged edges. Temporary protection matters, but roof access should be handled by people with the right safety setup.
If my roof looks fine from the yard, am I okay
Not necessarily. One roofing source notes that wind damage can compromise a roof's structural integrity long before leaks appear, because uplift can break the thermal seals on shingles and leave the roof vulnerable in a future storm even when it looks acceptable right after the event. That hidden-failure risk is explained in this guide to wind damage before leaks appear.
That's one of the biggest missed issues in South Florida. Homeowners often look for missing materials, but the more important question is whether the roof is still securely attached and weather-ready.
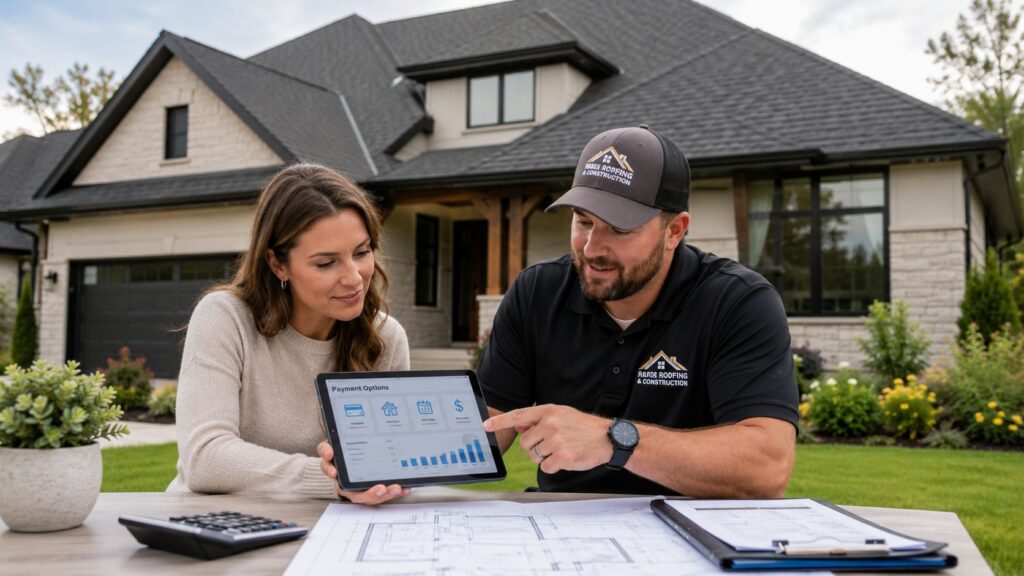
Should I file a claim right away
Start by documenting conditions and reviewing your policy language or speaking with your agent or carrier. Storm claims are policy-specific, and the right next step depends on the extent of damage, your deductible, and whether the issue appears limited or widespread.
If you're unsure whether the damage is claim-worthy, a professional inspection can help clarify the condition before you make decisions that affect cost, timing, and paperwork.
If your home took a storm hit and you want a clear next step, Paletz Roofing and Inspections can inspect the roof, document visible damage, and help you understand whether you're dealing with a repair issue, a hidden wind problem, or a condition that needs immediate mitigation.