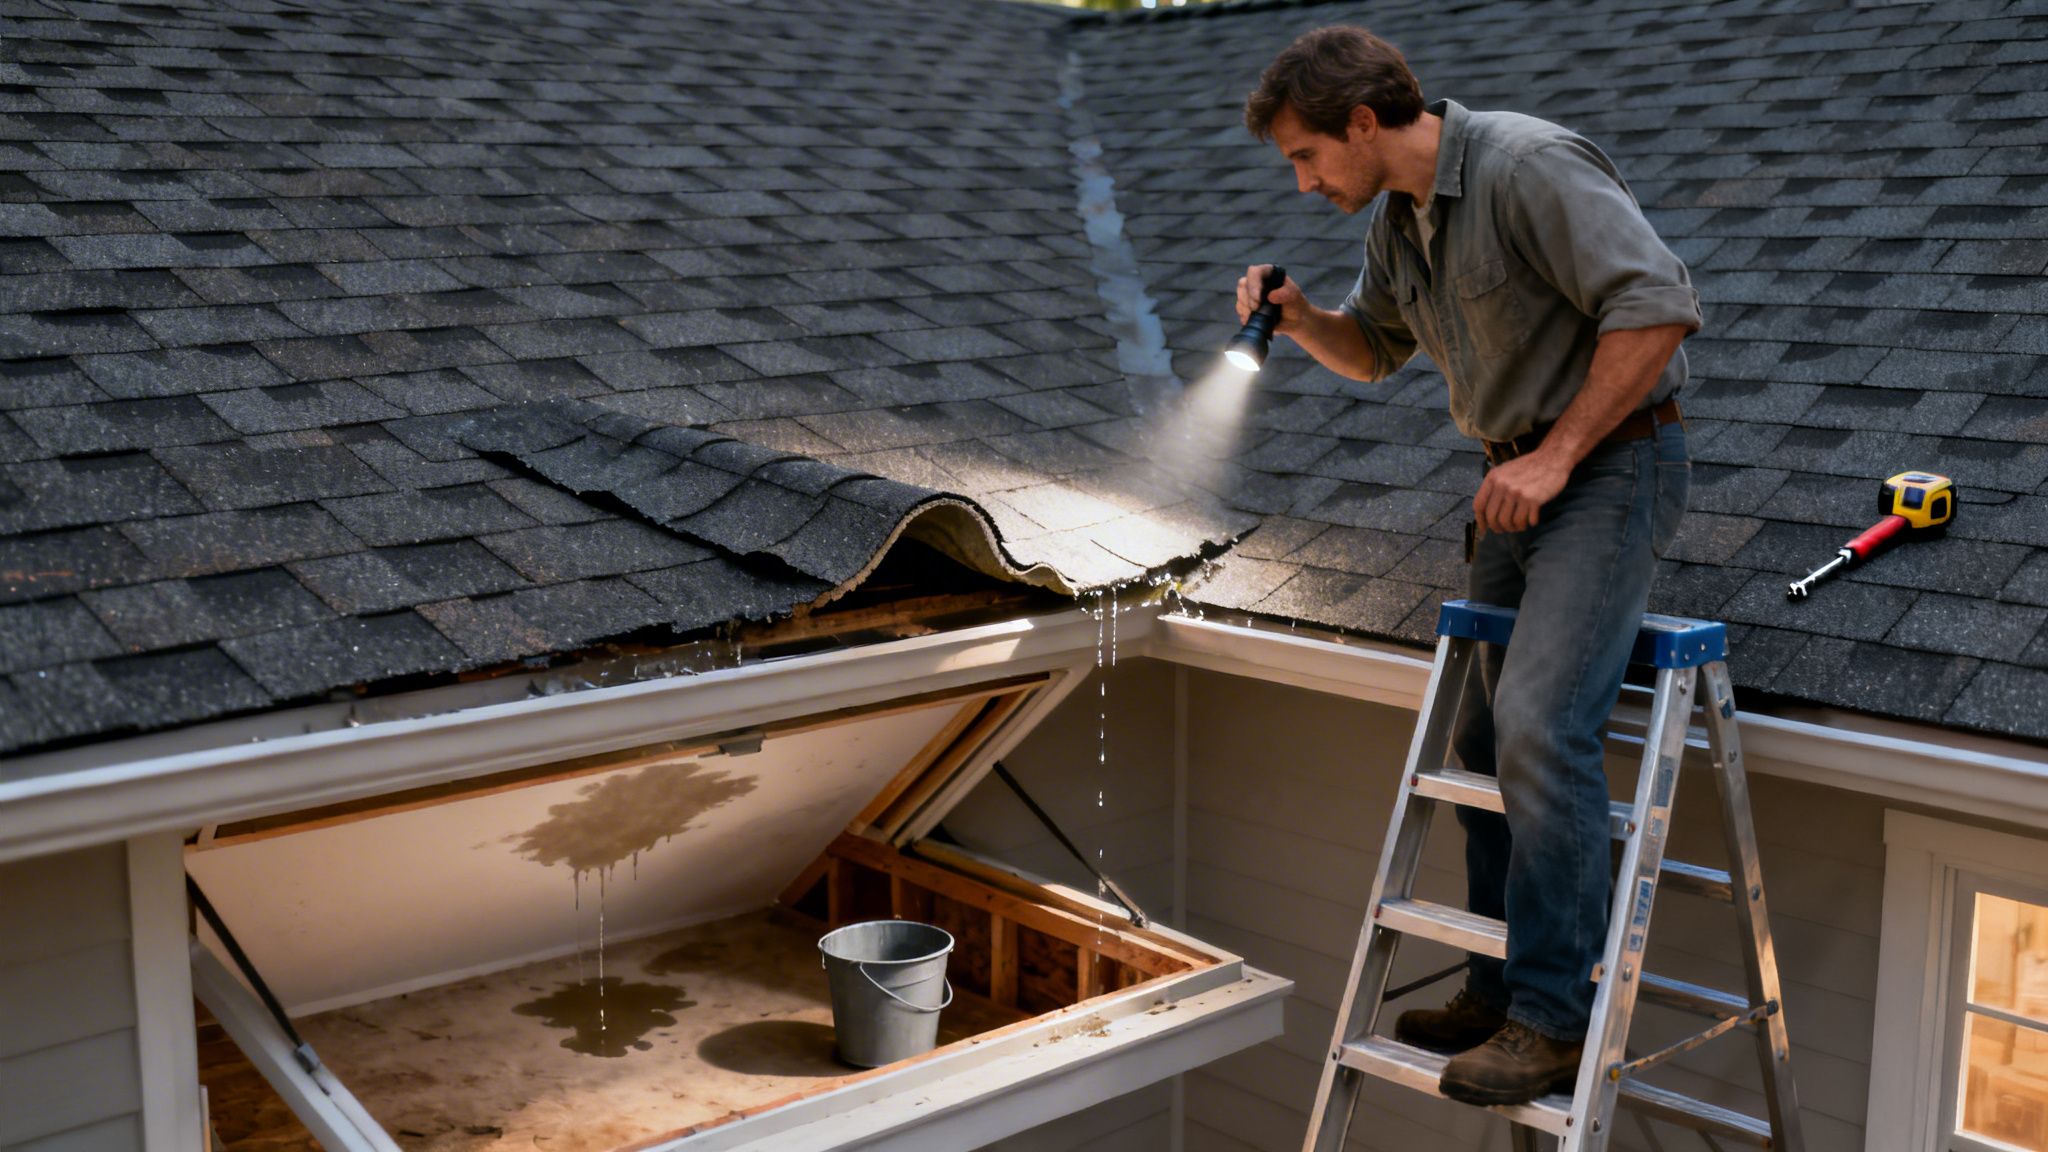
That dark spot on your ceiling isn't just a cosmetic issue—it's your home sending out an S.O.S. When you spot peeling paint, smell something musty in the attic, or see an actual drip, how you react in those first few minutes is critical. Your absolute first priority is damage control inside the house before you even start thinking about where the leak is coming from on the roof.
Responding to the First Signs of a Roof Leak

The moment you find evidence of a roof leak, the clock is officially ticking. Here in South Florida's humid climate, moisture is the enemy, quickly leading to bigger headaches like structural rot and mold.
That small, discolored patch on your ceiling is usually just the tip of the iceberg. It often means there’s a much larger, saturated area hidden away in the attic or between ceiling joists. This isn't the time to wait and see if it gets worse.
Ignoring these early warnings is a gamble homeowners lose far too often. Leaks are the single most reported roofing problem, impacting nearly 6 million homes across the country, according to the 2023 American Housing Survey. Older homes, especially those built before 1980, are prime candidates for leaks as their aging materials finally give out after decades of sun and storms. You can see just how common these issues are in this detailed report on residential roof leaks.
Your First Moves to Control the Damage
Before you can even think about finding the source, you need to contain the water and protect your home's interior. A few swift, smart actions can save you thousands in repairs to drywall, flooring, and personal belongings.
To get a handle on the situation, you need an immediate action plan. This quick checklist covers the non-negotiable first steps every homeowner should take to mitigate the damage as soon as a leak is discovered.
Your Immediate Damage Control Checklist
| Action Step | Why It's Critical | Insider Pro Tip |
|---|---|---|
| Contain the Drip | Prevents water from spreading across floors and saturating a larger area of drywall or subflooring. | Place an old towel in the bottom of your bucket to eliminate the annoying "drip, drip, drip" sound and stop water from splashing out. |
| Relocate Valuables | Protects furniture, electronics, and irreplaceable items from water damage, which can happen in seconds. | Water travels. Move items from a much wider area than you think is necessary, especially anything on the floor below the leak. |
| Address Ceiling Bulges | Relieves the immense pressure of pooled water, preventing a catastrophic ceiling collapse and a much bigger mess. | Use a small nail or screwdriver to make a tiny puncture in the center of the bulge. This creates a controlled drain. |
These immediate steps are your first line of defense. They won't fix the leak, but they will absolutely minimize the secondary damage that often proves more costly than the roof repair itself.
Safety First: Never, ever try to get on your roof or even go into the attic during a storm, high winds, or when things are wet and slick. Your safety is more important than anything else. Wait for clear, calm weather before you start any investigation.
Documenting the Damage for Your Records
Once you've managed the immediate threat, it’s time to become a detective. This documentation is absolutely crucial if you plan on filing an insurance claim.
Grab your smartphone and take plenty of clear photos and videos of all the interior damage. Get wide shots of the room to establish the location, then get close-ups of the leak itself, the water stains, and any personal property that got wet.
Jot down some notes about when you first saw the leak and what the weather was like. This detailed record creates a solid timeline that will be incredibly helpful for your insurance company and for the professionals at Paletz Roofing and Inspections when we come to assess the situation. You can see examples of what goes into professionally documented damage assessments to get a better idea.
Once you’ve secured the area and gathered your evidence, you’re ready to move on to the next phase: finding the source of the problem.
Tracing the Leak From Inside Your Home

Now that you've managed the damage inside, it's time to find where the water is actually getting in. A classic mistake is thinking the drip in your ceiling is directly under the hole in your roof.
The truth is, water is tricky. It can sneak through the roof sheathing, travel sideways along a rafter or a pipe, and finally drip down many feet from where it first entered. Your attic is the best place to follow this hidden trail back to the source.
Gearing Up for Your Attic Inspection
Heading up into the attic without the right equipment can be a waste of time and, more importantly, unsafe. Before you go, make sure you have the basics on hand to track the water's path and mark your findings.
- Powerful Flashlight: Your phone's light won't cut it. You need a bright, focused beam to spot the subtle dark stains, faint glimmers of moisture, or mold hiding on the wood.
- Safety Glasses and a Dust Mask: Attics are full of dust and insulation fibers that can be serious irritants. Protect your eyes and lungs before you start poking around.
- Chalk or a Marker: When you find a water trail or a suspected entry point, mark it. This makes it easy to find again and gives you a clear reference point for when you inspect the roof from the outside.
With these tools, you're ready to do some real detective work. Just remember to move carefully and only step on solid joists or walkways—a misstep through your ceiling is a costly mistake.
Hunting for Clues in the Rafters
Once you're safely in the attic, switch off your flashlight for a moment and let your eyes adjust. Can you see any tiny pinpricks of daylight shining through the roof deck? While not always the source of a major leak, these gaps are definite weak spots that need to be sealed.
Now, turn your flashlight back on and start searching methodically. Begin directly above the area where you saw the leak downstairs, but be ready to follow the evidence wherever it leads. Water almost always leaves a trail.
Keep an eye out for these key signs:
- Dark Water Stains: Look for discoloration or dark tracks on the underside of the roof sheathing, the rafters, and the joists. These stains are the "footprints" left by the water.
- Soaked or Compressed Insulation: Wet insulation is a dead giveaway. It will look darker and feel matted down compared to the dry, fluffy insulation around it. Gently pull back sections of insulation to check the wood beneath.
- Rust and Mold: Check for rust around roofing nails or any signs of black or white mold on the wood. Mold needs consistent moisture to grow, so it's a sure sign of a persistent, long-term leak.
Here’s a critical pro tip: use the "measurement method" to pinpoint the location for your outside inspection. Once you find the suspected source in the attic, measure its distance from two fixed points, like a vent pipe and the nearest gable wall. For example, "The leak is 4 feet from the plumbing vent and 10 feet from the west wall." Write this down—it will be your treasure map once you're on the roof.
You might also be interested in how professionals use specialized equipment for a comprehensive damage inspection.
By carefully tracing these clues, you can follow the water's path back to its origin. Don't forget to mark every suspicious spot with your chalk. This inside job gives you the crucial intelligence you need to make your exterior roof inspection targeted and effective, saving you from a lot of guesswork.
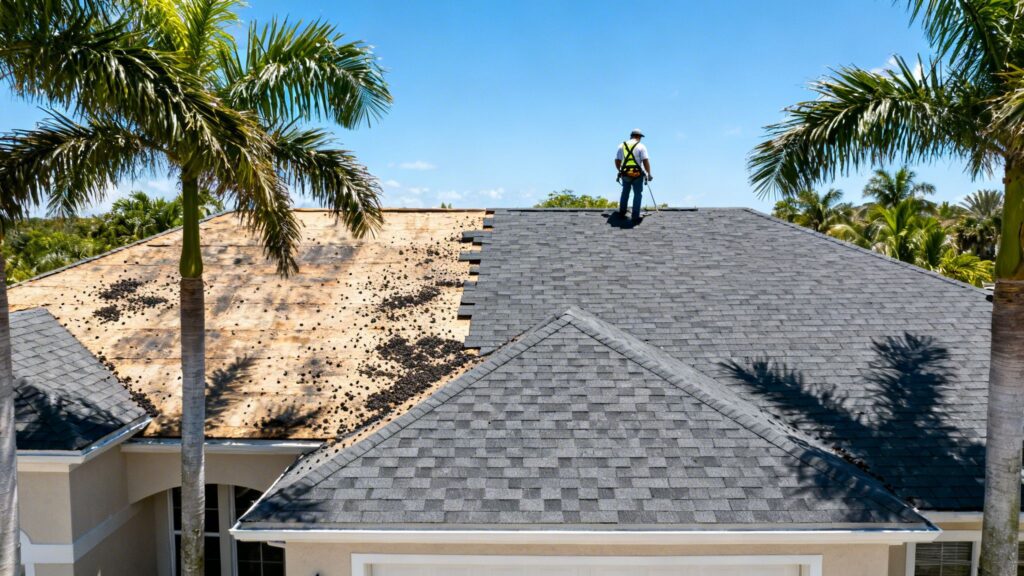
Conducting a Safe Exterior Roof Inspection
Now that you’ve played detective in the attic, it’s time to take the investigation outside. This is where you’ll hunt down the exact entry point for that pesky leak. But before you do anything else, remember this: safety is everything. A proper exterior inspection is methodical and cautious, never reckless.
For most homeowners, the smartest and safest move is to start with your feet planted firmly on the ground. A good pair of binoculars is your best friend for this part of the job. From your lawn, you can spot a surprising number of common roof problems without taking a single step up a ladder.
What to Look for From the Ground
Start by scanning the entire roof surface, giving extra attention to the general area you flagged from inside. You might be surprised by what a quick visual sweep can uncover.
Here’s what you should be looking for:
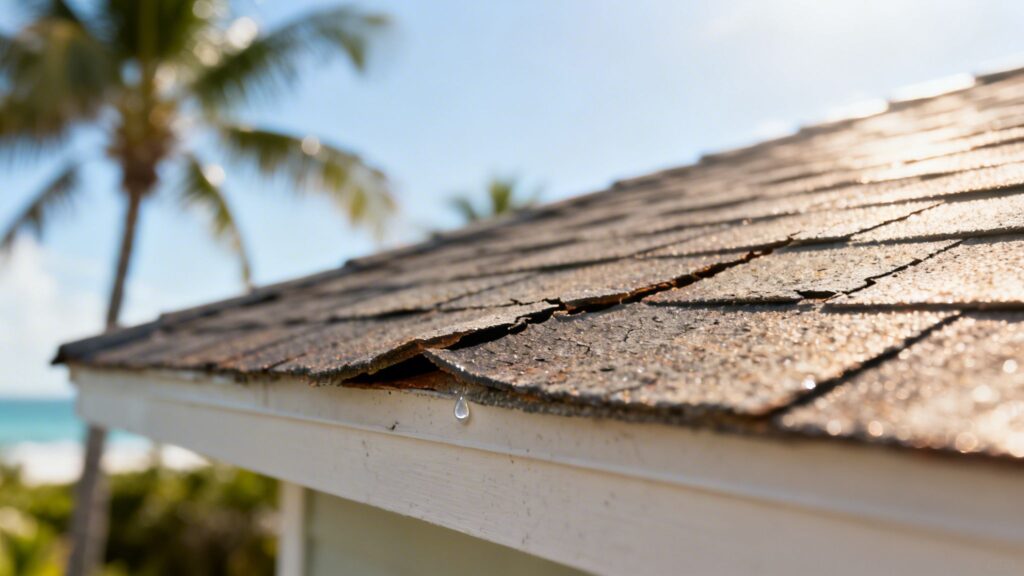
- Shingle Damage: Keep an eye out for shingles that are cracked, curling up at the edges, or missing altogether. Any bare patch is a wide-open door for water.
- Tile Issues: On tile roofs, which are common here in South Florida, check for any tiles that are cracked, chipped, or have slipped out of place. It only takes one shifted tile to expose the underlayment to the elements.
- Debris and Growth: Piles of leaves and branches can trap moisture, causing the roofing materials underneath to break down over time. Also, look for any algae or moss, as that’s a dead giveaway of persistent dampness.
While you're checking things out, take a look at your gutters. Clogged gutters force water to back up and seep under the edge of your roof, creating a whole new set of problems. Understanding how clean gutters protect your roof is a huge part of preventing leaks before they start.
Climbing Up for a Closer Look
If your ground-level inspection doesn’t turn up the culprit, you might decide a closer look is needed. But you should only climb a ladder if you feel completely confident and safe doing so. Never, ever get on a roof that is wet, steep, or during windy conditions. When in doubt, always call a professional.
If you do go up, make sure your ladder is on solid, level ground and extends at least three feet above the roofline. Sturdy, rubber-soled shoes are non-negotiable for good grip. The goal isn’t to walk around, but to get a better vantage point to see the details you missed from the ground.
Once you’re in a stable position, turn your focus to the high-risk areas where most leaks are born. These are usually the spots where different materials join together or where something pokes through the roof deck.
Pro Insight: From our experience, about 40% of all roof leaks start in the valleys and around flashing. These spots are especially vulnerable to the high winds we see during hurricanes in Palm Beach, which can easily lift materials and break their seals.
Zeroing In on Common Failure Points
It’s time to get a close look at the usual suspects. Use the measurements you took in the attic to guide you, but make sure to give these key zones a full visual inspection.
Your search should focus on these three areas:
Roof Penetrations: Anything that sticks out of your roof is a potential weak spot. This means plumbing vents, chimneys, exhaust fans, and skylights. Check the rubber "boot" or sealant around them for any cracks, gaps, or general decay. The relentless Florida sun bakes these seals over time, making them brittle and useless.
Flashing and Valleys: Flashing is the metal stripping installed to guide water away from joints, like where a wall meets the roof. Look for rust, bent sections, or any gaps in the caulk. Valleys—the channels where two roof planes meet—are notorious for collecting debris, which creates a dam that forces rainwater right under your shingles or tiles.
Shingles and Tiles: Now, look closely at the individual shingles or tiles in the problem area. For asphalt shingles, check for significant granule loss. If more than 25% of the gritty surface is gone, the shingle is past its prime. On a tile roof, gently press on tiles to see if any are loose. A tile that wiggles easily is a major red flag.
By carefully checking these common failure points, you have a great chance of finding exactly where the water is getting in. You can also see some examples of what our professional roofers look for during inspections to get a better idea. If you spot any of these issues, you’ve almost certainly found the source of your leak.
Advanced Tricks for Finding Hidden Leaks
Sometimes, even after you’ve checked the attic and walked the roof, the source of a leak can be maddeningly hard to find. Water is tricky; it can travel sideways along rafters and sheathing, meaning the spot on your ceiling is often far from where the water is actually getting in. When a simple visual inspection doesn't cut it, you have to get a little more strategic.
This is where you'll need to think like a pro and use some more advanced methods to force that leak to show itself.
Performing a Systematic Water Test
One of the most reliable DIY methods is what we call a controlled water test. This isn't about just spraying your roof wildly with a hose and hoping for the best. It's a slow, deliberate process designed to isolate the exact point of entry. You'll need a garden hose with a spray nozzle and a helper inside the house, armed with a cell phone.
Here’s how to do it right:
- Start Low: Always begin at the lowest point of the roof slope in the area you suspect the leak is coming from.
- Position Your Helper: Have your partner stationed inside, right underneath where you see the interior water damage.
- Soak, Don't Blast: Gently run water over a small section, starting just above the gutter line. Let the water run for a good five to ten minutes. Critically, don't spray water uphill, as this can force it under shingles and give you a false positive.
- Move Up Systematically: If your helper doesn't see any drips, move up the roof about three or four feet and repeat the process. Continue this method, soaking small, targeted sections as you move upward.
The moment your helper yells that a drip has appeared, you've found the general area. Now you can zero in on that specific horizontal line until you pinpoint the exact source.
This methodical approach is key to a safe and effective inspection, whether you're using a hose or just your eyes.

Starting from the ground up allows you to gather clues safely, making your time on the ladder and roof more efficient and focused.
A Glimpse into Professional Technology
When a leak is truly stubborn, professionals like us break out the high-tech gear. One of the most powerful tools in our arsenal is infrared thermography. An infrared camera doesn't see moisture, but it does see temperature differences. Trapped water makes the wood sheathing cooler than the surrounding dry areas, showing up as a distinct cold spot on the camera's screen—even if it feels dry to the touch.
In a humid climate like South Florida, this technology is a game-changer. It's estimated that infrared cameras are used in 70% of professional inspections to find hidden moisture that would otherwise go completely unnoticed. Catching these issues early can cut eventual repair costs by 50-70% by stopping a small problem before it turns into widespread rot and mold. For a deeper dive into finding water issues, you can learn more about how to detect water leaks with these comprehensive strategies.
Key Takeaway: Whether you use a simple water test or we bring in an infrared camera, the goal is the same: be 100% certain of the leak's source before a single repair is made. Guesswork in roofing is expensive and almost always leads to more problems down the road.
Safe Temporary Fixes While You Wait
Once you’ve found the leak, you need a temporary stop-gap to prevent more damage while you arrange for a professional repair from Paletz Roofing and Inspections. A quick patch can save your home from a lot of secondary damage, but it has to be done correctly.
- For Shingles: A small crack or a single nail hole can often be temporarily sealed. Carefully lift the damaged shingle and apply a dab of roofing cement underneath it with a putty knife, then press it down firmly.
- For Larger Areas: If you’re dealing with more significant damage, your best bet is a heavy-duty tarp. The key is to lay the tarp so it covers the entire damaged area and extends all the way over the peak of the roof. Secure it by rolling the edges around 2x4s and nailing them to the roof deck, but make sure you nail them outside the damaged area. You don't want to create new holes right where the problem is.
Remember, these are emergency measures meant to buy you a little time. The intense Florida sun and heavy rains will break down these temporary fixes quickly, leaving your home exposed all over again.
Knowing When to Call a Roofing Professional
Sometimes, the smartest thing you can do after a DIY roof inspection isn't grabbing a caulk gun—it's picking up the phone. Knowing your own limits is a critical part of protecting your home. While it's great to take the initiative to find where water is getting in, there are definite signs that it's time to step back and let an experienced professional take the lead.
This isn’t about giving up. It’s about making a strategic decision to prevent a small problem from turning into a major, costly repair or a dangerous accident.
Red Flags That Demand an Expert Eye
Certain situations go well beyond a weekend project and land squarely in professional territory. If you run into any of these red flags during your search, it's a clear signal to stop what you're doing and contact a licensed roofer.
- You Just Can't Find the Source: You've checked the attic, you've run the water hose test, and the leak is still a complete mystery. Professionals have specialized tools and years of experience tracing tricky water paths that don't follow a straight line.
- Signs of Structural Damage: This is a big one. If you see the roof deck sagging, feel spongy or soft spots underfoot, or notice widespread water stains across multiple rafters, you're likely looking at a problem that has compromised your home's structure.
- Major Safety Concerns: Is your roof incredibly steep? Are your tiles slippery from moisture or algae? If you aren't 100% comfortable with heights and confident in your footing, don't risk it. A fall can be devastating, and no amount of savings on a repair is worth that.
Pushing past these warning signs is a gamble. A seemingly minor issue could be pointing to widespread underlayment failure or hidden rot, both of which can escalate quickly and silently.
The Paletz Roofing Difference: Experience in Action
When you call a professional from Paletz Roofing and Inspections, you're getting more than just a person with a ladder. You're bringing in over 30 years of hands-on experience diagnosing and fixing roofs specifically designed to withstand South Florida's brutal climate. We've seen exactly how decades of intense sun and hurricane-force winds in Miami-Dade and Palm Beach counties break down roofing materials.
That deep-seated local knowledge means we can find a roof leak faster and with more accuracy. We know the most common failure points on the tile, shingle, and flat roofs popular across our communities. A problem that could take a homeowner days to find is often something we can spot in minutes.
A professional inspection goes beyond just finding the entry point. We identify the why—is the flashing failing due to age, or was it installed improperly years ago? This comprehensive diagnosis ensures we provide a permanent solution, not just a temporary patch.
The Value of a Professional Repair Plan
Once we've pinpointed the leak, we deliver something a DIY approach can't: a complete, long-term repair strategy. We assess the condition of the surrounding materials, check for hidden pockets of moisture you might have missed, and develop a plan that fixes both the symptom (the leak) and the root cause.
When you're trying to figure out the next best step, it's helpful to compare your situation to common scenarios we see every day.
DIY vs Professional Leak Detection
Use this guide to determine whether to continue your investigation or call in a professional for a safe and definitive solution.
| Scenario | Your Best DIY Approach | When to Call a Professional |
|---|---|---|
| Small, visible drip from a single shingle | A temporary patch with roofing cement can be a safe stopgap measure while you wait for a pro. | For a permanent, color-matched repair that ensures the surrounding area is sound and secure. |
| Multiple stains or a large discolored area | Document the damage with photos and use buckets to contain the water inside your home. | Immediately. This often signals a larger, systemic failure that requires an expert to assess the full extent of the problem. |
| Leak around a vent pipe or chimney | You can visually inspect the flashing for obvious cracks or gaps in the sealant from a safe distance. | Always. Repairing flashing is a precise job. If done incorrectly, it will fail and cause even more damage. |
Ultimately, calling a professional roofer is an investment in certainty and peace of mind. It guarantees the job is done right, protects the value of your home, and, most importantly, keeps you safely on the ground.
Common Questions About Finding Roof Leaks
Once you’ve spotted the signs of a leak, the questions start flooding in. What's this going to cost? Will my insurance even cover it? And how often should I be checking for this stuff anyway?
These are the exact questions we hear from homeowners across South Florida every day. Given our climate of intense sun, torrential rain, and hurricane threats, getting clear, straightforward answers is crucial. Let's tackle some of the biggest concerns you're likely facing.
Will My Homeowners Insurance Cover This Leak?
This is usually the first thing people ask, and the answer almost always hinges on a single word: cause.
Homeowners insurance is designed to cover damage that is "sudden and accidental." If a hurricane rips shingles off your roof and water gets in, that’s a classic example of a covered event. The same goes for damage caused by a fallen tree branch during a storm.
Where you'll run into trouble is with leaks from neglect or old age. If your roof is 25 years old and simply worn out, or you ignored a known problem for months, your insurance provider will almost certainly deny the claim. They expect you to maintain your property.
Key Takeaway: Documentation is your best friend. The moment you find a leak, take clear photos and write down the date and details. Having records of regular maintenance and past inspections can also be a massive help, proving you’ve done your part to care for the roof.
How Much Does Professional Leak Detection Cost?
Bringing in a professional isn't a cost—it's an investment in getting the diagnosis right the first time.
While every roof is different, a standard professional inspection to find a leak in South Florida can range from a couple of hundred dollars up to more for large homes or complicated roof designs.
Think about it this way: paying an expert to find the exact source of the leak keeps you from wasting money on the wrong fix. We've seen homeowners spend hundreds, sometimes thousands, patching the wrong spot while the real issue continues to rot away their roof deck. That's a far more expensive problem.
For those really tricky leaks that hide deep within the roof structure, we sometimes use advanced tools like infrared cameras. This might cost a bit more, but it’s invaluable for pinpointing hidden moisture without tearing your roof apart, which ultimately saves you a fortune.
What Is the Difference Between a Patch and a Repair?
Knowing the difference here is critical for managing your expectations and understanding what you're paying for.
- A Patch: This is a quick, temporary fix. It's the roofing equivalent of a band-aid. Think of slapping some roofing cement on a cracked shingle or throwing a tarp over a hole. A patch is designed to stop the water now, but it won't last. The Florida sun will break it down in no time.
- A Repair: This is the real, permanent solution. A professional repair means removing all the damaged materials, checking the underlying wood for rot, replacing the waterproof underlayment, and then installing new, matching materials to bring the roof back to its original integrity.
A patch buys you a little time. A proper repair buys you lasting peace of mind.
How Often Should I Inspect My Roof to Prevent Leaks?
In a place like South Florida, being proactive with your roof isn't just a good idea—it's essential. For the best protection, we always recommend a two-part strategy.
- Professional Inspections: Get a certified roofer on your roof at least once a year. It is also an absolute must to get an inspection immediately after any major weather event, like a hurricane or severe tropical storm.
- Self-Inspections: Every few months, do your own quick visual check from the ground. A good pair of binoculars is all you need. Look for anything that seems out of place—slipped tiles, missing shingles, or dark patches where debris is piling up. This simple habit can help you catch a small issue before it turns into a five-figure problem.
This simple routine is the most effective way to protect your roof and prevent most leaks from ever getting started.
Don't let a small leak turn into a major disaster. If you're facing a stubborn leak or simply want the peace of mind that comes with a professional assessment, Paletz Roofing and Inspections is ready to help. With over 30 years of experience protecting homes in South Florida, our licensed and insured experts can pinpoint the source of your problem and provide a lasting solution. Schedule your free quote today by visiting us at https://paletzroofing.com.