You see the stain first. Then the drip. Then the second drip.
If you live in Broward, Miami-Dade, or Palm Beach, that moment usually comes after a hard rain, a windy afternoon, or a storm band that pushed water sideways instead of straight down. A roof leak rattles people because it feels urgent, messy, and expensive all at once. That's a fair reaction.
Repairing leaking roof problems in South Florida isn't the same as following a generic online checklist. Heat bakes sealants. Salt air eats metal. Wind finds weak flashing and turns a small opening into a ceiling stain two rooms away. The right move is to slow down, protect the inside of the house, trace the water correctly, and fix the actual entry point instead of the symptom.
Table of Contents
- Your First Moves When You Discover a Roof Leak
- How to Pinpoint the Exact Source of Your Leak
- A Guide to Repairing Different South Florida Roof Types
- Estimating Roof Leak Repair Costs and Timelines
- Knowing When to Call Paletz Roofing and Inspections
- Proactive Maintenance to Prevent Future Leaks in Florida
- Navigating Insurance Claims for Your Leaking Roof
Your First Moves When You Discover a Roof Leak
A leak feels like an emergency because it is one, but your first job isn't climbing a ladder. Your first job is damage control inside the house.

Protect the room before you touch the ceiling
Move furniture, rugs, electronics, and anything made of paper or fabric away from the drip zone. If you can't move a large item, cover it with plastic sheeting and raise the edges so water can't run underneath. Put a bucket or wide container under the drip, and lay a towel around it to catch splash.
If the ceiling drywall is bulging, don't ignore it. Water pools above drywall, and when that pocket lets go, it can dump a lot of water at once. A careful puncture in the lowest point of the bulge with a screwdriver can release the water into a bucket in a controlled way. Wear eye protection and keep your face out of the drop line.
Practical rule: If the roof is leaking during active rain, stay inside. Wet roofs, steep slopes, and wind turn a simple inspection into a fall hazard fast.
Shut down nearby electrical risk
If water is close to a ceiling fixture, fan, outlet, or breaker-fed device, cut power to that area if you can do it safely from the panel. Water and electricity don't give warnings. If you're unsure which circuit controls the area, stop there and get an electrician or roofer involved before touching anything else.
Take photos before cleanup changes the scene. Get the ceiling stain, the active drip, damaged contents, and any standing water. Keep a quick note on your phone with the time, the weather, and what rooms were affected. That simple record helps later if the leak becomes an insurance matter.
Do only temporary interior control
Use towels, plastic, and containers. That's enough for the first pass. Don't smear caulk on interior stains, don't paint over wet drywall, and don't assume the leak is directly above the visible mark. Water often travels before it shows.
A calm first response saves flooring, cabinets, and drywall. It also gives you a cleaner path to diagnose the roof without guessing.
How to Pinpoint the Exact Source of Your Leak
A Broward or Miami-Dade homeowner sees a brown ceiling stain and looks straight up. That instinct makes sense, but roof leaks in South Florida rarely stay honest. Wind-driven rain, layered tile systems, underlayment laps, and attic framing can carry water well away from the opening before it shows inside.
The job is to trace the entry point, not just the drip.

Start inside and read the clues
Begin where the leak appeared. Ceiling stains can still tell you something useful if you read them carefully. A tight stain near a vent stack often points to flashing or a pipe boot. A stain that stretches across a seam or corner usually means the water traveled before dropping.
Then check the attic or crawl space above that area with a flashlight. In South Florida attics, heat builds fast, especially under dark tile or shingle roofs in summer. Go early in the day if you can. Step only on framing or secured walk boards. If access is too tight, too hot, or too risky, stop and have a roofer handle it.
Work in this order:
- Look for dark water tracks on decking, trusses, rafters, or fasteners.
- Check insulation for damp spots, compression, or staining.
- Look for rusted nails or blackened wood, which often marks a long-term drip path.
- Check for daylight around vents, wall flashing, valleys, and roof penetrations.
- Smell the area for musty air that suggests an older leak, not just a one-time storm event.
If you deal with interior water issues regularly, some of the logic is similar to identifying plumbing leaks in North Shore homes. The visible damage is often only the endpoint.
Use the attic like a trail, not a destination
The wettest spot is not always the source. Follow the highest sign of moisture back upslope. On Florida roofs, I often find the true entry point several feet above the ceiling stain, especially after a hard storm out of the east or southeast.
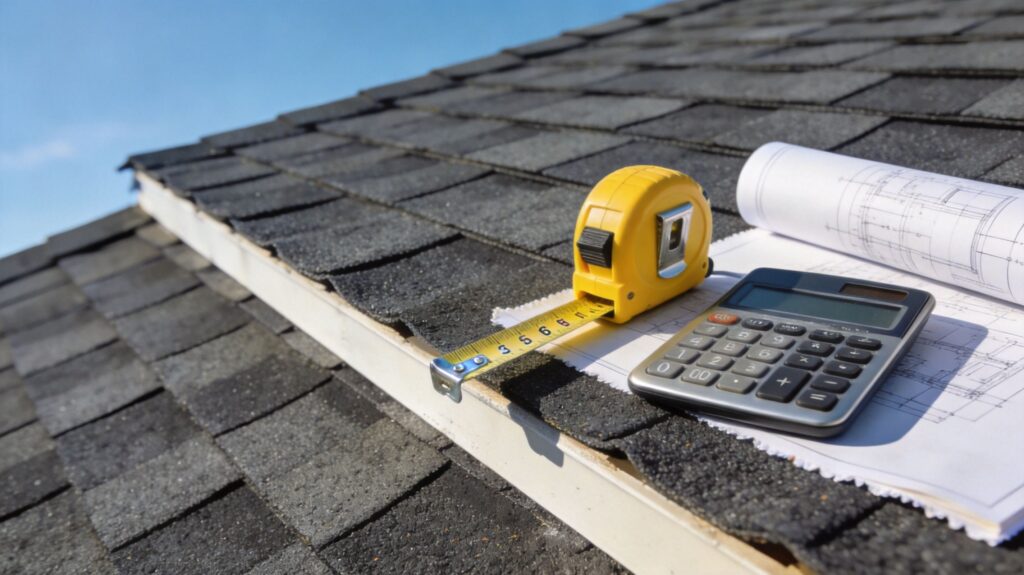
Mark what you find. Painter's tape on a truss, a lumber crayon on framing, or photos on your phone help keep the path straight when everything starts to look the same. If you want a simple visual reference for organized field notes, this roof inspection image example shows the kind of documentation that keeps a repair focused.
A second person helps. One person stays inside or in the attic. The other runs a controlled hose test outside on a dry day.
Keep that test disciplined. Start low and isolate one small section at a time for a few minutes. Then wait and watch. If you soak half the roof at once, you create your own mystery and learn nothing useful.
Check the places South Florida roofs fail first
In Palm Beach, Broward, and Miami-Dade, the leak usually starts at a detail. Sun, salt air, hurricane seasons, and years of expansion and contraction wear out the weak points long before the whole roof field gives up.
Pay close attention to these areas:
- Pipe boots and vent flashings: UV exposure hardens rubber and opens cracks around the pipe.
- Wall flashing and counterflashing: Wind-driven rain can push water behind loose metal or failed sealant.
- Valleys: Heavy runoff exposes small installation errors fast.
- Tile laps and shingle edges: High winds can lift edges enough to let water work underneath.
- Roof-to-wall transitions: These are common leak points on additions, garages, and older remodels.
- Old penetrations: Satellite mounts, abandoned equipment brackets, and patchwork repairs often become the hidden problem.
Flat and low-slope sections deserve extra suspicion. Ponding water, clogged drains, and membrane splits behave differently than steep-slope leaks. On coastal homes, corrosion around fasteners and metal details also shows up more often than generic roof guides admit.
Match the interior clue to the exterior area
Once you narrow the leak path from inside, inspect the corresponding roof area from the ground first. Use binoculars if needed. Look for slipped tile, lifted shingles, cracked sealant at penetrations, bent flashing, debris in valleys, or anything that looks out of line after a storm.
Do not climb a wet roof. Do not climb at all if the slope is steep, the tile is fragile, or you are dealing with a two-story home in windy conditions. Concrete and clay tile can crack under foot traffic, and a bad step causes more damage than the original leak.
One final rule matters. Find at least two clues that agree before you call the source confirmed. A stain in the attic plus a cracked boot. Rusted nails plus lifted shingles above. That kind of match is how you avoid patching the wrong spot.
A Guide to Repairing Different South Florida Roof Types
A roof leak in South Florida is rarely a one-size-fits-all repair. A shingle patch that holds in another state can fail fast in Broward salt air, Miami-Dade wind zones, or Palm Beach summer heat. The roof system matters. So does the local weather beating on it twelve months a year.

Asphalt shingles need a methodical repair
Shingle leaks usually come down to lifted tabs, failed seal strips, bad nailing, damaged underlayment, or flashing problems at walls and penetrations. In South Florida, wind-driven rain makes every one of those defects worse. If the repair only covers the visible opening, the leak often returns in the next hard storm.
A proper shingle repair means opening the area carefully, removing damaged material without tearing up sound shingles, checking the deck, replacing wet or deteriorated underlayment, then reinstalling matching shingles with the right fastening pattern for the roof design and local code requirements. On older roofs, matching can be the hard part. Color fade from UV is severe here, so a technically correct repair can still stand out visually.
I tell homeowners the same thing all the time. If the decking is soft, stained, or separating in layers, stop thinking about sealant. That area needs to be rebuilt, not covered.
Tile roofs leak through the system below the tile
Tile roofs are common across Miami-Dade, Broward, and Palm Beach, and they get misrepaired constantly. The tile sheds most of the water, but the underlayment and flashing provide the primary waterproofing protection. A broken tile matters, but many tile leaks come from aged underlayment, cracked mortar at transitions, loose foam-set attachments, or corroded flashing around walls and penetrations.
South Florida adds two problems generic guides skip. Salt air shortens the life of metal details near the coast, and years of heat expansion can shift tiles enough to open pathways for water. After hurricanes or strong summer storms, I look for more than the obvious cracked piece. I check whether adjacent tiles moved, whether the flashing lifted, and whether the underlayment has already failed below the surface.
Good tile repair takes patience. The surrounding tiles have to be lifted without causing more breakage, the waterproof layer has to be inspected, and replacement tiles need to match the existing profile so they sit correctly. Smearing mastic on top of a crack is a temporary delay, not a real fix.
Metal roofs usually fail at details, not in the field
On metal roofs, leaks are commonly found at fasteners, seams, end laps, skylights, vent penetrations, and transitions into walls or lower roof sections. On coastal homes, washers dry out faster, protective coatings wear down, and corrosion shows up where incompatible metals meet.
The repair has to match the metal system. That may mean replacing backed-out or rusted fasteners with the correct size and type, treating and sealing a seam with a product made for that panel, or replacing failed flashing components. Roof cement slapped over screws is one of the worst shortcuts I see. It does not move with the panel the way the roof needs it to, and it usually makes the next repair harder.
Metal roofs also get slippery fast in humidity. If the roof is steep or two stories up, this is professional work.
Flat and low-slope roofs need the leak path mapped correctly
Low-slope roofs over patios, additions, condos, and commercial spaces behave differently from steep roofs. Water can travel under the membrane before it shows up inside, which is why the ceiling stain is often not directly below the failure.
The repair depends on the membrane. Modified bitumen, BUR, TPO, and other systems each need compatible patch materials and proper surface prep. The area has to be dry, clean, and sound. If there is trapped moisture, deteriorated insulation, open seams, or chronic ponding, a simple patch may not last through one South Florida rainy season.
Drainage matters here more than homeowners expect. A clogged scupper or sagged section that holds water can keep stressing the same weak area until the leak returns.
If the waterproof layer underneath is still damaged, the leak is still there.
Tools and materials used in common roof leak repairs
Homeowners do not need a truck full of roofing gear to understand whether a repair plan makes sense. They do need to know what should be on site for the roof type being repaired.
| Item | Purpose | Estimated Cost |
|---|---|---|
| Flat pry bar | Lift shingles or tiles without excessive breakage | Varies by brand and size |
| Utility knife | Trim underlayment, membrane, or replacement material | Varies by brand and blade type |
| Roofing hammer or nail gun | Fasten replacement components correctly | Varies widely |
| Corrosion-resistant roofing nails | Resist rust in humid, coastal conditions | Varies by material and quantity |
| Roof-compatible sealant or roofing cement | Seal targeted joints and edges | Varies by product type |
| Replacement shingles or tiles | Restore damaged field areas | Varies by roof material and match availability |
| Underlayment or self-adhering membrane | Rebuild the water barrier below the surface | Varies by specification |
| Flashing metal | Repair chimneys, walls, valleys, and penetrations | Varies by metal type and gauge |
| Moisture meter | Confirm hidden moisture around suspect areas | Varies by model |
| Safety harness and ladder equipment | Reduce fall risk during roof access | Varies widely |
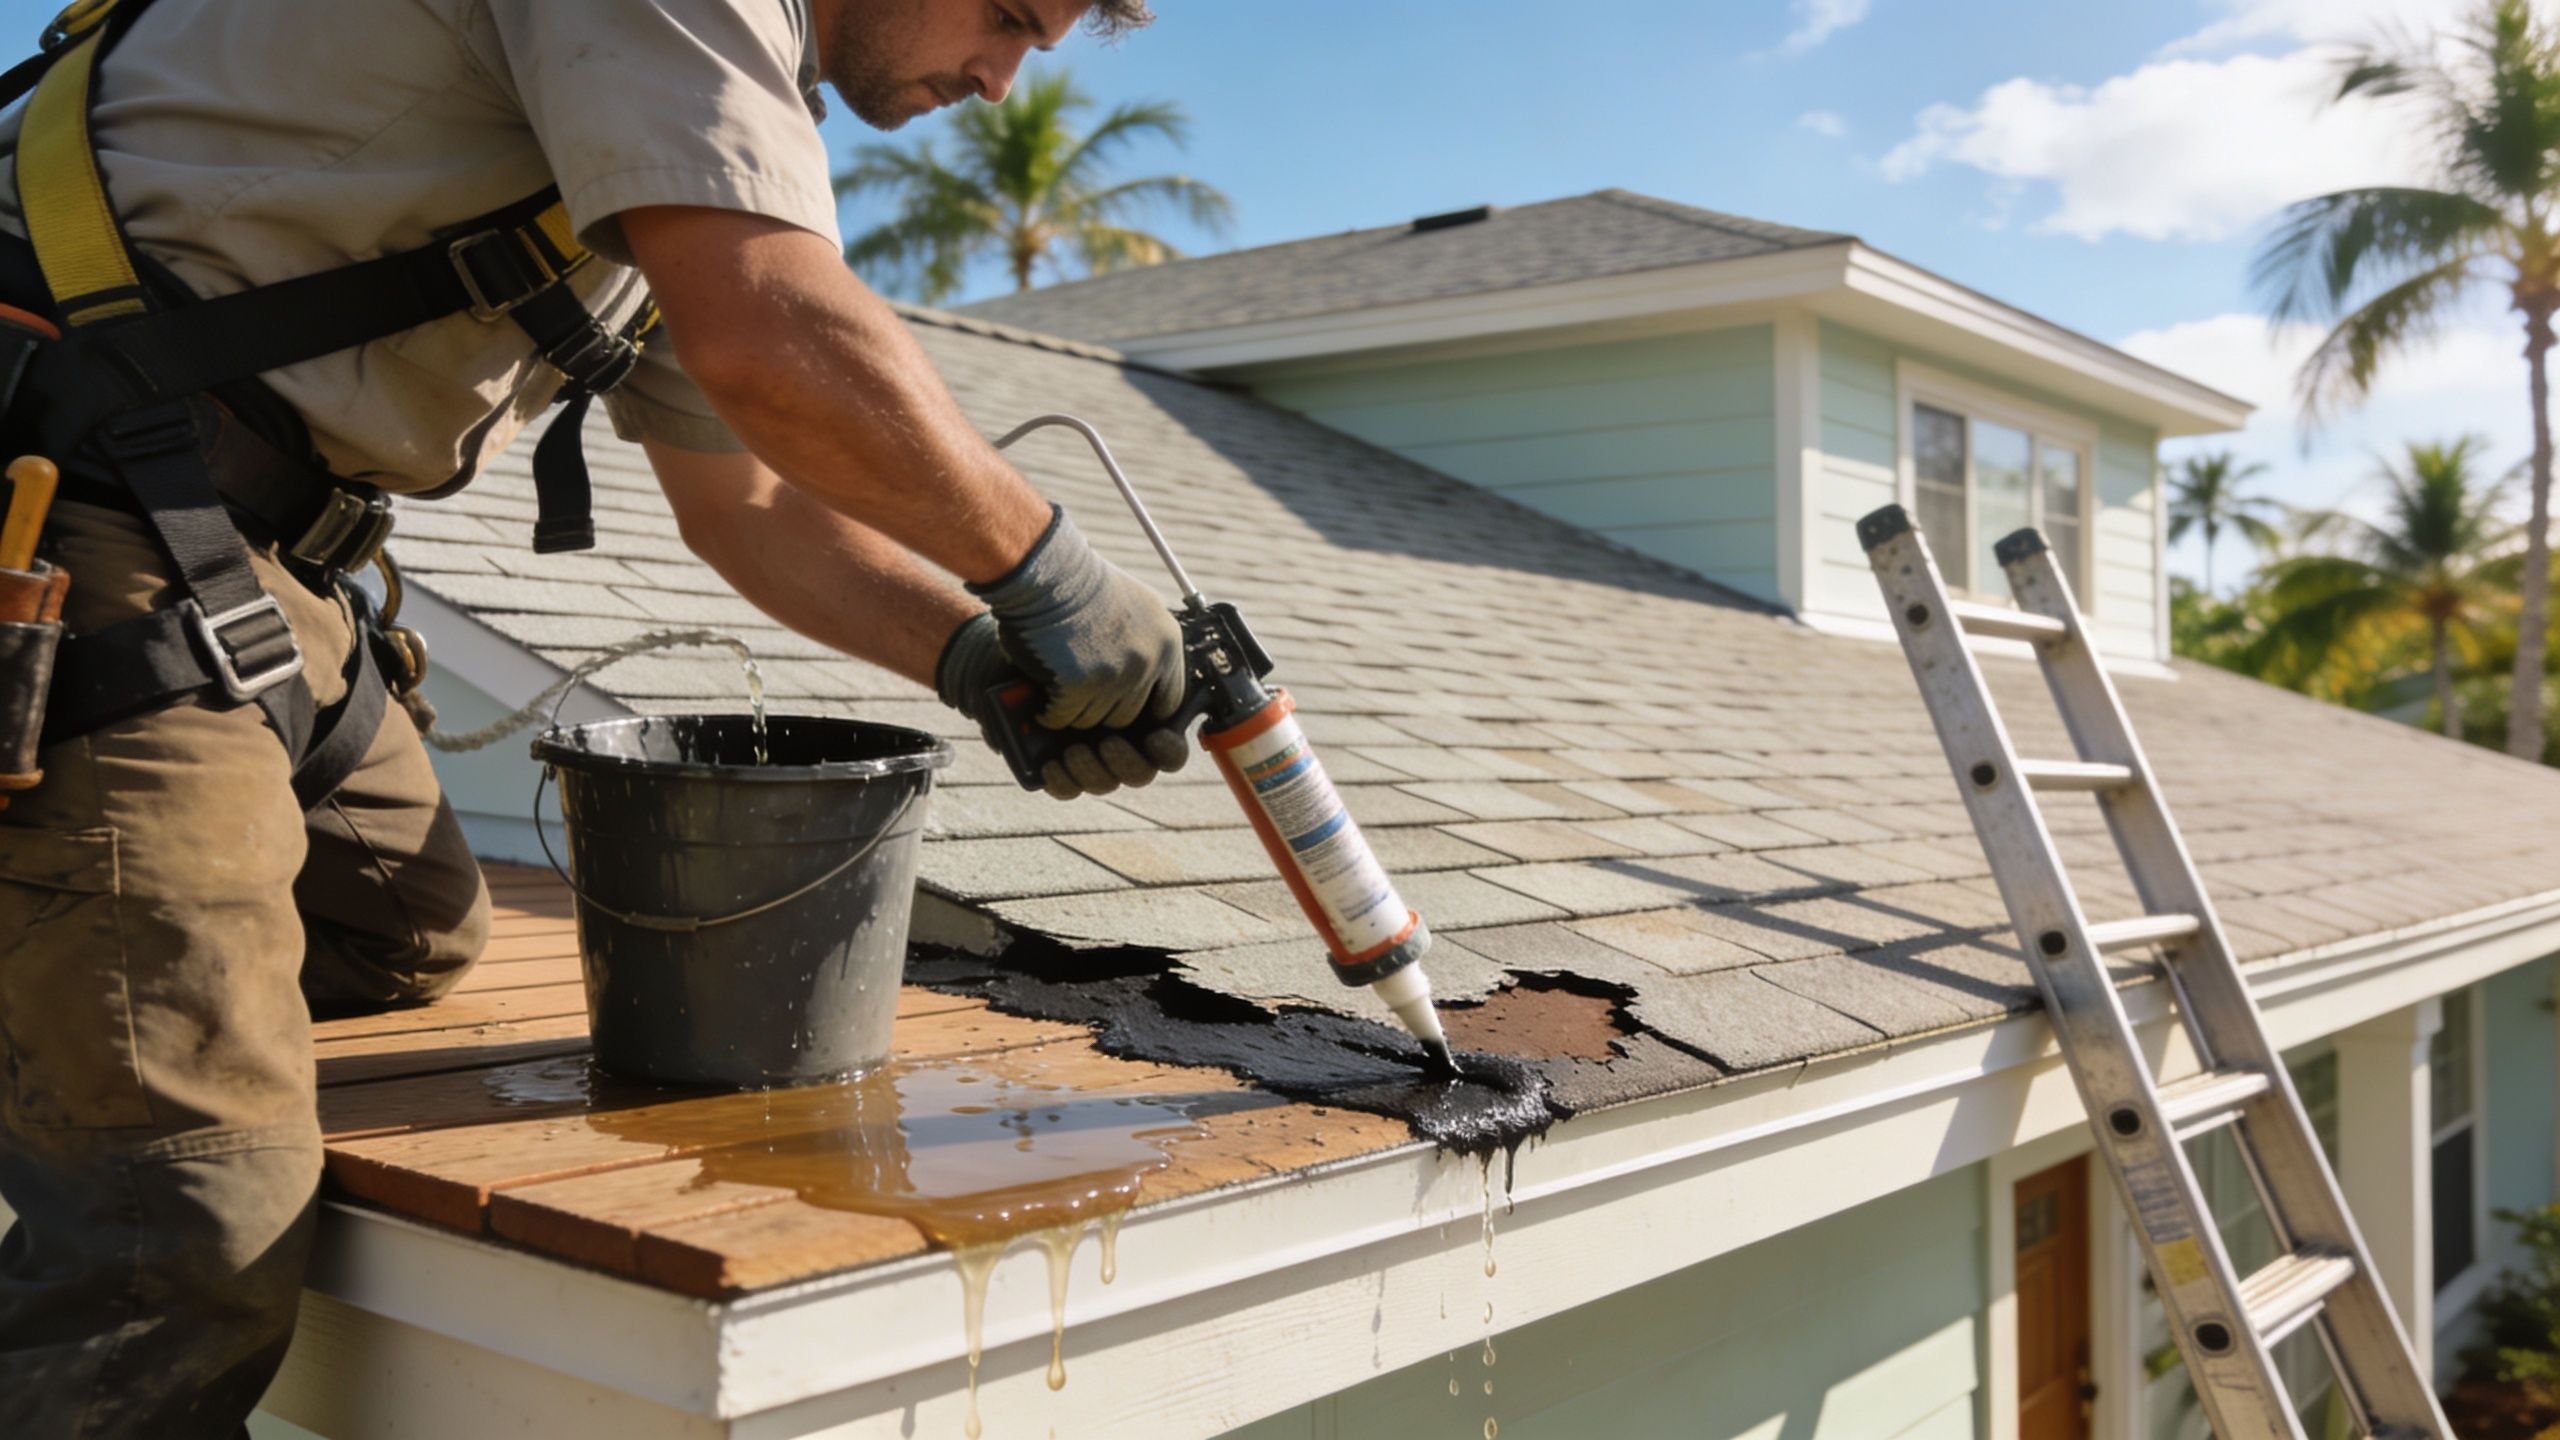
Ask a simple question before approving any leak repair. Is the contractor fixing the failed waterproofing layer, or just covering the symptom you can see? This roof repair detail photo reference helps show what an opened and properly restored repair area can look like.
Paletz Roofing and Inspections handles leak repairs across shingle, tile, metal, and flat roof systems in Broward, Miami-Dade, and Palm Beach. What matters is not the logo on the truck. What matters is whether the crew uses the right repair method for the roof in front of them, replaces damaged components instead of hiding them, and water-tests the repair before calling it done.
Estimating Roof Leak Repair Costs and Timelines
The question every homeowner asks is the right one. How much is this going to cost, and how long is this going to drag on?
The short answer is that leak repairs vary because the leak itself is only part of the bill. Access, roof type, material matching, flashing complexity, and hidden deck damage all matter.
What the numbers look like in 2026
According to 2026 roof leak repair cost data from ConsumerAffairs, the national average cost to repair a leaking roof ranges from $360 to $1,550 per project, and most homeowners spend between $350 and $1,500. Minor repairs such as replacing a few shingles or resealing a small component can start around $150, while more complex flashing repairs can exceed $2,500.
That same cost data notes that a full roof replacement can range from $9,858 to $41,822, which is why quick action matters. A small leak is rarely cheap to ignore.
For context on how labor is often structured, that source also notes pricing may be calculated per square, with hourly roofer rates and added emergency charges depending on timing and access. Those details explain why a simple-looking leak can produce a quote that surprises people.
Why one leak can produce very different quotes
A leak around a vent boot on a walkable roof is a different animal than a valley leak on a steep tile roof with rotten decking underneath. Both are "roof leaks," but they don't require the same labor or risk.
A sound estimate usually reflects these variables:
- Roof material: Tile, metal, shingle, and flat systems each require different repair methods.
- Location of the leak: Chimneys, walls, valleys, and penetrations take more time than an open field repair.
- Extent of hidden damage: Wet decking, insulation damage, or repeated leak history changes the scope.
- Access and safety setup: Multi-story homes and steep slopes cost more to work on safely.
A cheap quote often means one of two things. The roofer found a very small problem, or the roofer isn't opening enough area to find the whole problem.
Timelines vary for the same reason. Some isolated repairs can be handled quickly once the roof is dry and materials are on hand. Others stretch out because matching tile is harder to source, weather interrupts work, or the crew discovers failed decking after opening the area.
Knowing When to Call Paletz Roofing and Inspections
A lot of South Florida homeowners wait one storm too long.
The ceiling stain gets bigger, the bucket fills up again, and now the leak that looked manageable has spread into wet insulation, damaged decking, or a mold problem. In Broward, Miami-Dade, and Palm Beach, roofs take a beating from wind, UV, and salt air. Small failures at flashing, valleys, and roof penetrations do not stay small for long.
Safety is also a major concern. A roof that is wet, steep, heat-soaked, or covered in tile is not a place to experiment. I have seen plenty of well-meaning homeowners crack tiles, tear shingles, or miss the entry point because water was traveling before it showed inside.
Signs the repair is past DIY territory
Some leaks need a pro from the start. That is especially true after a tropical storm, during hurricane season, or any time the leak involves metal details, wall intersections, or more than one roof plane.
Call a roofer if you notice any of the following:
- Water around chimneys, skylights, walls, or valleys: These areas usually involve layered flashing details that have to be opened and rebuilt correctly.
- Soft spots or sagging: That can mean damaged decking under the roof covering.
- Leaks showing up in more than one room: Water may be entering in one place and traveling far from where you see the stain.
- A two-story home, steep slope, or fragile tile roof: The fall risk and breakage risk are high.
- A leak that comes back after patching: The visible gap was probably not the actual failure.
- Any leak after high winds: In South Florida, lifted edges, displaced tiles, and loosened flashing often hide from ground view.
CMB Roof notes in its repair benchmarks that flashing and valley leaks are a common source of repeat problems. That matches what experienced roofers see every week. The trouble is rarely the exposed joint alone. Failure is often tucked under the roof covering, behind counterflashing, or at a transition where different materials meet.
What a professional repair changes
A proper repair starts with tracing the water path, not guessing at the stain. On South Florida homes, that often means checking the surrounding system too: underlayment baked by UV, rusting metal near the coast, fasteners backing out after heat cycles, or sealants that failed long before the leak became visible indoors.
Good repair work may include removing tile or shingles around the suspect area, replacing wet or rotten decking, installing new flashing, resetting the roof covering, and testing the area before the crew leaves. That extra step matters. A quick surface patch can hold through one afternoon shower and fail on the next wind-driven rain.
If you need the local company behind this guidance, the Paletz Roofing and Inspections logo and contact reference identifies the team. The right time to make that call is before a leak turns into structural repair, interior damage, or a preventable fight with your insurance carrier.
Proactive Maintenance to Prevent Future Leaks in Florida
A South Florida roof can look fine from the driveway and still be one storm away from a leak. In Broward, Miami-Dade, and Palm Beach, the trouble usually starts at the small parts first. Sealants dry out under hard UV, salt air eats at exposed metal, and wind works loose edges that would hold up longer in other parts of the country.

What South Florida does to a roof
Guidance from Bumble Roofing points out a problem I see on local homes all the time. Generic roof maintenance advice rarely accounts for our mix of hurricane-season wind, year-round sun, and salt exposure near the coast. A roof in Weston, Kendall, or Boca may all leak for different reasons, but the pattern is familiar. The weak points are usually flashing, fasteners, sealant joints, and drainage areas.
That changes what homeowners should watch. Missing material matters, but early wear at penetrations, valleys, wall transitions, and roof edges causes plenty of leaks here.
A practical routine that helps prevent bigger repairs
Start from the ground. After heavy rain, tropical weather, or a named storm, walk the perimeter and look for anything that changed. Slipped tile, a lifted shingle tab, bent drip edge, loose soffit pieces, gutter overflow marks, and branches rubbing the roof all deserve attention.
Then stay on a simple schedule:
- Keep gutters and downspouts clear: In South Florida, one clogged run can push water under edge details fast during an afternoon downpour.
- Trim trees back from the roof: Limbs scrape surfaces, drop debris into valleys, and give wind more to work with.
- Check metal for rust or separation: This matters even more closer to the water, where salt air shortens the life of flashing and fasteners.
- Watch the attic and ceilings: A musty smell, a faint stain, or damp insulation often shows up before a ceiling drip does.
- Schedule inspections after major storms: Small movement in flashing or underlayment damage is easy to miss from the yard.
I tell homeowners the same thing every year. Maintenance costs less than emergency repair, especially after hurricane season when roofers are booked out and interior damage keeps spreading.
Professional inspections have real value here because South Florida roofs fail in ways people do not always spot early. A tile can stay in place but crack. A flashing lap can separate just enough to leak only during wind-driven rain. A documented inspection also helps if the leak later turns into a claim dispute and you need records, photos, or expert property claim assistance.
If you are not comfortable evaluating storm damage safely from the ground, stop there and call a roofer. No maintenance checklist is worth a fall.
Navigating Insurance Claims for Your Leaking Roof
A roof leak can turn into paperwork fast. If you think there's any chance you'll file a claim, start documenting before permanent repairs begin.
That doesn't mean you let the home keep taking on water. It means you do temporary protection, then preserve evidence of the cause and the resulting damage.
Document first and repair second
Take clear photos of the interior stain, active leaks, damaged personal property, attic moisture, and the exterior area if it can be photographed safely from the ground. Keep notes on when you first noticed the problem, what weather event preceded it, and what immediate steps you took to limit damage.
Save receipts for buckets, tarps, emergency dry-out work, or temporary protection. Carriers usually want to see that you acted reasonably to prevent further damage after discovery.
If the claim gets complicated, help from a claims-focused resource can make the paperwork easier to understand. Homeowners sometimes use expert property claim assistance to better organize damage records and communication before discussions with the insurer move too far.
Know what your carrier is asking for
Most claim disputes happen because documentation is thin or the cause of loss isn't clearly separated from wear, age, or maintenance issues. That's why roofers and adjusters both want the same thing at the start. Good photos, a clear timeline, and a repair scope that identifies what failed.
Ask these questions early:
- What caused the damage according to the inspection?
- What temporary repairs are necessary right now?
- What permanent repairs are recommended?
- What documentation will support the claim file?
A written roof assessment helps because it translates a wet ceiling into a cause-based explanation. That's what carriers evaluate. Not just the stain, but the failed component, the affected area, and the corrective work required to restore the roof properly.
If your home in Broward, Miami-Dade, or Palm Beach has an active leak, Paletz Roofing and Inspections can inspect the damage, identify the true entry point, and recommend the right repair for shingle, tile, metal, or flat roofing systems. The goal is straightforward. Stop the leak safely, document the problem clearly, and fix it in a way that holds up to South Florida weather.