Rain is hammering the roof. You hear one drip, then another. A brown spot blooms on the ceiling, a bucket comes out, and suddenly you're making decisions fast while water is moving through your house.
That's how most emergency roof repair in Parkland calls start. Not with a neat little leak, but with confusion. Is it safe to stay in the room? Should you go into the attic? Should you throw a tarp up yourself? Should you call insurance first or a roofer first?
In South Florida, a roof leak is rarely just a roof leak for long. Local Parkland roofers treat emergency response as a real service category because water intrusion can lead quickly to mold and structural trouble, and the area's severe weather is a big reason emergency leak repair evolved into a formal 24/7 response model rather than simple patch work, as noted by this Parkland roof leak overview. The right moves in the first day can protect your house, preserve your claim, and keep a temporary fix from turning into a very expensive mistake.
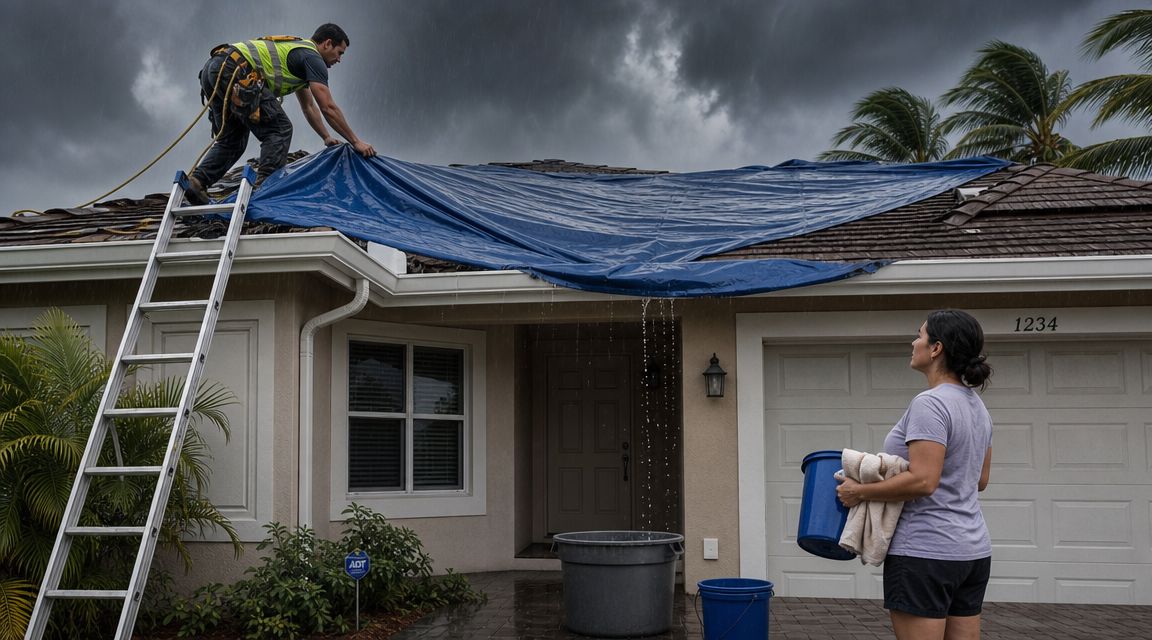
A calm plan beats panic every time. If you need a quick visual reference for the kind of roof conditions that often lead to urgent leak calls, this roof damage example image gives you a useful frame of reference.
Table of Contents
- Your First 24 Hours During a Parkland Roof Emergency
- Securing Your Home Before the Roofer Arrives
- Temporary Roof Tarping and Mitigation Techniques
- Finding a Reputable Emergency Roofer in Parkland
- Documenting Damage for a Smooth Insurance Claim
- Deciding Between a Major Repair and a Full Roof Replacement
- Your Next Steps to a Secure and Lasting Roof
Your First 24 Hours During a Parkland Roof Emergency
The first day is about control. Not perfection. If water is coming in, your job is to slow damage, stay safe, and avoid making the roof problem worse.

A common Parkland scenario goes like this. Heavy rain starts pushing sideways, the leak shows up in a hallway or bedroom, and the homeowner focuses on the stain they can see. Meanwhile, water may be traveling along decking, rafters, or underlayment before it ever reaches that ceiling spot. The visible drip is often the end of the path, not the start of it.
That matters because the first 24 hours aren't just about catching water in a bucket. They're about managing an event. You need to protect people, protect contents, document what happened, and get the roof into temporary dry-in condition so the home doesn't keep taking on water.
What matters most right away
- Protect occupants first. Keep people away from sagging ceilings, wet light fixtures, and slick floors.
- Contain the water inside. Buckets, towels, plastic bins, and moving valuables buy you time.
- Don't climb a wet roof. In Parkland storms, that's how homeowners get hurt.
- Call for emergency service early. Waiting to “see if it stops” often costs more later.
- Start your photo record immediately. Take pictures before cleanup and before temporary work changes the scene.
Practical rule: Treat an active leak like a property-loss event, not a handyman chore.
The right mindset
You do not need to diagnose the whole roof at midnight in the rain. You need to stop the house from taking on more damage and keep your options open. A rushed homeowner usually makes one of three mistakes: walking the roof, tearing out wet materials too soon, or skipping documentation because they're focused only on cleanup.
The best emergency responses are steady and boring. That's good news. Calm, simple actions work.
Securing Your Home Before the Roofer Arrives
It is 2 a.m., rain is still pushing sideways, and water is showing up in the hallway instead of the room under the roof damage. That is normal in a Parkland roof leak. Water travels. The smart move is to stabilize the inside of the house first, protect the people in it, and preserve the paper trail you may need for your insurance claim.
Roofers and restoration crews usually handle active leaks in phases. Interior control comes first, then exterior mitigation once conditions are safe. FEMA makes the same point in its guidance on emergency protective measures, which focuses on stopping further damage before permanent repairs begin: FEMA emergency protective measures guidance.
Start with hazards, not cleanup
If water is near recessed lights, outlets, extension cords, appliances, or the panel, keep everyone out of that area. Shut off power only if you can do it without standing in water or reaching through a wet area. If you cannot do that safely, leave it alone and call for help.
Watch the ceiling. A soft bubble in drywall means water is pooling above it. Wet insulation gets heavy fast, and a collapse can happen without much warning.
Handle the room in a sequence that saves damage and saves evidence
First, place buckets, bins, or deep pans under the active drip points. Add towels around them so splashing does not spread across the floor.
Next, move what costs real money to replace. Electronics, paper files, framed photos, rugs, upholstered furniture, and anything wood veneer should come out early. Homeowners who wait on that step often save the ceiling and lose the contents.
Then take photos before you start making the room look better. Get wide shots of the room, close shots of the stain or opening, and pictures of any damaged personal property. If you later need to explain why a quick patch made sense or why replacement became the better financial choice, this record helps.
A controlled drain can help, but only in the right situation
If drywall is badly swollen and the bulge is easy to reach from a stable floor, some homeowners choose to puncture the lowest point and drain the water into a bucket. That can keep the ceiling from dropping all at once and soaking a larger area.
Do not try that under a light fixture, near wiring, or from a ladder on a slick floor. If there is any doubt, leave the ceiling alone and let the emergency crew handle it.
What to avoid in the first few hours
| Situation | Smart move | Expensive mistake |
|---|---|---|
| Leak near electrical items | Isolate the room and shut off power only if safe | Reaching through water to unplug things |
| Wet furniture and contents | Move and photograph them first | Cleaning up before documenting loss |
| Bulging ceiling | Keep people clear and monitor it | Standing under it to inspect closely |
| Attic access during a storm | Wait for trained crews with proper lighting and footing | Walking attic framing in the dark |
One more point that gets missed. Do not start tearing out wet drywall, insulation, or trim unless your roofer or mitigation company has told you to. Early demolition can make the source harder to trace and can muddy the insurance file.
Keep the rest of the house functional
Close doors to the affected room if you can. Put down plastic or contractor bags to protect nearby flooring. Run fans only in dry, safe areas where you are not pushing moisture deeper into wall cavities or toward unaffected rooms.
If you hire temporary help, make sure the contractor is properly insured. Liability coverage is essential protection for self-employed tradespeople, and it matters if someone gets hurt or causes more damage during emergency work.
A calm, documented response gives you options. It helps the roofer dry in the house faster, and it puts you in a better position to decide whether you are paying for a targeted repair or staring at a roof that is ready for replacement.
Temporary Roof Tarping and Mitigation Techniques
At this stage, the goal is to buy clean, documented time. A proper tarp keeps new rain out, limits secondary damage, and gives you a fair shot at deciding whether this roof needs a targeted repair or whether you are throwing money at a roof that is already at the end of its service life.

If you want to see the kind of roof areas crews study before laying temporary protection, this roof service reference image gives useful context.
A tarp only works when it is installed for the way water travels. In Parkland, the leak you see inside is often not directly below the point where rain is getting in. Water can enter upslope, run along underlayment or decking, then show up several feet away at a light fixture, wall corner, or ceiling seam. That is why a good emergency crew covers the surrounding field of damage, not just the visible opening.
What a proper emergency tarp is supposed to do
A field-installed emergency tarp should do three things:
- Cover the damaged area and the likely entry path above it
- Shed water down the roof without trapping it under the covering
- Stay in place if the wind picks up before permanent repairs begin
That last point matters more in South Florida than homeowners expect. A tarp that looks secure at 3 p.m. can loosen overnight if the edges are not anchored correctly or if the installer ignored how wind-driven rain hits that roof plane.
What crews look at before they install anything
Experienced roofers do not just throw plastic over the wet spot. They check how the roof is built and how the failure happened.
- Slope and runoff path: Water has to move off the roof cleanly.
- Roof material: Tile, shingle, flat, and metal roofs each need different temporary methods.
- Condition of the deck: Soft decking changes how and where a tarp can be secured.
- Flashing and penetrations: Chimneys, vents, skylights, valleys, and wall tie-ins often cause the main leak.
- Wind exposure: Open corners, ridges, and long runs take more uplift.
If the deck is rotten or the area is structurally questionable, walking it can do more harm than the storm did. In those cases, interior containment and carefully planned exterior dry-in are safer than forcing access.
Temporary mitigation that actually helps
The best short-term work is boring. Heavy tarp material. Proper overlap. Secure fastening. Controlled sealant use where it makes sense. Clear photos before and after.
Homeowners get in trouble when they pay for a fast patch that stops the drip for a day but hides how bad the roof really is. That can cost you twice. First in repeat emergency calls, then in insurance friction if the carrier sees incomplete documentation or signs that temporary work changed the evidence. For a useful outside perspective on how damage records affect claim review, see Awesim Building Consultants on claims.
Same-day response is common for active leaks in this market, and many emergency roofers try to get a tarp in place as quickly as weather and safety allow. The smart question is not just, "How fast can you get here?" Ask, "What exactly are you doing when you arrive. Inspection, dry-in, photos, and written notes, or just a sheet of plastic?"
Where temporary tarps fail in real weather
I have seen plenty of tarps that looked fine from the driveway and leaked at the first hard rain. The usual failures are predictable:
- Top edge too low: Water gets behind it from above.
- Loose perimeter: Wind lifts the tarp and opens the field underneath.
- Bad fastening pattern: The cover holds in one area and flaps itself apart in another.
- No allowance for drainage: Water ponds, backs up, or gets pushed sideways under the roof covering.
- Leak path missed upslope: The stain is covered, but the entry point is still open.
Tarping versus patching
These are not the same decision, and making the wrong call wastes money.
| Temporary measure | Best use | Limitation |
|---|---|---|
| Heavy-duty tarp | Missing materials, storm openings, uncertain leak source | Holds the situation temporarily, not permanently |
| Limited patch or sealant repair | Small, isolated defect on an otherwise sound roof | Can fail quickly if hidden damage extends beyond the visible break |
| Interior containment only | Access is unsafe or weather has not cleared | Protects the inside, but water is still entering the roof system |
The money decision starts here. If the roof is generally sound and the damage is isolated, a tarp plus a focused repair often makes sense. If the roof already has widespread wear, multiple leak paths, brittle materials, or soft decking, temporary work is just buying a little time to line up replacement. One trade summary from Kodiak Roofing's repair versus planned repair discussion notes that emergency work often carries higher minimum charges and after-hours pricing. That is another reason not to keep paying for weak stopgaps.
Paletz Roofing and Inspections is one local option that provides emergency tarping and storm-related roof service in South Florida. Whatever company you call, look for a crew that treats tarping as loss control, evidence preservation, and decision support for the next 24 hours, not just a quick cover-up.
Finding a Reputable Emergency Roofer in Parkland
Emergency calls create bad hiring decisions. Homeowners are stressed, the house is leaking, and the first person who answers the phone can sound convincing. Slow down just enough to vet the contractor.
Parkland homeowners aren't short on choices. Angi's Parkland directory lists 39 highly-rated local roofers, which tells you there's a broad local pool, and many firms advertise 24/7 emergency services in that competitive market, as shown on Angi's Parkland roofing listings. More options can reduce response time. They also make it easier for an unqualified outfit to blend in if you don't ask the right questions.
The non-negotiables
When you call, listen for direct answers. Not sales talk.
- License and insurance: Ask for proof. In an emergency, this isn't paperwork theater. It protects you if something goes wrong on site.
- South Florida experience: Parkland roofs deal with heat, hard rain, uplift, and material-specific failures. Local experience matters.
- Emergency process: Ask what happens first. A real emergency roofer talks about safety, containment, documentation, temporary dry-in, and inspection.
- Scope clarity: Ask what is temporary and what is permanent. If they blur those lines, be careful.
For homeowners who want a better sense of why contractor insurance matters in the field, this guide on essential protection for self-employed is a useful primer on liability coverage and why it shouldn't be treated as optional.
Questions that tell you a lot fast
Here are the questions I'd ask before authorizing any emergency visit:
- Are you licensed and insured for roofing work in Florida?
- Do you handle emergency tarping, leak tracing, and written damage assessment?
- Will you photograph the damage before and after temporary mitigation?
- What does your temporary fix include?
- If the roof is older or badly damaged, will you explain repair versus replacement impartially?
Red flags in a roof emergency
Some warning signs show up immediately.
| What you hear | What it usually means |
|---|---|
| “We can quote it without seeing it” | They may be guessing |
| “You don't need documentation” | They don't understand claim friction |
| “A patch will solve everything” | They may be overselling a short-term fix |
| “We can start right now, no paperwork” | Vet them before you let them on the roof |
The right roofer lowers chaos. The wrong one adds a second problem on top of the first.
What a good emergency contractor sounds like
A reliable contractor doesn't promise miracles on the first phone call. They talk in stages. First, make the house safe. Next, stop active intrusion. Then inspect the full system, including shingles or tile, flashing, valleys, penetrations, and drainage paths. That kind of language usually comes from someone who has handled real storm calls, not just routine repairs.
Documenting Damage for a Smooth Insurance Claim
Most homeowners think about insurance after the tarp is up and the room is cleaned. That's too late for some of the evidence that matters most.
A major blind spot in roof-leak advice is the first-day documentation that keeps a claim organized. In a high-exposure market like Florida, homeowners need to photograph damage before temporary repairs, keep mitigation receipts, and log when the loss was discovered to reduce claim friction, as noted in this emergency roof service guidance focused on documentation.

If you've never dealt with property-loss documentation before, outside perspectives can help. This overview of Awesim Building Consultants on claims gives a useful look at how building-related insurance assessments are approached and why thorough records matter.
The claim file you should start immediately
Create one folder on your phone and one simple written log. That's enough. What matters is consistency.
Your log should include:
- the date and time you first noticed the leak
- where the leak appeared
- what weather was happening
- what emergency steps you took
- who you called, when, and what they said
The photo sequence that works best
Don't just snap a couple of pictures of the ceiling stain. Build the story.
- Start wide. Photograph the whole room so the location is obvious.
- Move closer. Get the stain, active drip, wet flooring, damaged contents, and any ceiling sag.
- Document the roof damage before tarping if it can be done safely. Ground-level photos are better than risky roof access.
- Photograph the temporary mitigation. Show the tarp or emergency protection once installed.
- Keep going afterward. If the leak continues, document each recurrence.
Receipts matter more than homeowners think
Save every receipt tied to emergency mitigation. That includes tarping, service call charges, buckets, plastic sheeting, towels used specifically for mitigation, and any immediate drying-related purchases you make because of the leak event.
A clean claim file usually includes:
- photos and video
- service invoices
- material receipts
- written communication
- a timeline of events
Insurance companies don't just look at damage. They look at whether the homeowner acted reasonably to limit further loss.
Don't erase the evidence
Homeowners often want to clean everything immediately. That's understandable. But don't throw out damaged materials, soak up all evidence, or make permanent repairs before the insurer has the documentation needed to evaluate the loss.
Here's a quick guide:
| Do this | Avoid this |
|---|---|
| Photograph first | Cleaning first |
| Save receipts | Paying cash with no record if you can avoid it |
| Keep a call log | Relying on memory later |
| Preserve damaged items if practical | Discarding everything the same day |
| Separate temporary from permanent work | Authorizing full rebuild work too early |
Why this changes the outcome
Good documentation doesn't guarantee an easy claim. But it gives you a timeline, proof of mitigation, and a clearer record of what happened before the situation changed. That makes conversations with adjusters, roofers, and restoration teams more concrete.
When homeowners document well, they stop sounding uncertain. They sound organized. That usually helps.
Deciding Between a Major Repair and a Full Roof Replacement
Once the leak is under control, the next decision is the one that affects your money the most. Do you repair the damaged area and keep the roof going, or do you stop pouring money into an aging system and move toward replacement?
Many online guides gloss over that choice. They make emergency repair sound like the answer every time. It isn't. For older South Florida roofs, insurance pressure and code-related reroof issues can make partial repairs less attractive, and roofs nearing the common 15 to 30 year asphalt shingle lifespan need especially careful evaluation, as discussed in this Parkland roof repair page on aging systems and replacement decisions.

When a major repair makes sense
A substantial repair can be the right move when the failure is concentrated and the surrounding roof system is still sound. That usually means the roof covering, flashings, and substrate outside the damaged zone still have useful life left.
Repair often fits when:
- the leak source is identifiable
- the rest of the roof is performing well
- materials can still be integrated properly
- the emergency event did not expose widespread hidden damage
When replacement deserves serious consideration
Replacement moves up the list when the roof is older, the damage pattern is broad, or the emergency leak is just the latest symptom of a system that's running out of time.
Look hard at replacement if:
- leaks have happened before
- matching materials is difficult
- underlayment, fasteners, or flashing show age-related failure
- multiple roof areas were affected by the same storm
- the “repair” mostly buys time rather than reliability
If the patch only gets you through this season, it may not be the cheaper option.
A practical comparison
| Question | Lean repair | Lean replacement |
|---|---|---|
| Is damage localized? | Yes | No |
| Is the roof relatively younger and otherwise sound? | Yes | No |
| Are recurring leaks already a pattern? | No | Yes |
| Will the fix restore confidence for the long term? | Yes | No |
The smart move is usually a two-part decision. First, stop the leak. Second, inspect the whole roof with clear eyes. Emergency roof repair in Parkland should never lock you into a permanent decision before the system is properly assessed.
Your Next Steps to a Secure and Lasting Roof
A roof emergency feels chaotic because several problems hit at once. Water is entering the house. Contents are at risk. Insurance questions start immediately. Then the bigger decision shows up. Repair or replace.
The good news is that the first moves are straightforward. Stay safe. Contain the water inside. Get temporary dry-in protection on the roof. Document the damage before conditions change. Then have a qualified roofer inspect the entire system, not just the visible leak point.
If you want a quick reference to the company's inspection branding and service identity, this Paletz Roofing and Inspections logo asset is the official image.
A well-managed first day gives you choices. A poorly managed one takes choices away. That's the main difference between an expensive emergency and a controlled one.
If you need help with emergency roof repair in Parkland, Paletz Roofing and Inspections can assess active leaks, provide temporary mitigation, and inspect the full roof system so you can make a clear decision about repair, replacement, and next steps.