The storm has passed, but that doesn’t mean the risk is over. In South Florida, a roof can take a beating from wind, hail, flying debris, and heavy rain, then still look fine from the driveway.
That’s what catches homeowners off guard.
You may be standing in the yard right now looking up at shingles, tile, or metal panels and wondering if you have damage or if you’re just seeing normal wear. That’s a fair question. The hard part is that some storm damage is obvious, and some of the most expensive damage is easy to miss in the first day or two.
A good post-storm inspection isn’t about rushing onto the roof. It’s about moving in the right order, keeping yourself safe, and learning how to separate surface marks from functional damage that can lead to leaks, rot, and insurance trouble later. If you want to know how to spot roof damage after a storm, start low, stay methodical, and let the evidence tell the story.
Your Post-Storm Action Plan Starts on the Ground
When the wind drops and the rain finally quits, most homeowners want answers fast. I understand that urge. But the first mistake people make after a hurricane or severe thunderstorm is treating the roof like the first thing to check instead of the last place they should physically go.
Your first job is to make sure the property is safe enough to inspect at all.
Walk the perimeter slowly. Look for downed lines, broken tree limbs hung up over the house, loose fence panels, shattered glass, and anything leaning that wasn’t leaning before. If you see standing water near electrical equipment, stay back and call the utility company or emergency services before you do anything else.
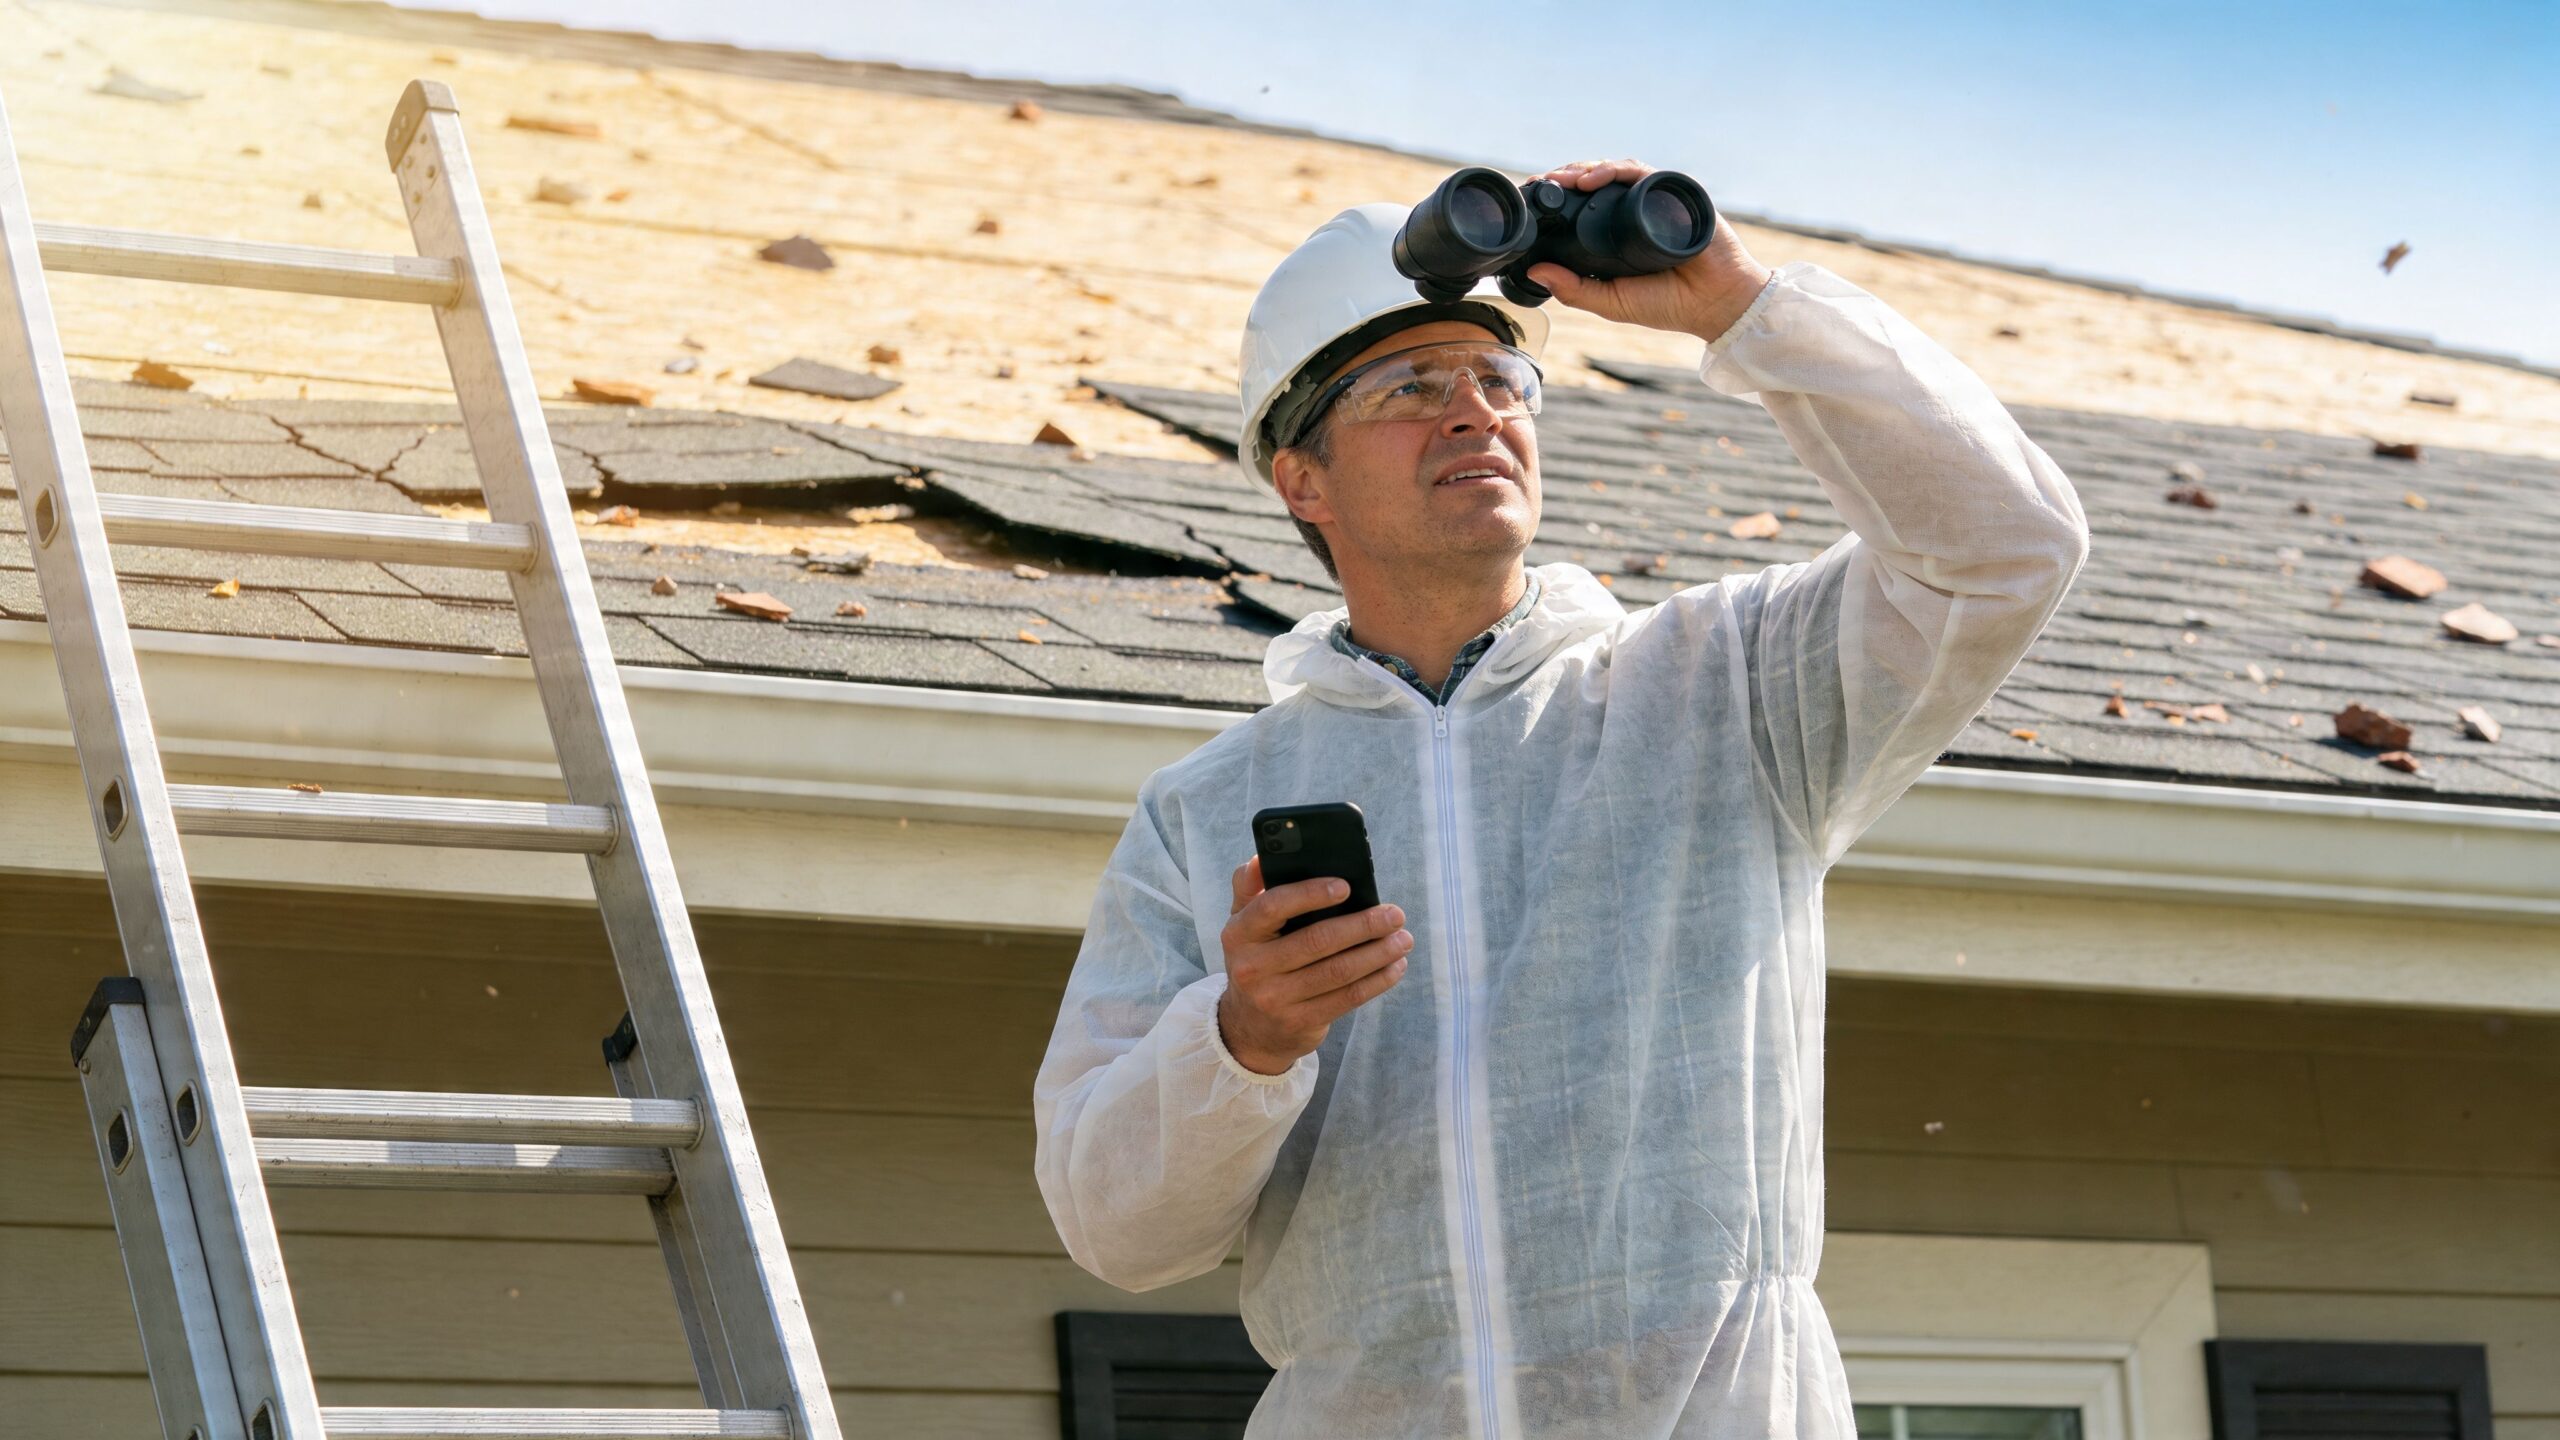
Once the area is safe, start your inspection from the ground. That’s how roofers do it when conditions are questionable. A careful ground-level review tells you a lot. You can often spot displaced materials, bent flashing, gutter trouble, and impact marks without ever touching a ladder. If you want a visual example of the kind of roofline changes to watch for, this roof inspection image helps show the perspective that matters from a safe distance: post-storm roof view.
Practical rule: If the roof is still wet, debris is still falling, or the yard still has hazards, the inspection waits.
The order matters. Start outside at ground level. Then check gutters, eaves, flashing, soffits, and visible roof surfaces. After that, move indoors to the attic and ceilings. Only after you’ve done those steps should you decide whether the problem is clear, minor, or something that needs a roofer and a formal damage report.
That patient approach saves money. It also keeps people out of the emergency room.
Safety First Your Pre-Inspection Game Plan
A rushed inspection creates two problems. You can get hurt, and you can miss what matters.
After a South Florida storm, roofs are slick, ladders shift in wet soil, and debris can hide hazards around the house. I’ve seen homeowners focus on one missing shingle and completely miss a torn power drop, a loose soffit, or a branch that’s still loaded and ready to fall.

Hazards to clear before you inspect
Start with a wide sweep of the property. Don’t stare at the roof yet. Look at the full scene.
- Power hazards. Downed or low-hanging lines are a stop sign. Don’t assume a line is dead because the lights are out.
- Tree damage. A branch resting on the roof may not have punctured it, but it can still shift and do more damage if you disturb it.
- Loose building parts. Bent gutters, hanging fascia, screen enclosure parts, shutters, and metal trim can fall without warning.
- Ground instability. Mud, washouts, and slippery pavers make ladder work unsafe even if the roof itself looks dry.
- Structural warning signs. If the roofline looks sunken, bowed, or twisted, stay off it entirely.
If anything about the house looks structurally off, skip the ladder and call a licensed roofer.
What to wear and what to carry
You don’t need a truck full of gear to do a homeowner-level inspection well. You do need the right basics.
Bring these:
- Closed-toe shoes with grip. Wet sneakers with smooth soles are useless.
- Work gloves. Good for moving small debris and protecting your hands around metal edges.
- Binoculars. They let you inspect without climbing.
- A strong flashlight. You’ll need it later for the attic and for shaded eaves.
- A smartphone. Use it for photos, video, and voice notes.
- A notepad or notes app. Keep the timeline straight while it’s fresh.
- A moisture meter if you have one. Helpful indoors for suspicious ceiling spots or attic framing.
Leave the ladder out of the plan unless you know how to set it safely and conditions are fully stable. Even then, most homeowners can gather enough information from the ground and from inside the attic to decide whether a professional needs to take over.
What works and what doesn’t
Some habits help. Some waste time.
What works is slow observation from multiple angles. Walk the property clockwise, then counterclockwise. Stop at each corner and scan the roofline, valleys, penetrations, and gutters. Storm damage often shows itself better from the side than from straight on.
What doesn’t work is standing in one spot in the driveway and deciding the roof is fine because nothing looks dramatic. Subtle storm damage rarely announces itself.
If you can inspect calmly, document clearly, and keep your feet on the ground, you’ve already done more right than most homeowners do in the first hour after a storm.
Conducting Your Ground-Level and Exterior Roof Inspection
Most real roof inspections start the same way. Not on the roof. Not on a ladder. From the ground, with patience and a good set of eyes.
That matters because storm damage tends to leave a pattern. Once you know what pattern you’re looking for, the inspection gets much easier.

Read the roofline before the roof covering
Before you zoom in on shingles or tile, step back and study the shape of the roof.
Look for:
- A sagging ridge or dip in one plane
- Edges that look uneven when they were straight before
- Sections casting odd shadows
- Soffit or fascia lines that look pulled loose
- Gutters that suddenly tilt or gap away from the house
These larger clues often point to water intrusion, uplift, or deck movement. If the shape changed, the problem usually runs deeper than a few damaged surface pieces.
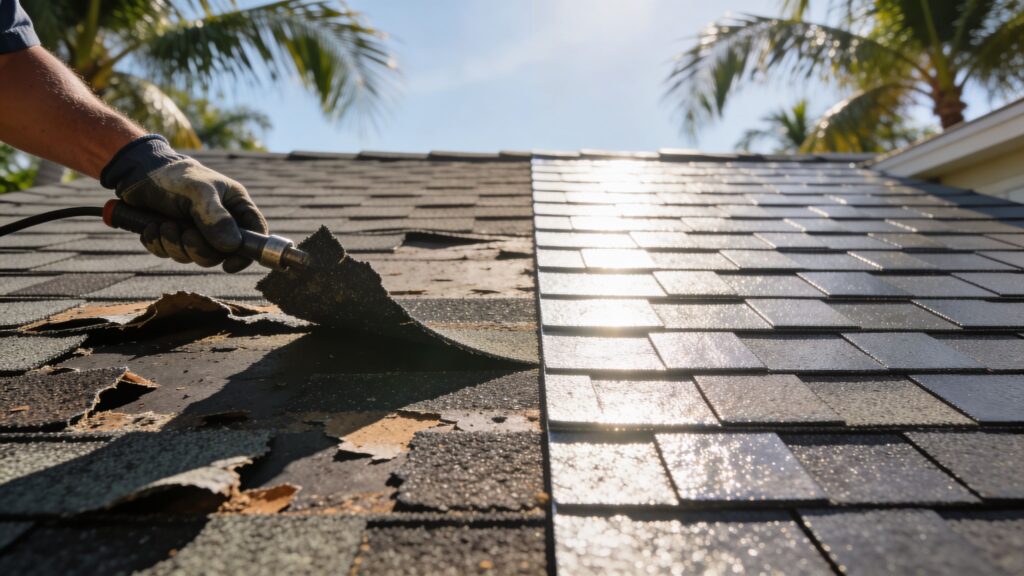
A side-angle roof photo can help you compare what you’re seeing to common storm-related distortions. This example is useful for that kind of visual reference: roof damage angle example.
What to check around the perimeter
Now move closer and work the edges.
Check the gutters for shingle granules, tile fragments, metal pieces, and packed debris. On an asphalt shingle roof, excessive granules in the gutter are one of the first clues that hail or wind has stripped away the protective top layer.
That matters more than many homeowners realize. Hail affects about 1 in 35 homes annually, and hail as small as 1 inch in diameter can significantly damage asphalt shingles. The same source notes that the Asphalt Roofing Manufacturers Association reports a 20% loss in granules can cut a shingle’s lifespan by up to 60% (graduatecontracting.com).
Look at downspouts and splash areas too. Fresh debris at the bottom often tells you what came off the roof during the storm.
A gutter full of granules after a hail event is not “just age” until someone proves it. Storm impact and age can look similar from the yard, but the repair path is not the same.
Asphalt shingles and what damage really looks like
Shingles are common, and they fool people all the time.
From the ground, use binoculars and scan for:
- Dark spots where granules are missing
- Random dents or bruised-looking areas
- Tabs that are bent, creased, lifted, or missing
- Edges that no longer lie flat
- Cracks around impact points
- Shiny patches where the surface coating has been disturbed
Wind damage often follows edges and weak adhesive lines. Hail damage tends to appear in a more random pattern. That random pattern matters later if you end up in an insurance discussion.
There’s another detail many guides skip. Not every hail mark is functionally important. A superficial bruise can be cosmetic. A strike that fractures the shingle mat is a different issue entirely. From the ground, your job is not to make the final call. Your job is to flag areas that need a closer look.
Concrete and clay tile roofs
South Florida has plenty of tile roofs, and they need a different eye.
Don’t just hunt for pieces missing from the yard. You’re also looking for:
- Hairline cracks
- Corners chipped off by impact
- Tiles shifted out of alignment
- Raised edges where wind lifted a tile
- Broken mortar at ridges or penetrations
- Exposed underlayment where tile moved
A tile roof can leak from one cracked or displaced tile in the wrong place. What makes tile tricky is that the underlayment often takes damage even when the field of tile still looks mostly intact from below.
If you see fresh pieces of tile on the ground, don’t assume they all came from one obvious break. Walk the whole perimeter. Storm-thrown debris can scatter.
Metal roofing signals
Metal roofs show storm damage differently. They don’t shed granules, so you need to pay attention to shape and fasteners.
From the ground, look for:
- Dents from hail or flying debris
- Panels that look rippled or lifted
- Fastener lines that no longer sit true
- Flashing bent at edges or around penetrations
- Scratches deep enough to expose bare metal
- Seams that look separated
A shallow dent might be mostly visual. A distorted seam, exposed fastener issue, or bent flashing detail is more serious because that’s where water gets in.
Flat roofs and low-slope sections
Many homes and additions in South Florida have flat or low-slope areas over porches, garages, or rear sections.
From the ground and from upper windows if you have them, check for:
- Debris piles that block drainage
- Edge metal pulled loose
- Membrane wrinkles, blisters, or tears
- Standing water that lingers
- Discoloration around drains or scuppers
On flat roofs, water doesn’t need much help to become a problem. A clogged drain and one membrane split can turn a minor event into interior damage fast.
Exterior components homeowners forget
The roof covering gets most of the attention, but storm damage often starts at the details.
Check these carefully:
- Flashing around chimneys and walls
- Pipe boots and vent collars
- Skylight edges
- Satellite or solar attachment points
- Soffits and fascia
- Gable vents and ridge vents
If metal flashing is bent, lifted, or detached, the roof can leak even when the shingles or tile still look decent.
Checking for Hidden Damage Inside Your Home
A roof can be damaged long before the ceiling starts dripping. That’s why the indoor inspection matters.
Plenty of homeowners look up at the roof, don’t see anything dramatic, and stop there. Then a week later they notice a ceiling stain, peeling paint, or a musty attic smell. By then, water has already been moving.

What to look for in the attic
Take a flashlight and go into the attic during daylight if you can do it safely. Move slowly and watch your footing. Step only on framing or designated walk boards, not on the insulation or drywall below.
Use the flashlight to check for:
- Dark water stains on the underside of the roof deck
- Wet or compressed insulation
- Damp rafters or truss members
- Rust on nails or metal connectors
- Light coming through the roof deck
- A musty smell that wasn’t there before
If you have a moisture meter, use it on suspicious framing and sheathing. Even without one, touch can tell you a lot. Damp wood feels cooler and different from dry wood.
What signs show up in living areas
Storm-related roof leaks don’t always appear directly below the damaged spot. Water can travel along framing before it shows itself.
Walk room to room and inspect:
- Ceilings near exterior walls
- Around recessed lights and ceiling fans
- Around AC vents
- The tops of walls
- Window headers
- Closets on upper floors or under roof slopes
Look for bubbling paint, fresh discoloration, soft drywall, swollen trim, and that faint brown ring that means water has been there more than once.
A stain that appears days after the storm still counts. Water often takes time to show itself indoors.
Match inside clues to outside trouble
Indoor evidence helps you narrow the likely source. A stain near a vent boot often points to flashing or seal failure. Damp insulation near the eaves can mean wind-driven rain entered at the edge. Water marks running down a masonry chimney chase often trace back to flashing.
If you find multiple interior signs, don’t assume you have multiple leaks. One breach can spread water over a wider area than people expect.
What not to ignore
Homeowners often dismiss small signs because they don’t look urgent. That’s a mistake.
Pay attention if you notice:
- A ceiling spot that seems dry but has a new outline
- Paint blistering after the storm
- Insulation clumped together
- A faint mildew smell in one room
- A door frame swelling or sticking near an exterior wall
Those are often the first signs of a leak path. Catching it early is the difference between a repair and a bigger restoration job.
Documenting Damage and Making Emergency Repairs
Once you’ve found possible damage, switch from inspection mode to documentation mode. This part matters for two reasons. It helps protect your home from additional damage, and it gives you a cleaner record if you need to file a claim.
Most homeowners take a few random photos and think they’re done. That’s not enough. A useful record tells the story clearly, from the first exterior sign to the interior effects.
Photograph it like an adjuster will review it
Take wide shots first. Show the full roofline, the side of the house, the gutters, and the surrounding area. Then move into medium and close shots of each problem.
For each area, capture:
- A wide photo that shows location
- A closer photo that shows the damage
- A second angle if depth or shape matters
- Any debris found on the ground below
- Any interior signs connected to that area
Use your phone’s date stamp settings if available, or keep a written photo log in your notes app. Label photos by side of house and feature, such as “front slope near valley” or “rear bedroom ceiling stain by vent.”
Build a simple damage log
You don’t need special software. A clean list works.
Write down:
- Date and time of storm
- Date and time of inspection
- What you saw outside
- What you found inside
- What temporary steps you took
- Any change in conditions after the first inspection
Professional inspection systems are more accurate than homeowner-only reviews. One roofing guide notes that a dual exterior-interior checklist using technical specs such as shingle deflection greater than 1/8-inch curl for wind damage and hail dents from 1/4-inch to 1-inch diameter for replacement benchmarks can improve accuracy. The same source states that professional protocols achieve 90% accuracy in damage quantification compared with 55% for homeowners, and skipping the interior check can miss up to 50% of active leaks (stellarroofing.com).
That’s why your notes should include both outside and inside findings, even if the indoor signs seem minor.
Here’s a printable format you can copy into a note, spreadsheet, or sheet of paper.
| Inspection Zone | What to Look For | Damage Found (Y/N) | Photo ID / Notes |
|---|---|---|---|
| Front roof slope | Missing, lifted, curled, or bruised roofing material | ||
| Rear roof slope | Displaced sections, impact marks, visible wear after storm | ||
| Valleys | Debris buildup, separated materials, water channel problems | ||
| Ridge and hips | Loose caps, cracks, lifted pieces | ||
| Flashing | Gaps, bends, separation at walls, vents, skylights, chimney | ||
| Gutters and downspouts | Granules, tile fragments, dents, detachment, blockage | ||
| Soffit and fascia | Loose panels, water staining, impact damage | ||
| Attic | Wet decking, damp insulation, daylight, musty odor | ||
| Ceilings and walls | Stains, bubbling paint, soft spots, active drips | ||
| Exterior ground area | Fallen roofing pieces, branches, metal fragments |
If you want another practical homeowner resource on leak control while you arrange inspection or repair, this guide on how to stop roof leaks for good is worth reviewing for temporary leak-management principles.
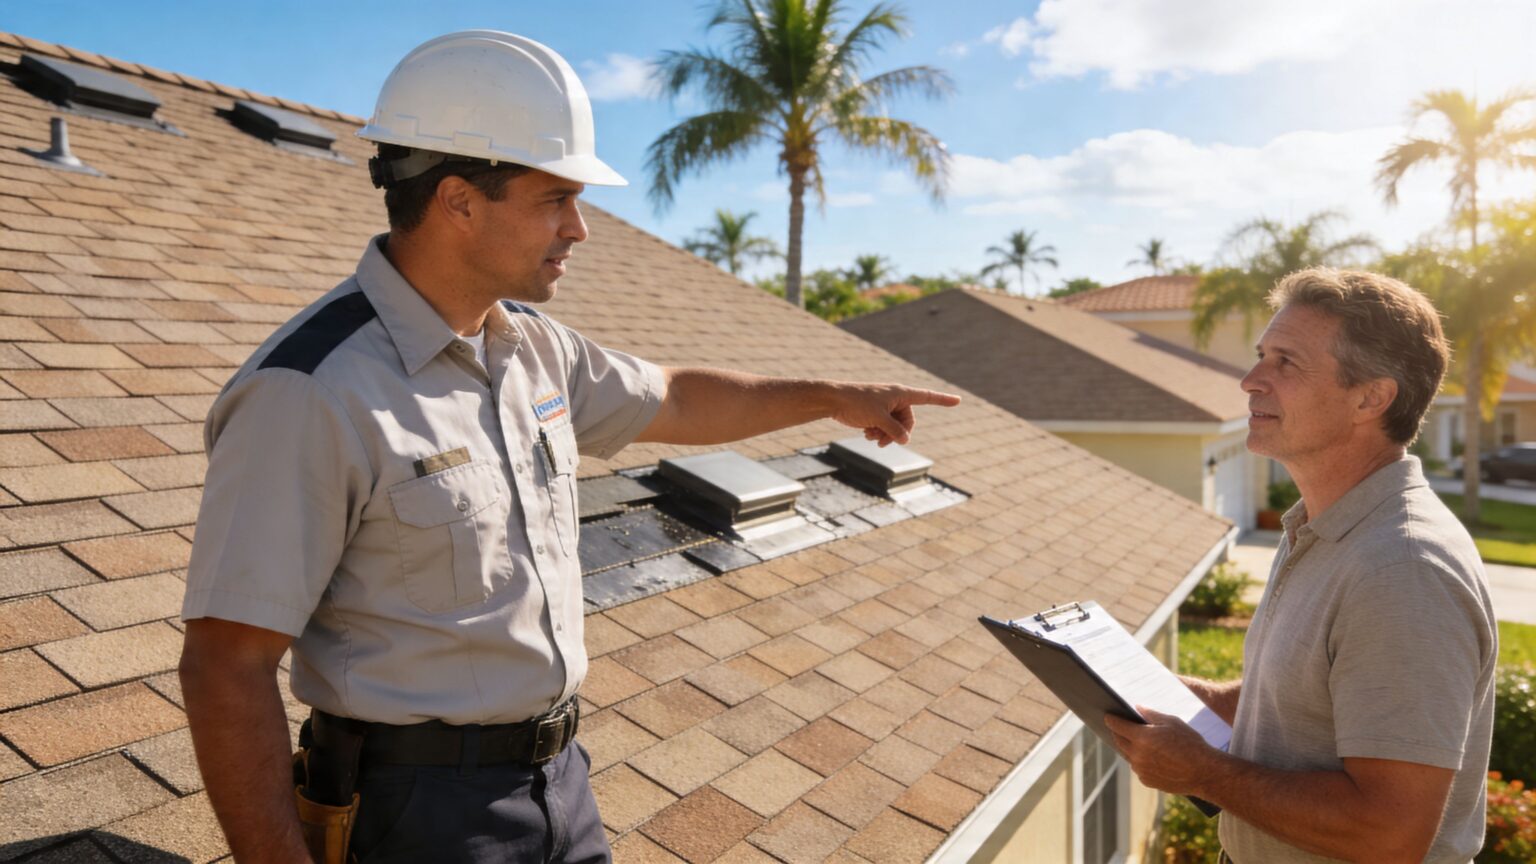
You can also compare your notes against a visual roof reference like this storm damage roof example so your labels stay consistent.
Emergency repairs that help
Temporary action should focus on preventing more water entry, not making a permanent repair on the fly.
Safe short-term steps include:
- Placing a bucket or plastic bin under active drips
- Moving furniture and electronics away from wet areas
- Relieving a bulging ceiling carefully if water is trapped and conditions are safe
- Using a tarp only if it can be installed safely by qualified help
- Clearing loose debris from drains or gutters from the ground where possible
Emergency fixes that usually create trouble
Don’t make the damage harder to document or harder to repair.
Avoid these:
- Smearing roof cement over random areas without knowing the source
- Pressure washing storm debris off the roof
- Walking on wet tile, metal, or shingles
- Breaking more materials while trying to “check under” them
- Throwing away damaged pieces before they’re photographed
If the roof needs covering, tarping should be done carefully. Poorly secured tarps can rip loose, trap water, or damage the roof further.
Knowing When to Call a Roofing Professional
A homeowner inspection is a smart first move. It is not the final word.
The biggest reason to call a professional is not just safety. It’s judgment. Storm damage often sits in the gray area where it looks minor but behaves like a major problem later. That’s especially true with hail, wind uplift, flashing failure, and underlayment damage on tile roofs.
Cosmetic damage versus functional damage
This is the part most online checklists barely touch.
A roof can show dents, scuffs, or bruises after a storm and still not qualify as functional damage. On the other hand, what looks like a small mark can fracture the shingle mat, loosen a seal, or expose the underlayment enough to create a real claim and a real leak path.
According to the National Roofing Contractors Association guidance referenced in Owens Corning’s storm checklist, functional damage requires impact forces that fracture the shingle mat, and 25% to 40% of homeowner claims are denied due to misidentification of superficial issues. The same guidance notes that an expert can identify the random pattern dings associated with functional hail damage versus uniform wear, which is especially important for insurance claims in South Florida (owenscorning.com).
That distinction is where many claims go off track. A homeowner sees a dent and says “hail damage.” An insurer may say “cosmetic wear.” The difference is often proven by close inspection, better documentation, and knowledge of what storm impact really does to that roof system.
If you can’t tell whether a mark changed the roof’s function or only its appearance, that’s the point where a pro earns the call.
Situations that justify professional inspection fast
Call a roofer promptly if any of these are true:
- You have active interior leaking
- The roofline looks bowed, dipped, or uneven
- Flashing, vents, or edge metal are visibly detached
- You found broken tile, torn shingles, or exposed underlayment
- The storm included hail and the roof now shows random impact marks
- The home has a flat roof or multiple roof transitions
- You’re preparing to file an insurance claim
- You don’t have safe access to inspect thoroughly
Professional review is also the right call when the roof is older and storm damage blends into existing wear. That’s where experience matters most.
Why professional tools change the outcome
A trained roofer isn’t just looking harder. They’re looking differently.
Close-up photography, moisture tracing, and aerial views can reveal damage that a ground-only review misses. For homeowners who want to understand how aerial assessment fits into a modern inspection process, this overview of a professional drone inspection service gives useful context on why drones are valuable for hard-to-see roof conditions.
In South Florida, where steep tile sections, multi-level roofs, and slippery surfaces are common after a hurricane, drone review often makes more sense than trying to force a manual inspection too soon.
One local option for a formal assessment is Paletz Roofing and Inspections, a licensed South Florida roofing company operating since 1990 that handles inspections, repairs, and replacements across Broward, Miami-Dade, and Palm Beach counties.
Why this matters for insurance and long-term roof life
Insurance claims turn on evidence and classification. If the issue is documented poorly, described loosely, or confused with normal aging, you can lose time and advantage.
The roof itself also doesn’t care whether damage looked minor on day one. A compromised shingle mat, cracked tile, bent flashing edge, or punctured membrane can let in water long before it looks dramatic from inside the house.
That’s why calling a roofer is not admitting defeat. It’s a practical move. You do the first inspection to protect yourself and catch the obvious. You bring in a professional when the answer affects safety, claim success, repair scope, or code-compliant restoration.
If your home took a hit from a recent storm and you want a clear answer on what’s cosmetic, what’s functional, and what needs repair now, contact Paletz Roofing and Inspections. They provide roof inspections, storm damage assessments, and repair guidance for homeowners across Broward, Miami-Dade, and Palm Beach counties.