Rain is hammering the windows, the ceiling stain that looked harmless an hour ago has turned into a steady drip, and now there’s a bucket on the floor filling faster than you expected. In Fort Lauderdale, that scene can go from inconvenience to real property damage in one storm cycle. The hardest part for most homeowners isn’t just the leak. It’s figuring out what to do first, what not to do, and how to avoid turning a roof emergency into an insurance fight and a much bigger repair.
A good response is part safety plan, part damage control, and part documentation strategy. Emergency roof repair Fort Lauderdale homeowners need isn’t only about getting a tarp overhead. It’s about protecting the people inside the house, preserving evidence, choosing the right repair path, and making sure the roof you end up with is ready for the next storm instead of barely surviving the current one.
Table of Contents
- The Moment a Drip Becomes a Disaster
- Your First 60 Minutes A Safety and Damage Control Plan
- Securing Your Home with Temporary Roof Repair Solutions
- Documenting Damage for a Successful Insurance Claim
- How to Choose a Fort Lauderdale Emergency Roofer
- Understanding Emergency Roof Repair Costs and Timelines
- Hurricane Season FAQs for Fort Lauderdale Homeowners
The Moment a Drip Becomes a Disaster
Most roof emergencies start small. A brown ring on drywall. A drip over the kitchen island. A little water around a recessed light after a hard afternoon storm. Then the weather holds, you put it off, and the next storm opens the roof for real.
That’s why panic usually shows up late. Homeowners often call when water is already moving through insulation, staining ceilings, wetting framing, and threatening floors, cabinets, and electronics. In this part of South Florida, that’s not rare. Fort Lauderdale’s roofing market stays under pressure because severe weather keeps coming, and Broward County has faced over 40 named storms since 1950, which is a major reason emergency response matters so much in this area, as noted in this Fort Lauderdale storm demand overview.

One leak doesn’t always mean the hole is directly above it. Water travels. It follows decking seams, underlayment laps, rafters, and plumbing or electrical penetrations before it shows itself indoors. That’s why guessing from the ceiling stain alone usually sends people to the wrong spot on the roof.
What homeowners usually get wrong
The first mistake is climbing onto a wet roof in the dark. The second is assuming a bucket solves the problem. The third is waiting until the storm passes for good before making calls.
Practical rule: Treat an active leak like a property emergency, not a household annoyance.
A roof opening during a Fort Lauderdale downpour can soak insulation fast, soften drywall, and turn a manageable repair into an interior restoration project. If the ceiling starts bowing, if water is near a light fixture, or if pieces of shingle or tile are on the ground, the situation has already moved beyond watch-and-wait.
A calm plan beats a rushed decision
The right response is simple in principle. Keep people safe. Control interior water. Protect the opening from outside when conditions allow. Document the damage before evidence gets buried under a rushed cleanup. Then decide whether the roof needs a targeted repair or a broader fix.
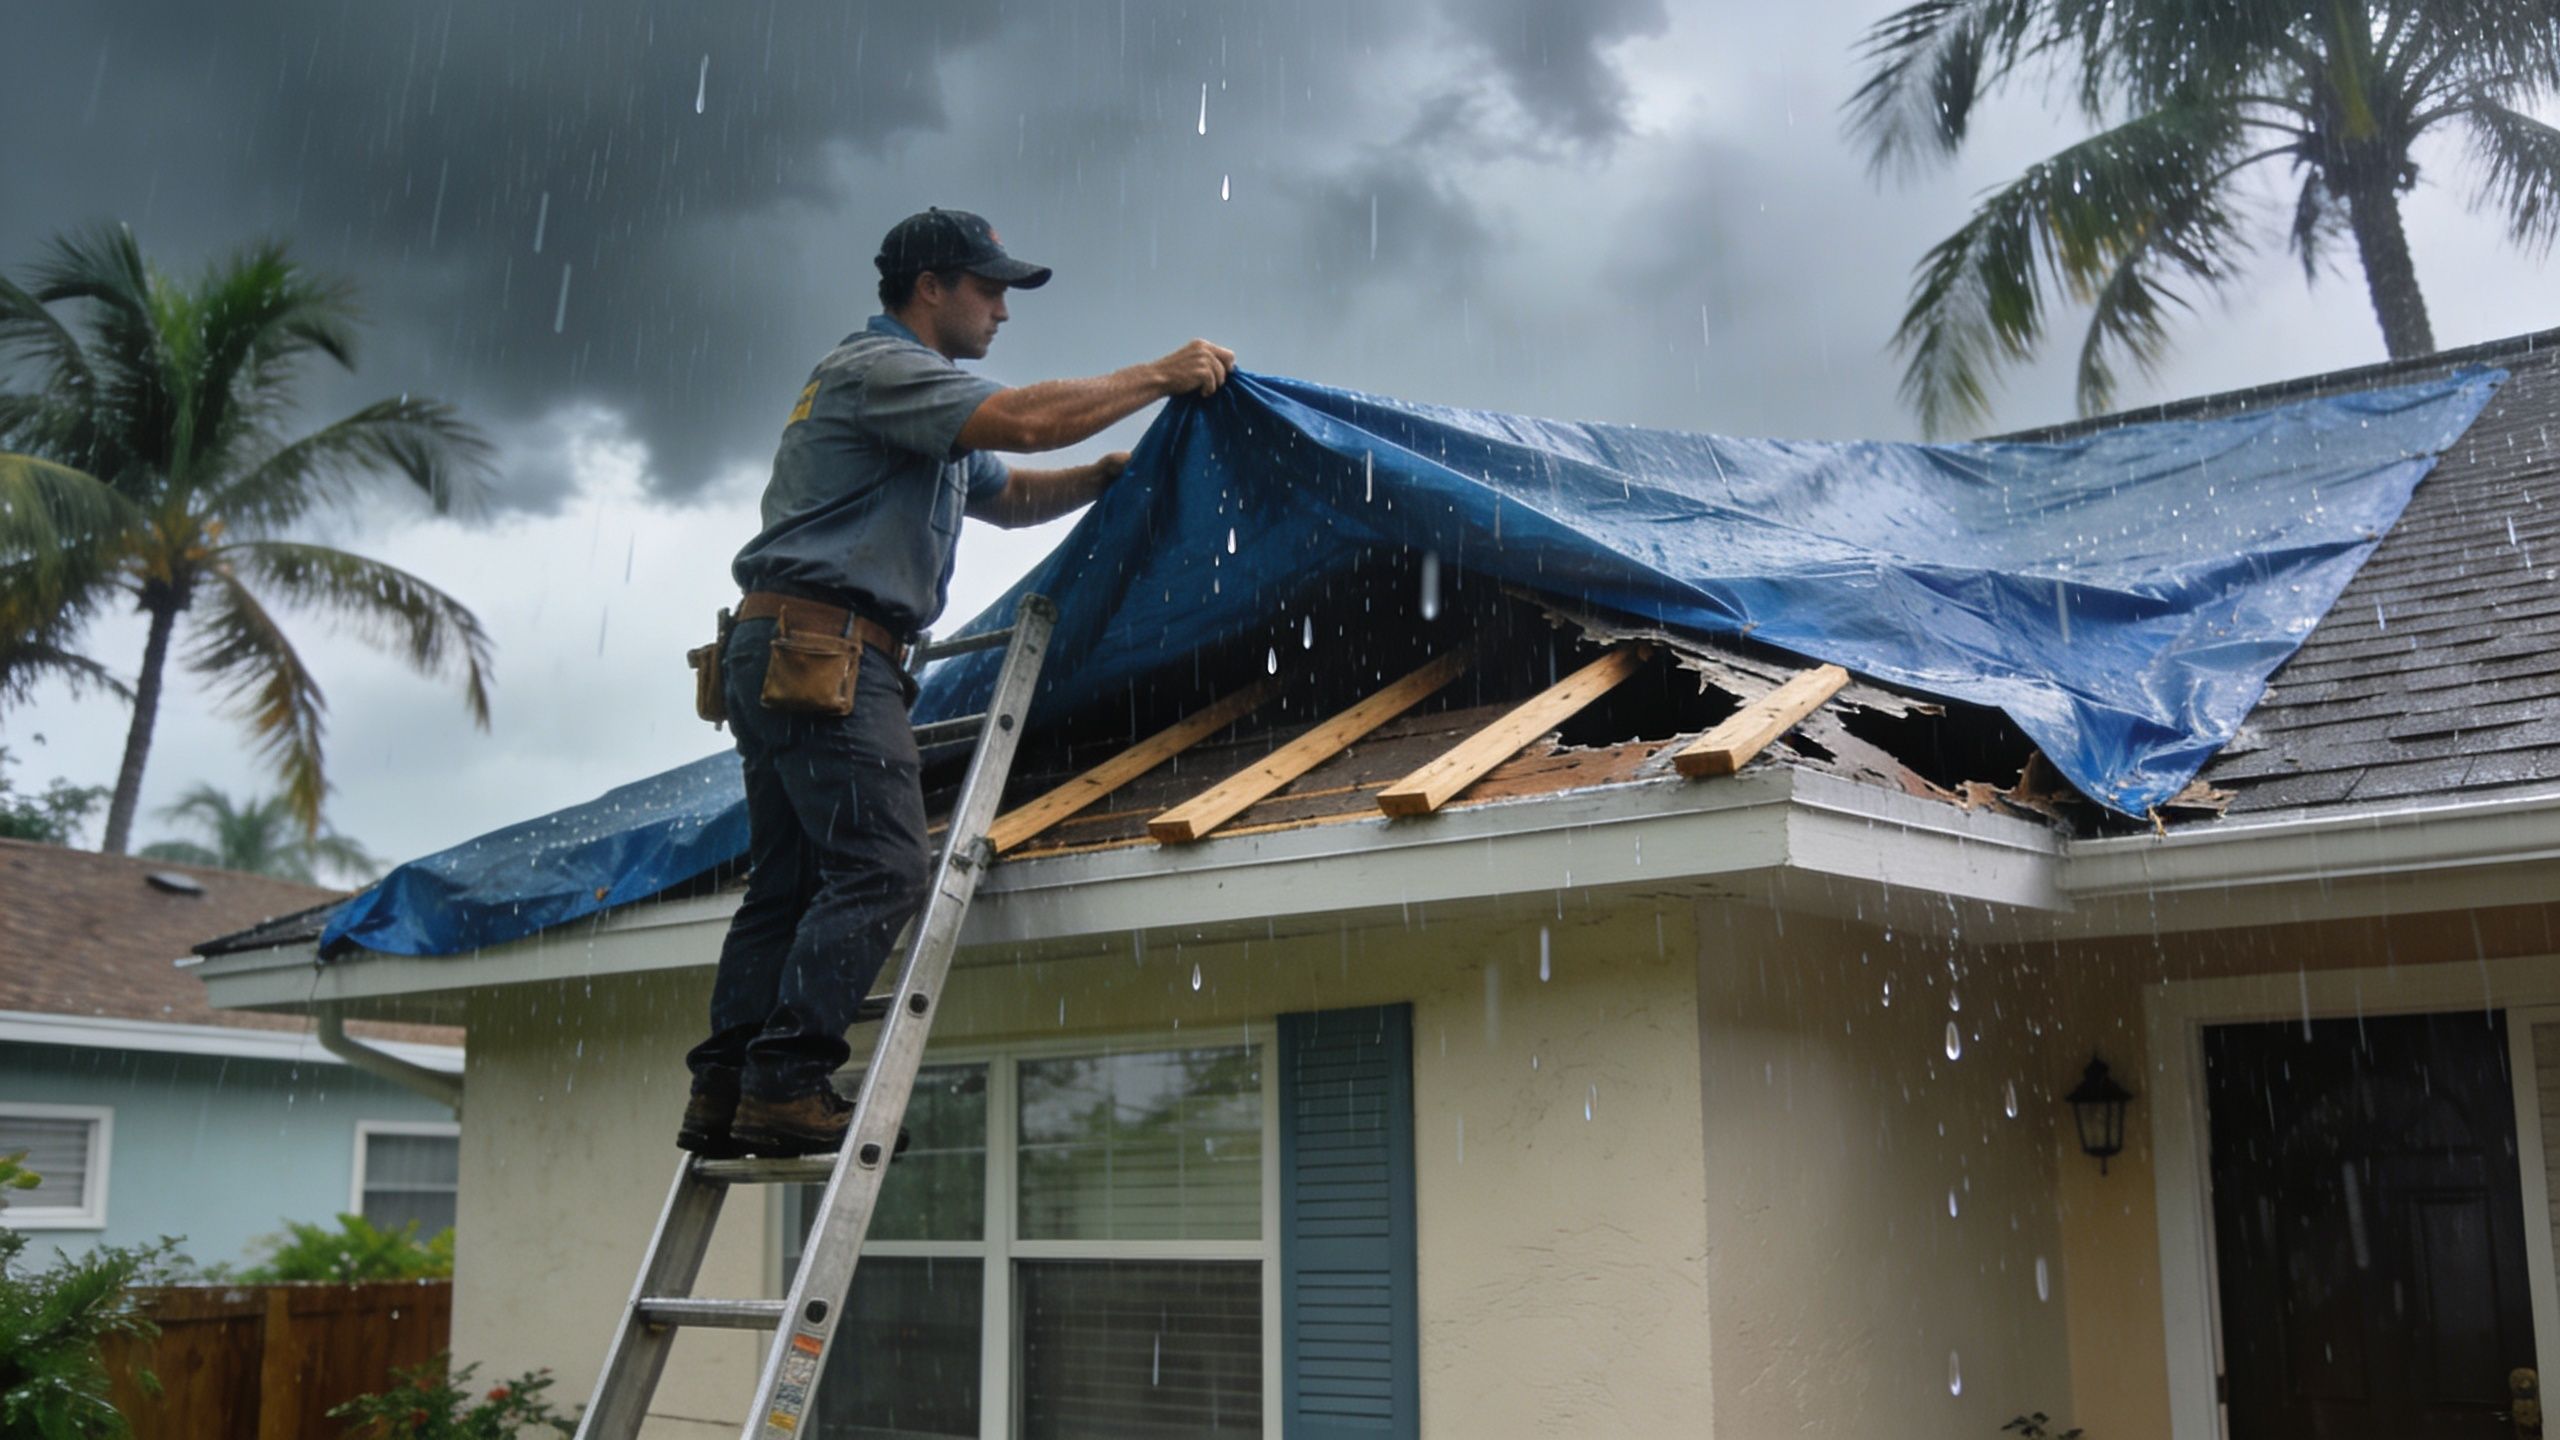
If you want to understand the kind of storm-related roof conditions local crews deal with, this South Florida roof damage image gives useful visual context.
That’s how experienced roofers approach emergency roof repair Fort Lauderdale homes need most. Not as one frantic patch, but as a sequence of decisions that protects the house now and keeps you from paying for the same problem twice.
Your First 60 Minutes A Safety and Damage Control Plan
The first hour matters more inside the house than on top of it. Focus there. Wet drywall, slick floors, live electrical fixtures, and trapped ceiling water can hurt someone long before roof work even begins.
Start with safety, not cleanup
If water is coming through a ceiling near a light fixture, fan, outlet, or appliance, stay clear of that area until you’re sure it’s safe. Don’t stand in pooled water while touching switches or cords. If you can safely isolate the affected area electrically, do that first. If you can’t, leave it alone and keep people away.
Pets and children need to be moved out of the room early. In a roof leak, people often step around buckets and forget that wet tile, wood, and laminate floors become slip hazards immediately.
Use this order:
- Move people first. Clear the room so no one is standing under sagging drywall or near wet electrical points.
- Protect the walking path. Put down towels where people have to pass, not only where water is dripping.
- Shut off and unplug what you can reach safely. Lamps, televisions, chargers, and small appliances should be disconnected before water spreads farther.
If the ceiling is bulging, don’t put a chair under it and keep using the room. Treat that bulge as trapped water with weight behind it.
Control the water before it spreads
Once the room is safe, contain the leak. Buckets are the obvious first move, but they’re only part of the job. Put towels around the bucket to catch splash. Use plastic sheeting or trash bags opened flat to cover furniture, electronics, and wood surfaces. If the leak is running down a wall, put protection at the baseboard too.
A lot of interior damage comes from runoff, not the drip itself. Water splashes out of a bucket, runs under flooring, or wicks into cabinets and trim. That secondary spread is what turns one roof opening into multiple repair trades.
Here’s a quick triage list:
- Catch active drips. Use deep containers first. Stock pots and storage bins can buy you time if buckets fill too fast.
- Lift belongings off the floor. Rugs, baskets, cardboard boxes, and fabric furniture absorb water quickly.
- Create a dry zone. Move valuables into one room that’s definitely unaffected instead of scattering items around the house.
- Photograph before heavy cleanup. A few clear photos taken now can matter later.
Relieve a sagging ceiling carefully
A bowed ceiling usually means water is pooled above the drywall. If that bulge keeps growing, the drywall can fail on its own and dump water across the room. The controlled approach is to protect the floor, stand off to the side, and carefully release the trapped water so it drains into containers instead of collapsing unpredictably.
Use a screwdriver or similar pointed tool from a stable position on the floor or a secure step stool. Never place your face or body under the bulge. Expect more water than you think. Have multiple containers ready.
This is one of the few interior actions that can stop a bigger mess fast. It also reduces the chance of the ceiling breaking open across a wide section.
Don’t create a second emergency
Some choices make things worse:
| What people try | Why it backfires |
|---|---|
| Climbing into the attic during active leaking | Wet framing, poor visibility, and exposed nails create injury risk |
| Running fans directly into an active leak zone near wiring | It adds electrical risk and doesn’t solve the roof opening |
| Patching from inside with caulk or tape | It hides the path of water without stopping entry from above |
| Waiting for daylight without containment | Water keeps spreading into finishes and contents all night |
Call for roof help as soon as the interior is stabilized. Then keep logging what happens. Time noticed, rooms affected, items moved, ceiling changes, and whether the leak gets worse in heavier rain all help later when the repair crew and adjuster start sorting cause and scope.
Securing Your Home with Temporary Roof Repair Solutions
Temporary roof repair is not fake repair. Done properly, it’s a controlled stabilization step that protects the house until permanent work can be completed under safe conditions and with the right materials on hand.
Done badly, it’s just loose plastic flapping over an opening.

What a proper emergency tarp job looks like
Professional stabilization uses 6-8 mil reinforced polyethylene tarps, secured with 1×4 wood battens and capped nails spaced 12-18 inches apart, and this approach can prevent 95% of further water intrusion according to this emergency roof stabilization reference. That same source notes that 62% of homeowners who delay professional intervention see total repair costs rise by 1.5x-3x because secondary damage keeps spreading.
That setup matters because wind gets under a loose tarp at the edges first. Once the edge lifts, the whole temporary cover is at risk. Battens spread the load and hold the tarp down across the field instead of relying on a few stressed fasteners.
A proper temporary roof cover usually includes these decisions:
- Cover beyond the visible damage. The tarp has to extend past the opening onto sound roof area, or driven rain still finds a way in.
- Anchor the perimeter tightly. Fasteners only in the middle won’t stop edge lift.
- Address ridge and slope. Water has to shed off the cover, not pond behind it.
- Keep exposed underlayment and decking dry. That’s the primary goal. The tarp is protecting the roof assembly, not just hiding a hole.
A tarp should be installed like a water-management system. If it’s thrown on like a blanket, it usually fails like a blanket.
When evaluating temporary covers and weather protection products more broadly, homeowners sometimes find it helpful to read an expert review of roof covers to understand how material choice and fastening details affect real-world performance.
What homeowners can do safely from the ground
You don’t need to be passive while waiting for a crew, but you do need to stay off the roof during active storm conditions and on any roof that may be structurally compromised.
Safe ground-level steps include:
- Check the yard for clues. Shingle tabs, broken tile pieces, bent flashing, or metal fragments can tell you where the failure started.
- Clear loose debris near downspouts and entry paths. Keep water moving away from the home and keep access open for responders.
- Document exposed areas with zoom photos. Stay on the ground and use your phone’s camera, not a ladder in bad weather.
- Mark leak locations indoors. Painters tape on the ceiling or wall can help correlate interior symptoms with exterior areas later.
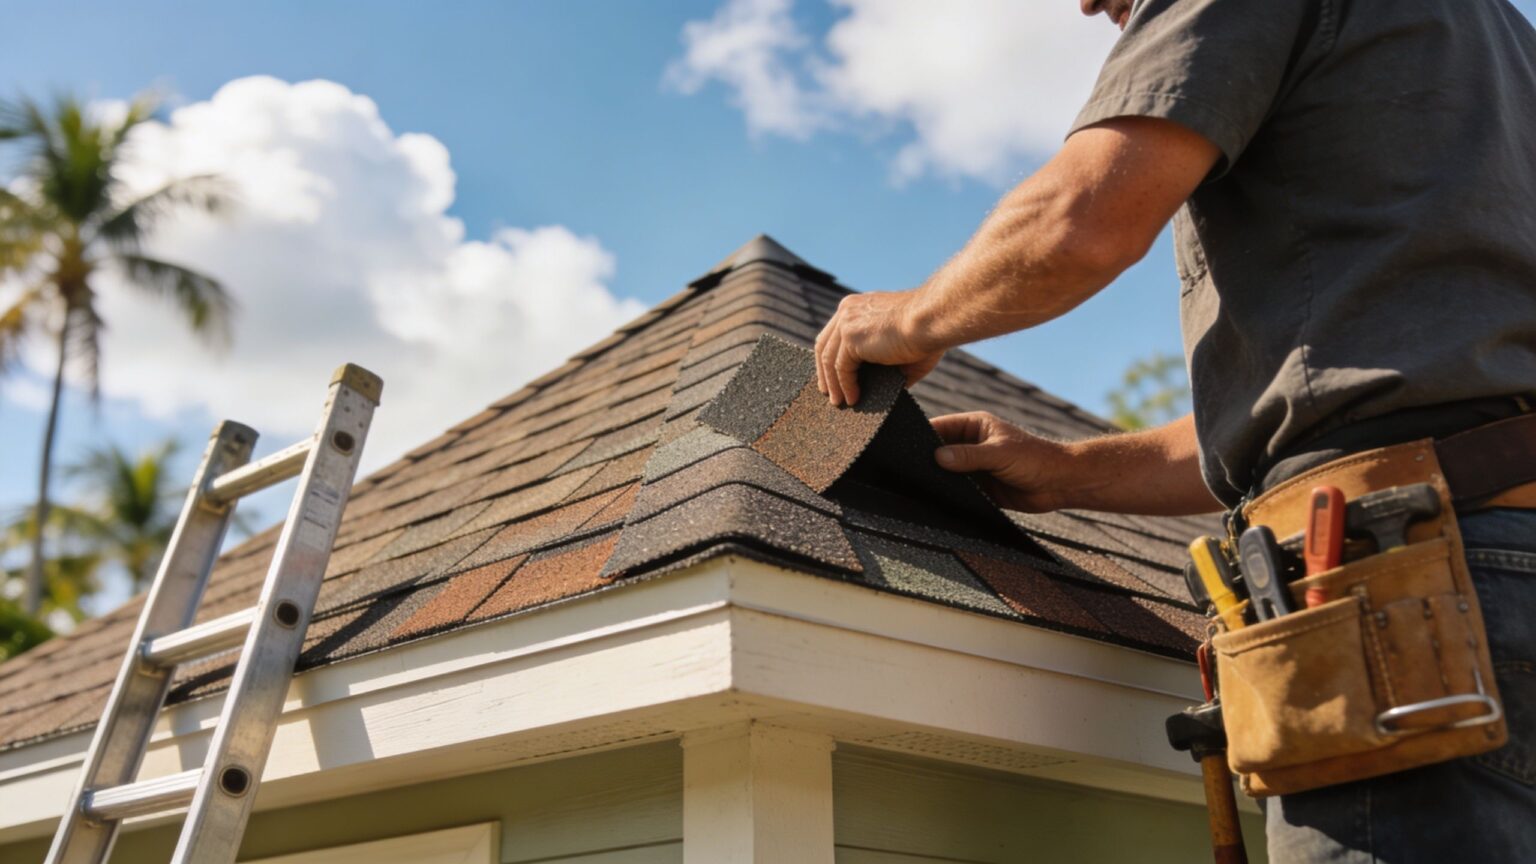
For a visual example of the kind of damaged areas a crew may inspect during emergency roof repair Fort Lauderdale calls, this roof damage photo reference is useful.
Temporary patch versus temporary trap
Not every situation calls for the same stopgap. A missing shingle field, lifted flashing, puncture from debris, displaced tile, or exposed flat roof seam all behave differently under wind and rain.
Here’s the trade-off:
| Temporary measure | What it does well | What it doesn’t do |
|---|---|---|
| Reinforced tarp with battens | Covers broad damaged areas fast | Doesn’t replace missing structural components |
| Roof cement or sealant spot treatment | Helps on limited flashing or small point-entry defects | Fails if used as a wide-area fix |
| Peel-and-stick temporary patch | Useful on some small exposed sections | Needs the right substrate and clean surface |
| Interior containment only | Limits damage to contents | Does nothing to stop roof entry |
If a crew arrives and wants to “patch from underneath” without controlling the exterior water path, that’s usually not the right first move. Water enters from above. The first job is to stop entry, then dry and repair what’s below.
A temporary solution earns its keep when it buys safe time. It fails when it becomes the excuse to postpone a real inspection.
Documenting Damage for a Successful Insurance Claim
Homeowners often lose ground on insurance before the adjuster ever visits. It happens because the roof got covered before anyone clearly recorded the damage, because the indoor damage wasn’t tied to the storm timeline, or because the file only shows the aftermath and not the path of water through the house.

In Florida, many roof damage claims are denied or underpaid over wear and tear disputes or inadequate documentation, and professional inspections before temporary tarping can reduce denial rates by up to 30%, according to this Florida roof claim documentation discussion. That’s the reason documentation isn’t paperwork after the fact. It’s part of the emergency response.
What the adjuster needs to see
Adjusters are trying to answer basic questions. What happened. When did it happen. What parts of the roof failed. What interior damage followed. What was done to prevent further loss.
Build your file around those questions.
Capture these items clearly:
- Exterior roof symptoms from safe vantage points. Missing shingles, displaced tile, debris impact, lifted metal, bent flashing, or exposed underlayment.
- Interior evidence in context. Wide shots of the room first, then closer shots of stains, drips, peeling paint, wet insulation, sagging drywall, or damaged contents.
- Temporary mitigation steps. Buckets, plastic, moved furniture, and tarping after the original condition is documented.
- Time sequence. Save weather alerts, note when the leak started, and log each meaningful change.
The strongest claim file tells a clean story. It doesn’t bury the adjuster in random photos.
Take both photos and video. Photos give detail. Video shows active dripping, ceiling movement, and the location of damage relative to windows, fixtures, and furniture. Speak briefly while filming so the timeline is obvious.
Build a clean claim file the same day
Most homeowners are better at taking pictures than organizing them. The file gets messy fast. That hurts credibility.
Use one folder on your phone and one written log. Name items by room and date. Keep receipts for emergency materials, hotel stays if applicable, and any immediate cleanup purchases. Don’t throw away visibly damaged materials until you know what your carrier wants preserved.
A simple claim record can look like this:
| Item | What to record |
|---|---|
| Event log | Time leak noticed, storm conditions, rooms affected |
| Photo set | Exterior, interior, damaged belongings, temporary mitigation |
| Video clips | Active leaks, ceiling bulge, water path, roof condition from ground |
| Receipts | Tarping, cleanup materials, emergency service charges |
| Communication notes | Claim number, adjuster name, dates of calls and emails |
If you’ve never built a household documentation file before, this home inventory for insurance guide is a practical companion resource. It’s especially useful for listing belongings affected by roof leaks so your contents claim doesn’t become an afterthought.
One more point matters. Don’t clean so aggressively that you erase the claim. Dry what needs drying. Protect what needs protection. But preserve enough evidence that an adjuster can still see fresh damage, affected materials, and the route the water took through the home.
How to Choose a Fort Lauderdale Emergency Roofer
A roof emergency is when bad hiring decisions happen fastest. The house is leaking, the ceiling is stained, and whoever answers the phone first can sound convincing. That pressure leads homeowners to focus on speed alone when they should be weighing speed, legitimacy, and repair quality together.
The non-negotiables
Begin with the essentials. The contractor must maintain proper licensing and insurance, possess a deep understanding of South Florida roofing systems, and demonstrate specific experience with the roof type found on your home. Shingle, tile, metal, and flat roofs fail differently and require distinct repair techniques.
For local homeowners, longevity matters. A company that has been operating in this market for decades has usually seen repeated storm cycles, recurring leak patterns, code shifts, and the difference between cosmetic damage and system failure. One local option that fits that profile is Paletz Roofing and Inspections, which has been licensed since 1990 and works on residential and commercial roofs across Broward, Miami-Dade, and Palm Beach counties.

Ask direct questions, not soft ones:
- Are you set up for emergency stabilization, not just estimates?
- Who documents the damage for the file?
- What materials are you using for the temporary fix?
- How do you handle flashing, penetrations, and debris before repair begins?
- Can you explain whether this is a stopgap or a lasting repair?
If the answers are vague, the work usually is too.
What good emergency workmanship looks like
Good roofers don’t just stop leaks. They control the water path, inspect the surrounding components, and avoid shortcuts that create hidden failures.
According to this emergency versus planned repair analysis, top-tier emergency roofers use ASTM D301 asphalt shingles rated for 140 mph winds when shingles are part of the repair strategy, and they rebuild flashing around penetrations using 26-gauge metal and polyurethane sealant, producing 98% leak-proof seals. The same source notes that 35% of repair failures stem from improper debris clearance, which is a classic sign of rushed work.
That tells you what to look for on site:
| Good sign | Red flag |
|---|---|
| Crew checks penetrations, valleys, and flashing details | Crew focuses only on the most visible hole |
| Debris is cleared before repair materials go down | Leaves, fragments, or loose pieces stay trapped under the patch |
| Temporary repair is explained in plain language | You hear only “we’ll seal it up” |
| Photos are taken before and after stabilization | No one documents anything |
| Material choices are named specifically | Materials are described vaguely |
A reliable emergency roofer should be able to tell you exactly what failed, what was done today, and what still needs permanent correction.
Local knowledge also matters in less obvious ways. A Fort Lauderdale roof doesn’t only face rain. It faces salt air, heat, fast weather changes, and repeated wind events. The right roofer understands which temporary measures hold, which sealants age poorly in this climate, and which roof details tend to open up again if they’re only patched from the surface.
Don’t hire based on the promise that someone can “fix anything tonight.” Hire based on whether they can stabilize the house safely tonight and then finish the job correctly.
Understanding Emergency Roof Repair Costs and Timelines
Emergency roof work costs more than planned roof work for a simple reason. The crew is mobilizing immediately, often outside normal scheduling, and solving a water-entry problem before it damages more of the home.
The average emergency roof repair cost in Fort Lauderdale ranges from $500 to $5,000, with variables that include job scope, labor, and materials, according to this Fort Lauderdale emergency roof repair cost breakdown. That same source notes that tarping can run $3-$7 per square foot, and after Hurricane Irma, emergency calls spiked 300%, which shows how quickly demand can affect response time and pricing.
What drives the price
The number on an emergency invoice isn’t just “roof work.” It’s a stack of conditions.
A small isolated leak on an accessible slope costs differently than a storm-torn section on a steep roof with wet decking, scattered debris, and interior protection needed below. Material choice also matters. Temporary stabilization, shingle replacement, flashing repair, and underlayment work are different scopes.
Common price drivers include:
- Access conditions. Multi-story sections, tight lot lines, and difficult setup areas slow crews down.
- Extent of wet materials. If water reached decking or surrounding components, the repair broadens.
- Urgency of dispatch. Nights, weekends, and storm-surge periods cost more because labor is being pulled into immediate response.
- Type of roofing system. Flat, tile, metal, and shingle systems require different repair methods and materials.
What the timeline usually looks like
The response timeline often comes in two phases rather than one.
First is stabilization. That means inspection, damage documentation, and a temporary measure that stops active water intrusion. Second is permanent repair, which may happen after materials are sourced, weather clears, and insurance scope is reviewed.
A practical timeline looks like this:
| Stage | What usually happens |
|---|---|
| Initial call | Basic triage, leak description, interior safety guidance |
| First site visit | Exterior and interior assessment, photos, immediate stabilization plan |
| Temporary repair | Tarping or targeted stopgap to control water entry |
| Scope review | Determination of whether spot repair or wider corrective work is needed |
| Permanent repair | Scheduled once conditions, materials, and claim coordination line up |
What delays the final repair most often isn’t indecision. It’s weather windows, material availability, and the discovery that the visible leak was only one symptom of a larger failure around flashing, decking, or roof transitions.
The best way to control cost is rarely to wait. It’s to stabilize quickly, document cleanly, and make the permanent repair decision with full information instead of guessing from a ceiling stain.
Hurricane Season FAQs for Fort Lauderdale Homeowners
How can I make my roof more storm-resistant
Start with the vulnerable details, not the broad surface. Most emergency leaks don’t begin in the middle of a healthy field of roofing. They start around penetrations, flashing transitions, wall tie-ins, ridges, valleys, and edges where wind and water work on small weaknesses over time.
A storm-resistant roof usually comes from disciplined maintenance choices:
- Have the roof inspected before hurricane season. Small issues are cheaper to fix before wind opens them up.
- Keep drainage paths clear. Water that can’t leave the roof finds another route.
- Replace damaged components with compatible materials. Mixing quick fixes into older assemblies often creates a weak link.
- Pay attention to flashing details. Many leaks come from transitions, not from the main roof covering itself.
If you’ve had repeated patching in the same area, ask whether the assembly needs to be rebuilt rather than sealed again. Repeated surface repairs on a failing detail don’t create resilience. They just postpone failure.
What’s the difference between a temporary patch and a long-term repair
A temporary patch is designed to stop active water entry. A long-term repair is designed to restore the roof system.
That distinction matters because a roof system includes more than the visible top layer. It includes underlayment, flashing, fasteners, edge conditions, and sometimes decking below. If the temporary work only covers the opening without correcting what allowed the failure, the leak often returns at the next hard rain.
Use this rule of thumb:
| If the work does this | It’s probably |
|---|---|
| Covers exposed area to stop immediate intrusion | Temporary stabilization |
| Replaces damaged roofing components in kind | Corrective repair |
| Rebuilds flashing and affected adjacent areas | Long-term repair |
| Restores damaged substrate as needed | System repair |
Temporary work buys time. Permanent work restores performance.
Ask one direct question after any emergency visit: “What still needs to be done so this doesn’t reopen in the next storm?” If the answer isn’t specific, keep asking.
Why does a pre-hurricane inspection matter
Because roofs usually fail at old weak points, not random spots. An inspection before the season can catch loose flashing, worn sealant, lifted sections, drainage issues, and early signs of water entry before they become active interior leaks.
That’s also when decisions are cheaper and clearer. You can compare repair options without rain coming through the ceiling. You can schedule work before contractors are overloaded. You can document existing roof condition before a claim situation makes every defect more contested.
Pre-season inspections are also useful if you own older property, manage multiple buildings, or are selling a home. A documented condition record makes post-storm decision-making much cleaner.
Should I file an insurance claim right away
File based on damage and policy terms, not emotion. If the roof damage affects the roof’s ability to protect the home, creates interior damage, or clearly came from a storm event, it may justify a claim. What matters most is that your documentation is organized before conditions change too much.
Don’t wait so long that evidence disappears. Don’t rush so fast that you submit a weak file. Stabilize the property, preserve proof, and communicate clearly.
Can I stay in the house during a roof leak
Sometimes yes, sometimes no. If the leak is isolated and away from electrical hazards, many homeowners can remain in the home while affected rooms are closed off. If ceilings are sagging, water is entering near fixtures or service equipment, or structural damage is suspected, the safer move is to stay out of the affected area and consider whether the home is still suitable to occupy until the danger is assessed.
Judgment matters more than bravado. A roof leak is inconvenient. A ceiling collapse or electrical incident is dangerous.
What should I ask after the emergency is stabilized
Ask for the repair story in plain English:
- What failed first
- What was done today
- What areas still need permanent work
- Whether damaged materials below the roof need drying or replacement
- What should be monitored during the next rainfall
Those answers tell you whether the emergency roof repair Fort Lauderdale property owners receive is a smart stopgap or the beginning of a complete fix.
If your home has an active leak, storm damage, or a roof area that needs immediate stabilization, Paletz Roofing and Inspections can help you assess the damage, protect the structure, and plan the right next step for permanent repair.