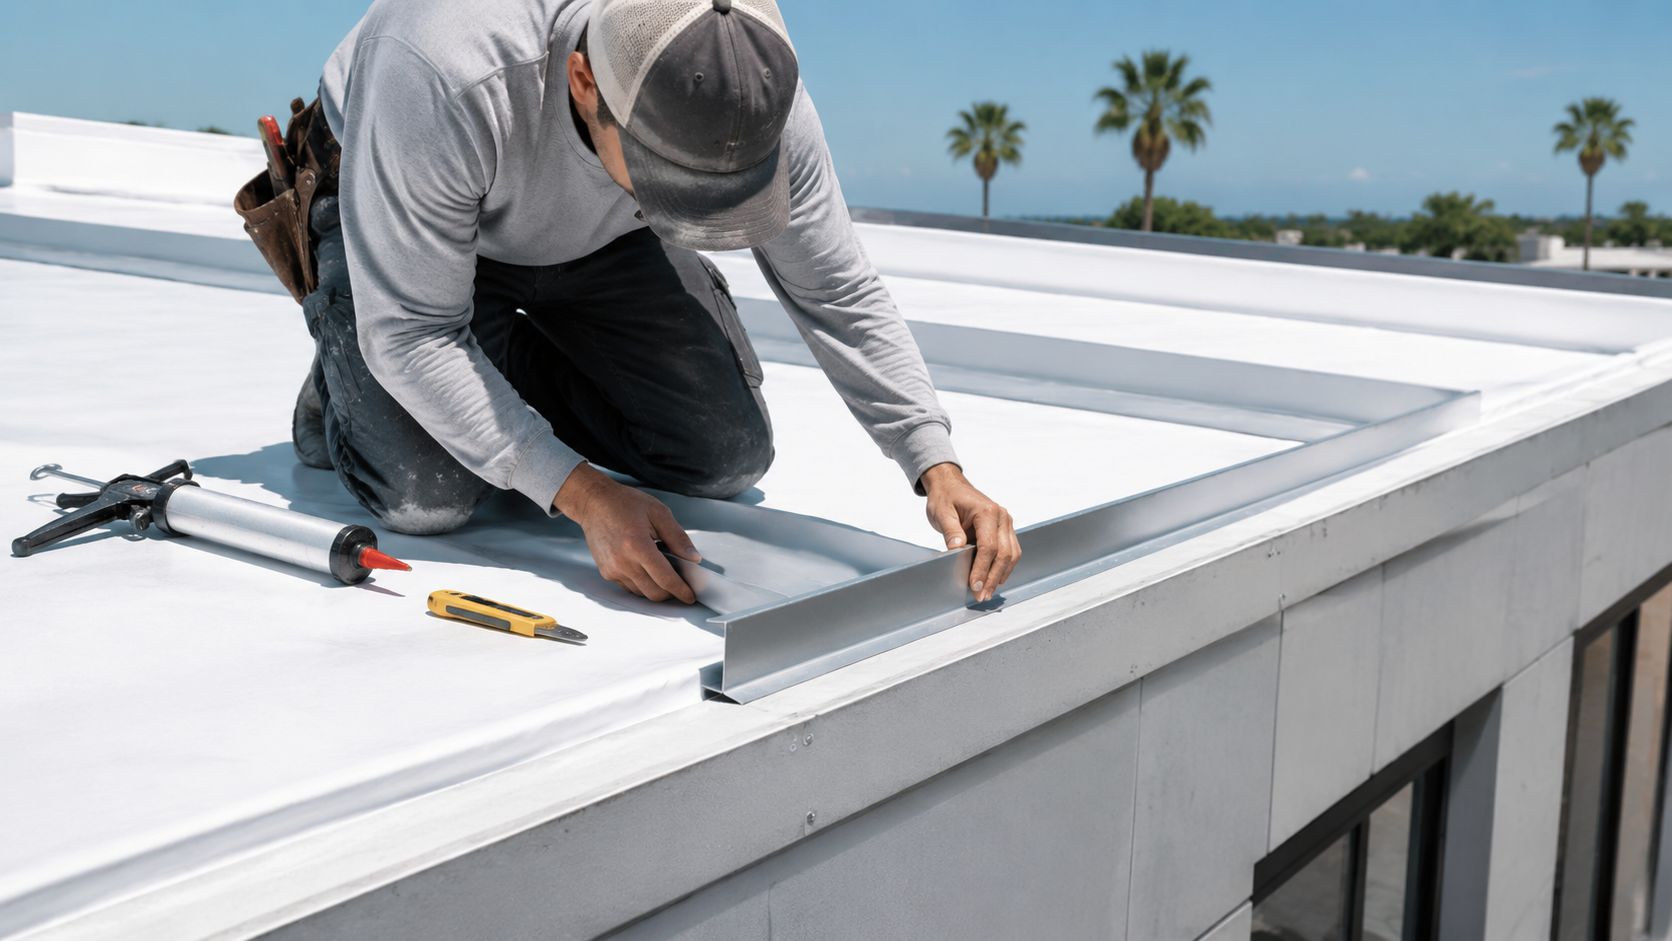
Leaks drive 33% of roof replacements, and that's exactly why flashing for flat roof systems deserves more attention than most owners give it (roof flashing durability and leak risk). On a flat roof, water doesn't rush off the surface the way it does on a steep slope. It slows down, finds seams, tests corners, and works every penetration. If the flashing is weak, loose, incompatible, or poorly terminated, the roof can look fine from the ground while water is already moving into insulation, decking, wall assemblies, and interior finishes.
South Florida makes that risk worse. Heat stretches materials. Humidity wears on sealants. Wind attacks edges and parapets. Hurricane season punishes every shortcut. A roof membrane might get most of the attention, but flashing is what seals the places where roofs usually fail first: walls, drains, curbs, vents, skylights, perimeter edges, and equipment penetrations.
Table of Contents
- Why Flashing Is Your Flat Roof's First Line of Defense
- Decoding the Different Types of Flat Roof Flashing
- Choosing the Right Flashing Material for Florida's Climate
- Key Principles of Flashing Design and Installation
- Common Flashing Failures and How to Spot Them
- Proactive Maintenance and Repair Options
- Costs Codes and When to Call a South Florida Expert
Why Flashing Is Your Flat Roof's First Line of Defense
A large share of flat roof leaks start at edges, walls, curbs, drains, and penetrations. That is where water, heat, movement, and wind put the most stress on the system.
Flashing is what keeps those vulnerable points sealed. Treat it like finish trim, and the roof starts failing long before the membrane should. In commercial buildings, one flashing leak can lead to wet insulation, stained ceilings, mold concerns, tenant complaints, and repair work far beyond the roof itself.
Flat roofs hold water longer than steep-slope roofs, especially after South Florida downpours. That extra dwell time matters. Water sits at transitions, presses on seams, and works into any small opening around edge metal, counterflashing, pitch pans, or pipe boots. Once moisture gets under the roof assembly, it can travel well away from the entry point and make the leak harder to trace.
I have seen roofs with decent field membrane and chronic leaks because the perimeter metal was loose or the wall flashing was terminated poorly. Owners often look at the broad roof surface first. The expensive problems usually start in the narrow details.
South Florida makes those details even more demanding. High UV exposure dries and ages sealants faster. Salt air speeds corrosion on the wrong metals or fasteners near the coast. Daily expansion and contraction open weak joints. Then a tropical storm or hurricane tests every lap, cleat, termination bar, and edge condition at once.
That is why flashing has to do more than divert water. It has to stay attached under uplift, allow for movement without splitting, and stay compatible with the membrane and metal around it. If any one of those pieces is wrong, the detail becomes the weak point of the whole roof.
Practical rule: On a flat roof, the membrane may cover the largest area, but flashing decides whether the system stays watertight at the places most likely to fail.
Good flashing work is quiet. You do not notice it during a heavy rain, after months of summer heat, or when the wind starts pushing at the roof edge. Poor flashing announces itself fast, and in South Florida, the repair bill usually grows once water gets below the surface.
Decoding the Different Types of Flat Roof Flashing
A flat roof uses several flashing types, and each one has a specific job. Think of them like the gaskets on a submarine hatch. One bad gasket can sink the whole assembly.
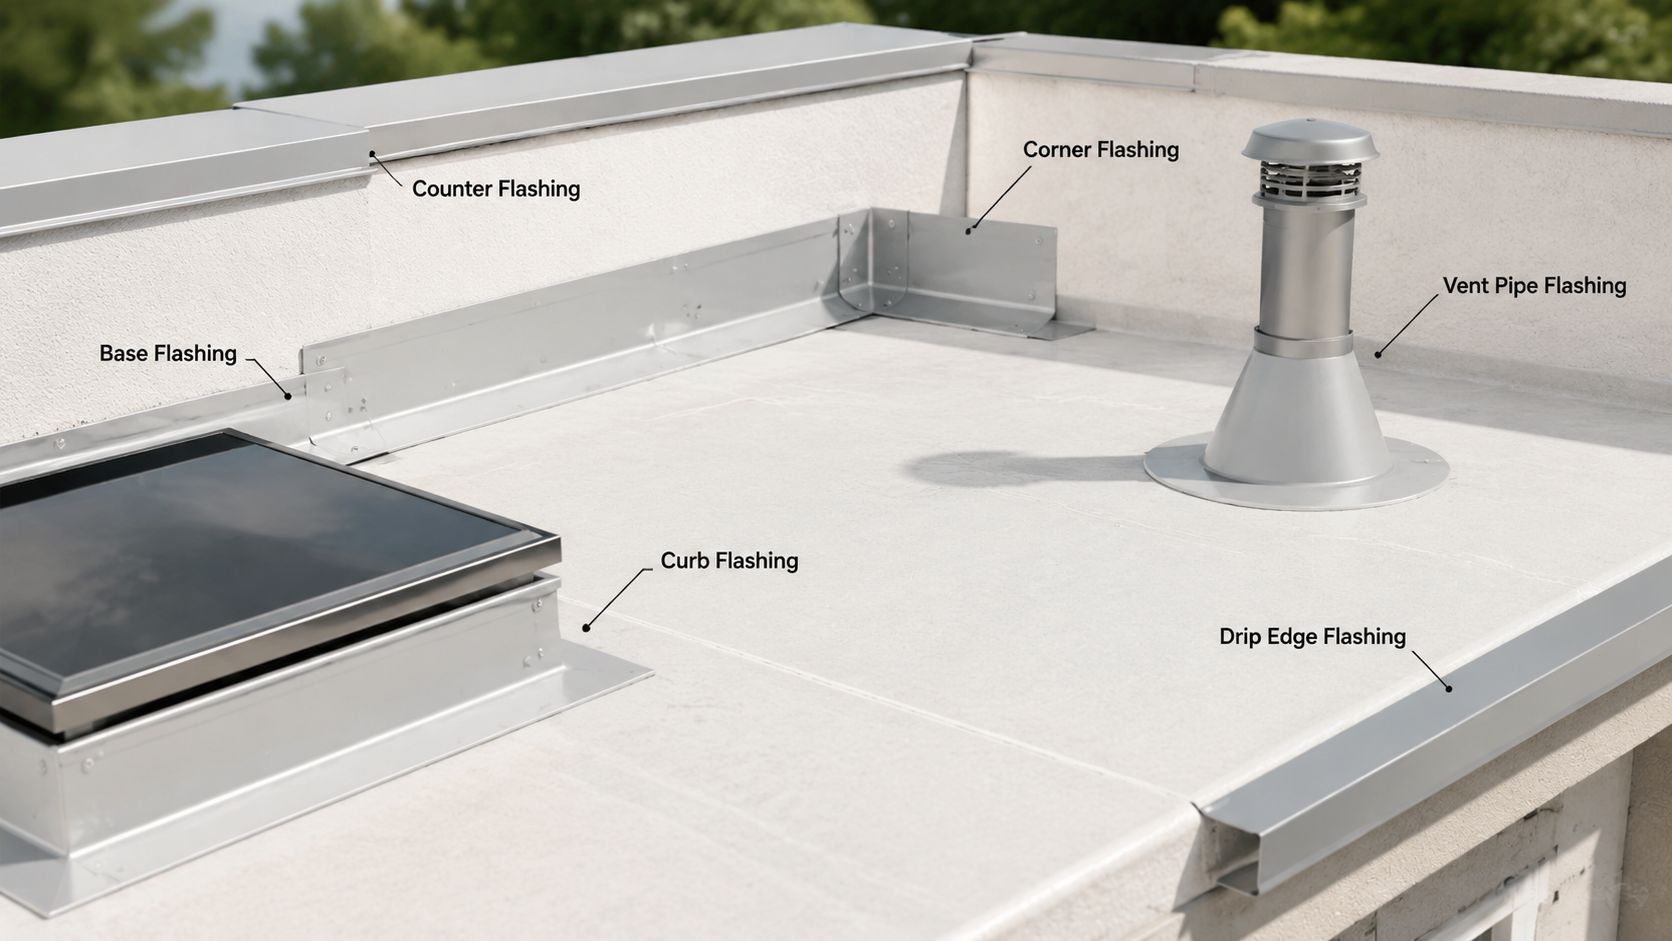
Perimeter and edge flashing
At the roof edge, flashing directs water off the roof and away from the deck. Drip edge flashing helps move runoff into the gutter system instead of letting it roll back into the edge assembly. Membrane flashing can run continuously along the perimeter to maintain the waterproof seal.
When edge details are done right, water exits cleanly. When they're done poorly, water lingers at the rim, wets the deck edge, and starts damaging fascia, nailers, and wall connections.
Wall and parapet flashing
Where the roof runs into a wall or parapet, the membrane has to turn up vertically and terminate correctly. This is one of the highest-risk areas on any low-slope roof because movement, water, and wind all meet there.
You'll usually hear a few terms:
- Base flashing wraps the lower transition where the roof surface turns up the wall.
- Counterflashing covers and protects the top of that base flashing.
- Parapet flashing seals the wall intersection and protects the top and inside faces of parapet conditions.
- Cant strip flashing support helps soften the angle at the base of a wall so the membrane doesn't bend sharply and split under stress.
Penetration and transition flashing
Every object that passes through the roof needs its own watertight detail. Pipes, vents, skylights, equipment curbs, drain bowls, and conduit supports all interrupt the field membrane. Those interruptions are where roofers earn their money.
Here's how the common pieces work:
- Pipe and vent flashing: seals round penetrations so water can't follow the pipe downward.
- Curb flashing: wraps rooftop unit curbs and equipment bases.
- Liquid-applied flashing: works well around irregular shapes where sheet material can't sit tight.
- Step flashing: more common at roof-to-wall transitions on sloped sections, but the principle matters on hybrid roof areas. Each piece overlaps the next to shed water in sequence.
A flat roof doesn't rely on one flashing detail. It relies on many details working together without gaps, reverse laps, or movement conflicts.
Owners don't need to memorize every term. They do need to understand that flashing for flat roof assemblies is a system, not a single strip of metal. If one transition is improvised, the entire roof becomes easier for water to beat.
Choosing the Right Flashing Material for Florida's Climate
Heat and wind ruin weak flashing details fast in South Florida. I see more failures caused by bad material pairing and poor attachment than by the field membrane itself.
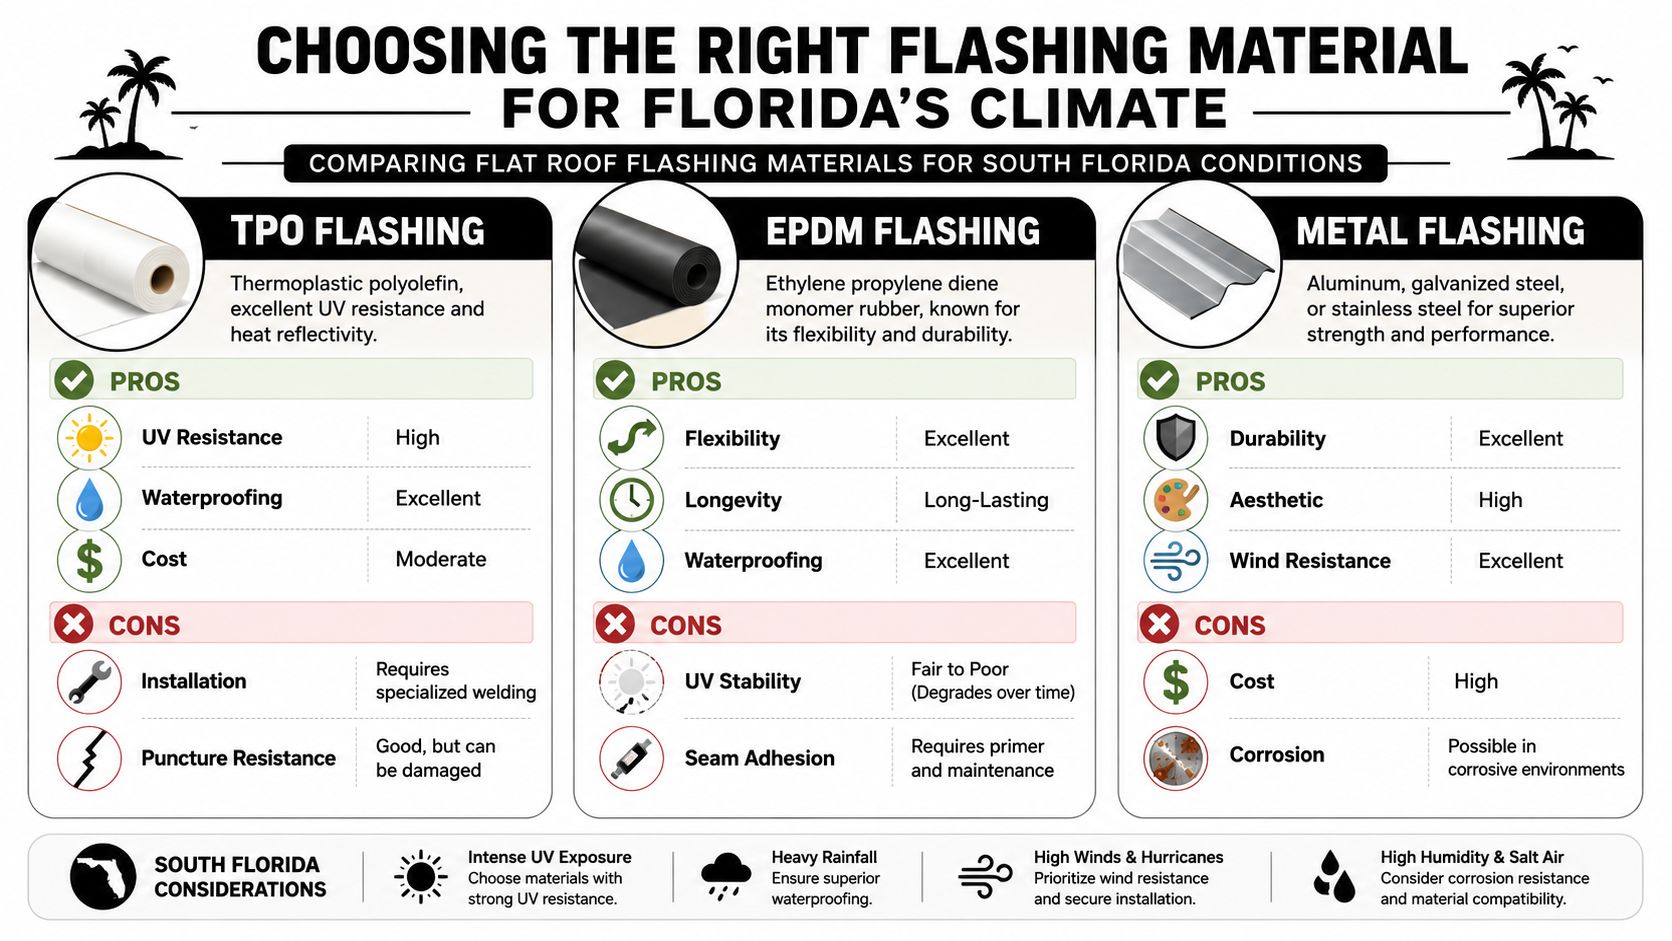
How metal and membrane behave differently
Generic roofing advice usually treats flashing as a simple trim choice. South Florida does not forgive that mistake. In Miami-Dade, Broward, and coastal Palm Beach County, roof surfaces run hot, afternoon storms drive rain sideways, and hurricane uplift keeps working on every edge, corner, and penetration.
Metal and membrane do not move the same way under those conditions. A detail can look tight at install and still start separating after enough heat cycles if the metal expands at one rate and the roof system below it moves at another. I usually find the first warning signs at corners, termination bars, edge metal joints, and around equipment curbs.
Metal still belongs on flat roofs. Aluminum, stainless, and other formed metals are often the right choice for coping caps, gravel stops, edge securement, and counterflashing. The solution is to use each material where it performs best. On movement-sensitive details, especially around penetrations and vertical transitions, membrane-compatible flashing usually holds up better because it flexes with the roof system instead of fighting it.
A practical material comparison
The lifespan ranges below are general industry figures commonly cited for flashing materials. Actual service life in South Florida depends heavily on salt exposure, attachment method, maintenance, and whether the material is compatible with the roof system.
| Material | Typical strengths | Typical weaknesses | Typical lifespan |
|---|---|---|---|
| Copper | Long service life, strong corrosion resistance | Expensive, often more than the detail requires | 50+ years |
| Lead | Very malleable for odd shapes and difficult penetrations | Specialty use, handling and code considerations | 50 to 100 years |
| Stainless steel | High strength, strong corrosion resistance | Harder to fabricate, higher material cost | 40 to 80 years |
| Aluminum | Lightweight, widely available, easy to form | Can suffer in salt-heavy environments if poorly isolated or finished | 20 to 30 years |
| Galvanized steel | Common, practical, economical | Protective coating can wear down, then corrosion starts | 15 to 25 years |
| Membrane-compatible flashing | Expands and contracts with TPO, EPDM, or PVC systems | Must match the roof system and manufacturer requirements | Tied more to roof system performance than metal-style lifespan |
| Liquid-applied flashing | Useful on irregular details, repairs, and tight conditions | Surface prep and thickness control determine success | Best used where sheet flashing cannot be detailed reliably |
What usually works in South Florida
For TPO, PVC, and EPDM roofs, I prefer flashing details that move with the membrane at the points that take the most stress. That usually means welded or adhered membrane flashing at corners, penetrations, inside angles, and wall transitions. Then I use metal where the assembly needs a rigid exposed cap, edge restraint, or protective cover.
Near the coast, material selection gets more specific. Aluminum can still work, but it needs the right finish, proper isolation from dissimilar metals, and careful fastening. Stainless holds up better in corrosive air, but it costs more and takes more labor to fabricate. Copper lasts a long time, but on many commercial flat roofs it is hard to justify unless the building has an architectural reason for it.
Liquid-applied flashing has its place too. I use it where a pipe cluster, conduit rack, or awkward retrofit makes sheet material hard to wrap correctly. It is a good problem-solver, but only when the substrate is clean, dry, and compatible.
A few rules keep owners out of trouble:
- Match the flashing to the roof system. TPO flashing should be made for TPO. The same goes for PVC and EPDM.
- Use metal for exposed protection and securement, not as a shortcut where membrane flashing should be doing the waterproofing.
- Account for uplift at every edge and corner. South Florida wind does not care that the detail looked fine on a calm day.
- Watch coastal corrosion. Fasteners, termination bars, clips, and sealants need to suit salt-air conditions.
- Do not mix materials casually. Incompatible metals, wrong sealants, and off-brand accessories shorten roof life fast.
If you want a useful regional comparison of flat roofing systems beyond Florida, this guide on TPO roofing Arizona shows how climate changes material priorities. The same roof system can need different flashing choices depending on heat load, wind exposure, and how the detail is expected to move.
Key Principles of Flashing Design and Installation
In South Florida, a flashing detail has to do four jobs at once. It has to shed water, stay attached in uplift, handle heat-driven expansion, and keep dissimilar materials from fighting each other. A detail that looks tidy from the roof hatch can still fail in one summer if those four points are missed.
Termination details that matter
Wall terminations deserve extra attention because they take wind pressure, reflected heat, and bulk water at the same time. The membrane should be bonded to a compatible substrate so air and water cannot track behind it. On low-slope work, that usually means carrying the flashing up at least 12 inches above the roof surface, setting it over coverboard instead of directly on rigid insulation, and securing it with an aluminum or stainless termination bar that matches the system. Then the assembly gets protected with metal counterflashing and a compatible sealant at the top edge (flat roof wall termination guidance).
Those parts work together. If the substrate is soft, the bar loosens. If the sealant is wrong for the metal or wall surface, it pulls away. If the flashing height is too low, wind-driven rain can get behind the detail during a tropical storm.
On SBS modified bitumen roofs, flashing height also has practical limits. Running membrane too high up a wall increases stress from movement and makes the sheet harder to keep bonded over time. Follow the roof system requirements and the approved wall detail instead of stretching the membrane farther just because the wall is available.
Field note: Roof edge and wall flashing should be built from a tested detail, not improvised with leftover metal and extra sealant.
Penetrations are never minor details
Small penetrations cause expensive leaks. Pipes, conduits, brackets, and equipment supports all interrupt the roof field, and every one of them has to stay watertight while the roof moves and the sun cooks the surface.
For simple round pipes, standard metal flashings can work well. For irregular shapes, clustered conduits, and retrofit conditions, liquid-applied flashing is often the better tool because it can wrap corners and fill transitions that sheet material cannot seal tightly. The trade-off is surface preparation. If the substrate is dirty, damp, or incompatible, the liquid detail will fail early.
I pay close attention to these spots:
- Solar mounting brackets
- Ventilation stacks
- Grouped conduits
- Odd-shaped equipment supports
South Florida makes penetration details harder than generic guides suggest. Rooftop equipment vibrates, service crews step around tight areas, and UV exposure dries out shortcuts fast. A boot or metal pan that might hold up in a milder climate can split, pull, or open at the edge here if it is forced into a shape it was never meant to cover.
Overlap fastening and movement control
Counterflashing needs to shed water over the base flashing with a proper lap. Where a reglet detail is used, the counterflashing should be inserted into the wall, overlap the base flashing by at least two inches, and be sealed at the joint so water cannot run behind the assembly (counterflashing reglet and overlap requirement).
Movement matters just as much as overlap. Roof decks expand. Walls move on their own. Metal reacts to heat faster than masonry. If the detail is locked too tightly, something tears, wrinkles, or backs out.
Step flashing rules show the principle clearly. Each piece should be at least 10 inches long, at least 2 inches wider than the expected shingle exposure, and bent to place 5 inches on the roof deck and 5 inches up the wall. Fasten the horizontal flange to the roof deck with two nails near the upper edge. Keep the vertical flange free to move with clips or another approved method that allows independent movement between roof and wall (step flashing dimensions and fastening rules).
Crews miss that point all the time. Once both planes are pinned tight, the building starts doing what buildings do in South Florida. It moves in heat, it twists in wind, and the flashing gives up first.
Common Flashing Failures and How to Spot Them
Most flashing failures don't start with a dramatic blow-off. They begin as small flaws that keep getting worked by sun, rain, and movement until the system opens up.
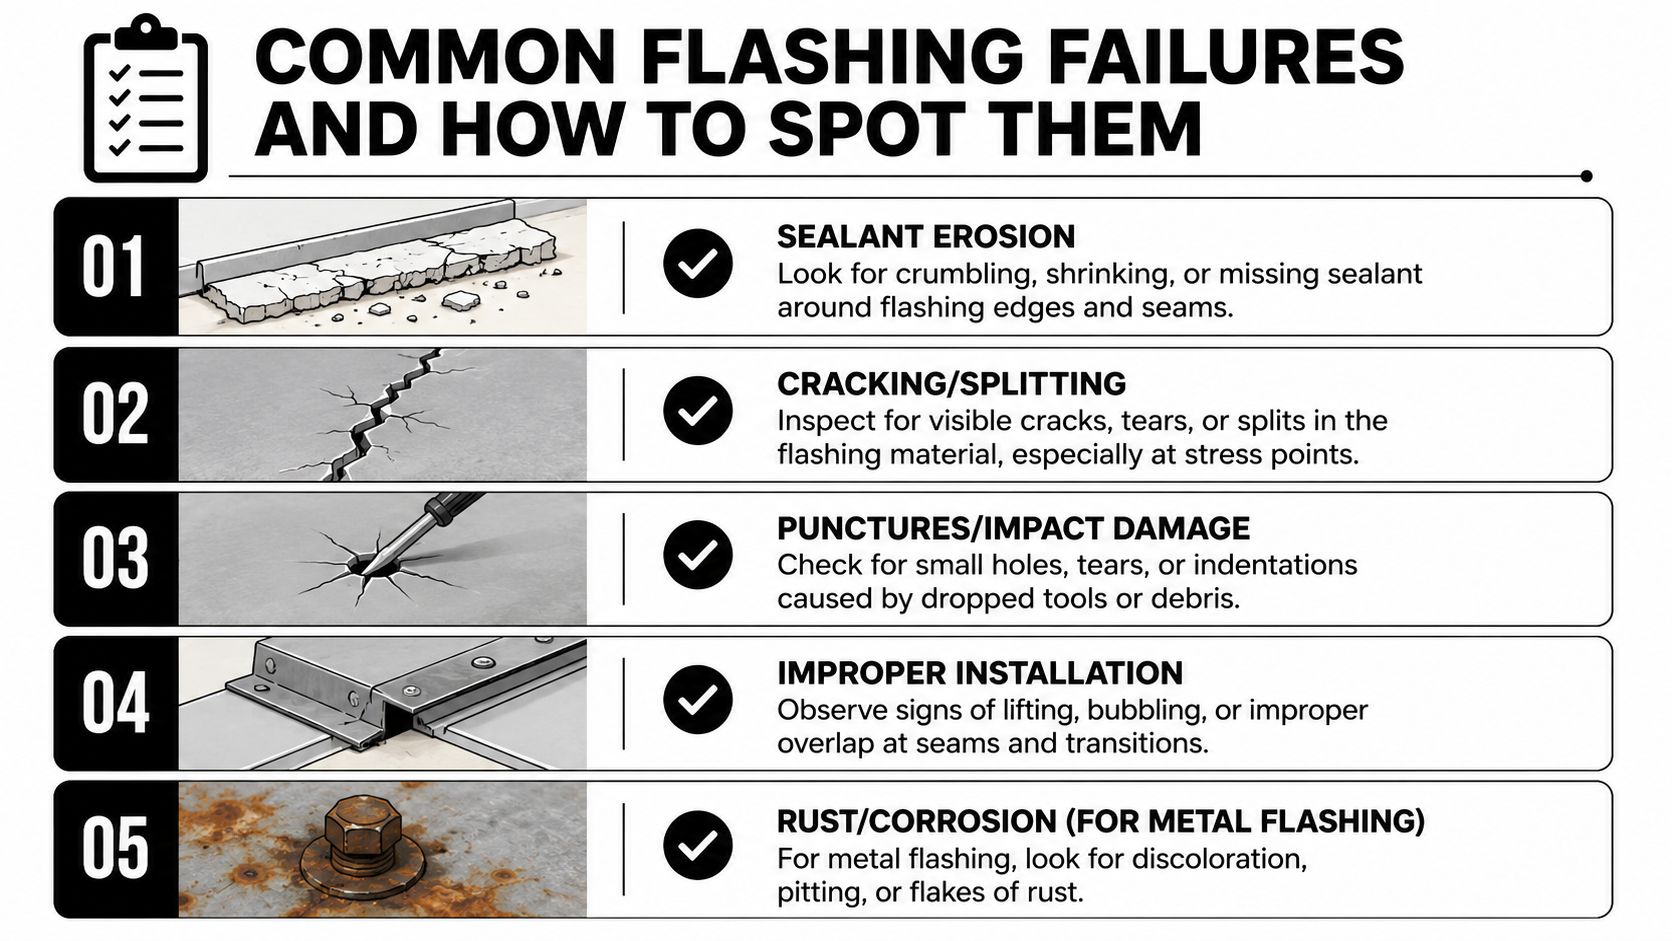
The failures I see most often
Some problems are easy to recognize once you know where to look.
- Sealant failure: sealant shrinks, cracks, or pulls away from edges. On a roof, exposed sealant is backup protection, not the main waterproofing.
- Lifting or fishmouthing: flashing edges curl up, often at corners or around bars.
- Punctures and tears: service traffic, dropped tools, and storm debris can nick flashing in places owners never notice.
- Corrosion on metal flashing: rust, pitting, or coating breakdown usually starts near fasteners, cut edges, or areas that stay wet.
- Bad overlap or reverse lap: water gets a direct path under the detail instead of being shed over it.
One South Florida failure deserves special attention. In hurricane-prone areas, surface-applied counterflashing systems fail three times more often than reglet-terminated ones in extreme wind events unless they're reinforced with self-adhered membrane and coated fasteners (South Florida counterflashing wind failure guidance). That's a major issue on parapet walls, especially where someone chose the easier surface-mounted option instead of a proper reglet detail.
Surface-applied counterflashing can work in sensitive wall conditions, but in this climate it needs reinforcement. Otherwise, wind will test the top edge until water gets in.
A roof check that catches trouble early
A useful inspection doesn't need to be complicated. It does need to be deliberate. When you're looking at flashing for flat roof systems, check these points:
- Start at the perimeter. Look for loose edge metal, open joints, and staining below the edge.
- Move to every wall transition. Check for gaps, wrinkles, lifted bars, and failed sealant at counterflashing lines.
- Inspect all penetrations. Pipes, curbs, and equipment supports should look tight, not patched together.
- Check for movement stress. Corners and inside angles often show splits first.
- Look inside the building. Ceiling stains near walls, curbs, and rooftop units often trace back to flashing details, not the field membrane.
The key is pattern recognition. If one penetration is patched badly, others usually are too. If one parapet detail is loose, the same crew may have repeated that detail around the whole roof.
Proactive Maintenance and Repair Options
Florida roofs rarely fail all at once. They fail at the details first, and flashing is usually where the trouble starts.
Routine maintenance matters because South Florida heat hardens sealants, UV dries out exposed components, and wind works loose anything that was only marginally secure to begin with. A small opening at a wall or curb can stay quiet for months, then turn into an interior leak after one hard rain with wind behind it.
What an owner can do safely
The National Roofing Contractors Association recommends having a certified roofing contractor inspect the roof system, including flashing, at least twice annually, once before storm season and once after to assess damage (NRCA inspection timing guidance). In South Florida, that schedule is practical. It catches heat damage before summer storms and storm damage before it spreads into the substrate.
Owners and facility staff should stay with safe observations from approved access points or during a contractor visit. The useful habits are simple:
- Remove debris at drains and edges. Wet leaves, seed pods, and trash keep water sitting against terminations longer than it should.
- Watch for movement after wind events. If metal trim, coping, or flashing looks shifted, lifted, or rattles in place, treat it as an active problem.
- Photograph changes. New rust streaks, split sealant, stained walls, and loose termination points should be dated and saved.
- Maintain labeled records. A simple folder with site photos and contractor identifiers, such as a roof inspection company logo record, makes it easier to tell whether a detail is stable or slowly failing.

Do not send maintenance staff out with a tube of sealant and assume the issue is handled. On a flat roof in this climate, surface caulk often hides the entry point instead of fixing it.
When repair turns into replacement
A localized repair still makes sense when the flashing failure is limited, the membrane around it is sound, and the substrate underneath is dry. That might mean replacing a short section of edge metal, rebuilding a penetration detail, or reinforcing a termination that has started to loosen before water gets below it.
Replacement becomes the smarter move when the same area has been patched several times, corrosion is widespread, fastening is loose across multiple details, or moisture has already gotten into the insulation or wood nailers. At that stage, patching usually spends money without restoring much service life.
Material choice also affects the decision. In South Florida, thin metals, exposed mastics, and mixed-metal repairs often come back to haunt owners because the sun, salt air, and wind exploit weak transitions fast. A proper repair uses compatible materials and attachment that can handle expansion, uplift, and repeated wetting.
For flat roof replacement work in South Florida, some contractors, including Paletz Roofing and Inspections, perform full flashing change-out rather than building a new roof around old failing details. That approach costs more up front, but it avoids one of the most common and expensive mistakes I see: putting a new membrane next to flashing that was already near the end of its life.
Costs Codes and When to Call a South Florida Expert
Flashing mistakes get expensive because they damage more than the roof. They affect insulation, decking, wall finishes, and occupied interiors. The exact repair cost depends on access, material type, extent of wet substrate, and whether the problem is isolated or spread through multiple details. Broadly, minor repairs stay in the repair category only when the surrounding roof system is still solid. Once multiple transitions are failing, a partial or full replacement discussion usually follows.
South Florida code expectations also change the conversation. In Broward, Miami-Dade, and Palm Beach counties, flashing details have to stand up to severe weather conditions, especially at edges, parapets, and penetrations. That means code compliance isn't paperwork. It's part of the waterproofing strategy.
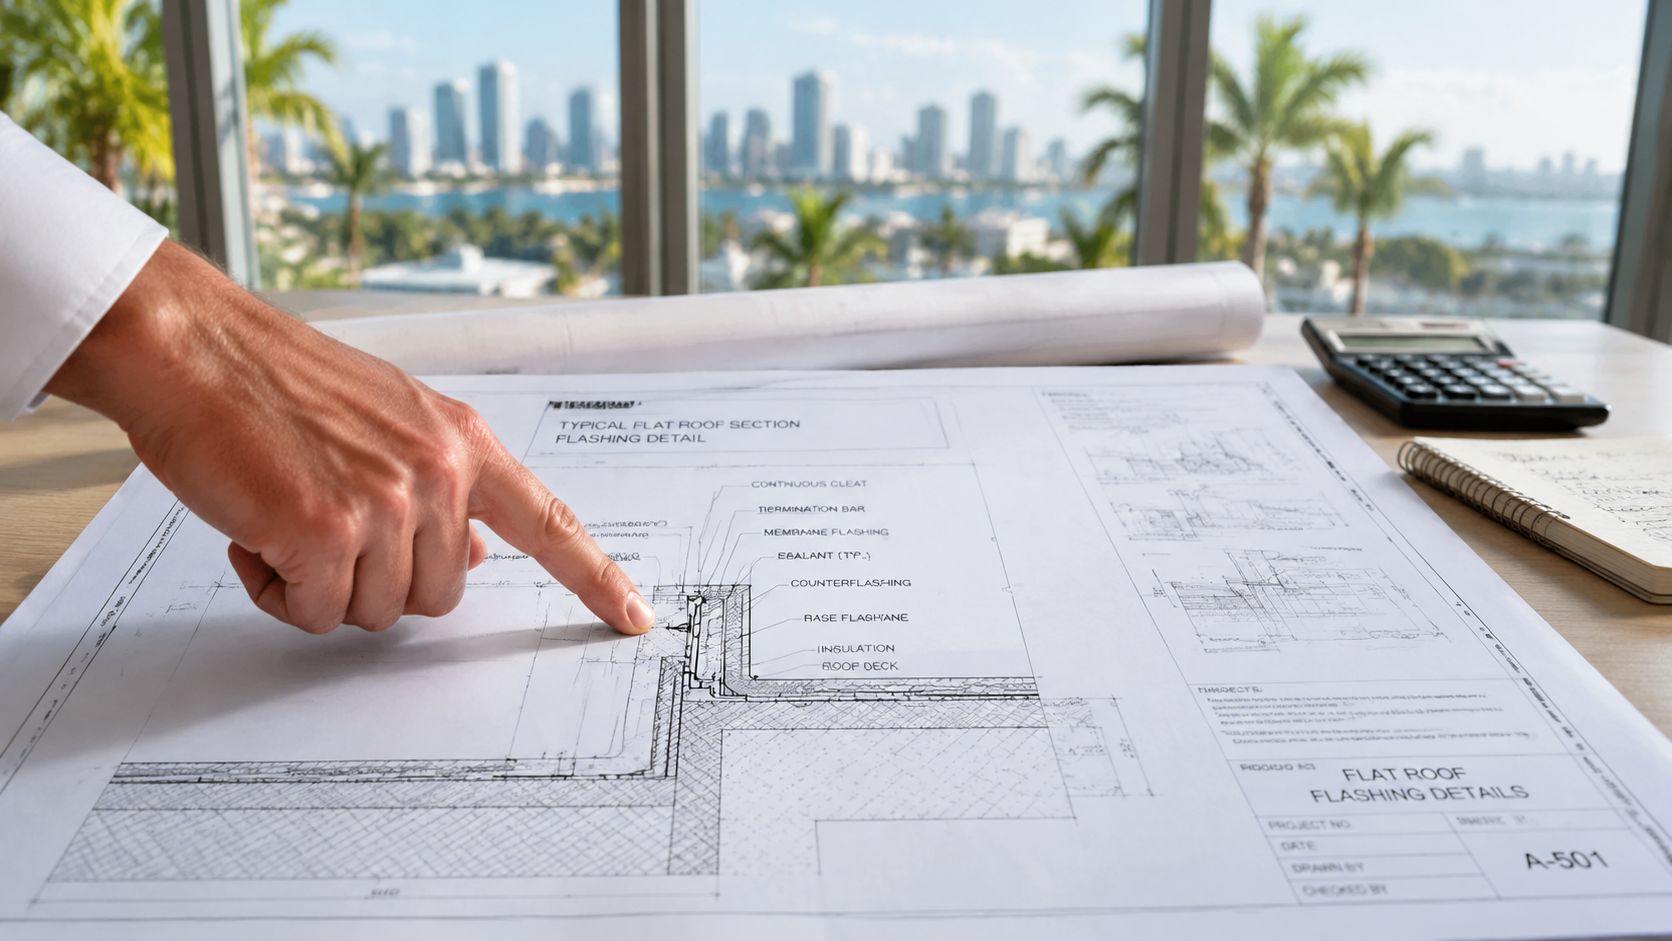
Call a South Florida roofing expert when you see active leaking, repeated flashing patches, loose edge metal, parapet movement, or storm damage around penetrations. Call one before a reroof too. Flashing for flat roof systems shouldn't be treated as an accessory line item. It's one of the main details that decides whether the next roof lasts the way it should.
If you need a professional opinion on flashing for flat roof systems in Broward, Miami-Dade, or Palm Beach County, Paletz Roofing and Inspections can inspect the roof, identify failing edge and penetration details, and recommend repair or replacement work that fits the roof type and local code conditions.