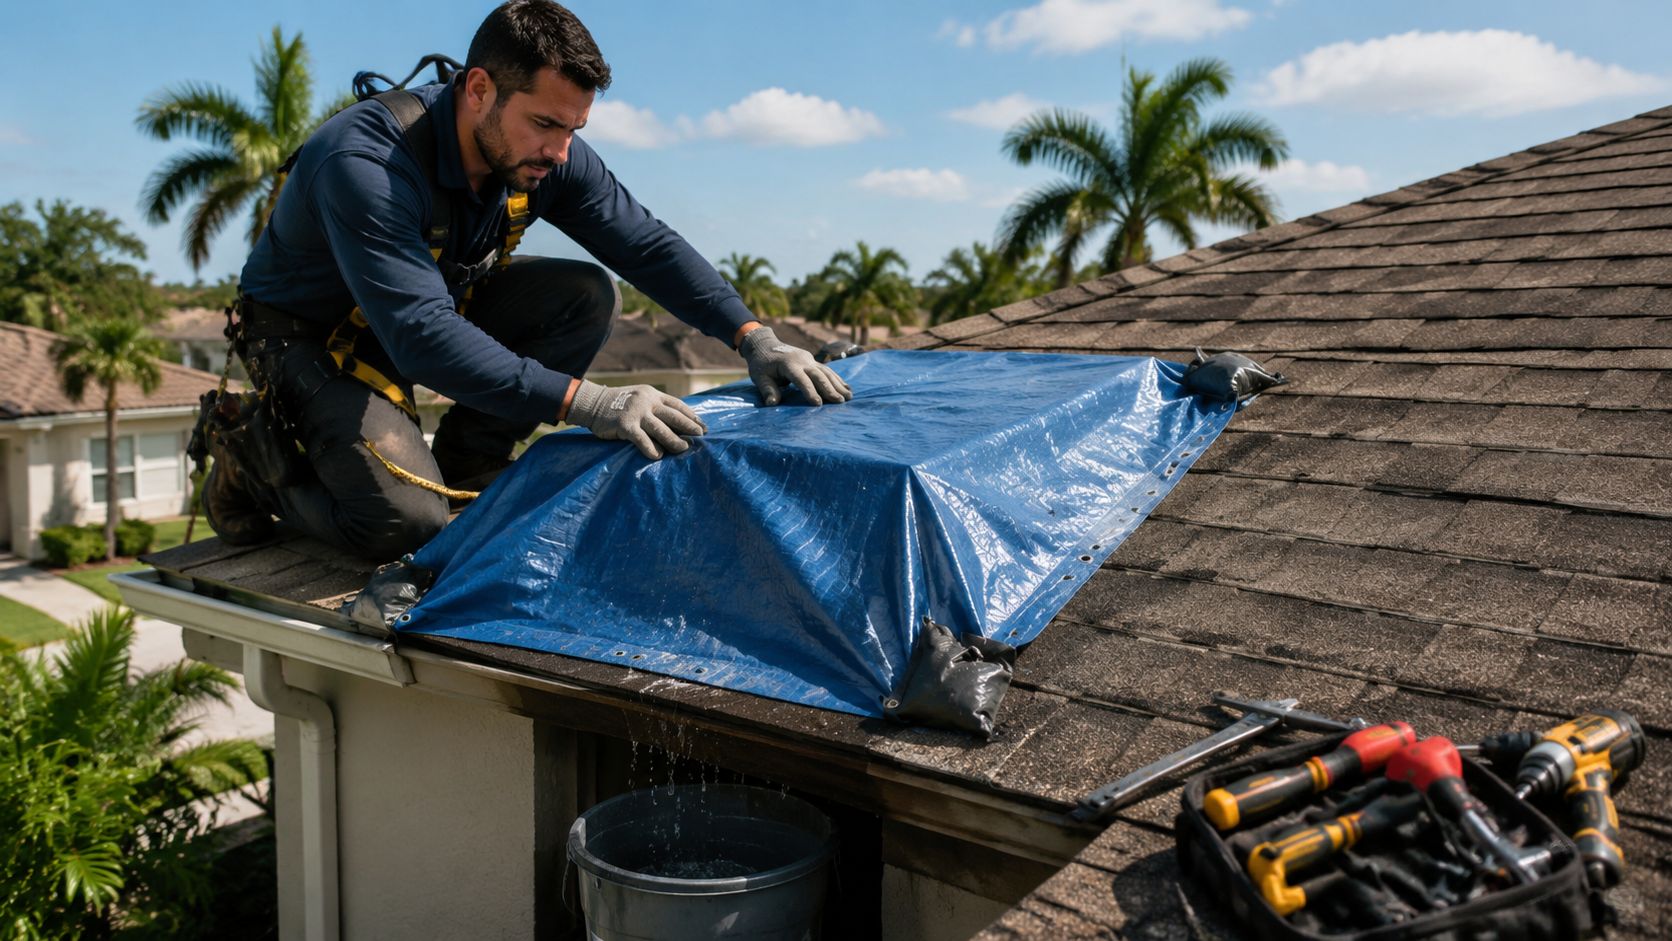
Water on the ceiling usually shows up at the worst time. It starts as a stain, then a drip, then a steady sound that makes every minute feel expensive. If you're dealing with that right now in Pembroke Pines, the first priority is simple. Stop interior damage safely, then move quickly from a temporary hold to a repair that will satisfy code and stand up to an insurance review.
That gap matters. A quick patch can buy time, but it often doesn't solve the source of the entry point, and in Florida it can create trouble if the repair isn't documented and completed to current standards. Good roof leak repair in Pembroke Pines isn't just about drying out a room. It's about tracing the leak correctly, repairing the roof system the right way, and making sure the work can hold up under local code, HOA requirements, and claim scrutiny.
Table of Contents
- First Steps When You Discover a Roof Leak
- Common Roof Leak Causes in Pembroke Pines
- DIY Temporary Fixes and Essential Safety Tips
- Knowing When to Call a Licensed Roofer
- The Professional Roof Repair Process and Costs
- Navigating Roof Repair Insurance Claims in Florida
First Steps When You Discover a Roof Leak
The first few minutes matter most. Most homeowners lose time trying to guess where the water is coming from. Don't start there. Start by controlling the interior damage and eliminating obvious safety risks.
Stabilize the room first
If water is actively dripping, place a bucket, storage bin, or trash can under the leak. Put down towels around it because splashing spreads farther than people expect. If the ceiling drywall is bulging, don't ignore it. Water can pool above the paint layer, and that weight can bring part of the ceiling down.
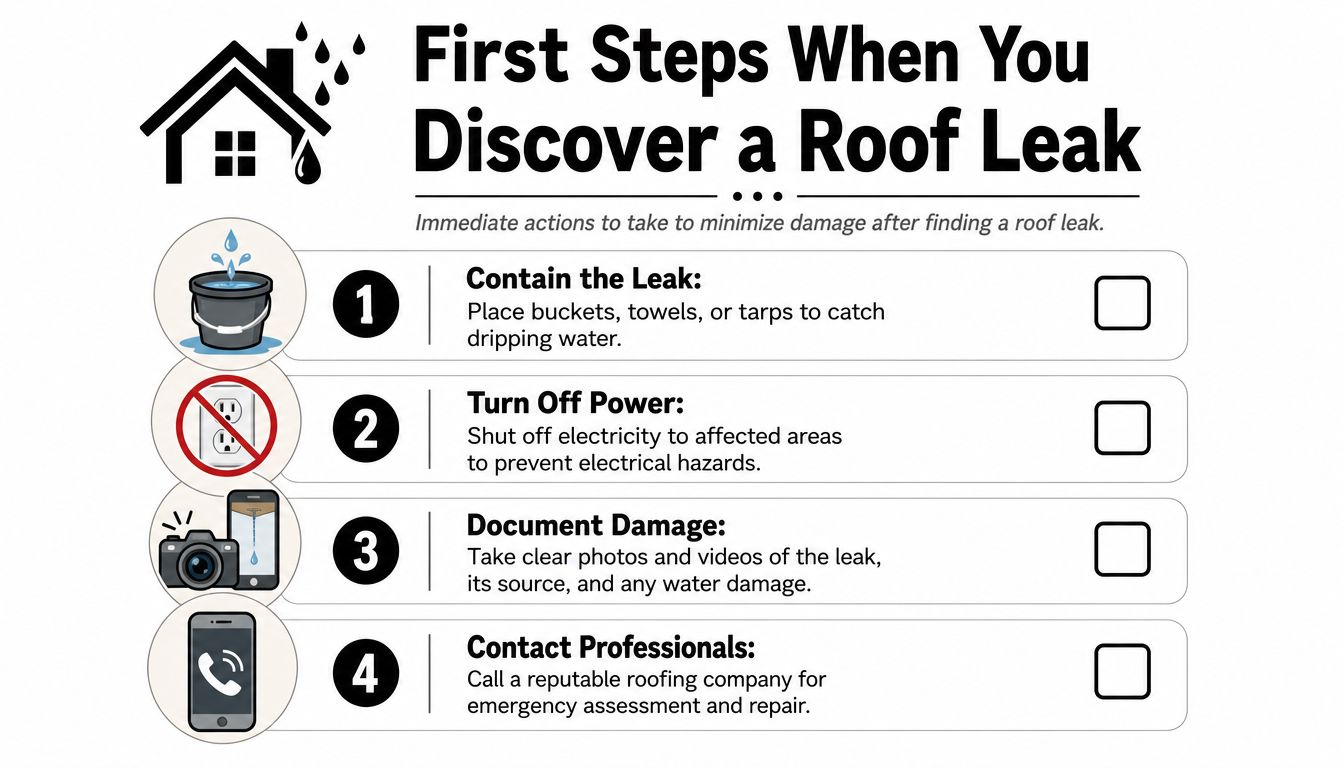
Take these actions in order:
- Contain the water: Use buckets, towels, tarps, and plastic bins to catch drips and protect flooring.
- Shut off power nearby: If the leak is close to light fixtures, outlets, or ceiling fans, turn off electricity to the affected area at the breaker.
- Move what can be damaged: Furniture, electronics, rugs, artwork, and paper items should come out of the room or get covered with plastic.
- Limit traffic below the leak: Keep children and pets out of the area until you know the ceiling is stable.
Practical rule: If water is near wiring, don't touch wet switches, fixtures, or appliances. Cut power first, then deal with cleanup.
A leak stain doesn't always sit directly below the roof opening. Water can travel along rafters, underlayment, or framing before it shows itself inside. That's why running into the attic during a storm or climbing onto a wet roof often makes things worse. You need a safe response first, not a fast guess.
Document what you see
Before cleanup changes the scene, take clear photos and short videos of the ceiling stain, dripping water, damaged belongings, wet insulation if visible, and any exterior debris you can safely photograph from the ground. Keep a simple timeline in your phone notes. Record when you first saw the leak, what the weather was doing, and which rooms were affected.
That record helps in two ways. It gives your roofer a cleaner starting point, and it preserves evidence if the damage later becomes part of a claim. Even if the leak looks minor, the pattern matters. A stain near a vent pipe means one thing. Water showing up along a wall line or around a window header can point to a different path entirely.
Use common sense with ladders. If conditions are slick, windy, or dark, stay off the roof and wait for daylight and proper safety equipment.
Common Roof Leak Causes in Pembroke Pines
Not every leak means the field of the roof failed. In Pembroke Pines, leaks often come from the details. Flashing edges, penetrations, transitions, and drainage points fail long before many homeowners expect them to.
Why local conditions change the diagnosis
Pembroke Pines follows the 2023 Florida Building Code with Broward County provisions and sits in the High Velocity Hurricane Zone, which affects wind resistance requirements and material standards for roof repairs and installations in the area, as noted in this Pembroke Pines roofing code overview. That matters because a repair that might be considered acceptable somewhere else may not meet the fastening, flashing, or material expectations here.
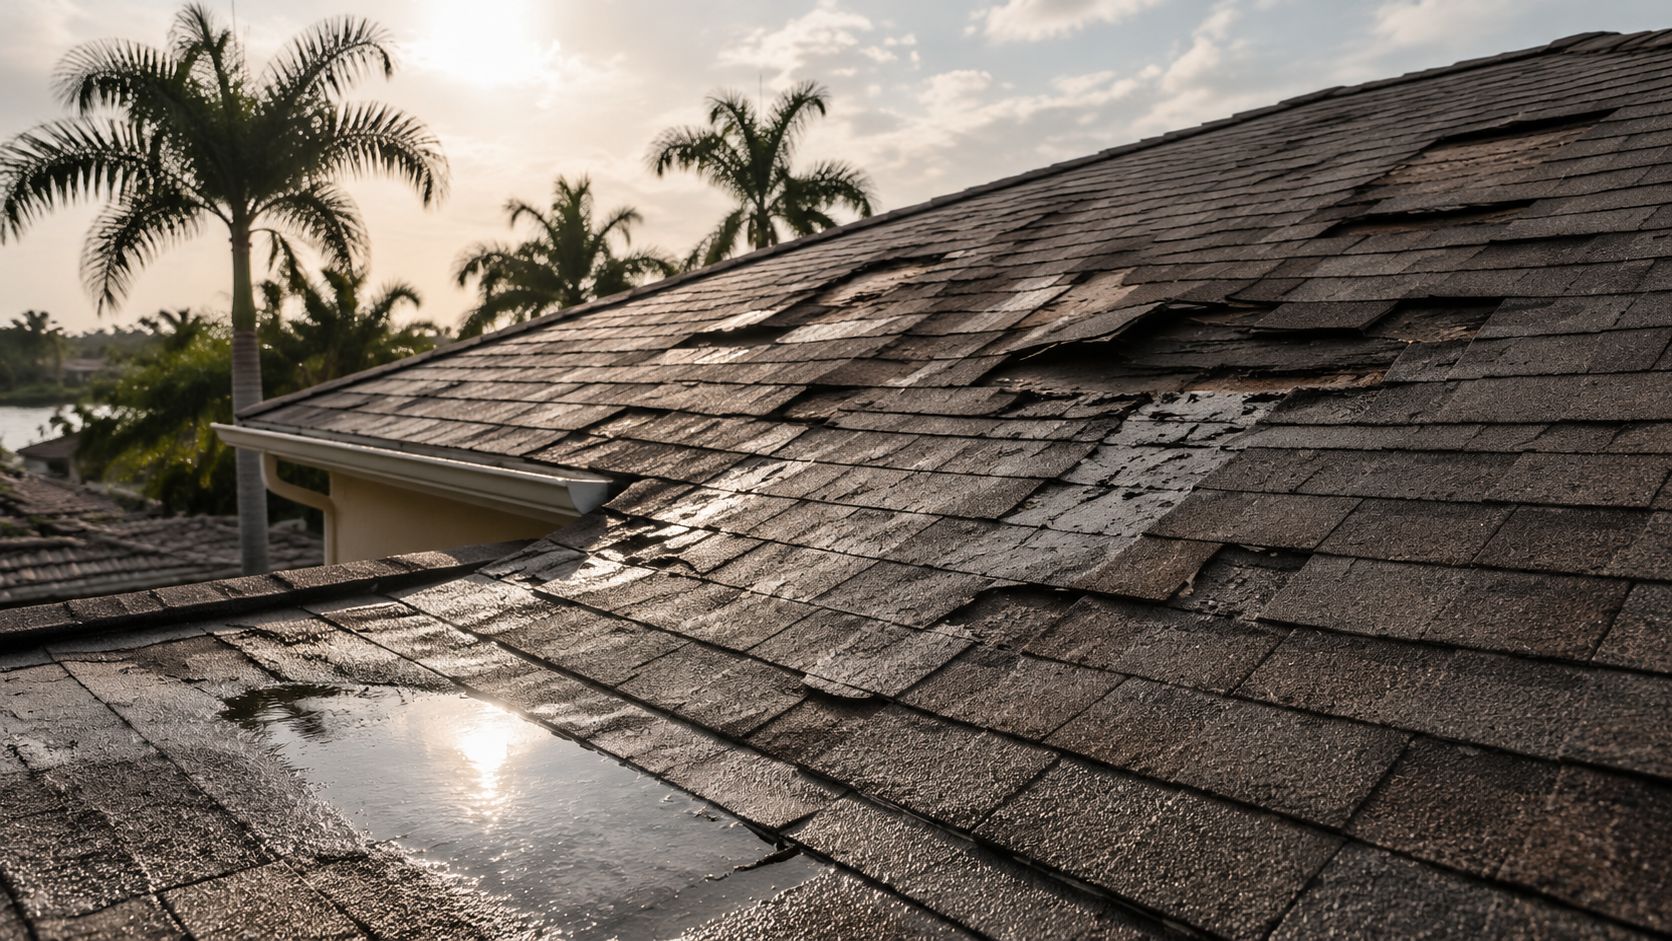
South Florida weather is hard on every roof type. Strong sun dries and ages exposed materials. Heavy rain tests every seam. Wind drives water sideways into weak points that might not leak during a routine shower. Add branches, seed pods, and clogged valleys, and the problem becomes less about one bad shingle and more about the whole path water takes across the roof.
Trees are part of that story. Overhanging limbs drop debris into valleys and against flashing, and they can scrape roof surfaces during storms. Homeowners trying to reduce repeat problems sometimes start with roof cleaning and canopy management, and a practical outside reference on that side of maintenance is this piece on tree trimming in Central Coast.
The roof areas that fail first
The leak source is often one of these trouble spots:
- Flashing around penetrations: Vents, stacks, chimneys, and wall intersections are frequent leak points because each one interrupts the roof surface.
- Valleys and low spots: Water concentrates there, so even a small installation defect can show up fast.
- Perimeter edges: Wind pressure hits eaves and rakes hard in storms.
- Flat roof transitions: Corners, curbs, drains, and scuppers are where many recurring leaks begin.
For flat roofs in South Florida, one technical mistake causes endless callbacks. According to this flat roof repair video reference, 90% of contractor repairs fail because they ignore the need for a can strip at 90 degree transitions, and repairs that include can strips, tapered insulation, and elastomeric top coats can exceed a 95% success rate when executed correctly. That lines up with what roofers see in the field. A membrane doesn't like being forced over a sharp corner. Sooner or later, it stresses and opens.
Water rarely enters where homeowners think it does. The stain is the symptom. The flashing detail, corner transition, or drainage path is usually the cause.
DIY Temporary Fixes and Essential Safety Tips
It is 10:30 at night, rain is still coming down in Pembroke Pines, and water has started dripping from a ceiling seam onto the floor. At that point, the priority is simple. Protect people, contain the water, and avoid making the roof harder to repair and document properly in the morning.
Temporary work buys time. It does not identify the leak path, and it does not satisfy the code and documentation standards that matter if the repair later turns into an insurance claim.
What you can do from inside
For most homeowners, interior control is the safest first move.
Start by moving furniture, electronics, and rugs out of the wet area. Put a bucket or plastic tote under the drip, then cover nearby finishes with plastic sheeting while keeping the water path open so runoff does not spread across the room. If drywall is bulging and clearly holding water, some homeowners choose to drain it at the lowest point into a bucket. Only do that if the area below is clear and any nearby power is shut off.
Then focus on moisture. Fans, towels, and a dehumidifier help limit swelling, staining, and mold growth while you wait for a roofer.
If you can reach the attic safely, use a flashlight and stay on the framing only. Look for wet insulation, dark roof decking, or active dripping. A licensed roofer will later use findings like that, along with exterior inspection photos such as this roof inspection image from Paletz Roofing and Inspections, to connect the interior symptom to the exterior failure. That matters because the water stain inside often masks the true source.

What a temporary exterior patch can and cannot do
Homeowners get in trouble when they confuse emergency containment with repair.
A tarp can reduce water entry over a damaged section if the roof is dry, the slope is manageable, and the person installing it knows how to anchor it without tearing more material loose. If the roof is slick, steep, or wind is still active, stay off it. In South Florida, one bad decision on a wet roof can turn a leak call into an injury claim.
Small amounts of roof cement or sealant may slow water at an exposed crack, fastener, or lifted edge. They can also trap moisture, contaminate the repair area, and make the permanent fix less clear once a professional opens the assembly. That is one reason rushed patch jobs so often fail inspection or have to be redone before the final repair is approved.
| Temporary action | What it helps with | Limitation |
|---|---|---|
| Buckets, towels, and floor protection | Reduces interior damage and slip hazards | Does not stop roof entry |
| Controlled ceiling drainage | Releases trapped water from a bulging drywall pocket | Can damage the ceiling and must be done carefully |
| Exterior tarp | Limits direct water intrusion over an exposed area | Fails quickly if poorly secured or installed in wind |
| Targeted sealant or roof cement | May slow a small visible opening | Can hide the actual failure path and complicate permanent repair |
A few safety rules matter every time:
- Do not get on the roof during rain or high wind: Wait for dry, stable conditions.
- Do not step into an attic carelessly: Stay on framing members only. Drywall will not hold your weight.
- Do not assume the stain marks the entry point: Water can travel along decking, underlayment, framing, and insulation before it shows inside.
- Do not spread caulk over every suspect area: That makes professional diagnosis harder and can interfere with a code-compliant repair.
- Do not throw away damaged materials or photos: Keep records if you may need to support an insurance claim.
Field advice: The best temporary fix is the one that keeps people safe, limits interior damage, and leaves the roof in a condition a licensed roofer can inspect, document, and repair correctly.
Knowing When to Call a Licensed Roofer
Some leaks announce themselves. Others act small until the ceiling softens, insulation saturates, or decking starts to rot. The hard part for homeowners is that the amount of water inside doesn't always match the seriousness of the exterior failure.
Signs this is no longer a wait and see problem
Call a licensed roofer right away if any of these are happening:
- Active dripping during or after rain: That means the roof system is currently taking on water.
- Multiple leak spots: One storm can expose more than one failure point, or one entry point may be feeding several interior areas.
- Sagging drywall or bubbling paint: Water is collecting where it shouldn't.
- Visible roof movement or missing material: From the ground, you may notice displaced shingles, broken tile, or debris impact.
- Leak around penetrations or wall lines: These areas usually require flashing work, not a cosmetic patch.
A small stain can wait for a scheduled inspection if it's dry, stable, and not spreading. A live leak, ceiling bulge, or water near electricity shouldn't wait.
A practical decision filter
Ask yourself three things.
First, is the leak active right now or did it only leave a mark? Second, has there been recent storm activity or visible debris on the roof? Third, can you safely confirm anything from the ground, without climbing?
If the answers point to uncertainty, active water, or visible exterior damage, bring in a licensed roofer. That's the point where trade knowledge matters. A proper inspection traces the leak path, checks flashing details, and determines whether the issue is localized or part of a larger failure.
One local option for that type of assessment is Paletz Roofing and Inspections, which handles leak repairs and inspections for South Florida properties. The important part isn't the logo. It's making sure the contractor is licensed, insured, and prepared to document the damage clearly.
The Professional Roof Repair Process and Costs
By the time a leak reaches your ceiling, the repair decision is no longer just about stopping water. In Pembroke Pines, the real job is finding the entry point, correcting the failed detail, and making sure the repair can stand up to inspection, insurance review, and current code requirements.
What a proper repair visit looks like
A competent leak visit follows a clear sequence, because roof leaks rarely travel in a straight line.
The inspection usually starts inside the house or building. Stain patterns, attic moisture, wet insulation, drywall damage, and leak locations around vents or wall lines help narrow the search. After that, the roofer checks the roof surface, flashing, penetrations, transitions, and drainage points to trace the water back to its source. On flat roofs, that often means seams, drains, curbs, and perimeter edges. On shingle, tile, or metal roofs, it often comes down to flashing failure, cracked components, uplifted material, or fastener problems higher up the slope.
As noted earlier, Florida leak repairs often follow the same practical order. Find the source, stop active water intrusion, remove failed sealant or damaged components, rebuild the flashing or patch correctly, and address any wet interior materials that should not be left trapped. That order matters. A quick surface patch over worn flashing may hold for a few weeks, but it usually fails again once the next hard rain hits.
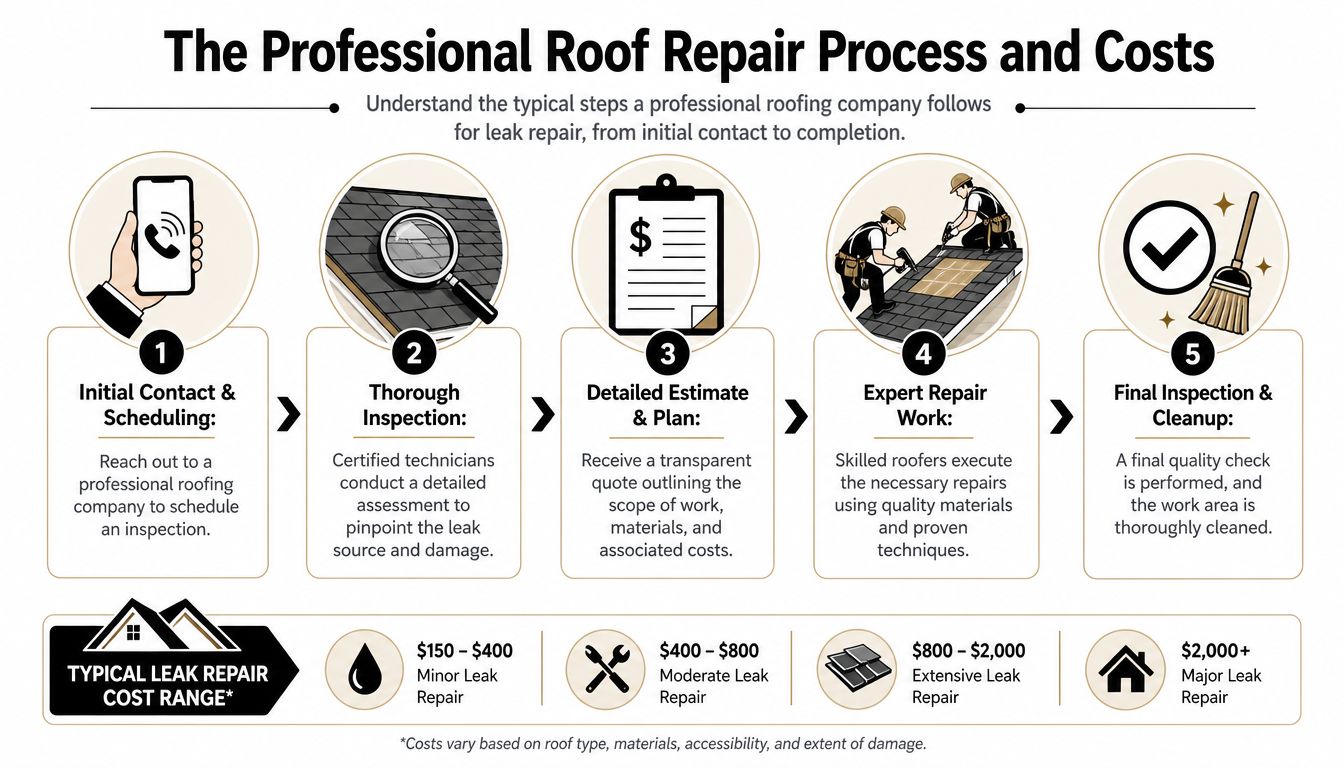
A proper leak repair fixes the failed detail and documents the condition underneath. That is how you move from emergency response to a permanent, insurable repair.
What roof leak repair costs in Pembroke Pines
Repair pricing depends on access, roof type, how far water traveled, and whether the damage stops at the surface or extends into underlayment or decking.
In Pembroke Pines, asphalt shingle and flat roof leak repairs average about $125.00 per hour plus materials, while tile roof repairs average $150.00 per hour plus materials according to Pembroke Pines roofing cost data. That same source notes that major damage can escalate to between $2,500 and $7,000.
Those numbers make more sense when you look at scope. A simple vent flashing repair is a small, targeted job. Replacing broken tile, rebuilding underlayment, and changing out rotted decking is a different project with different labor, material, and permit implications. Homeowners get into trouble when both jobs are described as a "roof leak repair" even though one is a patch and the other is a partial rebuild.
A solid estimate should identify the failed area, list the repair method, note whether substrate replacement is expected, and state whether permit or code-related upgrades may be required. If a contractor cannot explain why the leak happened, the price is not the main problem.
Code and HOA issues that change the scope
Pembroke Pines repairs are shaped by more than the leak itself.
One factor is Florida's 25% roof replacement rule. If repairs or replacement affect more than 25% of the roof area within a 12 month period, the project may have to be brought into compliance with current code requirements, as explained in this 25% rule reference. That can shift the conversation from a repair invoice to a larger code-driven project.
Another factor is HOA approval. Many communities in Pembroke Pines restrict material type, profile, and color, which means the technically correct repair also has to match association requirements, as noted in this Pembroke Pines HOA roofing overview. Tile and specialty roofing systems create the most problems here, especially when the original product is discontinued.
Condo and co-op buildings carry another layer of responsibility. Florida Senate Bill 4D, enacted in May 2022, requires condominium and cooperative buildings three stories or higher to undergo milestone structural inspections and submit specific data to the DBPR, with roof safety and integrity part of the compliance picture, according to this SB-4D roofing summary. For owners, boards, and property managers, that means leak repairs should be photographed, scoped clearly, and completed in a way that holds up under later review.
If storm exposure is part of the concern, this guide for Miami homeowners gives useful insurance context for the broader South Florida market.
Navigating Roof Repair Insurance Claims in Florida
A leak repair and an insurance-ready repair are not always the same thing. Homeowners usually learn that after a denial, when they find out the adjuster wanted photos, code context, repair scope, and proof that the work addressed more than a surface symptom.
Why documentation changes the outcome
In Broward County, 38% of residential roof claims were denied due to inadequate repair documentation or non-compliance with current building codes, according to a Florida Department of Financial Services finding cited in this Pembroke Pines leak repair insurance discussion. That's the core risk with temporary patch work. If the file only shows a stopgap fix, the insurer may see an incomplete repair history instead of a properly documented loss and correction path.

Good claim support usually includes dated photos, interior and exterior damage notes, material identification, code-related observations, and a clear explanation of what failed. If decking is compromised or flashing details are not compliant, that should be documented plainly. The adjuster doesn't need drama. They need an organized file.
For broader storm-prep context, especially if you're comparing policy language and hurricane exposure, this guide for Miami homeowners is a useful companion read.
What to hand your adjuster
Keep the package simple and complete:
- A dated photo set: Include ceiling damage, wet materials, visible roof damage from the ground if available, and post-mitigation conditions.
- A written damage summary: Note when the leak appeared, which rooms were affected, and whether water contacted electrical fixtures.
- A professional assessment: This should identify likely entry points, damaged components, and the proposed code-compliant repair scope.
- All invoices and emergency mitigation records: Buckets and towels don't matter. Paid mitigation and roofing documentation do.
Insurance reality: The cleaner your paper trail, the less room there is for an adjuster to treat a serious roof failure like a casual maintenance issue.
If your leak is active or you've already patched it temporarily, don't stop at containment. Get the roof assessed, documented, and repaired to current requirements so the problem doesn't shift from water damage to claim trouble.
If you need a documented leak assessment, repair scope, or code-focused review in Broward, Miami-Dade, or Palm Beach, contact Paletz Roofing and Inspections. They handle residential and commercial roofing work, including leak repairs, inspections, and damage documentation that helps property owners move from emergency containment to permanent, insurance-aware repair.