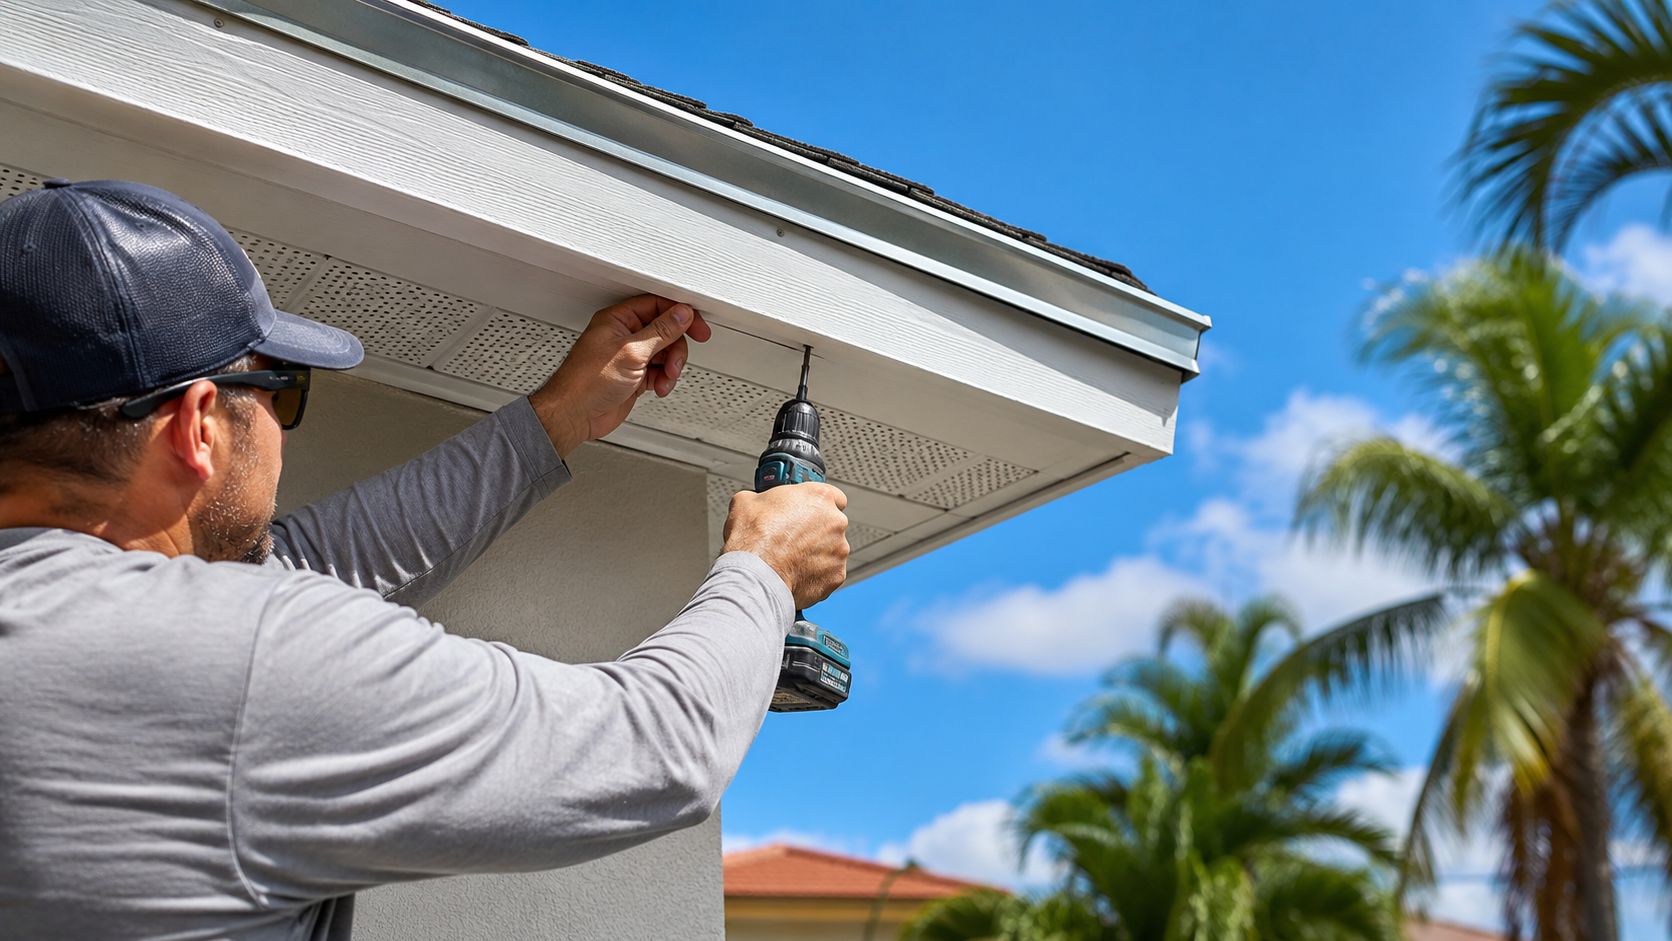
About 80% of roofing projects in the U.S. use asphalt shingles, and roughly 5 million roofs are installed each year, which means eaves aren't some niche trim detail. They're part of the standard roof system on most homes, and when they're installed wrong, South Florida weather exposes the mistake fast (EcoWatch).
In Broward, Miami-Dade, and Palm Beach, roof eaves installation isn't just about making the roofline look finished. It's about controlling runoff, limiting moisture intrusion, managing attic airflow, and reducing how much punishment wind-driven rain can deliver to the wall line. A neat-looking fascia board won't save a house if the drip edge is wrong, the soffit can't breathe, or the overhang is too short for the climate.
Table of Contents
- Why Proper Eaves Are Your Home's First Line of Defense
- Understanding Eave Components and Gathering Your Tools
- A Step-by-Step Guide to Eave Installation
- Eave Installation for South Florida Climate and Codes
- Avoiding Common Mistakes in Roof Eaves Installation
- Estimating Costs and Knowing When to Hire Paletz Roofing
Why Proper Eaves Are Your Home's First Line of Defense
Wind-driven rain is one of the fastest ways to expose a weak roof edge. In South Florida, that matters every hurricane season. From a roofer's perspective, eaves are the roof's first drainage and protection detail, because they control how water leaves the deck and how much of that water stays off the wall assembly.
A well-built eave does several jobs at once. It pushes runoff clear of the siding or stucco, gives the gutter a clean catch point, shades vulnerable wall areas, and helps limit the repeated wetting that leads to peeling paint, swollen fascia, soffit stains, and rot at the deck edge. If that handoff from roof to drip edge to gutter is sloppy, water does not miss by much. It runs behind the fascia, tracks into joints, and keeps feeding moisture into the same weak spots.
South Florida makes the trade-offs tougher. Strong sun dries surfaces fast, but high humidity keeps assemblies from drying fully. Heavy rain hits hard, and hurricane winds can drive water sideways under edges that looked fine during a light shower. That is why eave installation here is not just about appearance. It has to hold up under code expectations, storm exposure, and years of moisture cycling.
Shade matters too. A wider overhang can reduce direct sun on windows and upper walls, which helps with heat gain in hot climates, but more overhang also means more wind load at the edge. On homes near the coast, I pay close attention to how that overhang is framed, fastened, vented, and tied into the fascia and gutter line so the assembly does not become a weak point during a storm.
Practical rule: If water cannot leave the roof edge cleanly and land where it is supposed to, the eave is not doing its job.
If your existing gutter setup is undersized, loose, or badly aligned with the roof edge, it makes sense to Find local gutter services before you finalize eave work. The roof edge and the gutter system need to work together, especially in a climate where one summer storm can dump a lot of water on a short run of roof.
The expensive part is how subtly eave failures start.
Usually the first signs look minor. Caulk splits. Paint bubbles. The soffit shows a brown line. Then the wood at the perimeter starts to soften, fasteners lose grip, and insects or rodents find an opening. By the time a homeowner sees interior staining, the repair often reaches beyond trim and into decking, underlayment, and sometimes framing.
That is why proper eaves are a first line of defense. They protect the edge that takes the most punishment, and in South Florida, that edge has to be built for moisture, wind, and code compliance from day one.
Understanding Eave Components and Gathering Your Tools
Good roof eaves installation starts before the first cut. If the framing edge is uneven, the fascia won't run straight. If the ventilation plan is sloppy, the attic holds moisture. If you install parts out of sequence, water finds the opening you left behind.
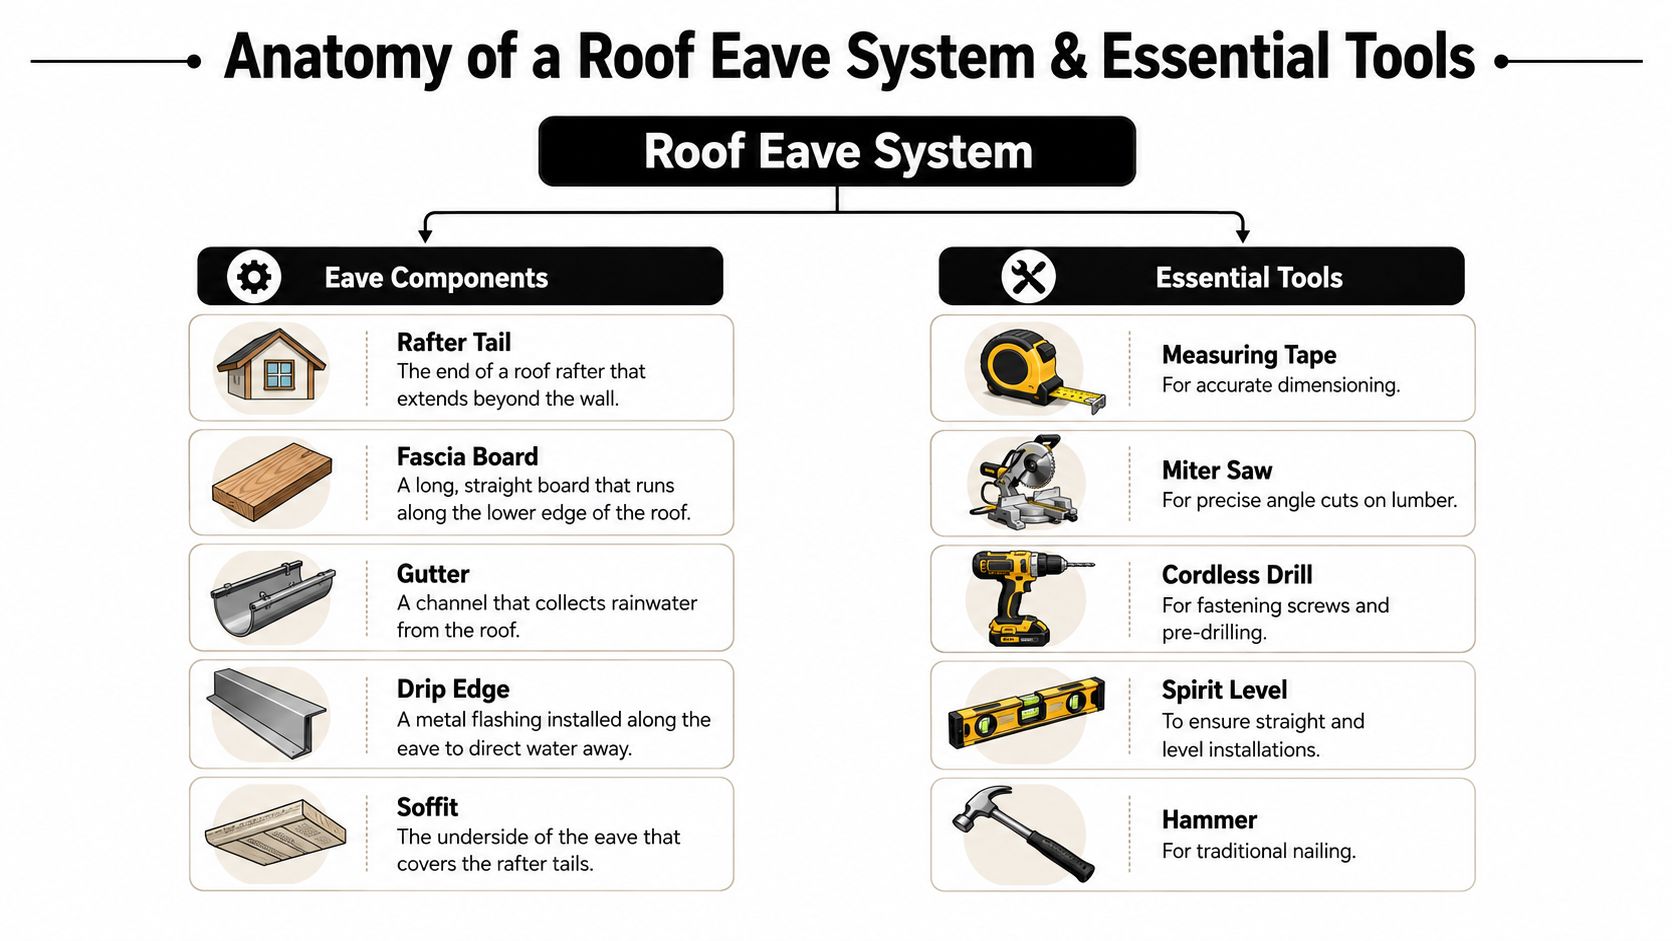
What each part actually does
The basic eave assembly isn't complicated, but each part has a job.
- Rafter tails: These are the framing members that project beyond the exterior wall. They set the line for the eave and determine whether the finished edge will be true or wavy.
- Fascia board: This is the long outer board that caps the rafter ends and gives gutters a solid mounting surface.
- Soffit: This closes the underside of the overhang and often carries the intake ventilation.
- Drip edge: This metal flashing kicks water off the roof edge and protects the deck perimeter.
- Gutter: This catches runoff after the drip edge and moves it away from the house.
In South Florida, ventilation planning belongs in this same conversation. Proper eave installation requires a minimum overhang of 12 inches and a balanced ventilation system with 50% intake through soffit vents and 50% exhaust through ridge vents to help prevent moisture buildup in high-storm areas (WeatherShield Roofers).
Tools and materials that make the job go smoothly
A clean eave install depends on layout accuracy more than speed. These are the tools I'd want staged before starting:
| Tool or material | Why it matters |
|---|---|
| Tape measure | Sets overhang, fascia runs, soffit cuts, and vent spacing accurately |
| Spirit level | Confirms the fascia line isn't dipping or rolling |
| Chalk line | Helps snap a straight visual guide across uneven framing |
| Cordless drill | Handles screws, pre-drilling, and bracket fastening |
| Miter saw | Makes cleaner fascia and soffit cuts than a rough field cut |
| Hammer and roofing nails | Needed for drip edge and related roof edge fastening |
| Pry bar | Removes old fascia, drip edge, and damaged trim without tearing up more than necessary |
| Corrosion-resistant fasteners | Hold up better in humidity and salt-heavy air |
| Safety gear | Gloves, eye protection, stable ladder setup, and fall protection where required |
A straight fascia board doesn't start with the fascia board. It starts with rafter tails that are checked, corrected, and shimmed before trim ever goes up.
Material choice also depends on roof type. Shingle systems, tile roofs, and metal roofs all finish differently at the edge, and that changes how much backing, flashing, and closure work you need. That's one reason broad guides often mislead homeowners. A mountain-market reference like Flagstaff AZ gutter services can still be useful for drainage planning, but in South Florida the moisture load and wind exposure change the execution.
What to inspect before you buy anything
Don't start by ordering trim. Start by checking the substrate.
Look at the rafter ends for rot, old insect damage, splitting, or sag. Check whether the old soffit venting is blocked by paint, debris, or insulation packed too tight from the attic side. If the edge decking is soft, that repair comes before finish materials.
Also check whether the old gutter line has been pulling on the fascia. A lot of “bad eaves” are really failed support conditions hidden behind aluminum wrap or paint.
A Step-by-Step Guide to Eave Installation
Sequence matters more than homeowners expect. You can't fix a bad edge detail by adding more caulk later. The work has to move from structure, to enclosure, to waterproofing, in that order.
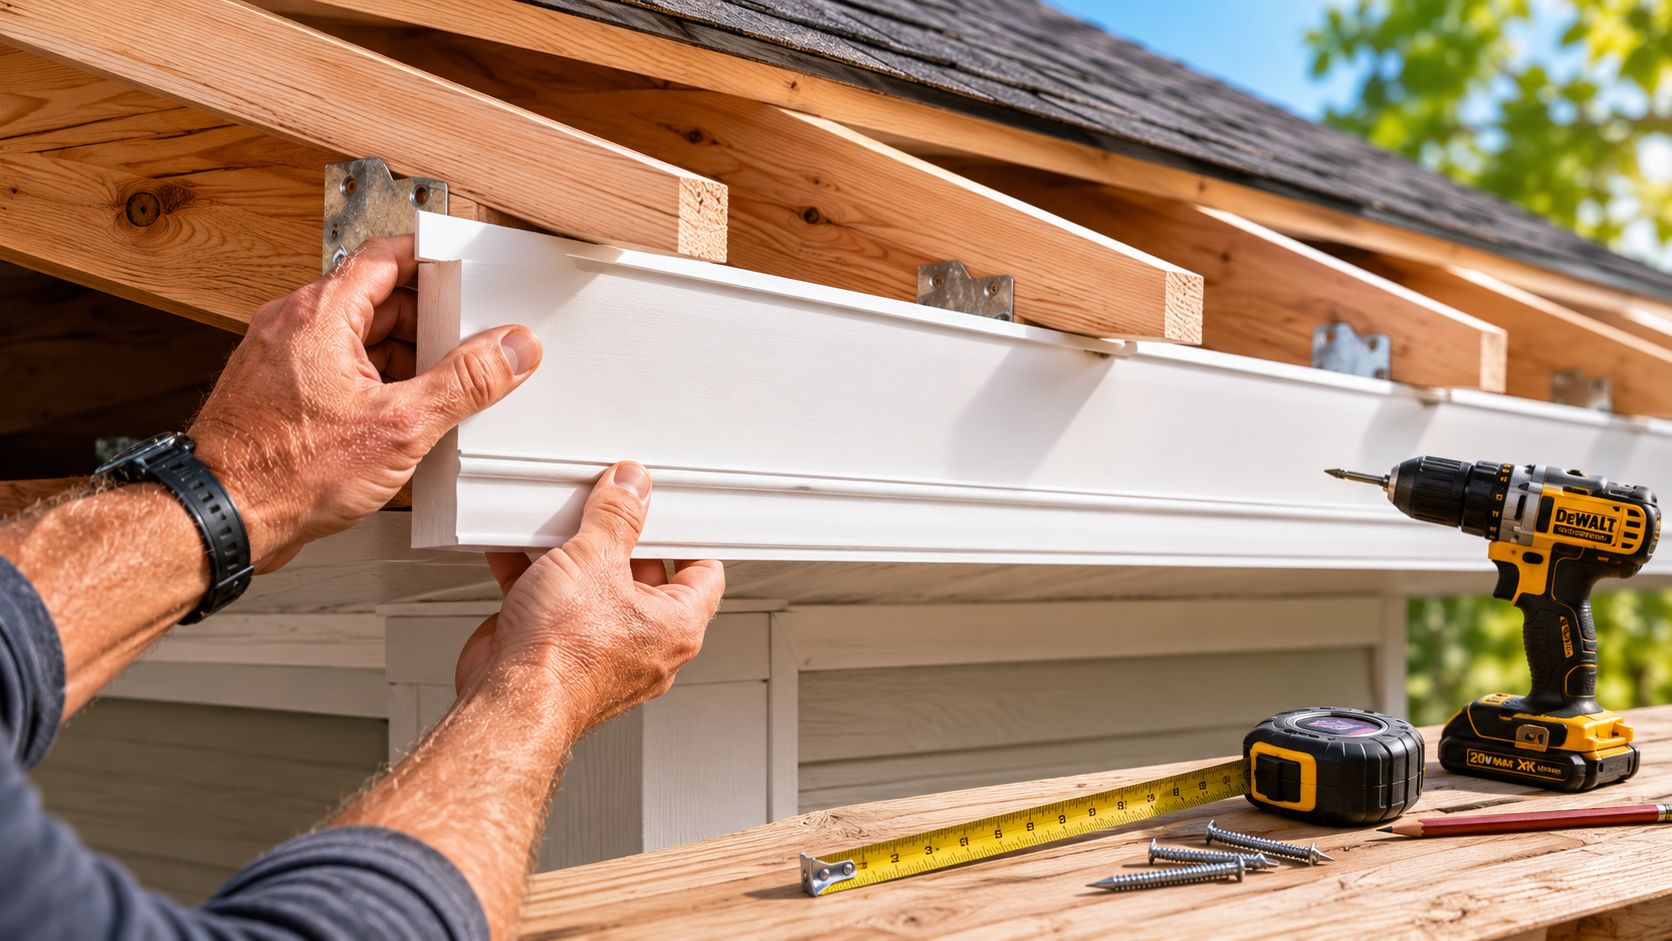
Phase one layout and tear-off prep
Start with access and safety. On a one-story section with stable ground, a careful homeowner may be able to inspect and replace limited trim. On a steep slope, upper story, or brittle roof edge, this is professional work.
Remove damaged fascia, soffit panels, failing drip edge, and any loose gutter hardware without ripping into sound roof decking. Once the edge is open, inspect the deck perimeter and rafter tails closely. If wood is soft, dark, delaminated, or crumbles under probe pressure, replace the damaged members before moving on.
For open-eave construction using rafters, one documented installation method begins with an 8-inch eave plank secured evenly against the upper edge of rafters. That method uses one-inch self-tapping screws when wooden plugs are used, or 28.5mm self-tapping screws with steel wings or prefabricated trusses, placing two screws per rafter end at 3cm and 10cm from the upper edge. It then adds a 6-inch eave plank above, secured with 38mm self-tapping screws at 30cm intervals, while staggering joints so upper and lower plank connections don't align (installation walkthrough on YouTube).
That exact plank approach won't match every South Florida house, but the principle does. Build the edge from sound framing, stagger joints, and avoid creating a weak seam where water can sit.
Phase two fascia soffit and backing
Once the framing edge is corrected, set the fascia line. If the rafter tails vary, plane or shim them until the line is consistent. Don't force a straight fascia board onto a crooked edge and hope the metal wrap hides it.
Then install backing and soffit supports. The soffit needs enough structure to stay flat and enough planning to breathe properly. If the house relies on soffit intake for attic airflow, don't block that path with solid closure details or over-insulated attic edges.
A practical field sequence often looks like this:
- Establish the finished overhang: Confirm the projection is consistent along the run.
- Cut and fasten fascia stock: Keep joints tight and support them properly.
- Install soffit receiving channels or framing cleats: This keeps the underside locked in cleanly.
- Fit vented or solid soffit panels as designed: Match the ventilation plan, don't improvise it.
- Leave the edge ready for waterproofing: The metal edge and underlayment need a clean substrate.
If the soffit is vented but the attic edge is blocked above it, the roof can't breathe the way the assembly was designed to.
Phase three waterproofing and drip edge
It is common for many roof eaves installation jobs to fail. The visible trim may look perfect, but the roof edge leaks because the waterproofing order was wrong.
During eave roofing material installation, a 12-inch strip of Ice and Water membrane must be installed so it wraps 1 to 2 inches down over the fascia board, whether gutters are present or not. After that, an Eave Metal Drip Edge should overlap the fascia by a minimum of 2 inches and extend up the roof slope at least 2 inches, with 4 inches preferred (RoofKey installation guidance).
For shingle roofs, the drip edge must be made of corrosion-resistant material, extend at least 2 inches onto the roof sheathing, and be fastened with roofing nails every 8 to 10 inches. The shingles should then extend 1/4 to 3/4 inch beyond the drip edge (Asphalt Roofing Manufacturers Association guidance).
That overhang range matters. Too short and water can cling back toward the fascia. Too long and wind can catch the shingle edge.
What changes by roof type
Shingle roofs are the most forgiving at the eave, but only if the drip edge and starter course are aligned properly. Tile roofs usually need more careful planning at the lower edge because profile, weight, and closure details can create pockets where water and debris collect. Metal roofs demand precise edge trim and fastening because any misalignment tends to telegraph through the whole run.
Here's the practical dividing line:
- DIY may be realistic for very limited trim replacement on a low, accessible roof edge with no structural damage.
- Professional installation is the right move when the work includes deck repair, ventilation correction, membrane sequencing, multi-story access, or any roof covering removal.
Eave Installation for South Florida Climate and Codes
South Florida changes the stakes. The same eave detail that survives in a mild climate can fail here because the roof edge doesn't just shed water. It also has to resist pressure changes, wind-driven rain, and long periods of trapped humidity.
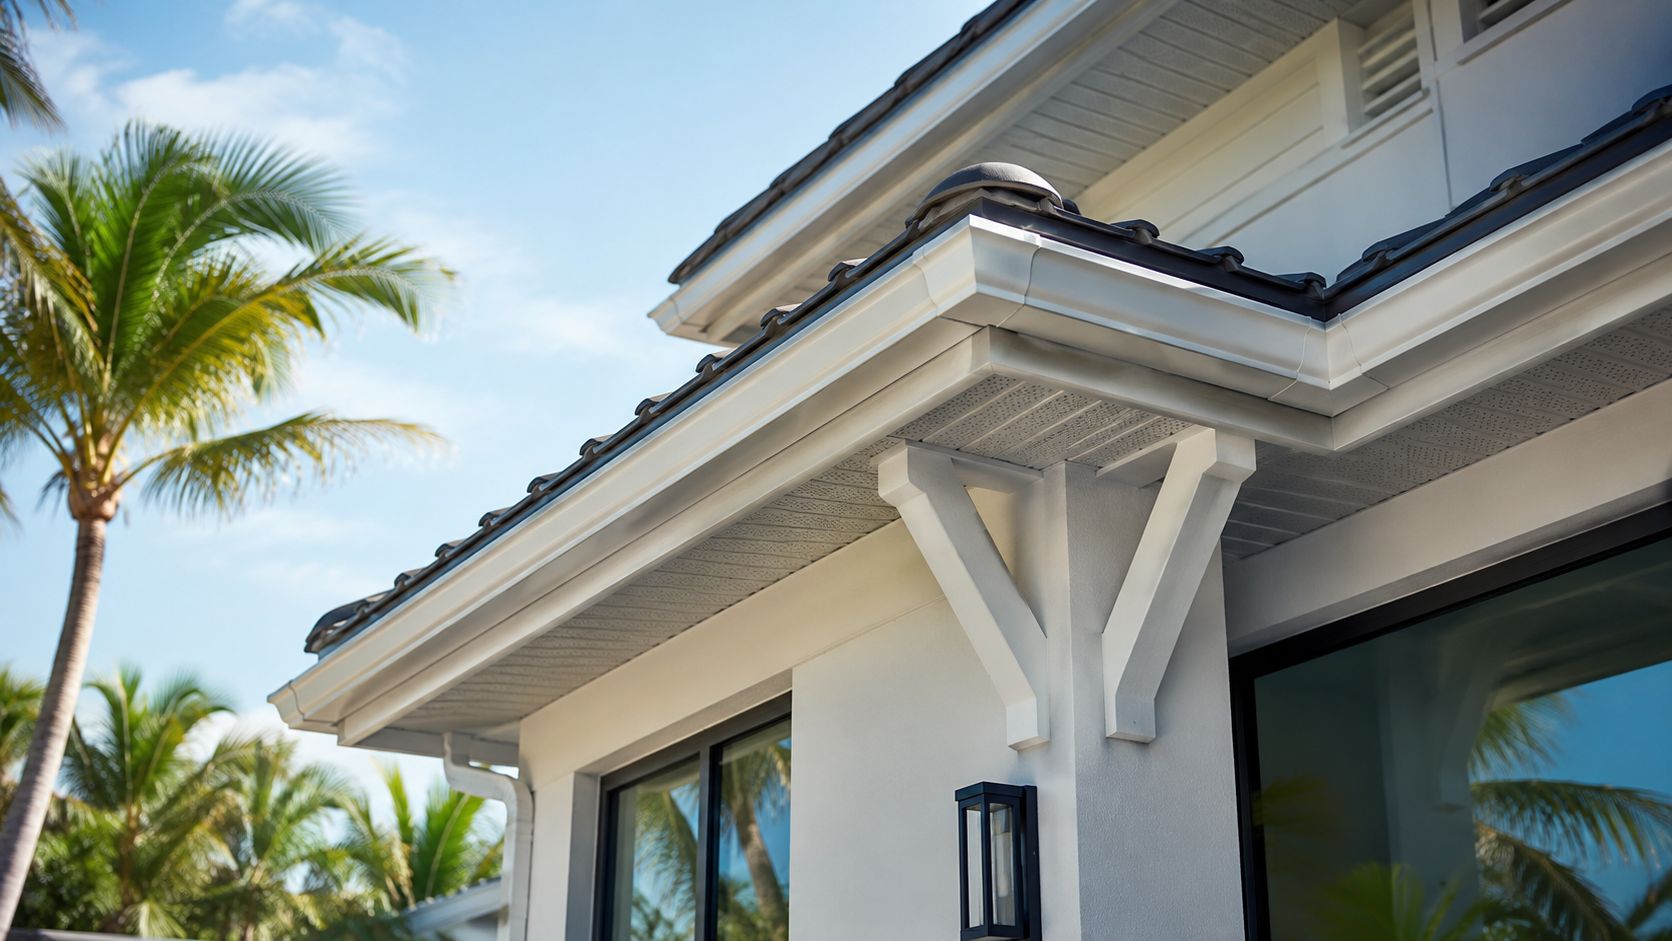
Why this region changes the install details
In hurricane-prone regions like Broward and Miami-Dade counties, eaves design directly controls wind load on a structure. A lack of eaves can trap heat and force wind-driven rain through walls, increasing cavity moisture and the risk of hidden rot (regional wind and moisture discussion on YouTube).
That's the part most consumer guides miss. The eave isn't only protecting the wall below it. Its geometry changes how air and rain behave at the edge of the building envelope.
Homes here also spend long stretches dealing with high humidity. Once moisture gets into the edge assembly, it doesn't dry out as easily as people think. That's why clean airflow, correct overhang, and disciplined flashing details matter so much more here than in a dry climate.
South Florida punishes half-correct roof edge work. The house might look fine after the install, then show staining, swelling, or hidden rot after a season of storms.
Code thinking that smart homeowners should understand
Local enforcement can vary by municipality, but the logic behind code review is consistent. Inspectors and serious roofers both care about water management, secure attachment, and attic performance. If your contractor can't explain how the intake and exhaust ventilation work together, that's a warning sign.
For homeowners trying to make sense of how residential and broader building standards differ, a plain-language comparison of IRC vs IBC helps frame why code language can feel inconsistent from one property type to another. That doesn't replace local permitting review, but it helps you ask better questions.
A solid South Florida eave installation usually reflects these priorities:
- Wind awareness: Edge details need to stay attached when storms load the roof perimeter.
- Moisture control: Water has to leave the roof edge cleanly, not wander behind trim.
- Ventilation integrity: Intake pathways can't be decorative only. They must function.
- Material durability: Corrosion resistance matters near the coast and in humid air.
What homeowners should verify before sign-off
Ask to see the edge before it's fully closed up. You want confirmation that damaged wood was replaced, not covered. You want to know where intake air enters. You want to know how water is being pushed into the gutter instead of behind it.
If the answer is vague, the installation probably is too.
Avoiding Common Mistakes in Roof Eaves Installation
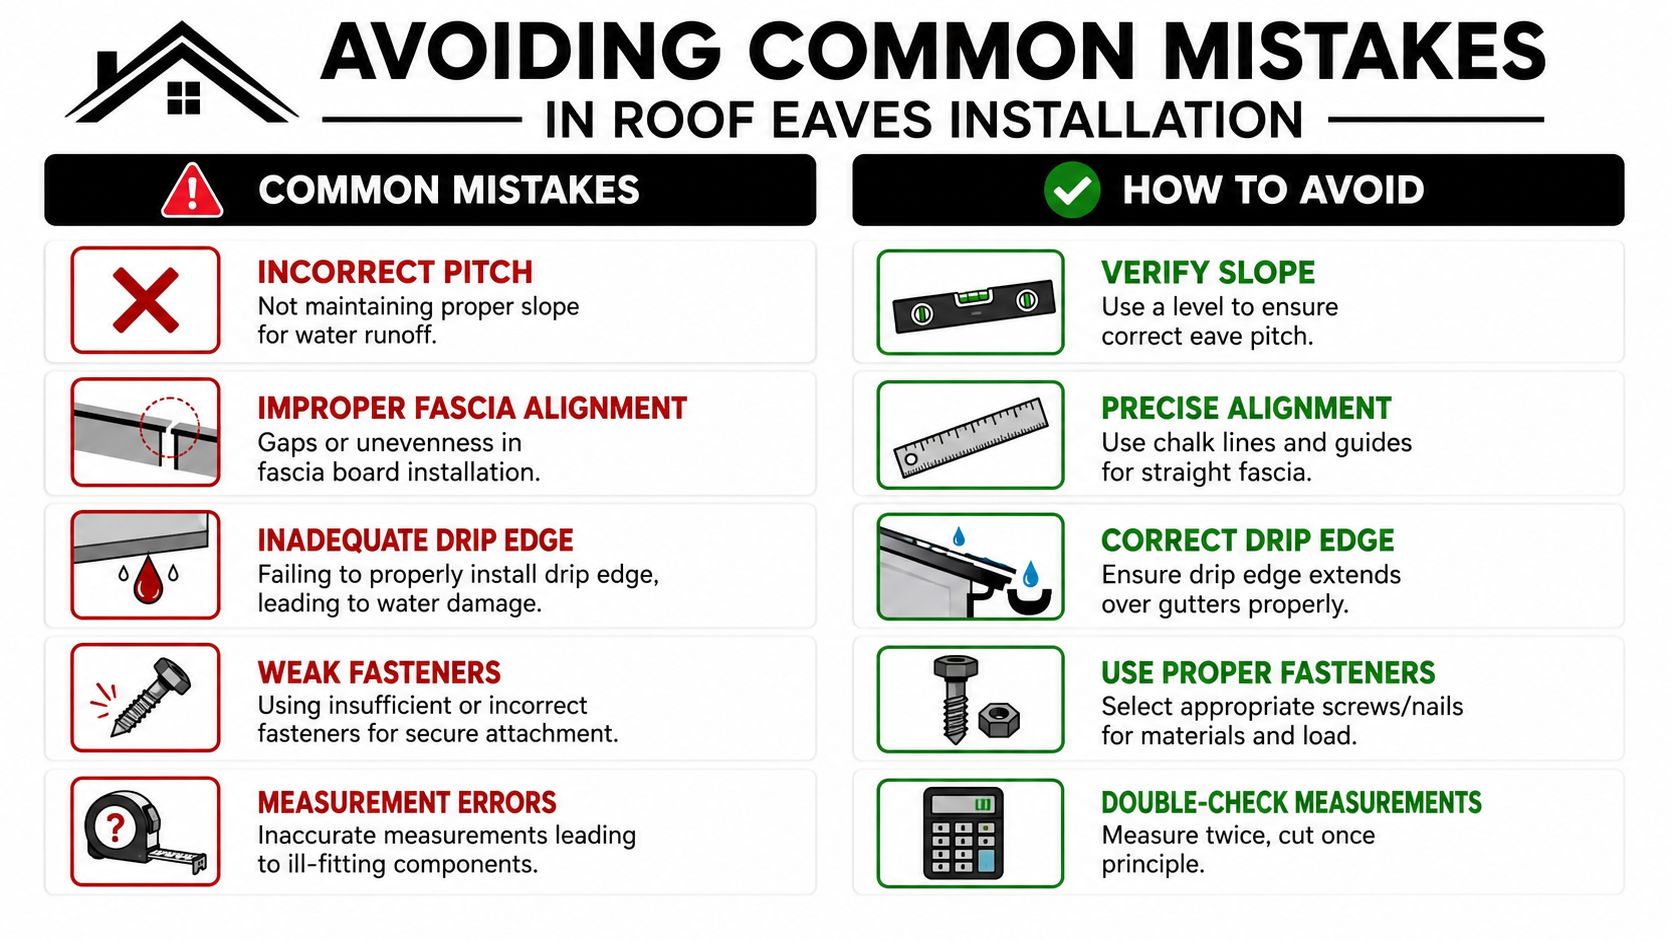
Most bad eave jobs don't fail because the installer forgot the whole system. They fail because one “small” detail was treated like it didn't matter. At the roof edge, small details are the system.
Mistakes that look minor but cause major damage
The biggest one is the drip edge to gutter relationship. A common but critical mistake is pinning the drip edge behind the gutter, which can cause water backflow into the attic. Best practice is for the drip edge to overhang into the gutter so runoff moves where it should and structural rot is less likely (discussion of this edge detail).
Other failures show up all the time in the field:
- Uneven fascia runs: If the fascia waves, the gutter usually follows it, and water won't flow cleanly.
- Blocked soffit intake: Vent holes don't help if insulation or framing closure stops airflow above them.
- Weak fastening choices: Interior-grade screws or mixed metals don't last at an exposed roof edge.
- Bad measurements: Short soffit cuts and open joints invite insects, moisture, and movement.
- Improper pitch assumptions: Water always tells you when the edge wasn't planned right.
How to spot a bad install early
You don't have to wait for a ceiling stain. Early warning signs usually show at the outside edge first.
| Warning sign | What it often means |
|---|---|
| Water marks behind the gutter | Drip edge alignment is wrong or runoff is overshooting |
| Peeling paint on fascia | Moisture is staying trapped at the edge |
| Soft soffit corners | Water is entering from above or backing up |
| Visible gaps at joints | Expansion, poor fastening, or sloppy cuts |
| Gutter pulling away | Fascia backing may be weak or rotten |
Check the roof edge during rain if you can do it safely from the ground. You'll learn more in five minutes of runoff than in an hour of looking at dry trim.
Another common mistake is over-focusing on appearance. Clean metal wrap and fresh paint can hide bad substrate work. If the installer covered rotted wood instead of replacing it, the problem is still there. It's just dressed up.
Estimating Costs and Knowing When to Hire Paletz Roofing
A roof-edge repair can stay in the hundreds or climb into the thousands fast. According to Angi's roof eaves cost guide, repairs often run $350 to $1,800, while full replacement is commonly $1,500 to $5,000. That same guide also notes that eaves often last 15 to 30 years, with paint and sealant maintenance needed every few years. In South Florida, salt air, wind-driven rain, and long wet seasons can shorten that timeline if the edge assembly was built poorly or left unchecked.
What drives the bill is usually not the soffit panel you can see from the yard. It is the hidden work behind it. Once a crew opens the edge, they may find rotten fascia, damaged rafter tails, loose gutter backing, failed drip edge, or water that has already reached the wall line. On tile roofs, the repair often takes longer because the edge has to be opened carefully and put back in sequence. On shingle roofs, the issue is often underlayment tie-in and making sure the new metal edge sheds water where it should.
Small repairs make sense when the damage is isolated and the substrate is still sound.
Full replacement makes more sense when the eave has repeated leaks, visible sagging, widespread rot, or old materials that were patched over instead of rebuilt. I tell homeowners to be careful with low bids on roof-edge work. If the price looks far below everyone else, someone may be skipping wood replacement, using the wrong fasteners, or wrapping damaged framing to make it look finished for a season or two.
DIY usually stops at paint, minor cleaning, or replacing a small non-structural trim piece at safe working height. It should stop immediately if you find any of these conditions:
- Soft or split framing: rafter tails, deck edges, or fascia backing that no longer hold fasteners well
- Second-story or steep access: ladder work at the roof edge gets dangerous quickly in heat, wind, and wet conditions
- Roof covering tie-in: tile, shingles, metal panels, underlayment, and drip edge all have to be layered correctly to keep water out
- Ventilation corrections: soffit intake changes can affect attic moisture and roof performance
- Permit or code questions: South Florida jurisdictions can require more than a simple patch if wind resistance or structural repair is involved
If you want a quick way to confirm you are dealing with a real local contractor, start with the branding used by Paletz Roofing and Inspections, then schedule an inspection before authorizing cosmetic cover-up work.

If your eaves are rotting, your gutters are pulling away, or runoff is getting behind the fascia, bring in a roofer who handles roof-edge repairs under South Florida conditions. Paletz Roofing and Inspections serves Broward, Miami-Dade, and Palm Beach, and knows how to inspect the full edge assembly, identify hidden structural damage, and rebuild it to meet local wind and moisture demands.