A flat roof inspection can uncover a serious problem before anyone sees a ceiling stain. Published industry guidance says one-third of new roofs are reported to leak before the end of the first year, and nearly 90% show problems within five years, with poor installation, design defects, failed materials, and missing maintenance among the cited causes. Commercial roof inspection guidance also explains why a useful review must go beyond an obvious leak.
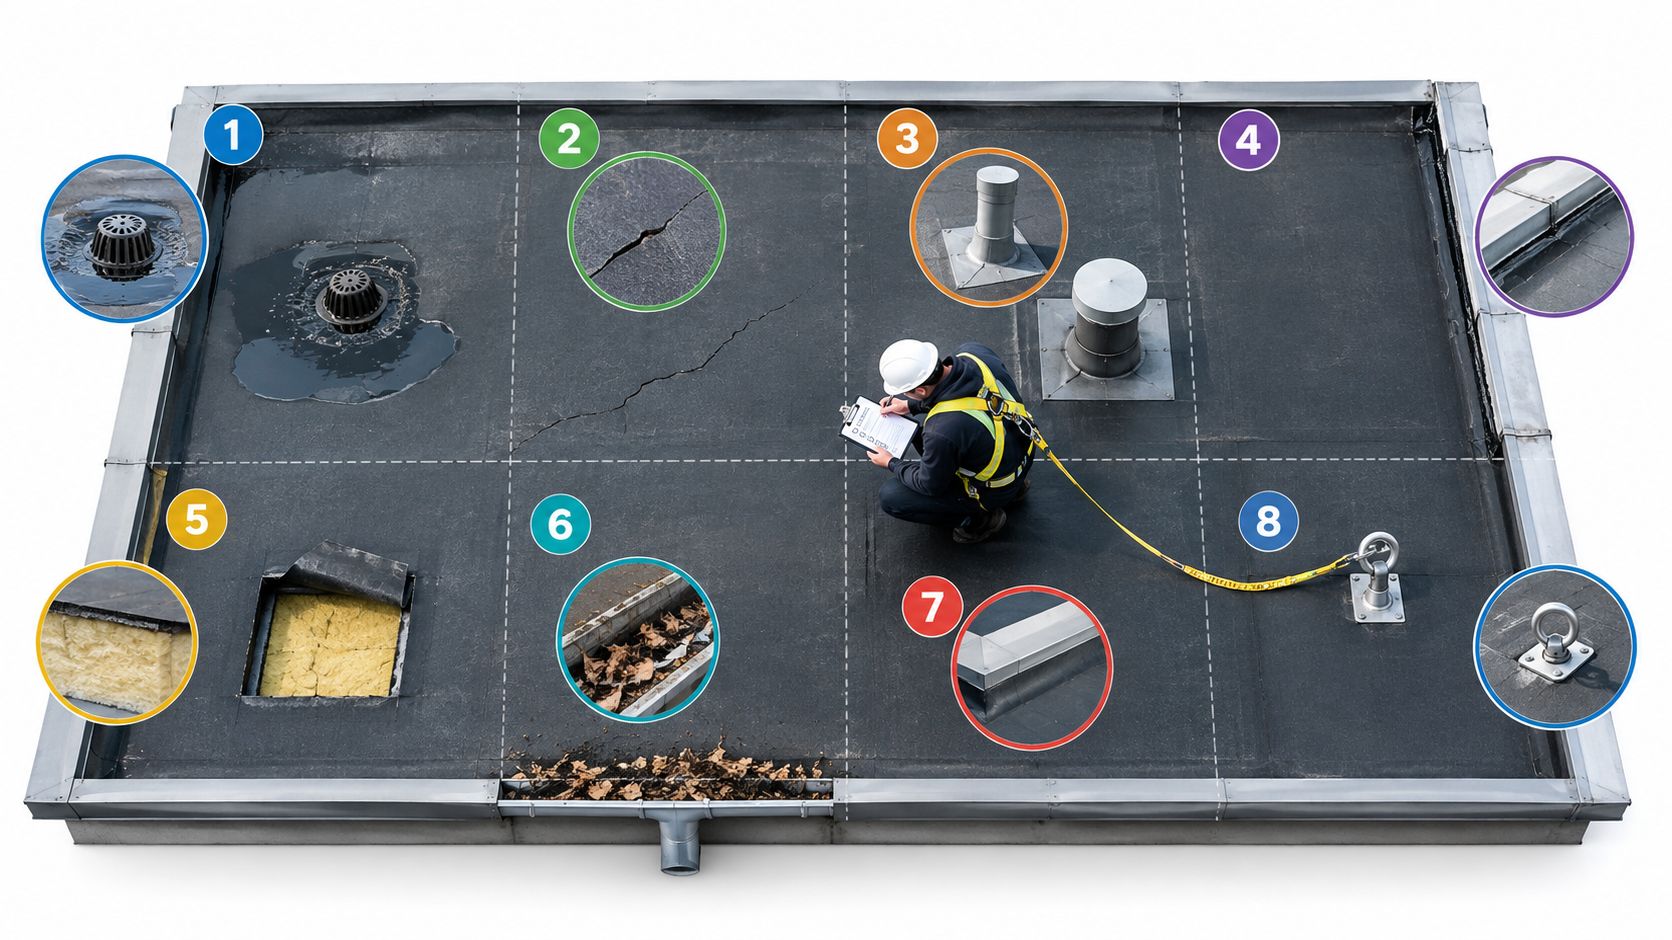
A reliable flat roof inspection checklist follows the roof as a system. It checks the waterproofing membrane, seams, penetrations, perimeter details, drainage, fasteners, underlying layers, debris, maintenance records, and safety conditions. The same sequence works for residential buildings, commercial properties, warehouses, multifamily buildings, and facilities with rooftop equipment.
Review the roof in this order: membrane condition, flashing and penetrations, seams and joints, drainage and ponding, fasteners, substrate and insulation, edges and parapets, then debris and maintenance condition. Record what you find, photograph each defect, note its location, and connect it to a practical next step.
Safety first: Nobody should walk a roof when access, weather, height, roof condition, or nearby equipment makes the inspection unsafe. Use a qualified inspector when you can't evaluate the surface confidently without exposing yourself or others to risk.
South Florida roofs face intense sun, humidity, heavy rainfall, salt exposure, and storm debris. Those conditions make disciplined inspection and clear records especially valuable.
Table of Contents
- 1. Membrane Condition and Integrity Assessment
- 2. Flashing and Penetration Sealing
- 3. Seams and Joints Evaluation
- 4. Drainage System and Ponding Assessment
- 5. Fastener Condition and Corrosion Analysis
- 6. Substrate and Insulation Deterioration Assessment
- 7. Edge Treatments and Parapet Condition
- 8. Roof Surface Debris and Maintenance Condition
- 8-Point Flat Roof Inspection Comparison
- Turn Inspection Findings Into the Right Next Step
1. Membrane Condition and Integrity Assessment
The membrane is the roof's primary waterproofing layer. Whether the system uses EPDM, TPO, PVC, or modified bitumen, start by examining the field surface for punctures, tears, splits, blisters, open areas, exposed reinforcement, brittle material, and repairs that are lifting at the edges.
Walk the accessible field in a consistent pattern, but don't treat every visible mark as a leak. A scuff from maintenance traffic is different from a puncture through the membrane. A blister may indicate trapped air or moisture, while a split can expose the assembly to repeated water entry. In South Florida, ultraviolet exposure, heat, humidity, and thermal movement can make aging more apparent at seams, patches, and highly exposed sections.
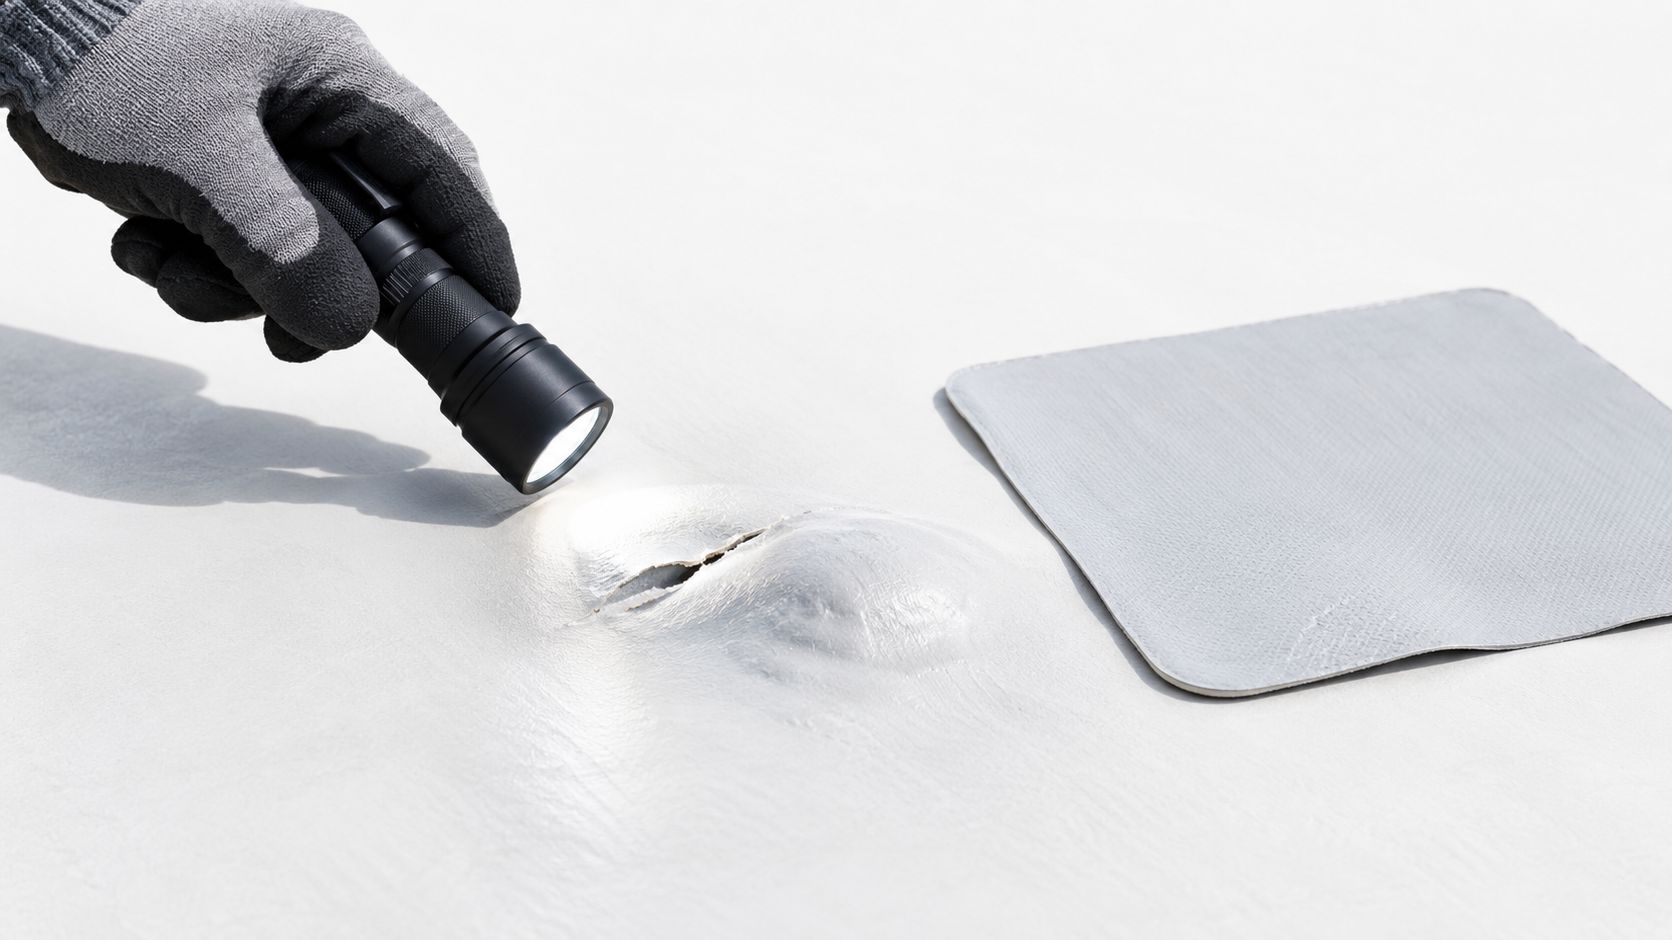
Document damage before anyone patches it
Photograph each defect from a distance to show its roof location, then take a close image that shows the actual condition. Add the roof section, nearby equipment, approximate dimensions, and whether the defect is dry, damp, recently repaired, or actively leaking.
Schedule routine reviews twice a year, typically in spring and fall, and arrange another review after severe storms. That spring and fall benchmark is widely used because it catches damage before and after the harshest seasonal conditions. Flat-roof maintenance guidance also supports broad documentation of surface defects, drainage, penetrations, metalwork, and water-intrusion risks.
Use the record to separate:
- Minor damage: A small puncture or localized defect that can receive a documented repair.
- Recurring damage: A patch or section that repeatedly opens, which may point to movement, installation problems, or a wider membrane issue.
- Systemic deterioration: Widespread aging, repeated failures, or compromised areas that deserve a repair-versus-replacement assessment.
A minor defect shouldn't be ignored because the interior is still dry. Water can move laterally between roof layers before it appears indoors.
2. Flashing and Penetration Sealing
Flat roofs often leak at transitions, not in the middle of an otherwise intact field. Inspect every place the membrane meets an HVAC curb, pipe, vent, skylight, wall, curb, or other penetration. Look for cracked sealant, loose or missing flashing, rust, open overlaps, deteriorated boots, membrane pull-away, and fasteners that no longer hold the detail firmly.
Create a penetration map while you work. Mark each unit or penetration by location, photograph the detail, and give it a condition rating. This turns a roof visit into a repeatable maintenance record instead of a collection of unconnected images.
Check the detail, not just the sealant
A fresh bead of sealant can hide a poor detail for a short time. Check whether the flashing is properly integrated with the membrane, whether overlaps remain closed, and whether water can stand against the penetration. A failed rubber boot around a plumbing vent needs a different response from corrosion around an air-conditioning curb.
South Florida's humidity and coastal exposure can accelerate metal corrosion, while sun and temperature changes can reduce sealant flexibility. In coastal areas, replacement specifications may call for corrosion-resistant materials such as stainless steel, but the right material still depends on the existing system and the repair design.
Field rule: A sealant line is not proof of a watertight penetration. Photograph the whole assembly, including the membrane transition, fasteners, boot or curb, and the surrounding drainage path.
For an older residential roof, rust around a chimney or vent can stain the surrounding material without revealing the full path of entry. On a commercial roof, HVAC maintenance may damage flashing or leave tools and sharp materials behind. Record recent rooftop work because a new leak after mechanical service may require a different investigation than a long-standing membrane failure.
Inspect flashing after severe weather and during the spring maintenance window. Replace deteriorated sealant only after confirming that the underlying detail is sound. Otherwise, the new sealant may conceal a defect rather than correct it.
3. Seams and Joints Evaluation
Seam failure often starts as a small discontinuity, then gives water a path beneath the membrane. Identify the roof system first. Joints may be heat-welded, adhesive-bonded, or mechanically attached, and each requires a different inspection approach. Trace the full visible seam route, checking for lifting, separation, wrinkling, cracked sealant, incomplete overlap, contamination, and signs of earlier water entry.
Follow the perimeter before moving through field seams and around equipment. Compare findings across the roof. One isolated defect may call for a targeted repair, while repeated separation points to an installation, movement, or material problem. A separating TPO heat weld differs from an EPDM seam with poor adhesive coverage or inadequate overlap, so avoid approving the same patch method for both.
A useful record connects the defect to its setting. Take one close photograph of the seam and another showing its position beside a drain, parapet, curb, or access route. Note whether the joint is open, aged, contaminated, previously repaired, or visibly stressed by movement. Add the location to the maintenance record and flag any leak history that may change the urgency.
Short decision points help turn observations into action:
- Lifting edge: Photograph its full length and check whether water can travel beneath the membrane.
- Cracked sealant: Establish whether it is a maintenance layer or evidence of a larger seam defect.
- Repeated reopening: Compare current and previous photographs before authorizing another patch.
- Corrosion near a joint: Inspect nearby membrane and attachment points, not only the rust.
Use binoculars or a drone for high or unsafe areas. Treat that evidence as a screening record, not a substitute for close inspection where contact is required. South Florida sun, humidity, coastal air, and storm exposure can increase movement, contamination, and corrosion around vulnerable joints.
The flat-roof maintenance guidance supports repeat inspections, defect-priority records, and attention to membrane condition and drainage. Classify each seam as none, minor, major, or complete failure, then assign the repair action and timeframe.
4. Drainage System and Ponding Assessment
Water movement deserves its own checkpoint because a roof can have an apparently sound membrane and still fail through poor drainage. Inspect internal drains, scuppers, gutters, downspouts, drain bowls, strainers, overflow provisions, and the low points that direct water toward them.
Remove leaves, dirt, vegetation, and loose debris only when it can be done safely and without damaging the membrane. Check whether drains are flush with the roof surface and free of obstruction. Confirm that downspouts discharge away from the foundation and that scuppers aren't blocked by accumulated material or damaged edge details.
Apply the 48-hour ponding rule carefully
Standing water that remains 48 hours or more after rainfall is widely treated as ponding, a condition associated with drainage or slope problems. Ponding guidance uses this benchmark to distinguish ordinary drainage delay from a condition that may require maintenance, repair, or warranty review.
Don't label a puddle from a recent shower without documenting its duration. Record when rainfall ended, photograph the area, measure water depth where practical, and recheck after 24 and 48 hours. Mark the wet edge or sediment ring so you can compare the size and recurrence of the area during later visits. Flat-roof maintenance advice describes this type of repeat observation as a way to make ponding records more useful for owners, managers, and claims files.
Drainage decision: A one-time shallow puddle after heavy rain may call for monitoring. Repeated water at the same low point, a blocked outlet, visible deflection, or water remaining beyond the 48-hour benchmark warrants a more detailed assessment.
South Florida's heavy rainfall makes blocked drains and undersized discharge paths especially disruptive. Don't solve recurring ponding by adding sealant to the membrane. First identify whether the cause is debris, a blocked or failed drain, inadequate slope, deflection, or a drainage design limitation.
5. Fastener Condition and Corrosion Analysis
Fasteners can reveal how the roof is handling movement, moisture, and South Florida exposure. Check screws, bolts, nails, plates, clips, washers, and other exposed attachment points for rust, corrosion, backing out, missing components, enlarged holes, membrane damage, and movement around the attachment.
Start with the pattern, then assess individual defects. A rusted screw through a TPO membrane can form a leak path. A loose screw in a metal attachment system may indicate wind movement or reduced holding power. Missing fasteners along a high-wind edge require prompt attention because they can affect waterproofing and attachment performance.
Coastal salt spray and humidity can accelerate corrosion, especially around exposed metal and rooftop equipment. Replacement may involve stainless steel or galvanized fasteners, but the new material must suit the existing metals, washers, and membrane. Incompatible metals can create galvanic corrosion and turn a small repair into a broader maintenance problem.
Trace fastener defects across the roof
Photograph each significant defect close enough to show its condition. Take a second image from farther back so the location is clear to another technician. Record whether the issue is isolated or repeated along a seam, perimeter, curb, edge, or equipment support. Compare the findings with previous reports and maintenance records, particularly after storms or rooftop service work.
Use a simple field record:
- Location: Grid reference, roof section, or nearby equipment.
- Condition: Tight, loose, corroded, missing, or damaged.
- Exposure: Coastal, sheltered, wet, or subject to maintenance traffic.
- Action: Monitor, replace, investigate, or escalate for attachment testing.
File the Florida wind-mitigation inspection reference with the property records, but do not treat it as a substitute for inspecting the actual fasteners.

After severe weather, reinspect affected areas. Widespread corrosion calls for more than tightening screws. Determine whether the roof needs replacement fasteners, corrosion treatment, attachment testing, or a broader roof-system evaluation.
6. Substrate and Insulation Deterioration Assessment
A flat roof can look acceptable while the layers beneath it are wet, compressed, or structurally compromised. Inspect the substrate, which may be concrete, wood decking, or metal, along with the insulation that supports thermal performance and membrane stability.
Look for soft spots, deflection, cracked or deteriorated decking, staining, efflorescence, uneven areas, and signs that water has migrated below the membrane. Interior access can be valuable. Check ceilings, attic spaces, suspended ceiling areas, and exposed deck sections for staining, dampness, odors, or damaged materials.
Use moisture detection instead of guesswork
ASTM C1153 is a recognized standard practice for locating wet insulation in roofing systems with infrared imaging. The ASTM standard reference supports the use of thermal scanning to locate hidden saturation instead of relying only on visible leaks.
Infrared imaging isn't a magic answer. A competent inspector must interpret temperature patterns, confirm suspicious areas with moisture readings or other testing, and account for weather and roof construction. Core samples may be appropriate where the assembly needs direct confirmation, but they create openings that must be properly repaired.
A soft area near a drain may reflect saturated insulation, deck deflection, or both. Concrete efflorescence can indicate moisture movement. Wood deterioration may remain hidden until a membrane repair exposes the deck. These findings should be linked to the roof plan and interior evidence, not filed as a vague “wet spot.”
Use this commercial flat-roof replacement reference in a property record when discussing the relationship between concealed assembly condition and replacement planning.
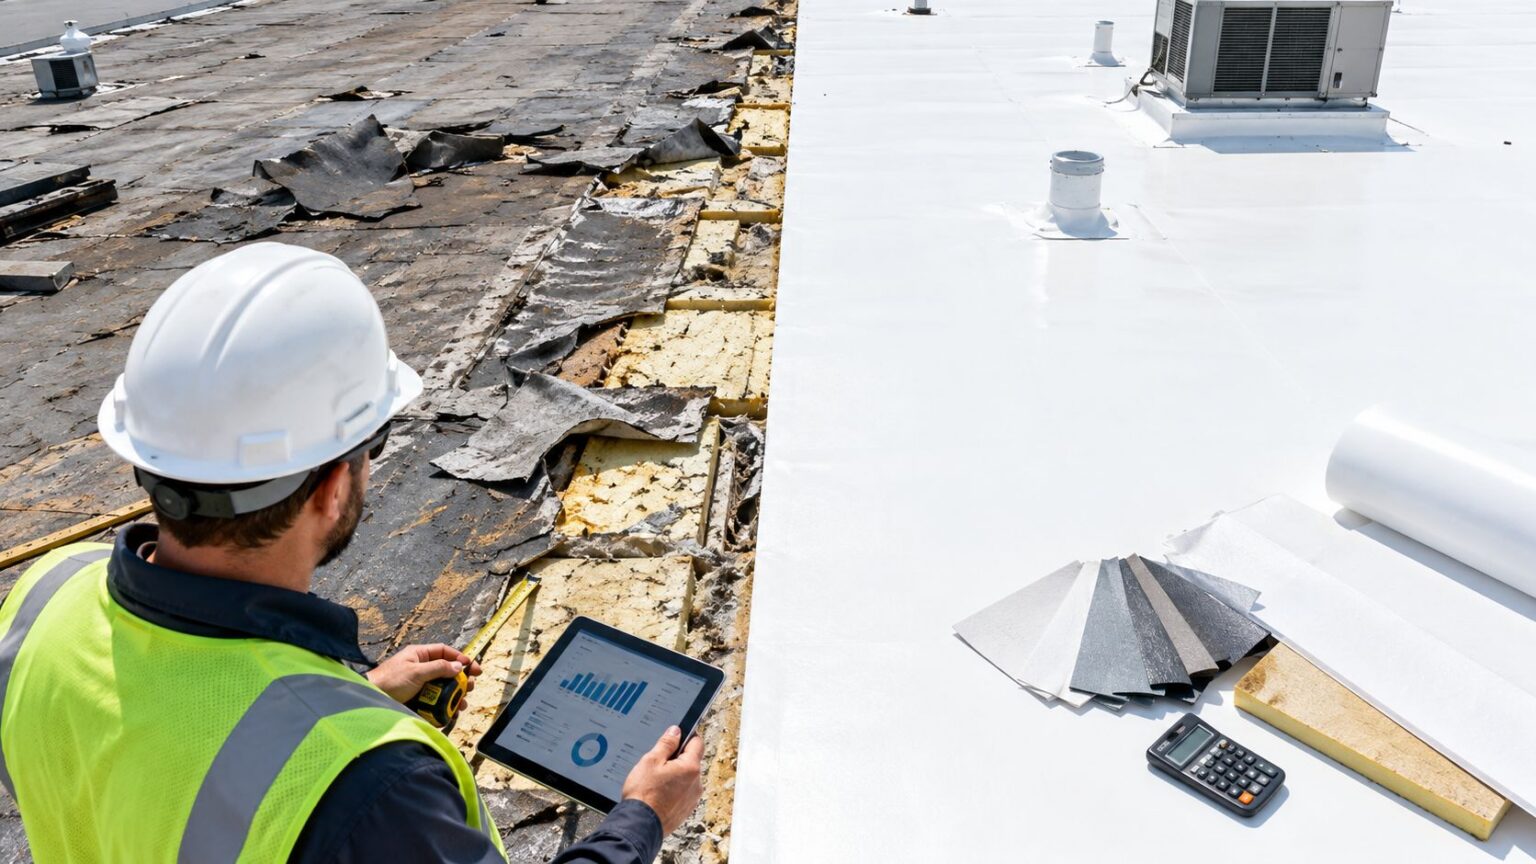
Escalate hidden moisture, suspected structural movement, mold, widespread compression, or deteriorated decking. Patching the membrane without addressing saturated insulation or damaged substrate can leave the underlying failure in place.
7. Edge Treatments and Parapet Condition
The roof perimeter takes concentrated exposure from wind, water, and maintenance activity. Inspect parapet walls, coping, edge metal, termination bars, fascia, membrane turns, and the junction between the roof and exterior wall.
Look for cracked masonry, open joints, loose coping, corroded metal, separated trim, failed sealant, membrane pull-away, and water staining below the parapet. Check the parapet top to confirm that it sheds water rather than directing it into the wall or roof transition. If possible, inspect from both the roof side and the building exterior.
Trace edge defects into the building
A cracked parapet may show up inside as staining at the upper wall rather than as a roof-field leak. Failed sealant at the membrane junction can allow water into the wall assembly. Improper termination may produce a leak that returns after every temporary patch.
Photograph each edge defect with a wide view, a close detail, and a corresponding interior image when accessible. Note the direction of water flow, nearby drains or scuppers, and whether corrosion is isolated or continuous. Commercial roof maintenance guidance identifies parapets, coping, flashings, termination bars, penetrations, drains, scuppers, and edge metals as important inspection points.
In coastal South Florida, salt and moisture can accelerate edge-metal deterioration. Stainless steel may be appropriate for some replacement details, but the repair must match the roof assembly and account for movement. Don't cover corroded metal with a cosmetic coating and call the edge repaired.
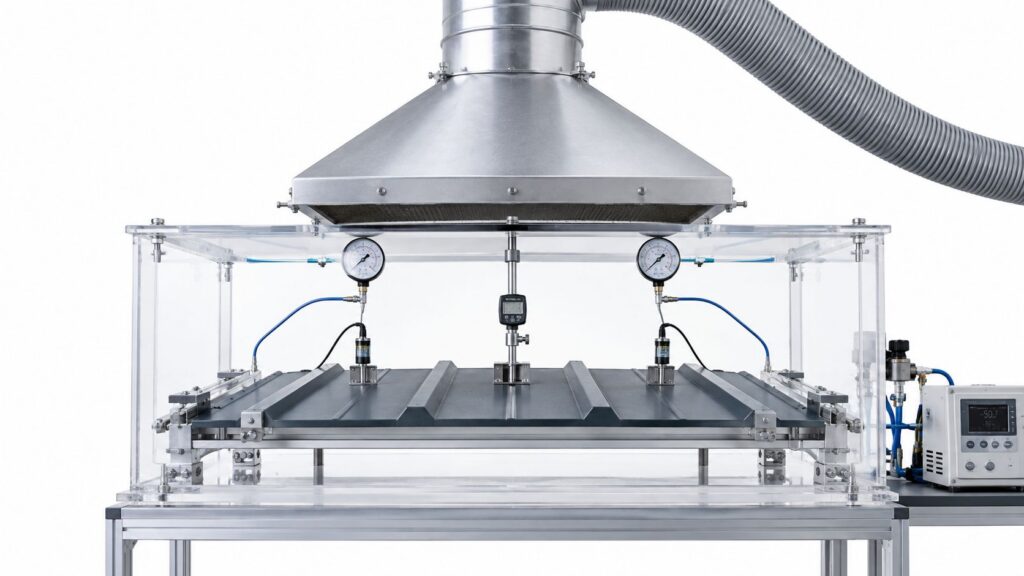
Review edge conditions after storms, especially where wind-driven rain or debris could have disturbed coping, trim, or membrane termination. If the edge is loose, visibly displaced, or associated with structural cracking, use this roof uplift testing reference when determining whether the issue needs specialized evaluation.
8. Roof Surface Debris and Maintenance Condition
Debris can hide damage and turn a minor drainage issue into a leak. Leaves, dirt, algae, moss, gravel, branches, discarded materials, and equipment waste may trap moisture, block drains, abrade the membrane, encourage biological growth, or restrict safe access.
Begin at roof access points and walkways. Move through low areas, drains, scuppers, equipment zones, and edges, recording conditions as you go. Check for vegetation at joints and perimeter details, shifted aggregate, materials placed directly on the membrane, and blocked paths. Photograph each accumulation before removal, then take a second image after cleaning so the maintenance record shows what was concealed.
Separate cleaning from damage repair
Use soft-bristle tools that will not cut or abrade the membrane. High-pressure washing can damage seams and drive water into vulnerable details. Treat algae only with products approved for the specific roof material, following the manufacturer's requirements.
Record four points in the work order:
- What accumulated: Leaves, sediment, vegetation, algae, gravel, or construction debris.
- Where it accumulated: Drain, scupper, low point, equipment area, edge, or roof field.
- What it affected: Drainage, membrane visibility, access, flashing, or seams.
- What happens next: Remove, clean, photograph again, repair, or monitor.
South Florida's warm, humid conditions support biological growth, while storms can leave branches and loose materials across the roof. Schedule cleaning before the most demanding weather period and after major debris-producing events. Guidance on keeping a roof in shape helps connect routine upkeep with longer-term roof care.
Cleaning changes visibility, not the roof's condition. Reinspect the membrane, drains, seams, and edges that debris concealed, then match any repair recommendation to the photographs, maintenance history, and urgency of the finding.
8-Point Flat Roof Inspection Comparison
| Inspection Checkpoint | Implementation 🔄 | Resources ⚡ | Effectiveness ⭐ | Outcomes 📊 | Ideal use cases & tips 💡 |
|---|---|---|---|---|---|
| Membrane Condition and Integrity Assessment | Medium 🔄🔄, visual + tactile; trained inspector | Moderate ⚡⚡, flashlight, probes, camera | ⭐⭐⭐⭐, early leak prevention | Reduced major leaks; extended membrane life | Routine twice-yearly; post-storm photos and track repairs |
| Flashing and Penetration Sealing | Medium 🔄🔄, focused around penetrations; some hidden areas | Moderate ⚡⚡, sealant tools, ladder; possible metal replacement | ⭐⭐⭐⭐, addresses common leak sources | Prevents infiltration at penetrations; low-cost targeted repairs | Inspect after HVAC work; consider stainless flashing in coastal zones |
| Seams and Joints Evaluation | Medium-High 🔄🔄🔄, close inspection, thermal/visual checks | Moderate ⚡⚡, binoculars/drone, seam testing tools | ⭐⭐⭐⭐, critical to stop inter-layer water | Prevents hidden inter-layer damage; extends system life | Inspect after thermal cycles; document seam condition with close photos |
| Drainage System and Ponding Assessment | Medium 🔄🔄, flow tests, slope checks; may need observation during rain | Moderate-High ⚡⚡⚡, drain clearing tools, measuring devices, possible re-slope work | ⭐⭐⭐⭐, essential to avoid structural/weight damage | Eliminates ponding, protects structure and membrane | Clear drains quarterly; test drains before hurricane season; mark ponding areas |
| Fastener Condition and Corrosion Analysis | Low-Medium 🔄🔄, visual/tightness checks | Low-Moderate ⚡⚡, basic hand tools, corrosion inhibitors | ⭐⭐⭐, prevents membrane shift and fastener failure | Avoids loosening-related leaks; informs fastener upgrades | Use stainless/galvanized fasteners in replacements; inspect after storms |
| Substrate and Insulation Deterioration Assessment | High 🔄🔄🔄, may require cores, interior access | High ⚡⚡⚡, IR thermography, core sampling, lab tests | ⭐⭐⭐⭐, detects hidden moisture and structural risk | Prevents mold, structural failure; informs repair vs replacement | Use infrared and core samples for suspect areas; act promptly on moisture findings |
| Edge Treatments and Parapet Condition | Medium-High 🔄🔄🔄, work at height; structural checks | Moderate ⚡⚡, scaffolding/boom, sealants, metal replacement | ⭐⭐⭐⭐, protects perimeter and exterior walls | Prevents perimeter leaks and wall damage; maintains aesthetics | Inspect parapet-roof junctions both inside/outside; upgrade edge metal in coastal sites |
| Roof Surface Debris and Maintenance Condition | Low 🔄, cleaning and visual inspection | Low ⚡, soft-bristle tools, labor, periodic cleaning | ⭐⭐⭐, reduces deterioration and drainage blockage | Keeps drains clear; lowers biological growth and abrasion | Quarterly debris removal in Florida; avoid high-pressure washing; document cleanliness |
Turn Inspection Findings Into the Right Next Step
A checklist becomes useful when another person can understand the finding without returning to the roof. Give every issue a location, a photograph, a condition description, a likely consequence, and a recommended action. Add the inspection date, recent weather, roof access conditions, membrane type if known, installation date if available, and any related work by HVAC, plumbing, solar, electrical, or construction crews.
Use a simple priority system. Routine maintenance may include clearing debris, restoring access, cleaning a drain, or recording a sound detail for future comparison. Repair candidates include open seams, failed sealant, damaged flashing, punctures, corrosion, and localized ponding. Professional assessment is appropriate for hidden moisture, structural concerns, repeated ponding, widespread membrane deterioration, failed attachment points, unsafe access, or a defect that keeps returning after repair.
A strong report answers five questions: Where is the issue? What does the photograph show? How serious is the condition? What could happen if it remains? What action should happen next?
The 48-hour ponding benchmark should be recorded with context, not used as a substitute for judgment. Note when rain ended, when the image was taken, the depth or visible water line, whether the same area has held water before, and whether a drain, slope, or deflection problem is nearby. A recurring low point deserves more attention than a single temporary event, even when the roof appears otherwise clean.
Compare current photographs with prior records. A seam that looks unchanged may be suitable for monitoring. A small increase in corrosion, a larger stain ring, a recurring patch failure, or a new soft area changes the recommendation. For insurance or storm claims, preserve original images and notes, document loose metalwork and water-intrusion risks, and avoid disturbing evidence before it has been recorded.
A roof that can't be safely or confidently evaluated shouldn't receive a casual pass. Arrange a detailed inspection or repair assessment when the roof has unsafe access, suspected wet insulation, structural movement, repeated leaks, or complex equipment and drainage conditions. The same principle applies to buying or selling property. A written condition record is more useful than an informal opinion because it helps owners, managers, contractors, and adjusters discuss the same locations and priorities.
South Florida property owners in Broward, Miami-Dade, and Palm Beach counties can contact Paletz Roofing and Inspections for residential and commercial inspections, repairs, replacements, and damage assessments. The company works with shingle, tile, metal, and flat roofing systems, so the inspection can lead into a practical maintenance, repair, or replacement discussion when the findings justify it. For broader seasonal planning, these seasonal home care strategies for DIYers can complement, but not replace, roof-specific professional evaluation.
Paletz Roofing and Inspections provides residential and commercial flat roof inspections, repairs, replacements, and damage assessments across Broward, Miami-Dade, and Palm Beach counties. Use this checklist to organize your records, then visit Paletz Roofing and Inspections to arrange a detailed inspection when access, ponding, concealed moisture, storm damage, or recurring leaks need professional attention.