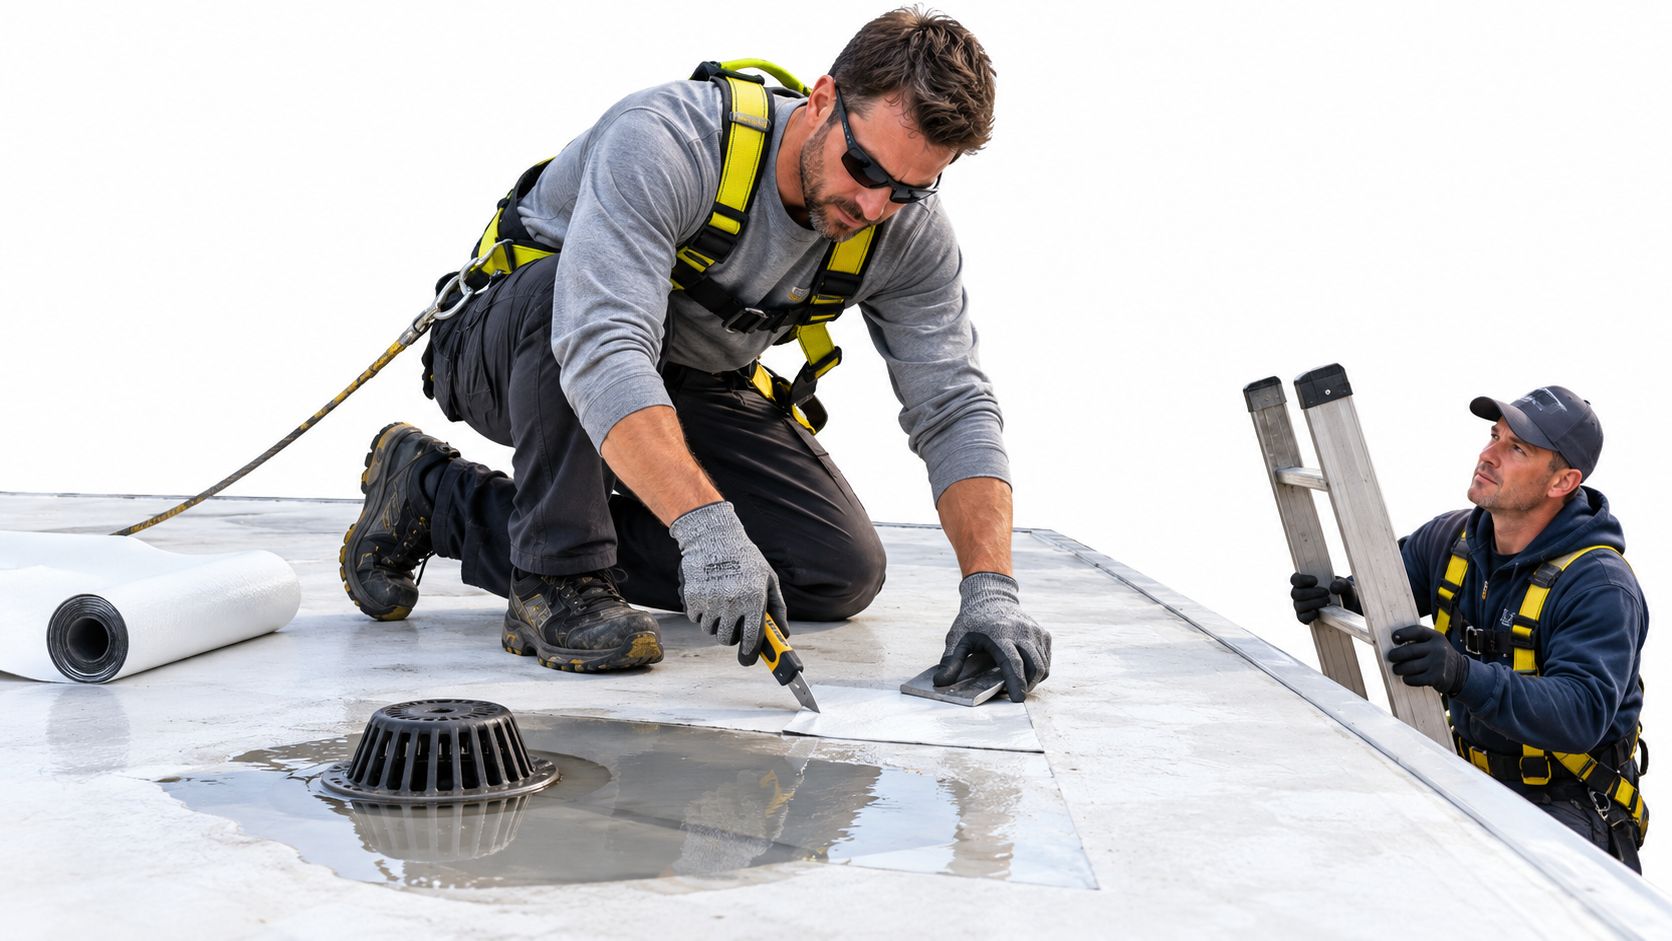
A yellow-brown ring has appeared on the ceiling after a hard South Florida storm. You've checked the attic or the room above, moved the furniture, and found no obvious hole. The natural assumption is that the roof leak is directly above the stain, but flat roofs rarely make diagnosis that simple.
A proper flat roof repair leak starts with locating the entry point, not sealing the first wet spot you see. Heat, wind-driven rain, ponding, roof equipment, and concealed moisture can move water well beyond the original breach. The immediate priority is to stabilize the interior, document the evidence, and decide whether the roof has an isolated defect or a broader assembly problem.
Table of Contents
- When the Ceiling Stain Is Not the Leak
- Safety Gear and Tools You Need Before Climbing Up
- Why Flat Roof Leaks Travel Before They Drip
- How to Inspect a Flat Roof for the Real Source
- Temporary Patches and Permanent Repairs for TPO, EPDM, and Modified Bitumen
- When a Patch Is a Waste of Money
- Calling a South Florida Roofer and What to Expect
When the Ceiling Stain Is Not the Leak
A homeowner in a single-story Dania Beach home built in the late 1990s notices a fresh ceiling ring after a heavy August rain. The stain sits near the hallway light, so the homeowner marks the roof area directly above it and applies sealant around a visible crack. The ceiling dries for a short time, then the next storm produces another stain several feet away.
That sequence is common because a low-slope roof still has layers, joints, insulation, and structural decking beneath the surface. Water can enter at a failed seam or flashing, migrate along the membrane, spread through wet insulation, travel across the decking, and finally drop through drywall where gravity finds the easiest path. The interior stain is often the last visible event in a chain that began somewhere else.
The ceiling tells you where water finished its journey, not necessarily where it entered the roof.
Three common misreads in South Florida
Ponding water is one of the first mistakes. Standing water that remains more than 48 hours after rainfall is treated as a drainage defect, according to flat-roof repair guidance on ponding and drainage. It may sit over a small membrane weakness and keep feeding moisture into the assembly long after the weather clears.
The second misread is an HVAC condensate line. A disconnected or cracked condensate pipe can release water near a ceiling stain, especially around mechanical rooms and closet units. The water may look identical to rainwater, so the roof shouldn't be blamed until the drain pan, condensate routing, insulation, and equipment connections have been checked.
The third is a window or stucco crack. Wind-driven rain can enter at a wall opening, parapet, stucco joint, or window transition and then appear inside as though it came through the roof. Inspectors should compare the stain location with exterior wall details, parapets, coping, and roof-to-wall transitions instead of treating every ceiling mark as a membrane failure.
A major survey of 3,059 roof sections covering 18 million square feet found that membrane roofing systems had an average actual service life of 16 years, about 80% of the industry-standard 20-year design life. The same research connects shortened service life with performance loss that often appears as leaks, particularly on low-slope and flat roofs where maintenance and installation quality matter greatly. The findings are summarized in National Research Council roofing research.
This guide is for the homeowner who needs to stabilize the situation and make a sound next decision, not for someone trying to replace an entire membrane from a ladder. If water is actively entering, protect the room, keep electrical equipment away from wet areas, photograph the stains, and avoid cutting into the ceiling until you know whether wiring or trapped water is present.
Safety Gear and Tools You Need Before Climbing Up
Climbing onto a flat roof is a hard safety gate, not a casual first step. A South Florida membrane can reach about 150 degrees Fahrenheit at midday, while a dark TPO patch can reach about 130 degrees, making heat exposure, burns, dehydration, and loss of footing serious concerns. If the roof is wet, the access ladder is unstable, or you can't identify a safe anchor point, stay on the ground and call a professional.
Wear soft-soled, non-slip shoes that won't cut or abrade the membrane. Add cut-resistant gloves for handling flashing, scrim, old fasteners, and damaged membrane. A Class III harness must connect to a known structural anchor, not a vent pipe, HVAC support, or improvised attachment. Take sunscreen, carry a 2-gallon water jug per person, and keep a second person on the ground to steady access, watch conditions, and call for help.
The basic kit should be organized around diagnosis and controlled repair rather than random sealants.
- For locating defects: Use a flashlight, chalk, and a phone with a full battery for close-up photos and wide shots of the roof layout.
- For surface preparation: Carry a 4-inch margin trowel, a utility knife with fresh blades, a wire brush, and the membrane-matched cleaning solvent approved for that roof system.
- For moisture checks: A moisture meter with a flat-roof probe can help identify suspicious insulation or damp areas, but readings require interpretation and shouldn't replace a full assembly assessment.
- For emergency sealing: A caulk gun and a compatible temporary product can help limit water entry when the surface is clean and dry enough to accept it.
A concise guide to health and safety for SMEs is useful for reviewing basic worksite controls before anyone goes onto the roof.
When a DIY repair is reasonable
A homeowner may be able to document a small, accessible puncture or apply a temporary cover when the membrane is dry, the roof deck feels solid, the weather is stable, and no electrical equipment is exposed. The work should remain limited to a clearly identified surface defect, not a repair around a drain, HVAC curb, parapet, or complicated flashing detail.
Stop immediately if the deck feels soft or saturated, if the roof flexes beneath your feet, if water is actively falling, or if wiring, conduit, or rooftop equipment may be energized. Don't walk across a blistered or spongy area to reach a suspected leak. Heat illness can develop before the repair is finished, and a short-term patch isn't worth a fall or electrical injury.
Why Flat Roof Leaks Travel Before They Drip
A typical South Florida low-slope assembly may include a modified bitumen or TPO membrane over polyiso insulation and structural decking. Each layer can redirect water. The membrane may hold water at the surface, the insulation can absorb or channel moisture, and the deck can carry water toward a joint, fastener, light fixture, or drywall opening.
A breach no larger than a nickel can produce a broad interior stain if water spreads through the insulation before descending. The damage path depends on the roof's slope, attachment method, seams, penetrations, moisture content, and the location of framing beneath the deck. A drip six feet from the breach isn't unusual, particularly where a joist or deck lap changes the direction of flow.
Drainage controls the size of the problem
Tapered crickets and saddles are designed to direct water toward drains and away from curbs, walls, and equipment. When a drain is clogged, water remains over the membrane and applies prolonged pressure to seams and details. A small puncture can then feed a wet insulation layer that carries water horizontally for days.
A standing-water area that remains beyond the accepted 48-hour ponding threshold needs more than a surface patch. Recommended drainage slope is about 1/4 inch per foot, and drainage corrections may involve clearing blockages, adding drains, or installing tapered insulation, as described in guidance on fixing flat-roof leaks.
South Florida weather complicates tracing. Thermal movement between midnight and the hottest part of the afternoon can open and close seams. Hurricane-driven rain can push beneath flashing and wall transitions. Biological growth, dirt, and roof traffic can conceal small membrane defects around drains, equipment, and parapets.
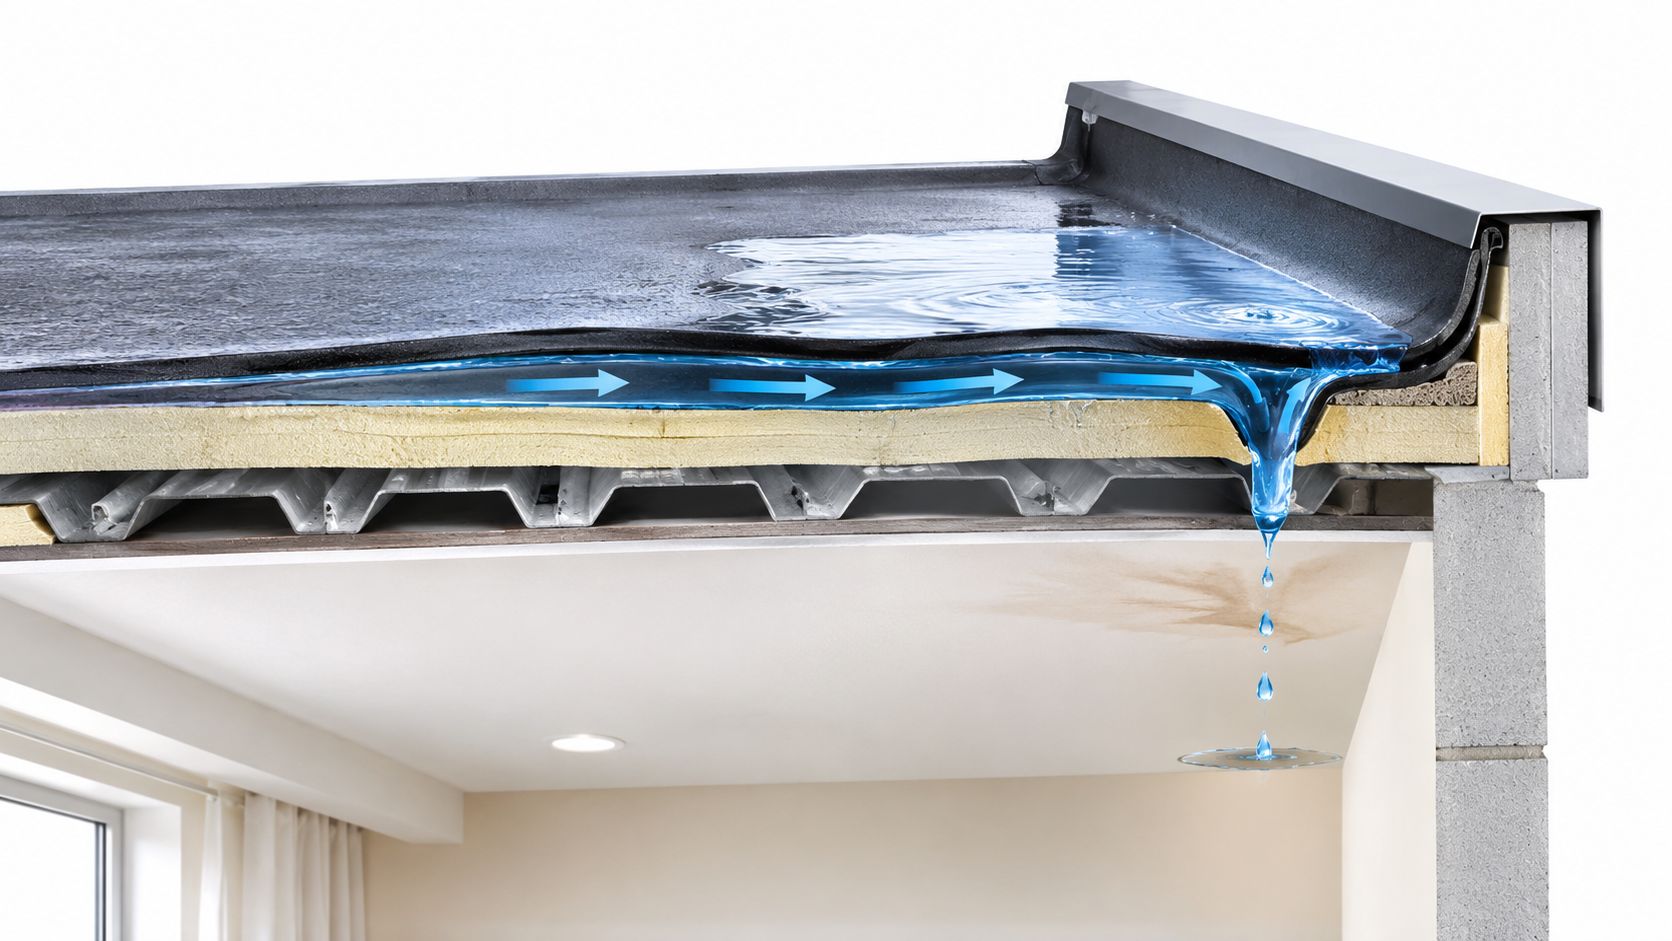
The visible drip may be the first sign you notice, but it isn't necessarily the first moment of failure. Water can remain hidden until insulation becomes saturated or a storm produces enough volume to push it through the ceiling. That is why a repair decision should reflect the condition of the membrane, insulation, flashings, and drainage, not just the location of the drywall stain.
How to Inspect a Flat Roof for the Real Source
Start indoors and work outward. Photograph every stain, bubbling paint area, sagging section, and nearby light fixture. Mark the direction of travel if water has run along a wall or ceiling joint, then compare those observations with the roof layout above.
Follow a controlled inspection sequence
Begin with the likely roof zone, not the exact ceiling point. Look above and around the stain, then expand toward drains, parapets, roof edges, HVAC units, vents, skylights, and wall transitions. Water may have traveled from any of these details.
Find ponding zones and drainage obstructions. After rain, note where water collects and whether it remains beyond the 48-hour drainage benchmark. Look for blocked strainers, debris caps, damaged drain bowls, and low areas around equipment.
Examine membrane joints closely. On TPO and EPDM, inspect seam overlaps for lifting, separation, contamination, or incomplete bonding. On modified bitumen, check lap edges, blisters, fishmouths, exposed reinforcement, cracks, and patches that have begun to curl.
Inspect every penetration and termination. HVAC curbs, vents, pipes, wall flashings, parapets, coping, and fasteners deserve deliberate attention. Rust rings around fasteners, exposed scrim, brittle sealant, and separated flashing can identify a failure that isn't visible from inside.
Confirm the suspected entry point carefully. A controlled garden-hose test can help, but flood testing the roof or spraying randomly can create misleading results. Use one small area at a time, allow the interior time to respond, and stop if water begins entering rapidly.
The practical workflow is a full survey of seams, laps, upstands, parapets, outlets, and penetrations, followed by mapping of ponding areas and wet boundaries with visible tide marks or moisture testing. Guidance on this process notes that about 80% of leaks occur at details rather than in the field, as explained in the flat-roof leak inspection reference image.


This sequence is triage, not a guarantee. Infrared scanning, electronic leak detection, moisture meters, and controlled water testing can reveal concealed moisture or microscopic breaches that a visual inspection misses. Don't commit to a permanent patch until the surrounding membrane is dry, stable, and free from loose material.
Temporary Patches and Permanent Repairs for TPO, EPDM, and Modified Bitumen
A temporary patch has one job, to reduce water entry until the roof can be properly prepared and repaired. Roofing cement or peel-and-stick tape may help during an active leak when the area is accessible and reasonably clean, but these materials shouldn't become the permanent repair by default. They can hide the original defect, trap moisture, and make later membrane-matched work more difficult.
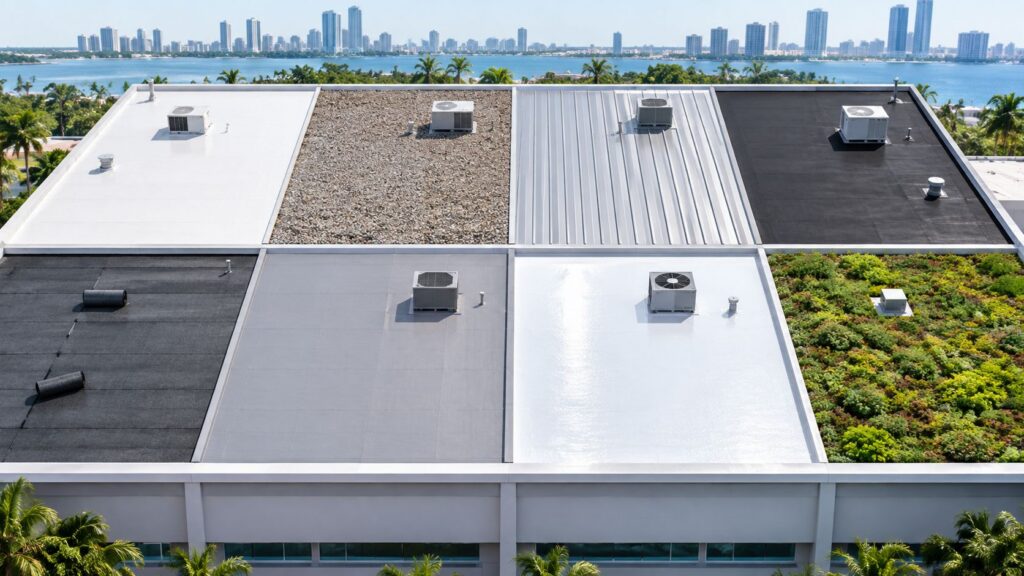
Permanent repairs depend on the membrane. TPO, EPDM, and modified bitumen don't share the same bonding chemistry or installation method. A product that appears to adhere during a dry afternoon may release, shrink, or peel after repeated South Florida heat and rain.
Match the repair to the membrane
| Membrane | Temporary Patch | Permanent Repair | Key Prep Step |
|---|---|---|---|
| TPO | Compatible emergency tape or temporary cover over a clean, dry area | Heat-welded TPO patch with a compatible membrane and tested weld | Clean with membrane-safe solvent, remove contamination, and prepare a sound welding surface |
| EPDM | EPDM-compatible emergency tape when the surface is dry | EPDM primer, cover tape, and a seam roller, or a properly matched patch system | Clean and dry the rubber, prime as specified, and press the repair firmly with a seam roller |
| Modified bitumen | Roofing cement or compatible peel-and-stick material as a short-term measure | Torch-applied or cold-process modified bitumen patch, depending on the assembly and safety conditions | Remove loose material, clean the area, and prepare a stable surface without applying heat near unsafe combustibles |
For an EPDM puncture, the patch should extend at least three inches beyond the damaged area in every direction, with rounded corners. EPDM repair guidance on patch sizing and corner treatment explains why square corners are more likely to peel first.
Preparation determines whether the repair holds. Remove loose edges, dirt, failed tape, and biological growth. Clean with a solvent approved for the specific membrane, allow the surface to dry, and scuff a smooth area only when the system instructions call for it. Don't apply a patch over wet insulation, damp membrane, trapped debris, or a blister that hasn't been evaluated.
For TPO, the lasting method is generally a membrane-matched heat weld performed with the right temperature, pressure, and overlap. For EPDM, primer and cover tape need firm, even pressure across the complete bond line. Modified bitumen repairs may use a torch or cold-process material, but torch work introduces fire hazards and should be left to trained roofers when conditions are uncertain.
A common failure pattern is the use of mismatched adhesives or silicone. These products can bond initially but fail under movement, contamination, ponding, and heat, sometimes within a single South Florida storm season. The commercial roofing systems reference image is useful when identifying how different assemblies require different repair approaches.
Test the repaired area after the material has cured. Check the patch edges, seam transitions, and nearby details, not just the center of the repair. A clean-looking patch isn't proof that the drainage problem or hidden moisture has been resolved.
When a Patch Is a Waste of Money
The reflex to seal the obvious hole is understandable, especially when rain is entering a bedroom or a business is trying to stay open. It becomes wasteful when the hole is only one symptom of a failing roof assembly.
Widespread alligatoring, soft walking areas, several active leak points, or repeated seam failures indicate that the roof deserves a broader assessment. A history of patching over patches is another warning. Each new layer can conceal the original membrane, retain moisture, and make it harder to identify where the next repair should connect.
Patterns that change the decision
- Soft or spongy areas: Walking softness can indicate saturated insulation or weakened decking beneath the membrane. Surface sealing won't dry the assembly.
- Multiple unrelated stains: Several interior zones may point to widespread moisture migration, failing details, or a drainage layout problem rather than one puncture.
- Seams failing across more than 10% of the roof: At that point, isolated seam repair may leave a large amount of similarly vulnerable material in place.
- Widespread alligatoring: Cracking across broad areas reduces the value of treating one opening while the surrounding membrane continues to deteriorate.
- Repeated repair history: Patching the same locations over and over usually means the underlying movement, drainage, or material failure remains unresolved.
Wet insulation can turn a small roof repair into a deck-replacement project once the assembly is opened. The moisture may have reduced insulation performance, corroded fasteners, weakened decking, or created conditions that continue to spread below a seemingly intact membrane.
The better question isn't whether a contractor can cover the visible hole. It is how much of the roof assembly is compromised. Localized damage may justify a patch. A recover or restoration may make sense when the membrane is broadly serviceable but the surface needs renewal. Full replacement becomes more rational when wet insulation, deck deterioration, widespread membrane failure, or persistent drainage defects affect the system as a whole.
That decision should come from moisture readings, test cuts where appropriate, roof age and repair history, drainage observations, and photographs. A contractor who recommends replacement without examining the membrane and details hasn't completed the diagnosis.
Calling a South Florida Roofer and What to Expect
Call for a professional inspection when there is active dripping, ceiling sagging, a mold odor, multiple stain zones, ponding that lasts 48 hours after rain, or membrane damage near a seam or flashing. Waiting is especially risky when insulation or decking may already be wet.
A credible South Florida contractor should document the roof with photographs, inspect seams and penetrations, and use an infrared scan or moisture-meter readings when concealed moisture is suspected. The first visit should produce a written report separating urgent repairs from conditions that can be monitored, plus an itemized quote distinguishing patch repair, partial recover, and full replacement.
Watch for door-knocker roofers who appear after a storm, cash-only demands, vague line items, and replacement quotes from contractors who never walk the membrane. Multi-family and commercial flat-roof work may also involve permit requirements, so ask who will confirm the applicable local triggers before work begins. Hurricane season can create longer lead times, particularly after widespread storm damage, so secure an inspection before a minor leak becomes an emergency.

You can responsibly keep watching only when the roof is dry, the defect is localized, there is no soft decking or wet insulation, and the temporary measure has stopped water entry. If the stain is growing, the ceiling is sagging, ponding persists, or the source remains uncertain, waiting another week can expose the deck, insulation, and interior finishes to further damage. A roof inspection service reference can help you understand the kind of documentation and inspection process to expect.

Paletz Roofing and Inspections provides South Florida flat-roof inspections, leak repairs, drainage corrections, flashing work, and replacement assessments for homes and businesses across Broward, Miami-Dade, and Palm Beach counties. If a ceiling stain has returned or you can't identify where the water enters, visit Paletz Roofing and Inspections to request an inspection and a repair recommendation based on the condition of the roof assembly.