A shingle roof rarely fails all at once. More often, one damaged shingle lets water in, and that small opening leads to interior repairs that cost homeowners an average of $386 to $1,875 according to roof damage guidance on granule loss and leak risk. That’s why knowing how to fix damaged roof shingles matters. It’s not a cosmetic chore. It’s home protection.
In South Florida, that risk goes up fast. Our roofs take relentless sun, high humidity, salt air near the coast, and wind events that test every seal, nail, and shingle tab. A repair that might hold in a milder climate can fail here if it’s rushed, under-nailed, or sealed with the wrong material.
Homeowners often want to handle isolated shingle damage themselves, and in some cases that’s reasonable. In other cases, a DIY repair causes more harm than the original problem. The key is knowing the difference before you step onto the ladder.
Table of Contents
- Introduction Your First Line of Defense Against the Elements
- Diagnosing Shingle Damage Before You Repair
- Your Guide to Common Shingle Repair Techniques
- When a DIY Fix Becomes a Costly Mistake
- Navigating Roof Damage Insurance Claims in Florida
- Your South Florida Proactive Roof Maintenance Checklist
Introduction Your First Line of Defense Against the Elements
A damaged shingle is easy to dismiss from the ground. It looks small. It doesn’t seem urgent. Then rain gets under it, the underlayment starts taking water, and the stain on the ceiling shows up days later.
That’s how roof trouble usually starts in South Florida. Sun dries and hardens asphalt. Humidity works on the sealant lines. Wind lifts edges that were already weak. By the time a homeowner sees a missing tab or a crack, the roof may already be telling you more than one story.
The first job isn’t repair. The first job is diagnosis. You need to know whether you’re looking at a single repairable shingle, a pattern of wind damage, or an aging roof that’s past the point where patching makes sense.
Practical rule: If the damage is isolated, dry, and easy to reach, a repair may be worth doing. If the problem is widespread, storm-related, or tied to soft decking, patchwork usually wastes time and money.
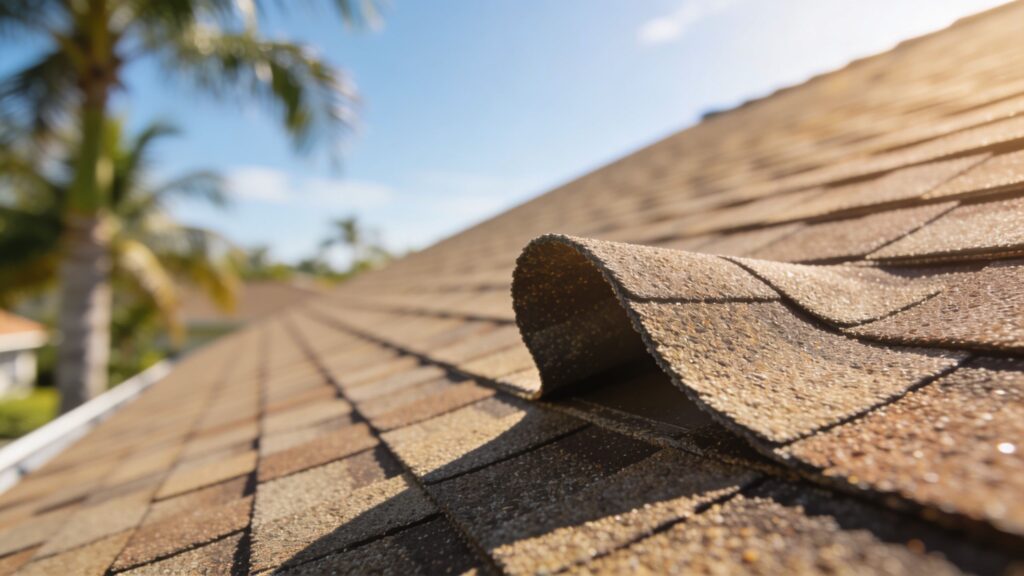
A solid repair has to match the actual failure. Curling is treated differently than cracking. A lifted shingle needs a different fix than one that has torn around the nail line. Granule loss changes the decision again, because that tells you whether the shingle still has enough protective surface left to justify repair.
South Florida homeowners also need to be honest about risk. Roof work here isn’t just about hand tools. It’s about footing on hot shingles, sudden weather shifts, and wind exposure. The smartest move isn’t always climbing up there. Sometimes it’s documenting the damage, stopping active water intrusion from inside, and making a measured decision.
Diagnosing Shingle Damage Before You Repair

On a South Florida roof, the first visible shingle problem is often not the first failure. I see that after summer storms all the time. A lifted tab, a small crack, or a patch of missing granules may be the clue that wind has already broken the seal strip, driven water under the course, or loosened nearby fasteners.
Diagnosis decides whether you are dealing with a simple repair, storm damage spread across a slope, or a roof that is aging out. If you get that part wrong, the repair usually fails early.
Inspect safely before you decide anything
Start from the ground. In our climate, that is often enough to spot pattern damage without taking a risk on hot, slick shingles. Use binoculars to scan ridge lines, roof edges, valleys, and the slopes that face south and west, where UV exposure is usually hardest. Then check the attic for staining, damp sheathing, musty odor, or small points of daylight around penetrations.
Go onto the roof only if the surface is dry, the pitch is manageable, and the shingles are still firm underfoot. Stay off a roof that is steep, brittle, freshly rained on, or visibly storm-damaged. In South Florida, afternoon heat can soften asphalt enough to scuff the surface just by walking it.
Bring a short list of useful tools and keep the inspection simple:
- Binoculars: For checking tabs, edges, ridges, and changes in shingle pattern from the ground.
- Phone or camera: Clear photos help you compare slopes, track changes, and document storm-related damage.
- Chalk or notepad: Mark which slope has the problem and note whether the damage is isolated or repeated across the roof.
- Moisture awareness: If the decking feels soft anywhere underfoot, stop. That points to a bigger issue than a single shingle repair.
- A visual comparison: A clean, even roof section makes defects easier to spot. A sample like this roof reference image helps homeowners see what a uniform shingle field should look like.
If the damage showed up after a named storm or strong wind event, pattern recognition matters. This overview of storm damage roof repair in Marion County gives a useful outside example of the wider damage patterns contractors look for after severe weather.
Read the damage correctly
Different defects point to different causes. Curling usually comes from age, long-term heat, or a failed seal strip. Cracks often show up after years of UV exposure, thermal movement, or impact. A missing shingle usually means wind uplift, but the key question is whether nearby shingles are also unsealed or weakened.
Granule loss needs a careful look. The Asphalt Roofing Manufacturers Association explains that asphalt shingle granules protect the asphalt coating from weathering and UV exposure, and loss of those granules shortens the roof's service life, especially where sun and rain hit hardest. See ARMA's homeowner guidance on asphalt shingle granule loss.
This distinction is important because many homeowners try to "repair" a shingle that has already lost too much of its protective surface. Sealant can slow water entry on a small, sound area. It does not rebuild a worn-out shingle.
One more South Florida reality. Humidity can hide the true extent of the problem. A roof may look dry from above while the decking below is still holding moisture after repeated wind-driven rain. That is one reason DIY repairs get risky fast here, especially after tropical weather.
South-facing slopes, eaves, and perimeter edges usually show trouble first in South Florida because they take the hardest combination of sun, wind, and rain.
Shingle Damage Diagnostic Chart
| Damage Type | Visual Cue | Common Cause | Recommended Action |
|---|---|---|---|
| Curled shingle edges | Corners or tabs lifting upward | Age, heat, failing seal strip | Seal only if isolated and the shingle is still flexible |
| Hairline crack | Fine split with no major tear-through | UV exposure, minor movement | Seal if limited and dry |
| Structural crack | Wider break, torn shingle body, split around fastening area | Wind stress, impact, brittle shingle | Replace the shingle |
| Missing shingle | Exposed underlayment or nail line | Storm wind uplift | Replace and inspect surrounding tabs |
| Granule loss | Bare or shiny asphalt spots, heavy granules in gutters | Aging, UV wear, storm abrasion | Monitor, plan replacement, or replace immediately depending on severity |
| Blistering | Small raised areas or popped spots | Moisture and ventilation issues | Inspect ventilation and surrounding field condition |
| Lifted but intact shingle | Tab no longer sealed but not torn | Wind, aged adhesive strip | Re-seal if the shingle remains sound |
A good inspection looks for patterns, not just one bad shingle. If the damage repeats across multiple slopes, shows up around the nail line, or includes soft decking, the roof is telling you that patching may not hold for long.
Your Guide to Common Shingle Repair Techniques

Repair methods depend on the failure. In South Florida, that matters more than many homeowners realize. A lifted tab after a summer thunderstorm, a brittle crack from years of UV exposure, and a shingle torn loose in a tropical system do not get the same fix if you want the repair to last through heat, humidity, and the next hard rain.
The bad repairs I see usually come from one mistake. People treat roofing cement like a cure-all. It is not. Cement has its place, but it cannot make a worn-out shingle younger, and it will not correct bad nail placement or hidden damage under the course above.
Stop active water first
If water is entering the house now, contain it before you worry about a clean-looking repair. Protect floors and furniture. Catch the leak. If drywall is bulging with trapped water, release it carefully so the ceiling does not come down in a wider section.
On the roof, a properly secured tarp can reduce additional intrusion until the surface dries and you can work it safely. South Florida roofs stay slick longer because of humidity, and afternoon storms can turn a manageable repair into a fall hazard fast.
For small, dry defects, roofing cement may slow water entry for the short term. Keep that in perspective. It buys time. It does not replace a torn shingle, restore failed underlayment, or fix a wind-damaged fastening pattern.
Emergency measures make sense when:
- Rain is still falling: You need to limit interior damage first.
- The damaged spot is exposed: Missing shingles and fresh storm tears can pull in water quickly.
- The roof is too wet to repair safely: This is common after overnight rain and during hurricane season.
- You need matching materials: A rushed patch with the wrong shingle profile often creates a new leak path.
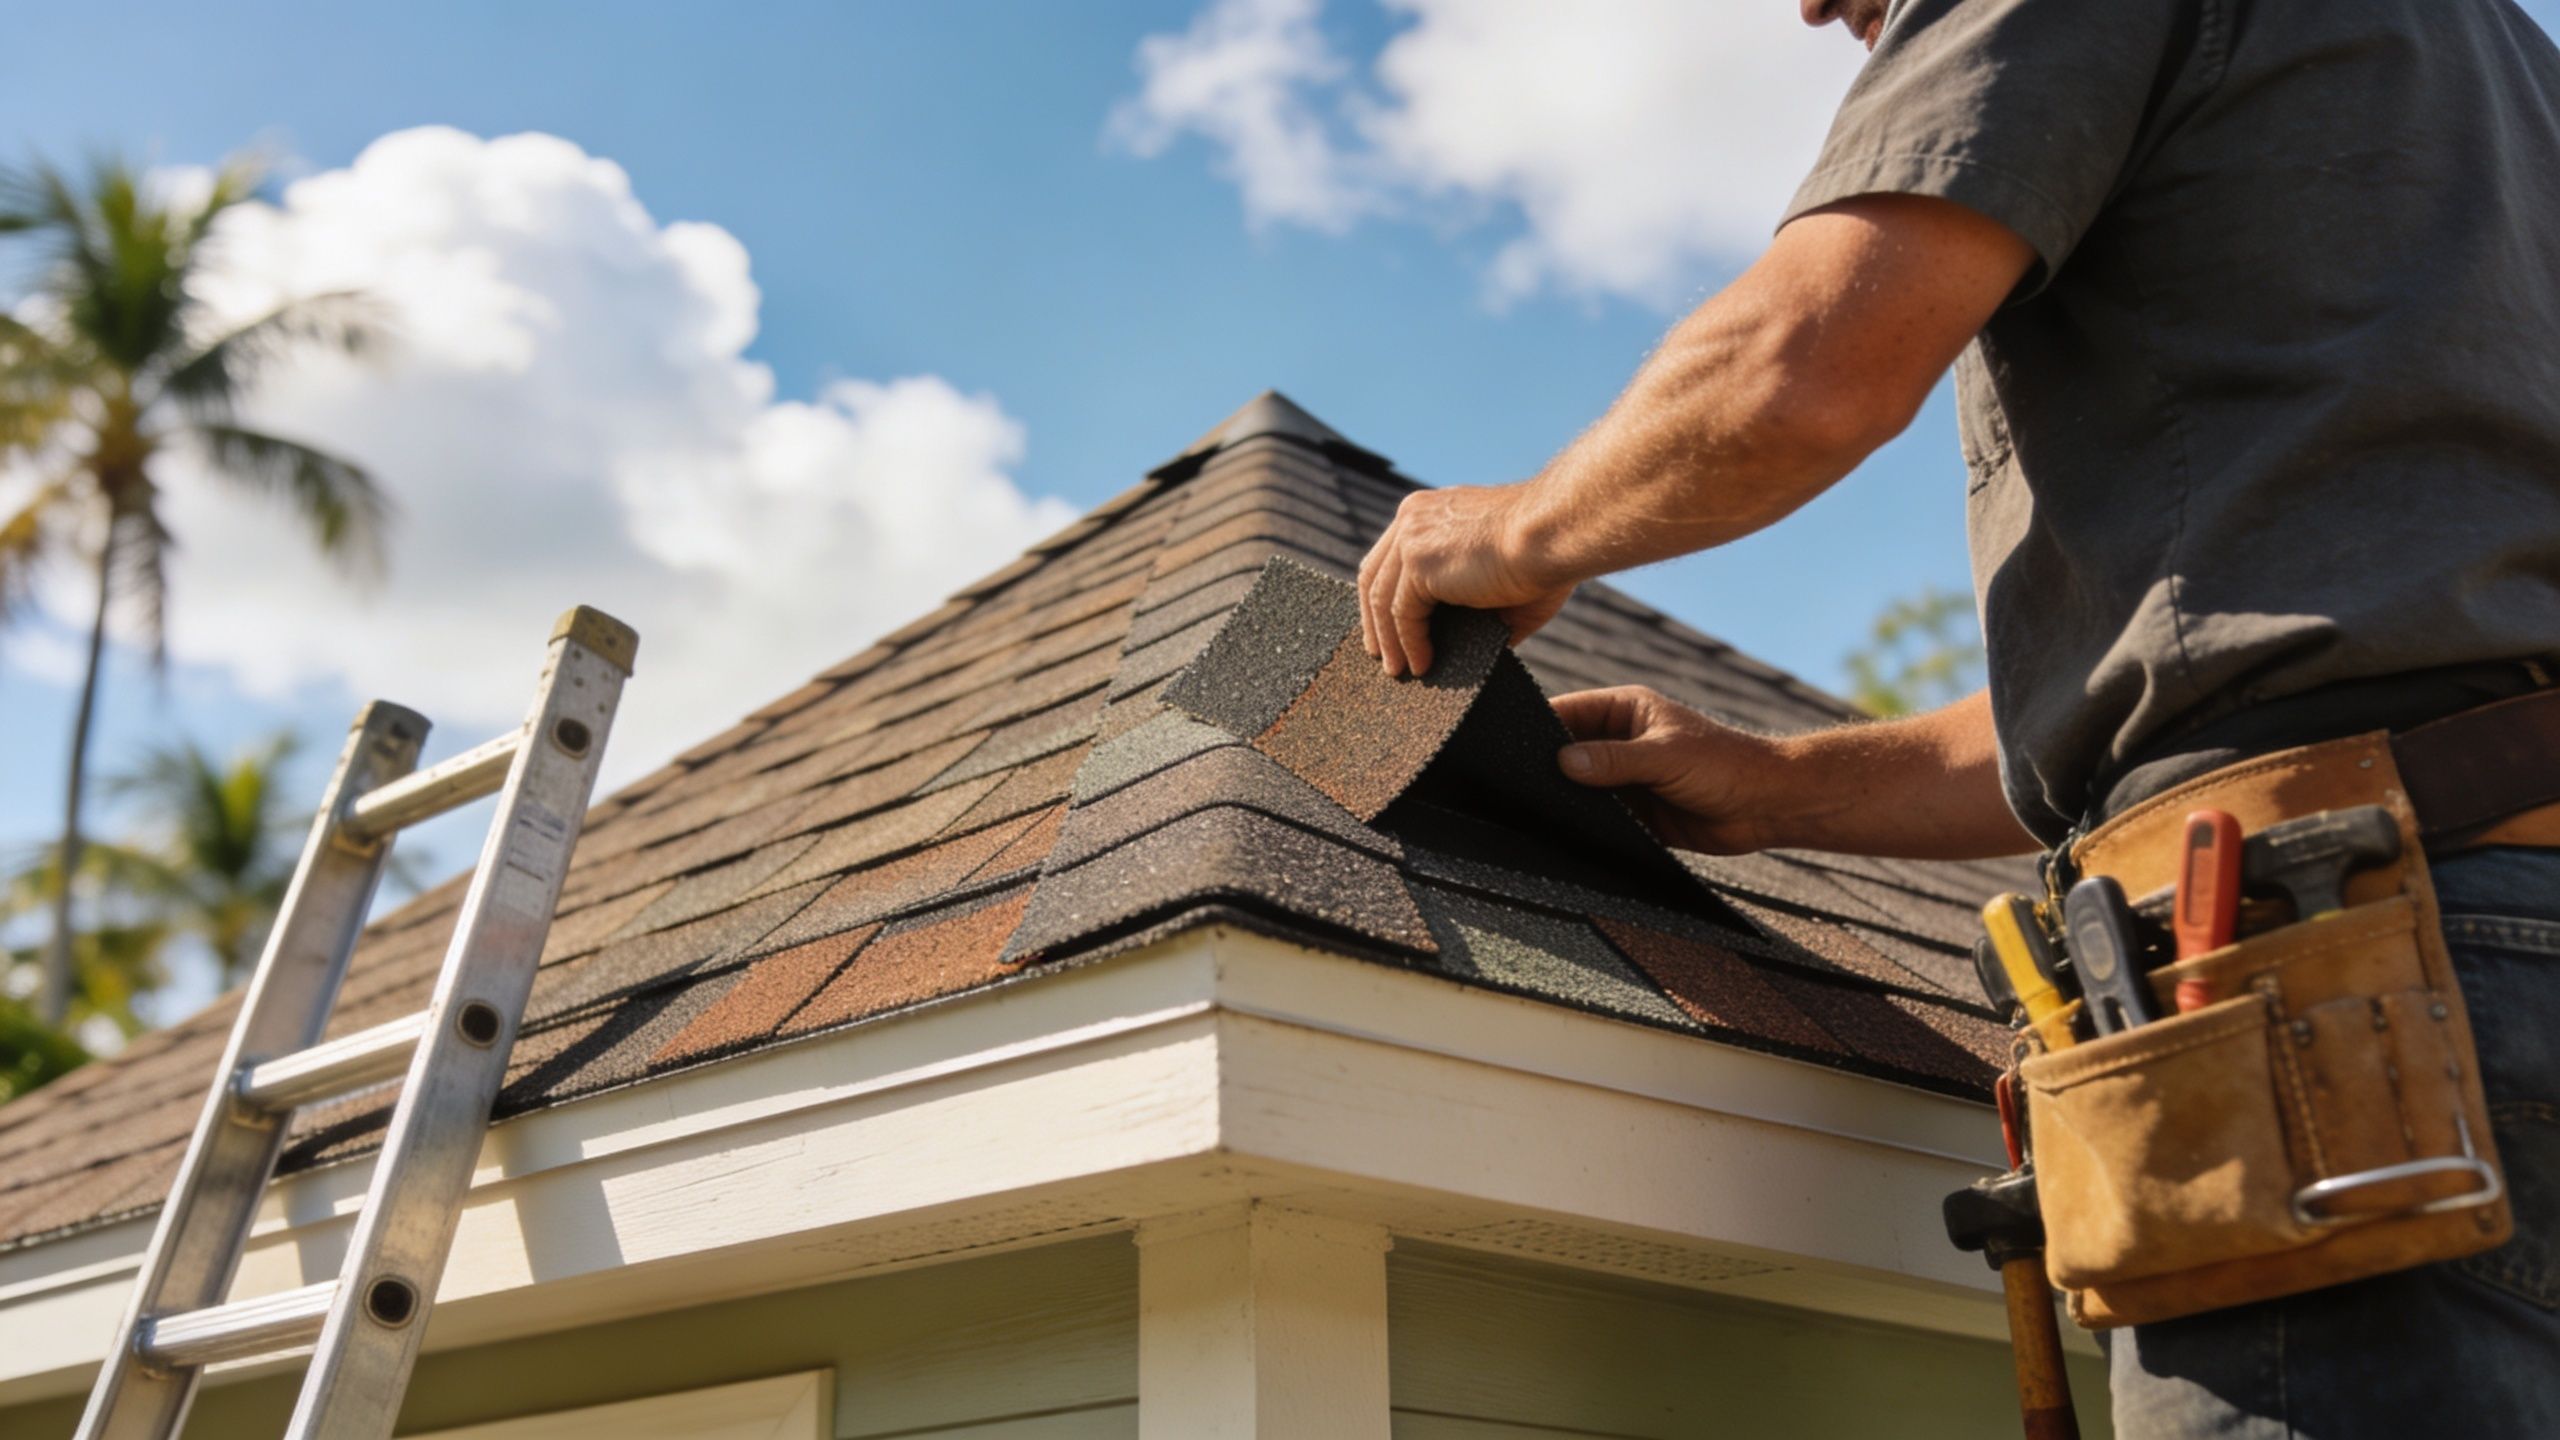
Replace one damaged or missing shingle the right way
Single-shingle replacement works best when the surrounding area is still in decent condition. If nearby shingles are brittle, sealed hard, or losing granules heavily, removing one can crack two more. That is a common problem on older South Florida roofs that have taken years of heat and salt air.
Use the right tools:
- Flat pry bar: Breaks the adhesive bond and lifts nails cleanly.
- Roofing hammer: Gives better control than a general claw hammer.
- Galvanized roofing nails: Use roofing nails of the right length for the assembly.
- Roof cement: Reseals disturbed tabs and exposed nail heads where appropriate.
- Matching shingle: Match profile, exposure, and color as closely as possible.
- Utility knife: Helps with trimming when the replacement needs adjustment.
The National Roofing Contractors Association explains in its homeowner guidance that asphalt shingle repairs often require carefully loosening the bonded tabs above, removing the fasteners from the damaged shingle, sliding in a replacement, and fastening it in the correct nail zone according to the product design and local code: NRCA roofing repair guidance. On high-wind roofs, nail placement is where many homeowner repairs go wrong.
Start by lifting the tabs in the course above the damaged shingle. Go slowly. Work the pry bar side to side to separate the seal without tearing the tabs you need to keep.
Then expose and remove the nails. Many shingles use four nails in standard applications, but high-wind installations often require more, based on the manufacturer instructions and code requirements for the area. In South Florida, guessing here is a mistake. Wind resistance depends on the right nail count in the right line, driven flush rather than angled or overdriven.
Slide the new shingle into place and line it up with the surrounding course. Fasten it where the manufacturer intended, not near the visible bottom edge. If you broke the seal on the tabs above, place small dabs of roof cement under those tabs and press them back into contact.
If you want a quick visual before you start, this roof shingle layout image shows how courses and tabs line up.
If the old shingle will not come out without cracking the course above it, stop there. On an aged roof in Florida, forcing a one-shingle repair can spread the damage and turn a small job into a larger section repair.
Seal curled edges and minor cracks
Sealant repairs work on limited defects. They do not work on every defect. A shingle with a small hairline crack or an isolated lifted corner may be repairable if the shingle is still flexible and the surrounding field is in good shape.
A shingle that is torn through, split near the nail line, badly cupped, or worn thin should be replaced instead.
Timing matters. Apply sealant only to a dry surface. In humid South Florida conditions, trapped moisture under a tab can weaken the bond and leave you with a repair that looks fine for a week and fails after the next storm cycle.
The Asphalt Roofing Manufacturers Association notes that asphalt roof cements and sealants are maintenance materials, not permanent substitutes for damaged shingles, and product performance depends heavily on proper surface prep and application conditions: ARMA guidance on asphalt roofing materials.
Here is the field method that holds up best. Lift the edge carefully with a putty knife. Remove grit, dust, and loose granules. Apply the sealant under the lifted area, not just across the top. Press the tab flat so the adhesive makes full contact.
For a small crack, work sealant into the split first. Close the crack, smooth a thin coat over it, and add matching granules if you have them. That extra granule layer helps shield the exposed sealant from direct sun, which matters in Florida where UV cooks exposed mastics quickly.
For curled tabs:
- Lift gently: Older shingles can snap instead of flex.
- Apply sealant underneath: The bond needs contact below the tab.
- Press the tab flat: Full contact matters more than excess material.
- Hold it in place while it sets: Weight helps if the tab wants to spring back.
For hairline cracks:
- Clean first: Dust and granules weaken adhesion.
- Fill the crack completely: A surface smear does not stop water well.
- Keep the top coat thin: Thick ridges weather poorly and trap debris.
- Cover exposed sealant with granules if possible: That slows UV breakdown.
Re-secure a lifted shingle before wind gets under it again
A lifted shingle with no tear can often be saved. I see this after strong gusts and outer rain bands, where the seal strip has released but the shingle body is still intact.
Check the shingle closely before you try to press it back down. If it is cracked near the nail line or has stretched around the fasteners, replacement is usually the better call. If the shingle is intact, clean the underside and the surface beneath it, apply roof cement or the manufacturer-approved sealant, press the tab down firmly, and keep pressure on it until it bonds.
This repair makes sense for one or two isolated tabs. It is a poor choice for a broad area where multiple courses have lifted. In that case, the problem is usually larger than the one loose tab you can see from the ladder.
A few practical rules help:
- Avoid the hottest part of the day: Shingles get soft and scuff easily.
- Do not seal over damp surfaces: The bond will be weak.
- Use roofing fasteners only: Screws, finish nails, and general caulk do not belong in a shingle repair.
- Match the shingle profile: A wrong-profile replacement can sit high, catch wind, and shed water poorly.
A good local repair should restore the roof’s water-shedding surface and hold through normal Florida weather. If the repair only looks tidy from the driveway, it is not finished.
When a DIY Fix Becomes a Costly Mistake

DIY roof work sounds simple from the ground. On the roof, it’s different. The shingles are hotter than expected, the slope is steeper than it looked, and the damaged area is larger than the first glance suggested.
Why South Florida DIY repairs fail more often
South Florida is hard on asphalt shingles in ways generic repair articles often skip. Salt air, high humidity, and sustained UV exposure change how materials age and how repairs perform.
According to guidance discussing DIY repair risks in Florida conditions, salt air corrosion weakens asphalt bonds 20-30% faster, there has been a 35% spike in insurance claims from botched DIY repairs, and 60% of repaired shingles by amateurs fail within 2 years in these conditions.
Those numbers line up with what seasoned roofers see after storms. Homeowners often patch the visible spot and miss the loosened tabs around it. Or they seal a crack on top but don’t address the failed bond underneath. The roof looks patched until the next heavy rain or wind gust.
A repair isn’t successful because it stayed in place for a week. It’s successful if it still sheds water and resists uplift after weather hits it.
Red flags that mean stop and call a roofer
Some conditions move a roof problem out of DIY territory fast. These are the ones that deserve a professional inspection before more damage is done.
- Damage spreads beyond a small isolated area: If you’re seeing multiple affected shingles across a section, that usually points to a broader wind or aging issue.
- The decking feels soft: Soft or spongy areas mean water may have compromised the roof deck below.
- The roof is steep or high: Even a good repair plan isn’t worth a fall.
- Shingles are brittle when lifted: Older shingles can fracture during removal, turning one replacement into a larger repair.
- Storm patterns are visible across courses: Wind doesn’t always damage one shingle at a time.
- You suspect moisture below the field shingles: Surface repair won’t fix trapped moisture or deck damage.
Another warning sign is when the roof keeps producing “small” problems in different places. That usually means the roof system is aging as a whole, not that you’re unlucky.
A professional inspection also catches issues many homeowners won’t see from the top surface. Ventilation problems can contribute to blistering. Fastener placement from an older repair may already be wrong. Bond failure near coastal exposure can show up in subtle ways before shingles start leaving the roof.
Good roof decisions are mostly risk decisions. The repair itself may be possible. The question is whether it’s smart, safe, and durable under South Florida conditions.
Navigating Roof Damage Insurance Claims in Florida

Roof damage creates two jobs at once. One is protecting the house. The other is documenting the loss clearly enough that the claim stands on solid ground.
Document what insurers and adjusters need to see
Take photos before any permanent repair begins. Get wide shots of each roof slope if you can do so safely from the ground or ladder. Then get closer images of the specific damage, including missing shingles, torn tabs, exposed underlayment, and any interior staining.
Crack severity matters. According to roofing guidelines on crack classification and storm documentation, cracks are classified as hairline, under 1/16 inch, or structural, over 1/8 inch. Proper documentation of that severity is important for insurance claims. The same guidance notes that post-storm zipper patterns of sequential lifting affect 15-20% more roofs in hurricane-vulnerable regions, and that pattern is important to document for adjusters.
That means your notes should describe the type of damage, not just say “roof leak” or “some shingles missing.”
Photograph and note:
- The date the damage was found: Keep a timeline from discovery through mitigation.
- The specific roof areas affected: Front slope, rear valley area, ridge, eave edge, and so on.
- Any interior evidence: Ceiling stains, wet insulation, or visible water paths.
- Temporary protection installed: Tarping or other mitigation helps show you acted to prevent further damage.
- Past roof records: Receipts, prior repairs, and inspection reports can be useful.
If the claim becomes disputed or unusually difficult, homeowners sometimes need outside guidance beyond the roofing side. For legal context on coverage disputes, this resource on help with Florida insurance claims may be useful.
Know the role of the roofer and the adjuster
The adjuster represents the insurance process. The roofer evaluates roof condition and repair scope. Those are not the same job.
A roofing contractor documents roof conditions, identifies repairable versus non-repairable damage, and explains what work is needed to restore watertight performance. The adjuster evaluates the claim under the policy terms. Homeowners do better when they keep those roles straight and provide organized information to both.
Keep a single folder with photos, storm date, repair receipts, temporary mitigation records, and all insurer communication. Claims get easier when the paper trail is clean.
Don’t make permanent repairs before fully documenting the damage unless immediate action is necessary to stop active water intrusion. Mitigate what you safely can, preserve evidence, and keep records.
Your South Florida Proactive Roof Maintenance Checklist
Florida insurers have reported that wind and water drive a large share of residential roof claims in this state, and in South Florida, shingles take that punishment year after year from heat, salt air, humidity, and tropical weather. A roof here can look decent from the driveway and still be one storm away from a leak if basic maintenance gets skipped.
The goal is simple. Catch the small failures before summer heat bakes them in place or hurricane winds turn one loose tab into a repair across half a slope.
Seasonal habits that prevent repairs
Homeowners who stay ahead of shingle problems usually follow the same routine.
- Before hurricane season: Walk the perimeter with binoculars and check for lifted tabs, cracked shingles, exposed nail heads, dark patches where granules have worn off, and debris sitting in valleys.
- Trim back overhanging branches: Branches scrape granules off the shingle surface, and once those granules are gone, South Florida sun dries the mat out fast.
- Clean gutters and downspouts: Water needs a clear path off the roof. Backup at the edge can soak fascia, stain soffits, and push moisture into places that stay hidden until damage spreads.
- Check attic ventilation and moisture: Poor airflow traps heat and humidity under the roof deck. That shortens shingle life, raises attic temperature, and can leave the decking damp during our wet season. The Federal Housing Administration details common attic ventilation ratios in its guidance for attic venting requirements and roof ventilation basics.
- Inspect roof edges and transitions: Eaves, ridges, valleys, and areas around flashing usually show trouble first because they take the hardest wind and water exposure.
Keep a visual record too. Dated photos from the ground, taken a few times a year from the same angles, make it easier to spot gradual change. This roof maintenance reference image for tracking condition over time shows the kind of baseline that helps homeowners notice what changed after a storm.
Post-storm checks that catch trouble early
After a hard rain or wind event, check the property the same day if conditions are safe. In South Florida, fast follow-up matters because moisture moves quickly in a humid attic, and a small opening can become hidden deck rot before the stain ever shows inside.
- Scan the ground first: Look for shingle pieces, loose tabs, nails, flashing fragments, or piles of granules near downspouts.
- Check the attic: Fresh staining, damp wood, wet insulation, and a musty smell usually show up there before they show on drywall.
- Inspect roof lines from the ground: Uneven shingle courses, lifted corners, and exposed underlayment are red flags.
- Photograph everything before any cleanup or tarp work: Good records help with repair decisions and storm documentation.
- Recheck over the next several days: Some leaks appear after trapped moisture migrates or after another afternoon storm hits the same weak spot.
One caution from experience. South Florida homeowners get in trouble when they assume a small repair is safe just because the damaged area looks isolated. On an older roof, especially one that has already seen multiple heat cycles and tropical storms, walking it without the right footing can break more shingles than you fix. If the slope is steep, the tabs are brittle, or the damage sits near a valley, ridge, or flashing detail, call a roofer and get it checked properly.
Good maintenance keeps repair work smaller, cheaper, and more predictable. Ignoring early warning signs usually does the opposite.
If you need a professional assessment, repair, or storm-damage inspection in Broward, Miami-Dade, or Palm Beach, Paletz Roofing and Inspections can help you determine whether the issue is a safe localized repair or a larger roofing problem that needs immediate attention.