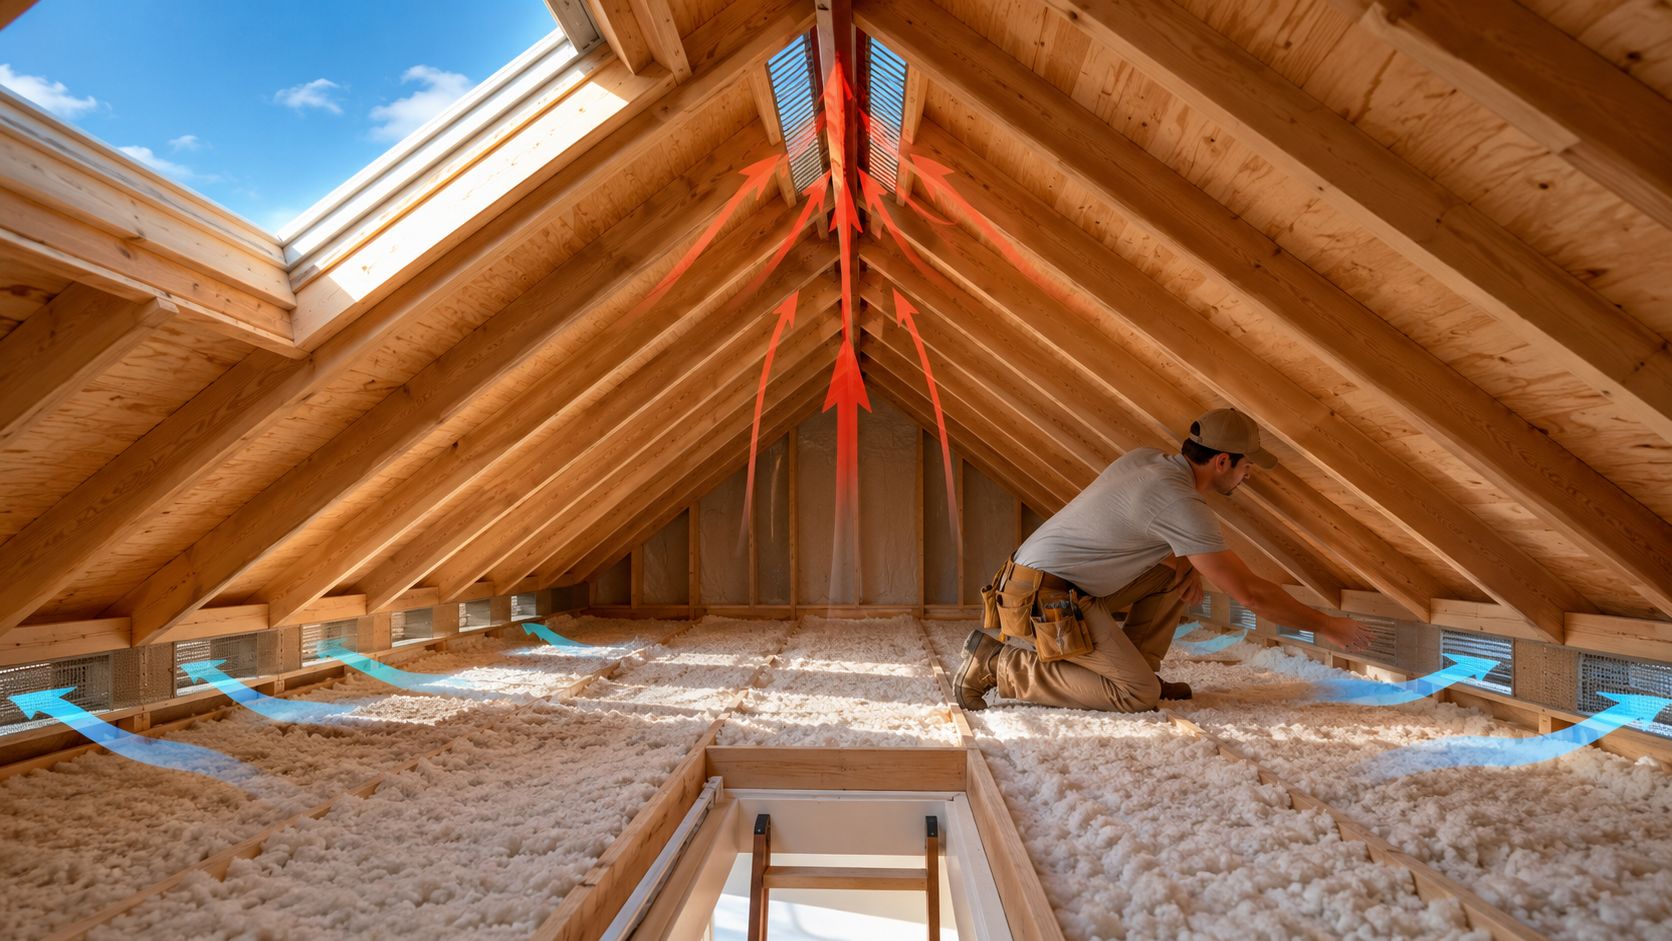
You open the attic hatch and get hit with a wall of heat. In South Florida, that's common, but it's not normal. A good attic should move air steadily enough that heat and moisture don't sit there and cook your roof system from the underside.
That matters more here than in a lot of places. Between long cooling seasons, heavy humidity, wind-driven rain, and hurricane exposure, attic ventilation isn't just about making the house feel less stuffy. It's part of protecting shingles, roof decking, insulation, and the air your family lives with every day. If you've been trying to figure out how to ventilate an attic without creating a leak problem or wasting money on the wrong setup, start with the basics and build the system the right way.
Table of Contents
- Your Attic Could Be Costing You Money
- Why Proper Attic Ventilation Is Non-Negotiable
- Assessing Your Attic's Current Ventilation Needs
- Choosing Your Attic Ventilation System Components
- A Guide to Professional Vent Installation
- Frequently Asked Questions About Attic Ventilation
Your Attic Could Be Costing You Money
If your ceilings feel warm late in the day, your air conditioner seems to run forever, or certain rooms never cool down evenly, the attic is one of the first places I'd look. In Broward, Miami-Dade, and Palm Beach counties, the attic often acts like a heat reservoir sitting right over the living space. When that heat has nowhere to go, your HVAC system has to fight it from below.
The problem isn't just temperature. In a humid climate, a poorly ventilated attic also holds moisture. That moisture can hang around the roof decking, framing, and insulation. Once that cycle starts, the house gets harder to cool, materials stay damp longer, and small issues turn into bigger repair bills.
Why homeowners miss this problem
Homeowners often don't inspect the attic until they see a stain, smell something off, or need a new roof. By then, the warning signs have usually been there for a while.
A few common clues show up early:
- Hot ceiling zones: Upstairs rooms or rooms under low-slope roof areas feel warmer than the rest of the house.
- Musty smell after rain: The home smells stale even when there's no active leak.
- Dirty or compressed insulation at the eaves: Airflow is often blocked right where the system needs intake most.
- Premature roof wear: Shingles age faster when heat builds underneath them day after day.
Practical rule: If the attic feels like trapped heat instead of moving air, don't assume “that's just Florida.” It usually means the system is out of balance, blocked, or undersized.
Homeowners who want to reduce attic energy costs often start with insulation, and that can help. But insulation without proper ventilation can trap problems in place. The right fix is getting the attic to breathe the way it was supposed to.
Why Proper Attic Ventilation Is Non-Negotiable
Bad attic ventilation always shows up somewhere. Sometimes it shows up on the power bill. Sometimes it shows up as brittle shingles, damp wood, or that stale smell that never fully leaves the house. In South Florida, I treat attic airflow as part of the roof system, not an optional add-on.

Heat does more damage than most homeowners realize
When hot air gets trapped under the roof deck, roofing materials take the abuse from both sides. The sun is already beating down on the roof surface. Add trapped attic heat underneath, and you create a harsher environment for asphalt shingles, underlayment, and roof sheathing.
That kind of stress can dry materials out, make them more brittle, and shorten the time before repairs are needed. Homeowners usually notice the symptom first. Rooms are hotter. The AC runs longer. Then later they notice the roofing problem.
Here's the practical issue. A hot attic doesn't stay in the attic. Heat pushes down into the conditioned part of the house, especially in the afternoon when roof temperatures have been building for hours.
South Florida moisture is the bigger threat
Heat gets attention because you can feel it. Moisture is often the more destructive part because you don't notice it right away. In our climate, attics can collect damp air from outside conditions, from the house below, or from an unbalanced vent setup that never really moves air through the space.
Signs of moisture trouble can include:
- Darkened wood surfaces: Roof decking or framing starts showing discoloration.
- Rusting metal components: Fasteners and metal connectors can show corrosion.
- Insulation performance loss: Insulation that gets damp doesn't do its job well.
- Odor issues: If you're trying to sort out the causes of musty home odors, the attic is one of the first areas worth checking.
Attic ventilation isn't only about dumping hot air. It's about giving moisture a path out before it settles into wood, insulation, and the underside of the roof.
The reason proper ventilation matters so much is simple. A balanced system keeps air moving. Hot, moisture-laden air needs a way to leave at the high point of the roof, and replacement air needs to enter low at the eaves. When one side is missing, the attic stalls out.
For South Florida homes, that balance also has to hold up in hard weather. Vent products need to be appropriate for wind, rain, and roof design. A vent that looks fine on paper but is installed poorly, or paired with the wrong intake, won't solve the problem. It just gives water and humidity more ways to cause trouble.
Assessing Your Attic's Current Ventilation Needs
Before you buy a vent, cut a hole, or let anyone sell you a fan, determine what the attic's specific needs are. Many jobs go wrong when this initial assessment is skipped. People start with a product when they should start with the attic size, the current vent layout, and the condition of the airflow path.
The first pass is mostly observation. You're looking for restrictions, missing components, and signs that heat or moisture has been trapped for a while.

What to look for before you change anything
Start safely. Use a stable ladder, good lighting, a dust mask or respirator, and only step on framing members or secured walking boards. Never step on the drywall ceiling between joists.
Once you're up there, check these areas first:
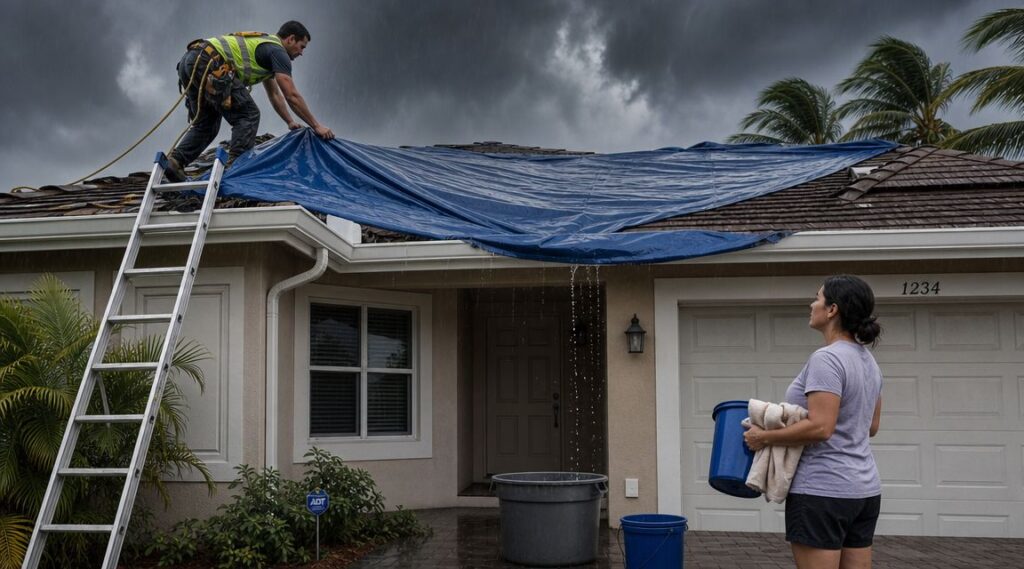
- Soffit and eave zones: Look for insulation packed tight against the roof edge. That's one of the most common reasons intake air never reaches the attic.
- Existing vent types: Note whether you have ridge vents, box vents, gable vents, turbines, or powered fans.
- Moisture clues: Watch for staining, mildew-like growth, damp insulation, or a persistent musty smell.
- Air path continuity: You need a clear channel from the soffit area up toward the high exhaust point.
A visual reference can help homeowners understand what they're looking at. This attic ventilation inspection image is the kind of overview I like clients to compare against their own attic conditions.
How to calculate the ventilation area your attic needs
A technically sound attic-ventilation workflow starts with sizing the ventilation area before selecting products. Major guidance uses the 1:300 rule as the baseline: one square foot of net free area for every 300 square feet of attic floor area when a vapor barrier is present, or 1:150 when it is not, and the total should then be split roughly 50/50 between intake and exhaust to preserve a balanced system, according to IKO's attic ventilation guidance.
That gives you the framework. The practical sequence looks like this:
- Measure the attic floor area. Use the footprint of the attic floor, not the roof surface area.
- Determine whether a vapor barrier is present. If you're not sure, a roofer or insulation contractor can verify it.
- Calculate total net free area needed. Use the applicable rule from above.
- Split the total between intake and exhaust. Don't load everything at the top of the roof.
- Choose vent products by manufacturer-rated net free area. Product size alone doesn't tell you airflow capacity.
More vent openings do not automatically mean better ventilation. The right amount in the right locations matters more than just cutting extra holes.
What usually goes wrong in older Florida homes
Older homes in South Florida often have a patchwork setup. Someone added a powered fan years ago. Another contractor installed a few box vents later. The soffits may be painted shut, blocked with insulation, or too limited to support the exhaust above.
That creates a system that looks ventilated but doesn't function well.
The most common problems I see are:
| Problem | What it causes |
|---|---|
| Blocked soffit intake | Exhaust vents can't pull in replacement air |
| Exhaust-only upgrades | Airflow short-circuits and leaves dead zones |
| Mixed vent strategies | One vent type can interfere with another |
| No baffles at eaves | Insulation closes off the air channel |
If you're learning how to ventilate an attic properly, this is the turning point. Don't guess from what you see on the roof. Size the system first, confirm the intake path, and only then pick the vent components.
Choosing Your Attic Ventilation System Components
South Florida attics fail in predictable ways. The roof gets hammered by sun, the air stays heavy with moisture, and one poorly chosen vent can leave you with trapped heat, damp decking, and wind-driven rain problems during storm season.
Once the attic has been measured and the airflow target is clear, the next job is choosing parts that work together. I look for a system that pulls air in low, releases it high, and stays dependable through heat, humidity, and hurricanes.

Start with intake, or the rest of the system underperforms
On Florida homes, intake usually decides whether the whole setup works. A homeowner sees a hot attic and adds more exhaust on the roof. If the soffits cannot supply enough replacement air, those new vents do very little.
Soffit vents are still the standard choice because they feed air into the attic at the lowest practical point. That gives heat and moisture a clear path out. On homes with short overhangs or limited soffit area, under-eave products can help, but they still need even distribution across the eaves.
Energy Star's attic ventilation guidance explains that good vent layouts keep most of the vent area at the eaves and maintain an open air channel above the insulation with baffles or rafter vents. In real houses, that detail matters as much as the vent product itself. If insulation is packed tight at the eaves, the intake side is choked off before the system ever gets started.
How the main exhaust options compare
Exhaust choice depends on roof design, attic shape, and storm exposure. The best option on one house can be the wrong one two streets over.
| Exhaust type | Where it works well | Main concern |
|---|---|---|
| Ridge vent | Roofs with a long, uninterrupted ridge and strong soffit intake | Needs careful layout, proper slot cuts, and weather-resistant installation |
| Static box vent | Roof areas where ridge vent is not practical or where ventilation needs are split by design | Pulls air from a smaller area, so coverage is less uniform |
| Gable vent | Older homes with existing gable openings and attic layouts that support crossflow | Often leaves lower roof areas under-ventilated |
| Powered attic fan | Specific retrofit cases where passive venting is limited by the structure | Can pull conditioned air from the house if intake is weak |
| Turbine vent | Some windy sites with simple roof lines | Moving parts wear out, and storm reliability matters |
Homeowners comparing layouts often find this roof ventilation component overview useful for seeing how intake and exhaust pieces fit together.
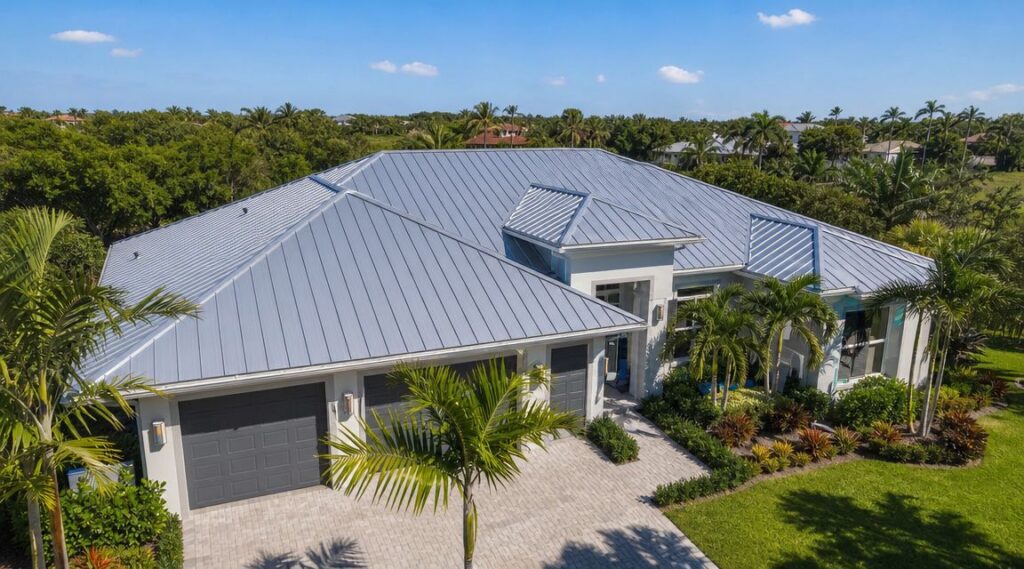
Powered fans deserve extra caution in South Florida. They can move a lot of air, but they can also create the wrong pressure pattern if the intake is undersized. I have seen fans pull air from ceiling gaps, recessed lights, and attic access points instead of from the soffits. That wastes energy and does little to dry the attic the way a balanced system should.
What usually works best in South Florida
Simple systems tend to hold up better here. Salt air, high humidity, long cooling seasons, and hurricane winds are hard on anything with unnecessary moving parts.
A ridge vent with clear soffit intake is often a strong option when the roof has a clean ridge line and enough intake below. On chopped-up roofs, hip roofs, or older homes with limited soffits, static vents paired with corrected intake paths can be the better answer. Gable vents may stay in place on some older homes, but I do not count on them alone if the goal is whole-attic airflow.
The other factor is storm readiness. Every roof penetration has to be flashed and fastened correctly, and every vent has to make sense for the roof's wind exposure. A ventilation plan that looks fine on paper can become a leak risk if the vent type does not suit the roof shape or local weather.
Paletz Roofing and Inspections can inspect ridge vent, soffit vent, gable vent, and attic fan configurations as part of a roof ventilation evaluation. The right component mix comes down to three things: balanced airflow, a clear path from intake to exhaust, and hardware that can stand up to South Florida rain and wind.
A Guide to Professional Vent Installation
A lot of homeowners can understand the theory of attic ventilation in one afternoon. Installing it correctly is a different matter. Once you cut the roof or modify the soffits, you're doing work that has to stay watertight through hard rain, summer heat, and storm season.
That's why good installers move slowly at the planning stage and carefully at the roof stage.

What a proper install looks like
The job starts with layout. A professional confirms vent placement from both the attic and roof side, checks for framing conflicts, and marks openings so the ventilation path lines up with the design. This is especially important for ridge vent work, where the slot cut has to be accurate and consistent.
On the intake side, soffit openings have to be clear and continuous enough to feed the system. Inside the attic, baffles or rafter vents are installed tight to the roof decking so insulation can remain in place without choking off the channel.
A typical sequence looks like this:
- Mark and verify vent locations from inside and outside.
- Create or open intake paths at soffits or eaves.
- Install baffles to protect the air channel above insulation.
- Cut exhaust openings at the ridge or selected roof vent locations.
- Fasten and weather-seal vents to match roofing requirements.
- Inspect airflow path from low intake to high exhaust.
Where good installs separate from bad ones
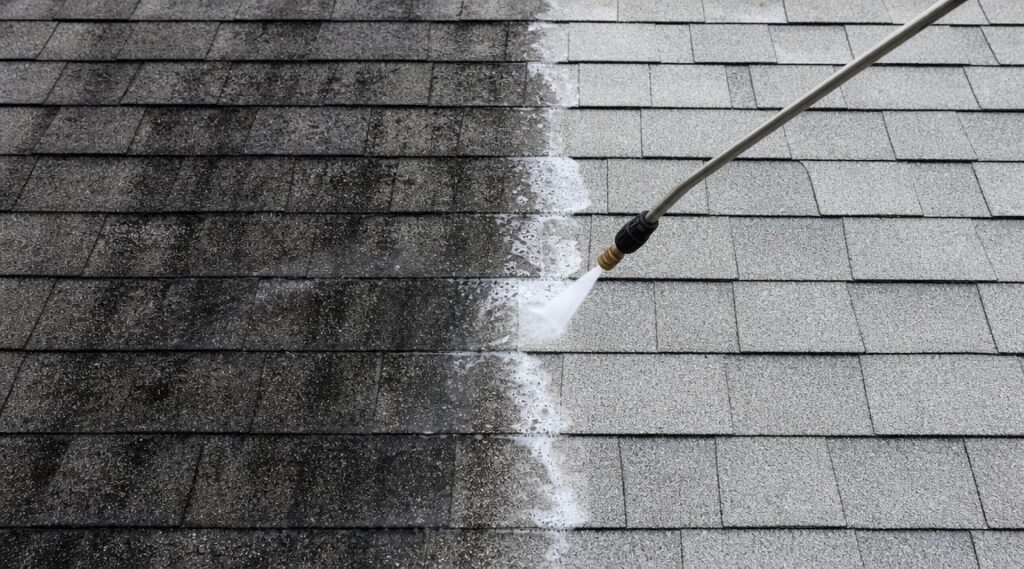
The details make the difference. A sloppy slot cut at the ridge can affect performance and weather resistance. Improper fasteners can loosen over time. Poor shingle integration around static vents can become a leak point. In South Florida, details that seem minor during installation become major during wind-driven rain.
A roof-side photo reference like this professional vent installation example helps show what clean integration should look like.
What I want homeowners to ask any contractor is simple:
- How are you protecting the intake path from insulation blockage
- How are you sizing intake and exhaust
- How will the vent be sealed into the roof system
- What product is being used and why that one fits this roof
A vent should look like it belongs on the roof, not like it was added after the fact. Clean layout, proper flashing, correct fastening, and a clear air path are what you're paying for.
For hurricane-readiness, attachment matters. So does product choice. Vents need to be installed according to the manufacturer's instructions and integrated with the roof covering so they stay secure and watertight. The goal isn't just airflow. The goal is airflow without creating a weak spot in the roof.
Frequently Asked Questions About Attic Ventilation
Can you have too much attic ventilation
You can have too much of the wrong kind, or too much in the wrong place. The core issue isn't merely the amount of venting. It's whether the system is balanced and whether air can travel from intake to exhaust without obstruction. Randomly adding roof vents to an attic with poor soffit intake usually doesn't fix anything.
Are powered attic fans better than passive vents
Not automatically. Powered fans can help in some situations, but they're often installed to compensate for bad intake or poor design. If the attic doesn't have enough replacement air coming in low, the fan can pull air from the wrong places and reduce the system's effectiveness. Passive systems tend to be more reliable when the attic has a clear, balanced airflow path.
Will adding vents make the roof leak
A properly installed vent should not create a leak problem. Leaks usually come from bad placement, poor flashing, incorrect fastening, or rushed workmanship. That's why vent installation should be treated as roofing work, not as a handyman add-on.
What should homeowners check during the year
Keep it simple and visual:
- Look at soffits and eaves: Make sure paint, debris, or insulation hasn't blocked openings.
- Check for odor after storms: A stale or musty smell can point to trapped moisture.
- Watch ceilings and upper rooms: Uneven heat can suggest attic airflow trouble.
- Inspect after major wind events: Damaged or lifted vent components should be checked quickly.
If you're not sure whether your attic is venting correctly, get a roof and attic inspection before the next stretch of heavy heat and humidity. Paletz Roofing and Inspections works with homeowners across Broward, Miami-Dade, and Palm Beach counties on roof ventilation issues, inspections, and vent installation planning, so you can get a clear answer on what your attic needs and what it doesn't.