
When a nasty Hallandale Beach storm finally moves on, the first thing on any homeowner's mind is the roof. And while you might be looking for missing shingles, it's often the flashing—the thin metal strips protecting your roof's seams—that takes the real beating.
High winds have a nasty habit of getting underneath this metal, bending it up and creating a perfect, non-stop invitation for rainwater. Your first look from the ground is crucial. Spotting a peeled-back drip edge or a gap where the roof meets a wall can be the difference between a simple fix and a major interior repair job.
Your First Look at Post-Storm Roof Damage
It’s easy to feel a bit overwhelmed in the immediate aftermath of a storm. But before you even think about dragging out a ladder, your most powerful first move is a simple walk around your property. The goal here is just to spot the obvious signs of bent flashing after wind in Hallandale Beach, all from the safety of the ground.
This quick once-over gives you a solid idea of the storm's impact and helps you give clear information to a roofing pro if you need to make that call. We all know these weather events hit the whole community, not just one house. It’s a shared experience, and understanding the challenges faced by local businesses' recovery post-storm really puts the community's resilience into perspective.
Identifying Obvious Flashing Damage
Take a slow walk around the outside of your home. Your eyes should be drawn to the places where your roof meets anything else—a wall, a chimney, another roof plane. These intersections are where flashing does its most important work.
You’re basically looking for anything that just doesn't look right. Here’s what to zero in on:
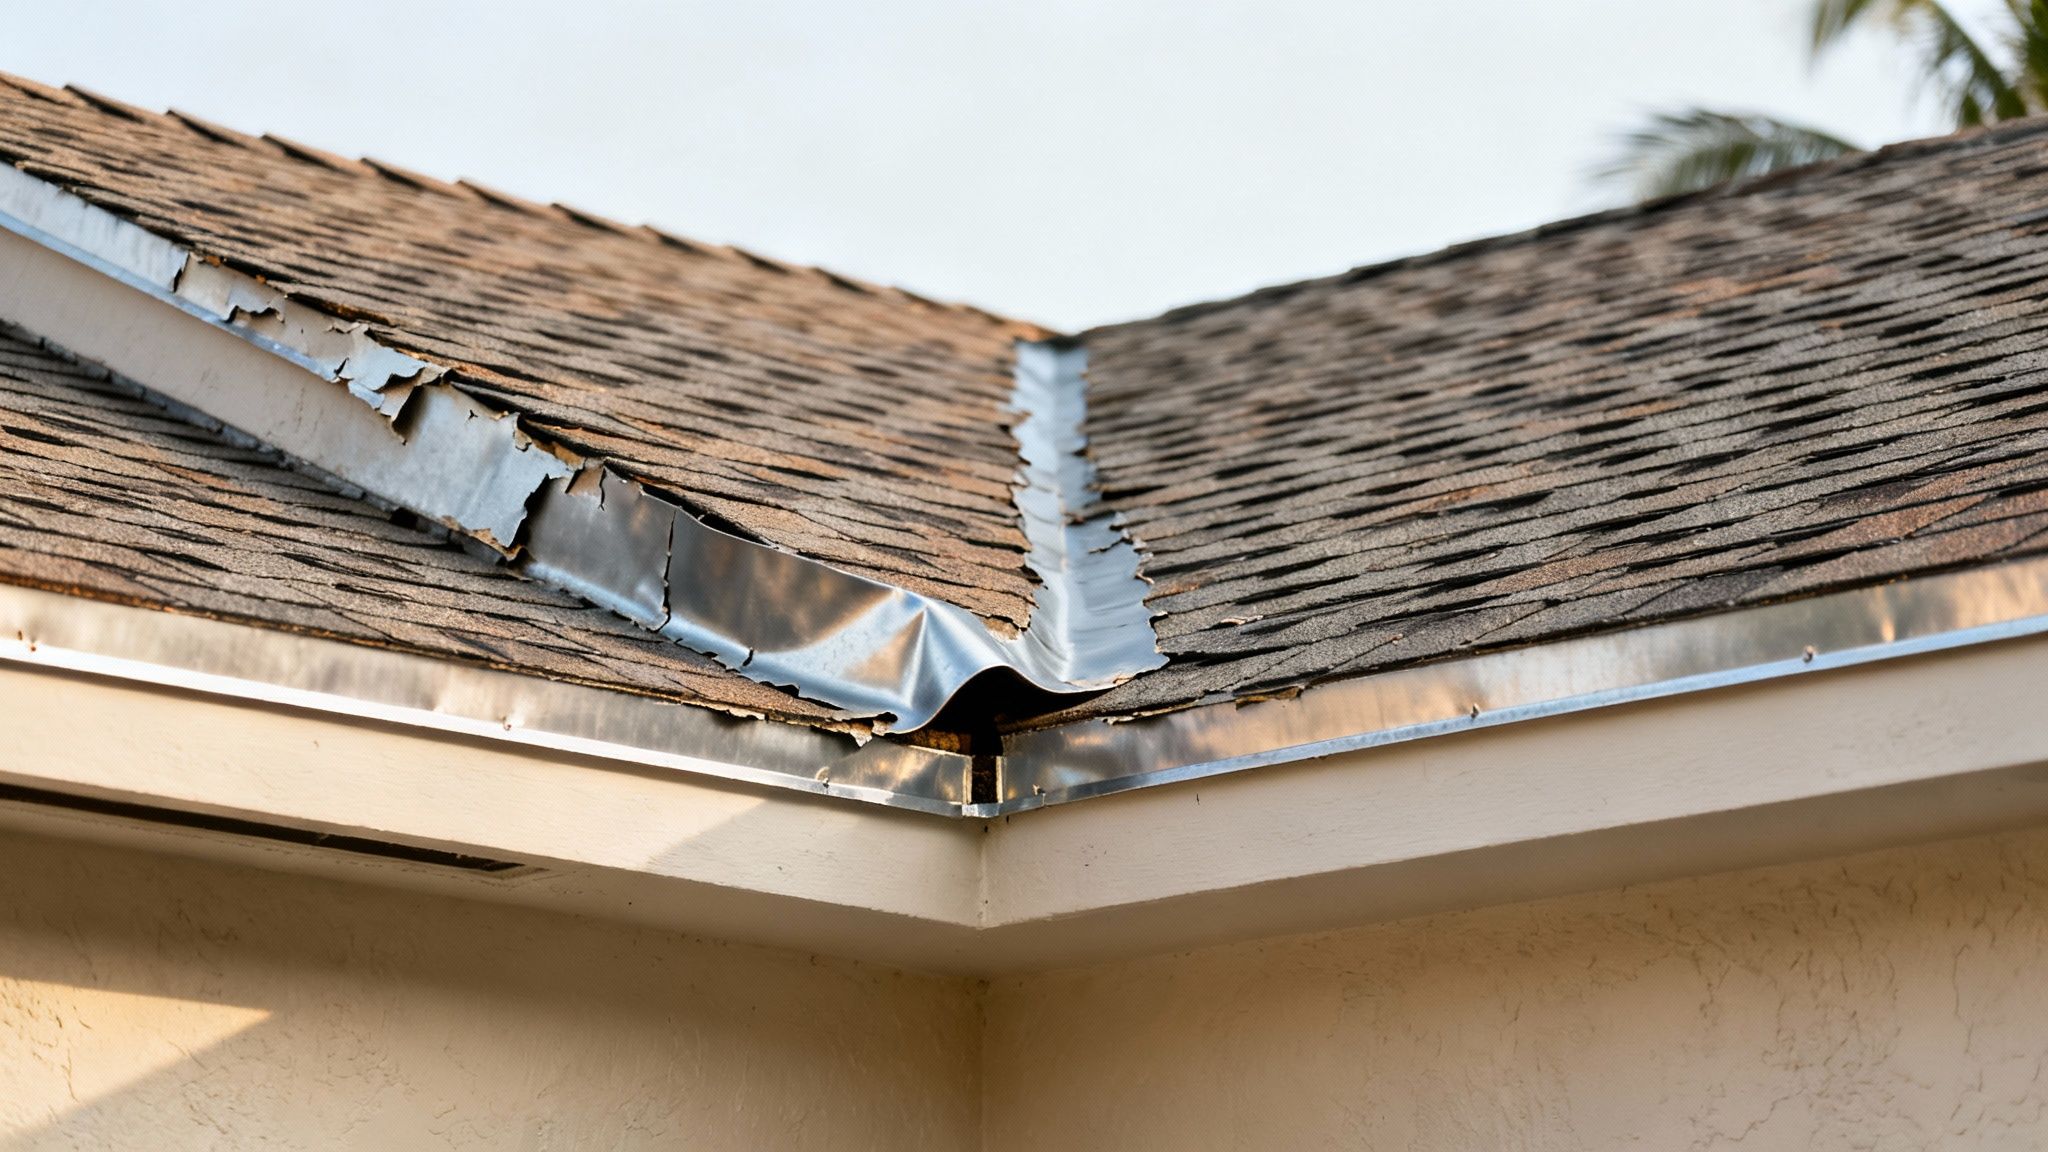
- Lifted Drip Edge: Scan the perimeter of your roofline. That metal strip, the drip edge, should be tight against the wooden fascia board. If you see it bent up or pulled away from the house, wind got under it.
- Gaps in Step Flashing: Look at the sides of your chimney or any dormers. You should see a neat, woven pattern of L-shaped metal pieces. If you can see gaps between them or notice any pieces bent outward, you've found a leak-in-waiting.
- Damaged Valley Flashing: The valleys, where two roof slopes meet, have a wide channel of metal designed to handle a ton of water. Grab a pair of binoculars and check if that metal looks crumpled, pushed up, or out of position.
This isn't just theoretical. Hallandale Beach has a documented history of 293 recorded wind events, from tropical storms to full-blown hurricanes that have hammered our homes and businesses. It's events like Hurricane Dorian, which blasted the area with wind gusts up to 61 mph, that are the culprits behind this kind of flashing damage.
Expert Tip: Your phone is your best tool right now. Snap pictures of anything that looks off. This visual proof is gold, whether you're showing it to a roofer or filing an insurance claim. Even a small bend in the metal can turn into a serious leak down the road.
To help you get started, here's a quick checklist for that initial ground-level inspection.
Immediate Post-Storm Roof Assessment Checklist
| Inspection Area | What to Look For | Safety Note |
|---|---|---|
| Roof Edges | Drip edge metal that is bent, lifted, or pulled away from the wood. | Use binoculars for a closer look to avoid getting near fallen power lines. |
| Chimneys & Dormers | Gaps between the wall and roofing; metal flashing that is bent outward or missing. | Stay on solid, even ground. Avoid walking on debris-covered areas. |
| Roof Valleys | Metal channels that appear crumpled, dented, or lifted from the roof deck. | Again, binoculars are your friend here. Do not attempt to get on the roof. |
| Vents & Pipes | Rubber boots or metal collars around pipes that are cracked, torn, or dislodged. | A visual check from a distance is sufficient and safe. |
Completing this quick check gives you a clear picture of the situation. This information is exactly what an expert needs to properly diagnose the problem when they arrive. You can learn more about professional roofing assessments to see how your initial findings fit into the bigger picture.
How to Safely Inspect Your Roof Flashing
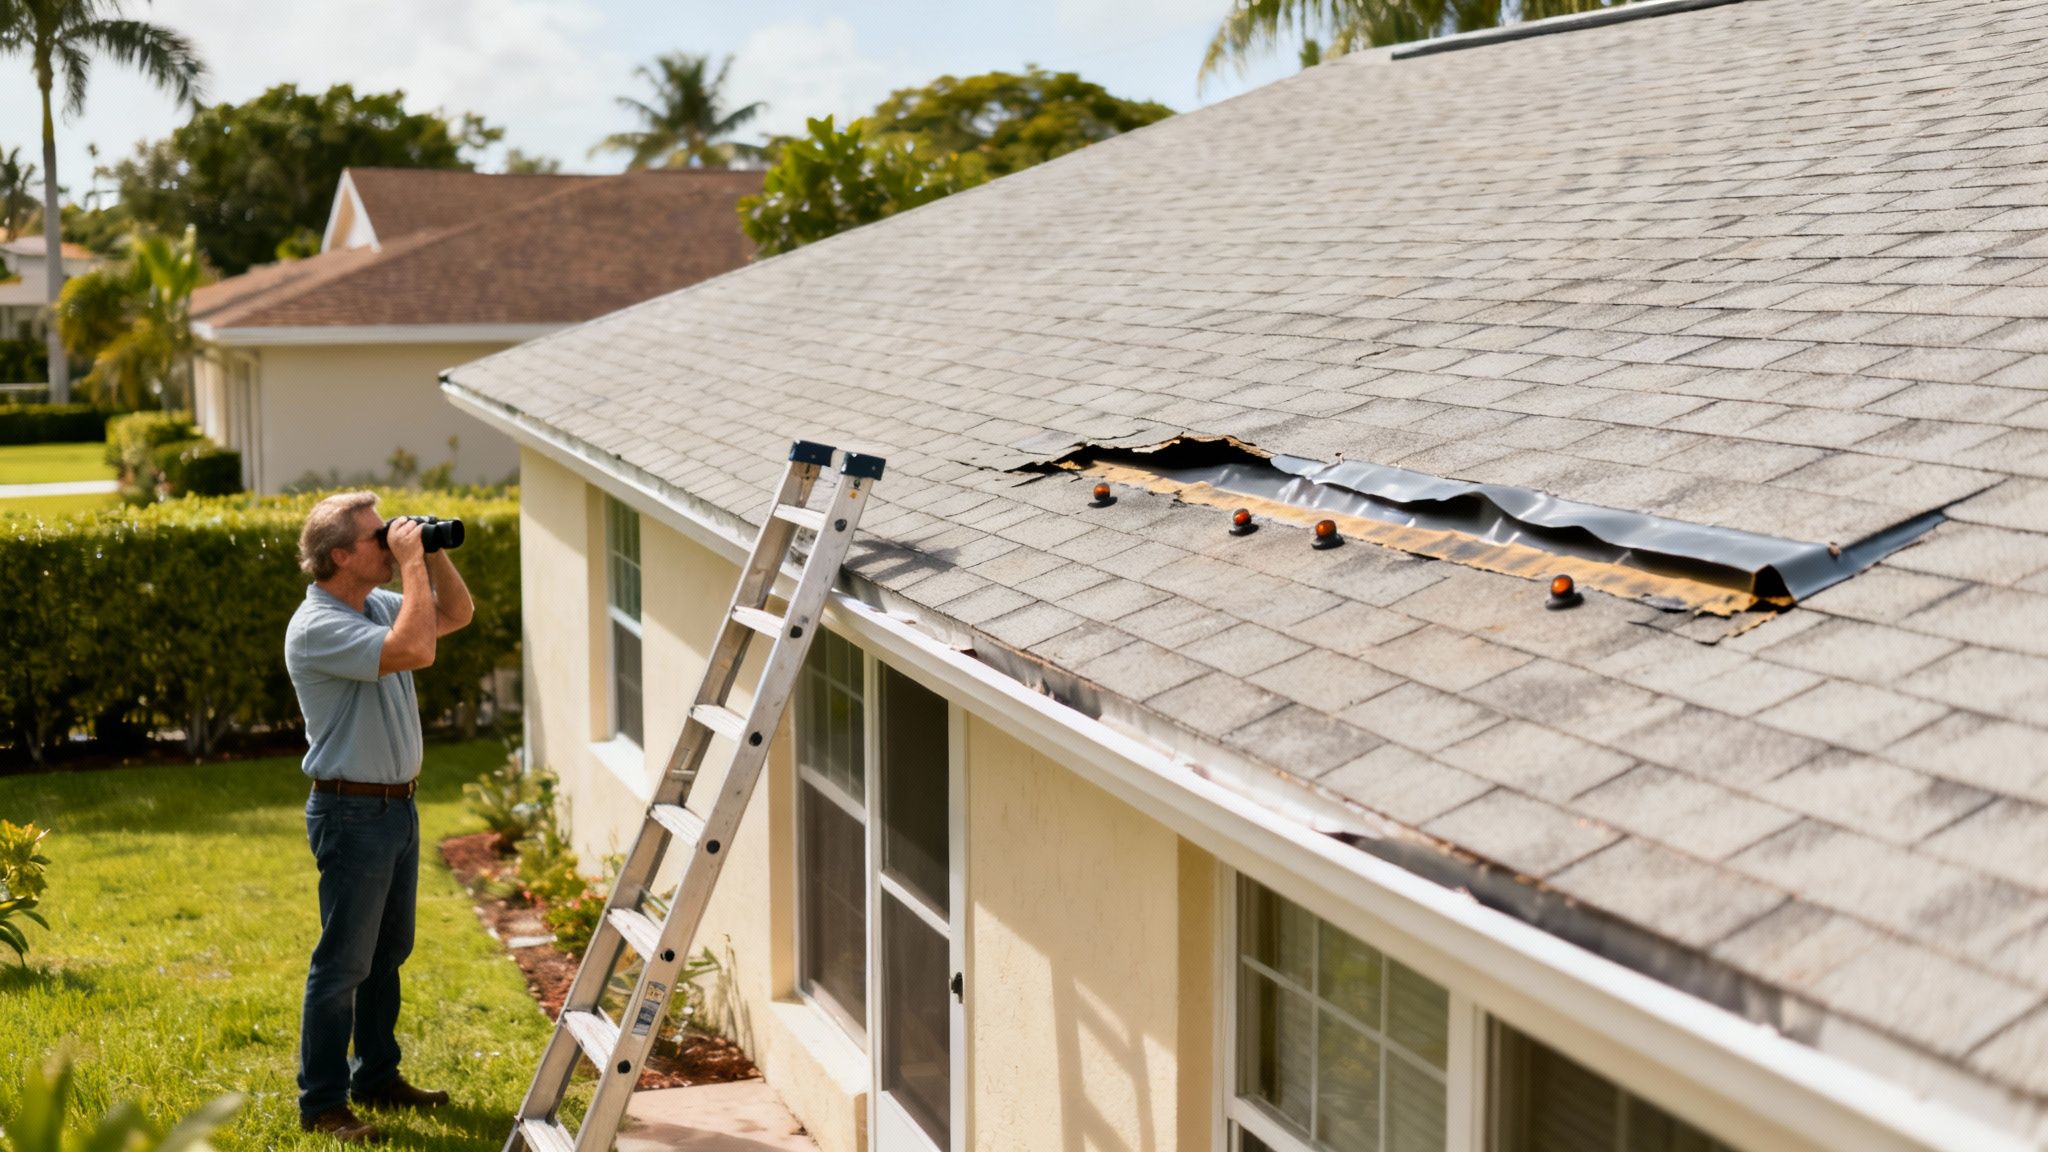
After a big storm blows through, the only way to really know what’s going on with your roof flashing is to take a good, hard look. Cutting corners here is a recipe for expensive water damage down the road. The good news? Your first pass can, and should, start safely from the ground.
Grab a good pair of binoculars and do a slow walk around your property. This lets you get up close and personal with your roofline without ever setting foot on a ladder. Scan every edge, corner, and place where two surfaces meet—you’re looking for any piece of metal that isn't sitting perfectly flat and tight.
Ground-Level Inspection Checklist
From down on the ground, your goal is to spot the obvious red flags. We're not looking for microscopic flaws; we're hunting for the big stuff that tells you a professional needs to get involved or that a closer look is warranted.
Keep your eyes peeled for these common culprits:
- Visibly Bent or Lifted Metal: Look at the flashing around your chimney, dormers, and any valleys. Does it look wavy, buckled, or like the wind tried to peel it back like a can opener?
- Obvious Gaps: Pay close attention to where the roof meets a wall. You shouldn't see any daylight or major gaps between your siding and the step flashing.
- Debris in the Yard: This one’s a dead giveaway. If you find pieces of metal or shingle scraps in your flowerbeds, it’s a sure sign something came loose up top.
A Pro's Insight: Snap photos as you go. Even if something looks minor, document it from a few different angles. This visual record is gold if you end up filing an insurance claim because it helps prove the damage was caused by the storm.
Preparing for a Closer Look
If your ground-level check turned up some questionable spots—and you feel 100% comfortable and safe using a ladder—you can move on to a closer inspection. Let me be clear: safety is everything. Never get on a roof that’s wet, has a steep pitch, or is covered in debris.
Before you go up, make sure your ladder is on solid, level ground and that it extends at least three feet above the edge of the roof. Always wear shoes with a good rubber sole for grip, and it's smart to have a spotter on the ground. To get a better feel for what to look for, you can check out these images of common roof damage that we see all the time.
Identifying Subtle Flashing Damage
Once you’re in a safe position, you can start looking for the sneaky stuff. This is the kind of bent flashing after wind in Hallandale Beach that’s often invisible from the ground but can let a surprising amount of water in.
Get a good look at the details and check for:
- Popped Fasteners: High winds create uplift that can yank roofing nails and screws right out, breaking that all-important watertight seal.
- Hairline Cracks in Sealant: Check the caulk around vents and flashing seams. Old sealant gets brittle and easily cracks under the stress of high winds.
- Dark Water Stains: Look at the fascia boards just under the drip edge. Those dark, streaky stains are a telltale sign that water is sneaking behind the flashing.
Taking the time to do this detailed check gives you a complete picture of your roof's condition. It's what will help you decide if this is a quick DIY fix or if it's time to bring in the pros.
Gauging the Seriousness of Flashing Damage
After a big storm blows through, not every bent piece of flashing is a five-alarm fire. The real skill is knowing what you're looking at. Is it a minor tweak you can handle yourself, or is it a sign of bigger trouble that needs a pro right away?
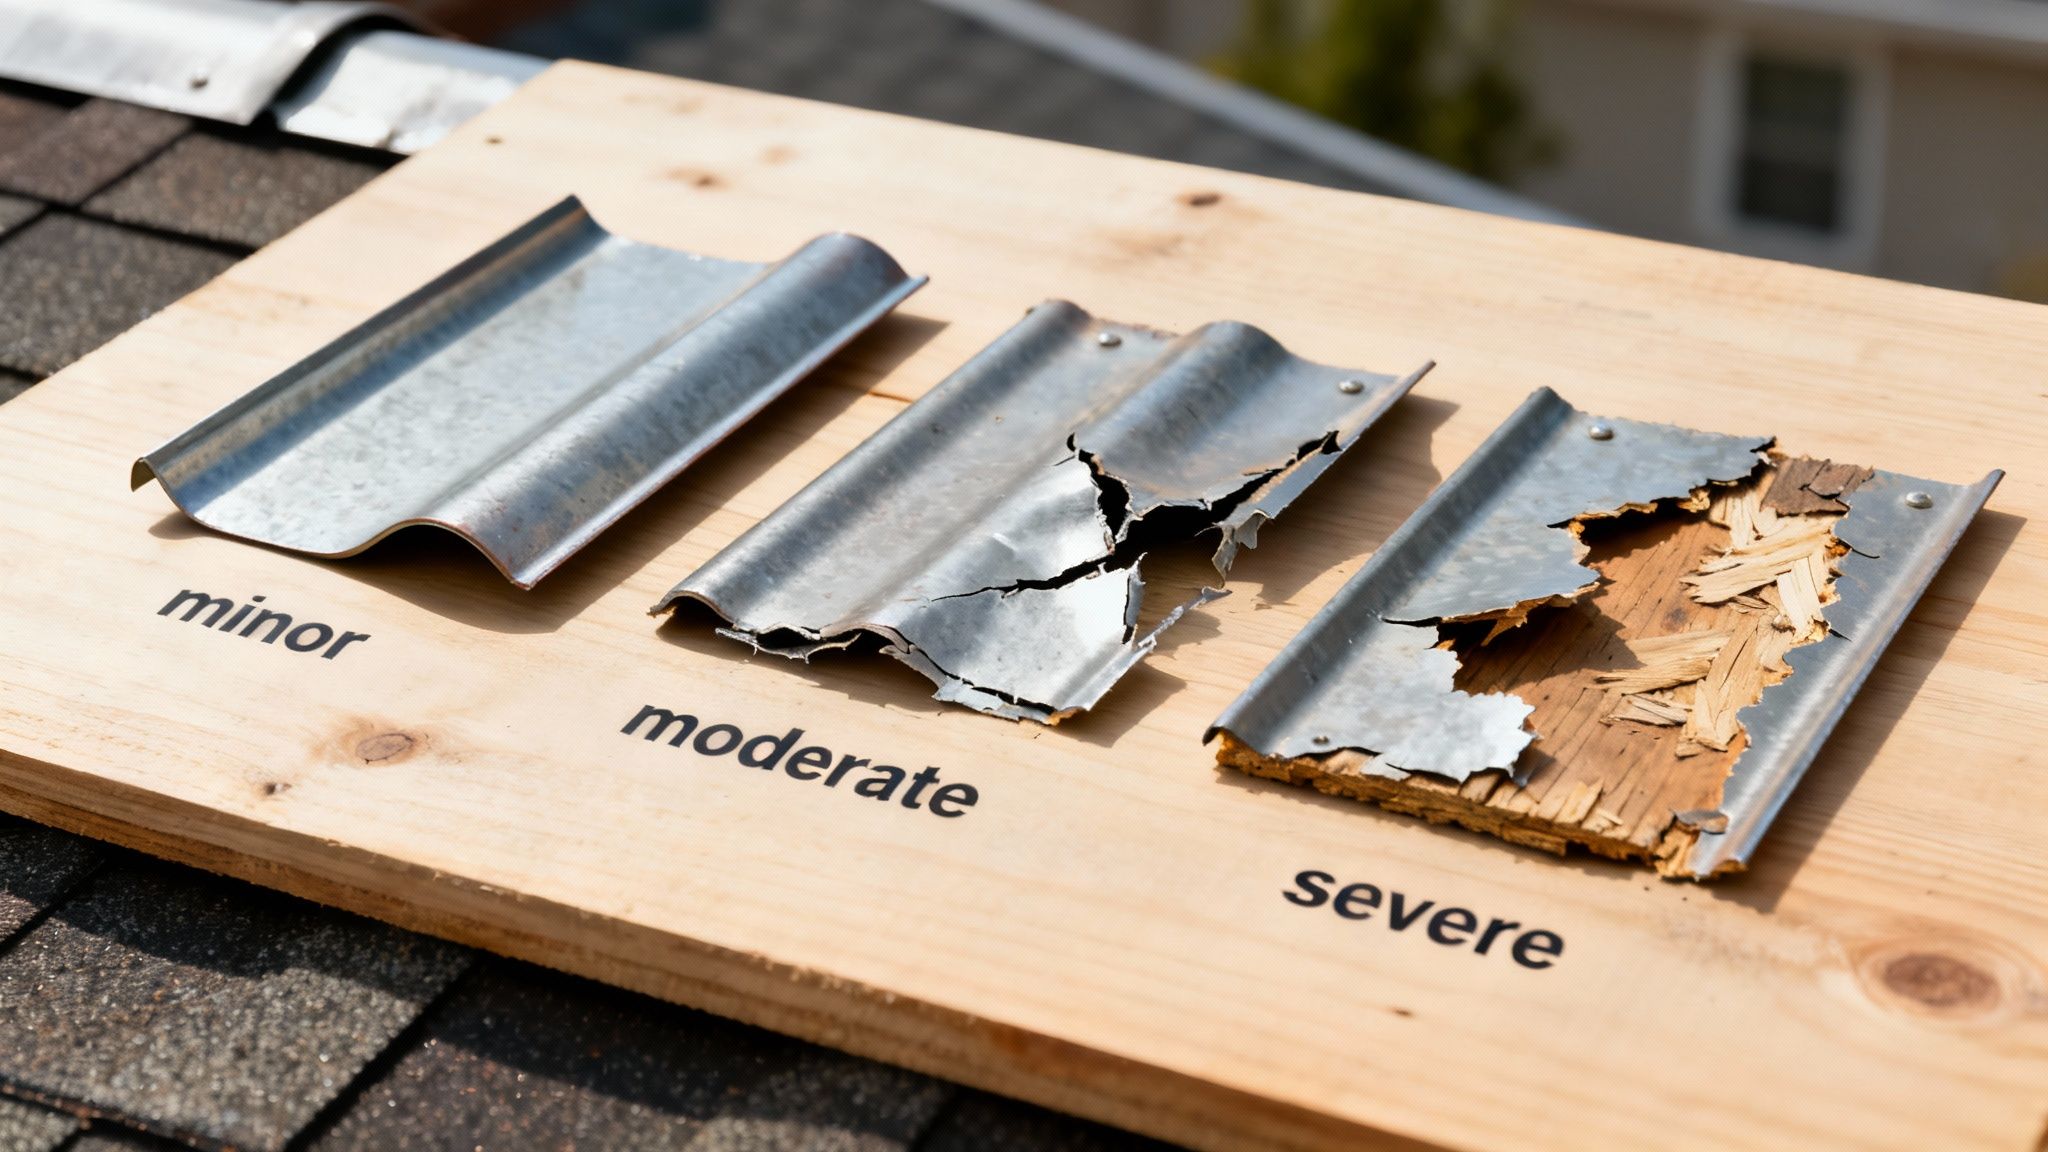
Figuring this out is crucial. It keeps you from panicking over a small issue but also prevents you from ignoring a problem that could lead to thousands in water damage. Let's break down what you might find into three categories.
Minor Bends and Lifts
This is the stuff you’ll see most often after a good Hallandale Beach thunderstorm. Think a slightly lifted drip edge or a corner of step flashing that's been peeled up, but by less than an inch. The key here is that the metal itself isn't torn, punctured, or badly creased.
Here’s what that looks like on a real roof:
- Drip Edge: You might notice a gentle, uniform wave in the metal along your roof's edge where the wind pried at it, but it’s still sitting mostly tight against the fascia board.
- Step Flashing: Maybe one L-shaped piece next to your chimney has pulled away from the wall just a bit, but the shingle above it is still doing its job.
With this kind of minor damage, your immediate leak risk is pretty low. You can often carefully press these bends back into place and just double-check that the fasteners are still secure. If you’re comfortable on a ladder and know what you're doing, it’s a manageable fix.
Moderate Tears and Loose Sections
Alright, now we're getting into more serious territory. This is more than a simple bend. We're talking about visible tears in the metal, a sharp crease where it was bent back and forth, or even a whole section that's rattling in the wind.
The risk of flooding and wind damage in Hallandale Beach is extremely high, impacting approximately 99% of buildings in the city. When flashing is moderately damaged, it creates a direct pathway for this water, turning a roof issue into a potential interior flood. You can explore more about local climate risks and how they impact properties.
A classic example is seeing an entire 8-foot section of drip edge hanging on by just a nail or two. Another red flag is finding valley flashing with a clear puncture or rip from flying debris. Damage like this is a direct invitation for water to get in, and it really needs a professional to make a lasting, watertight repair.
Severe Damage and Missing Pieces
This one’s the real emergency. If you're looking at severe damage, it means large sections of flashing are completely gone, or what's left is so mangled you can see the bare wooden roof deck underneath. You might have even found pieces of your flashing in the yard.
When you can see exposed wood, splintered decking, or big gaps where flashing should be, your roof's integrity is officially compromised. This isn't just about a leak anymore—it’s about preventing serious structural decay and wood rot. Don't even think about a DIY fix here. Your first and only move should be to call a licensed roofer immediately.
A Practical Guide to DIY Flashing Repairs
If your inspection turns up only minor damage—maybe a slightly lifted edge or a small bend—you can probably handle the repair yourself. Tackling bent flashing after a Hallandale Beach windstorm is definitely manageable if you have the right tools and know-how. This can save you a service call for what might be a quick fix.
This isn't just about slapping on some caulk and calling it a day. The goal is a durable, watertight repair that's going to last.
Before you even think about climbing that ladder, let's get your tools in order. You don’t need a whole roofer’s truck, but a few items are absolutely essential.
- Pry Bar: A flat pry bar is your best friend for gently getting under shingles to access fasteners without cracking them.
- Hammer: You'll need it for pulling out old nails and driving in new screws.
- Quality Roofing Sealant: This is non-negotiable. Get a high-grade, polyurethane-based sealant made specifically for outdoor roof use. Steer clear of cheap silicone caulk; it just won't hold up.
With your gear ready, the first job is to carefully reshape that bent piece of metal.
Proper Repair Techniques
The trick is to coax the flashing back into its original shape without creasing or cracking it. I’ve seen plenty of DIY attempts fail right here. Grab a small block of wood, place it on the backside of the metal, and gently tap it with your hammer. Work slowly from the good, unbent area toward the damaged spot. This technique helps you avoid creating a sharp fold, which is a guaranteed weak point.
Once the flashing is looking flat again, take a close look at the fasteners. High winds love to pull roofing nails right up. Use your pry bar to remove any of these popped nails.
Don't just hammer them back in. Replace them with new, gasketed roofing screws. These offer way more holding power and will stand up much better to the next storm. Make sure to drive the new screws into a fresh spot near the old hole for a solid bite.
Crucial Tip: Never, ever apply sealant to a dirty or wet surface. It will fail, I guarantee it. Use a wire brush to scrub the area clean of any grime or old sealant, then wipe it down with a rag and denatured alcohol. You need a perfectly clean, dry bond for it to work.
Now for the final step: applying the sealant. Lay down a thick, continuous bead of sealant over every fastener head and all along the top edge of the flashing where it meets the roof or wall. Use a putty knife or even a gloved finger to smooth the bead out, making sure you press it firmly into the seam. This eliminates any tiny gaps that water will inevitably find. You can see what a professionally sealed job looks like in our gallery of completed roofing projects.
Common DIY Mistakes to Avoid
So many well-intentioned DIY repairs end up failing because of a few simple, avoidable mistakes.
Using the wrong fasteners is a huge one. You absolutely must use galvanized screws to prevent rust, which can lead to ugly stains on your roof and a weakened repair over time.
Another common error is being too stingy with the sealant. This is not the time to be conservative. A thin, neat-looking line just won't cut it. You need a robust, waterproof barrier to protect your Hallandale Beach home from the next big downpour.
When to Call a Roofing Pro in Hallandale Beach
Look, I'm all for rolling up your sleeves and tackling a home project. A minor bend in your roof flashing can often be a manageable DIY fix. But I've been doing this long enough to know that the most important tool any homeowner has is knowing their own limits.
Sometimes, the smartest—and safest—move you can make is to put down the tools and pick up the phone. Ignoring the red flags that point to a bigger problem can turn a simple repair into a catastrophic failure the next time a big storm rolls through.
Knowing what to look for is half the battle. If the wind has actually torn, creased, or ripped off entire sections of flashing, a simple patch-up job is off the table. Likewise, if you spot any damage to the shingles or the wooden decking underneath the metal, you're looking at a problem that goes way beyond the surface.
To make it a bit easier, here’s a quick way to think through the problem and decide on your next move.
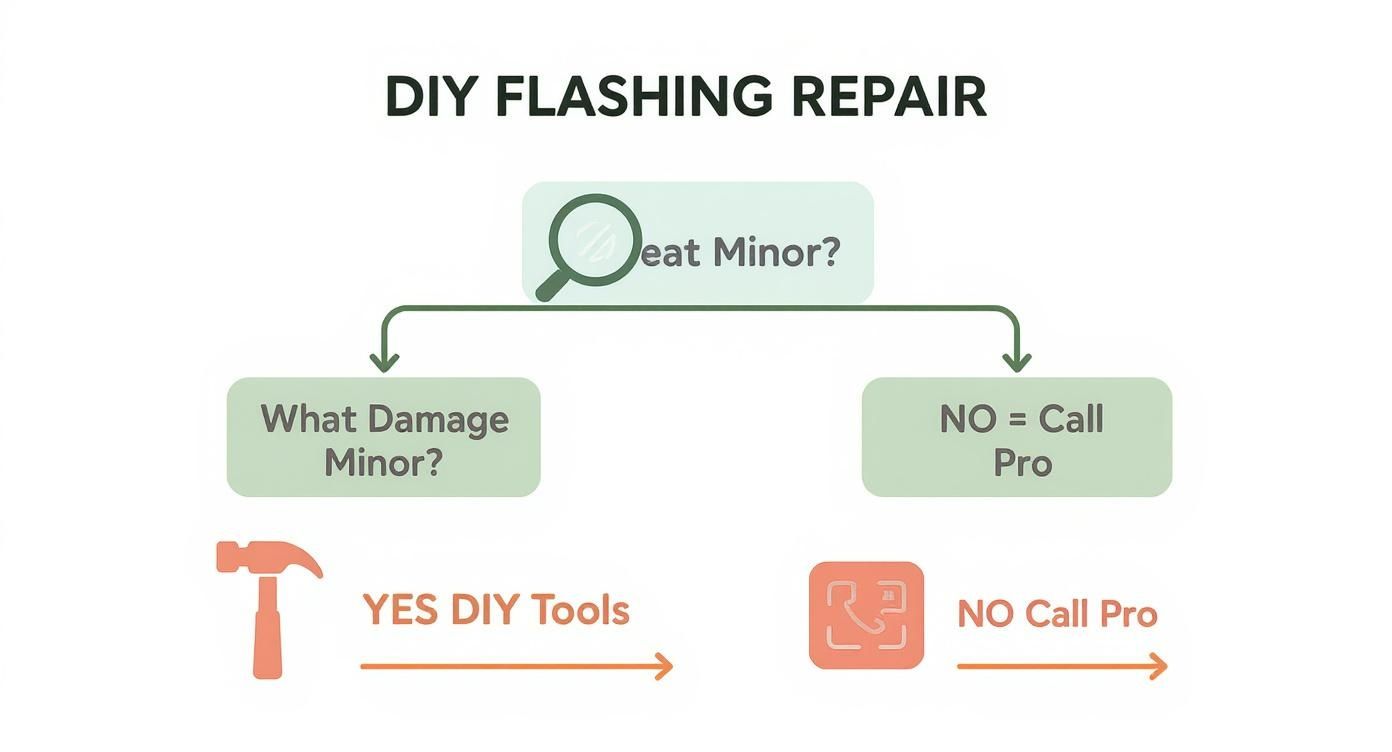
This flowchart really simplifies things, pointing you toward a professional if the damage is anything more than minor. It’s all about ensuring the repair is done right and, more importantly, safely.
When DIY Is Not an Option
Let's talk about safety and logistics for a second. If the damaged flashing is on a steep second-story roof or in any other spot that’s tough to get to, the risk of a fall is just too high. It's not worth it. Professional roofers have the training and specialized safety gear—harnesses, proper ladders, anchorage points—to work in those dangerous conditions.
Here are a few specific scenarios where you should absolutely call a licensed Hallandale Beach contractor, no questions asked:
- Significant Tears or Punctures: Any actual hole or major tear in the flashing isn't a job for sealant. That entire section needs to be replaced by someone who knows how to properly integrate it with the surrounding materials.
- Compromised Underlayment: If you can see the black roofing felt or the wood deck beneath it, your roof's primary water barrier has been breached. This is a serious issue that needs an expert's touch.
- Widespread Damage: Seeing bent or lifted flashing in multiple spots? That could signal a systemic problem with how it was installed in the first place, and only a pro can properly diagnose and fix that.
The weather here is no joke. Hallandale Beach has seen 21 severe weather warnings in a single year, with thunderstorms capable of producing 60 mph winds. It's no wonder that bent flashing is a constant headache for the owners of our city's 27,000+ housing units. You can get a better sense of the forces your roof is up against by checking out the local severe weather patterns in Hallandale Beach.
Investment Over Expense: Try to think of hiring a professional not as an expense, but as a critical investment. A proper, professional repair is your best defense against the kind of costly water damage, wood rot, and mold that can cost tens of thousands to fix down the road.
Vetting Your Hallandale Beach Roofer
Once you've decided to call in a pro, getting the right one is everything. First and foremost, verify they are licensed and insured in the state of Florida. This is non-negotiable—it protects you from liability if someone gets hurt on your property.
When you call around for estimates, have a few key questions ready:
- Can you provide me with proof of your Florida license and general liability insurance?
- Do you offer a warranty on your repair work, and what does it cover?
- Will you give me a detailed, written estimate that breaks down all material and labor costs?
A reputable contractor will have no problem answering these questions and providing the documentation. Their goal is the same as yours: to perform a safe, durable repair that keeps your home protected for years to come.
Got Questions About Wind-Damaged Flashing? We’ve Got Answers.
After a big storm blows through Hallandale Beach, seeing bent flashing on your roof can be a real gut-punch. It’s normal to have a flood of questions about what to do next, from insurance claims to how to stop it from happening again. We hear the same concerns from homeowners all the time, so let's get you some straight, practical answers.
This is all about giving you the clarity and confidence to handle the situation.
Can I Just Slap Some Roofing Cement on Bent Flashing?
I see this all the time, and it's a huge mistake. While roofing cement is a fantastic sealant, it’s not a structural fix. Using it alone on a piece of bent metal is a recipe for disaster.
Think about it: when flashing gets peeled back by the wind, it creates an open channel. Wind-driven rain doesn’t just fall down; it gets pushed sideways and up. That gap is a superhighway for water to get right under your shingles.
Smearing sealant over that gap is like putting a Band-Aid on a broken arm. It might look sealed for a little while, but it will fail, and probably when you least expect it. The right way to do it is to first get the metal bent back into place and properly secured. That often means adding new, gasketed roofing screws because the old ones are likely compromised. Only after the flashing is mechanically sound and tight against the roof again should you lay down a solid bead of high-quality sealant to waterproof everything.
The Bottom Line: Sealant is for waterproofing a solid repair, not for creating one. You have to fix the physical problem first.
Is Bent Flashing Covered by Homeowners Insurance?
For the most part, yes. A standard Florida homeowners insurance policy typically covers wind damage, and bent flashing is a textbook example of that. But—and this is a big but—it’s not always a straightforward process.
A few things can complicate a claim. Your specific policy details matter most, especially your hurricane deductible and any fine-print exclusions. The insurance adjuster will also look at the age and condition of your roof. They need to be convinced the damage was caused by a specific storm, not just slow-motion failure from years of neglect.
This is exactly why documentation is your best friend.
- Snap Photos Immediately: As soon as you can do it safely, take a bunch of clear, dated photos of the bent flashing. Get different angles.
- Call Your Agent ASAP: Don't wait. Report the damage and ask them what the process is for your policy.
- Get a Pro on Your Side: A formal inspection report from a licensed roofer is worth its weight in gold. It proves the extent of the damage and validates your claim.
How Do I Keep This From Happening Again?
In a place like Hallandale Beach, you have to play offense, not defense. A little proactive maintenance goes a long, long way in preventing headaches and huge repair bills down the road. The single best thing you can do is have your roof inspected regularly—at least once a year, and always after a major storm.
When you're up there (or your roofer is), you’re looking for the small stuff: sealant that's starting to crack or fasteners that look like they’re backing out. Catching those little things stops the wind from getting a grip and turning a tiny issue into a torn-off section of your roof.
And when it’s eventually time for a new roof? Invest wisely. Ask for a thicker-gauge flashing material. Insist that your contractor uses the proper number of fasteners to meet Florida's tough building codes. Upgrading the whole system to be more wind-resistant is the best long-term protection you can buy for your home.
Dealing with roof damage is stressful, but you don't have to figure it all out on your own. For a professional, no-strings-attached inspection and a clear plan to make your home secure, you can trust the experts at Paletz Roofing and Inspections. Contact us today and make sure your roof is ready for whatever the weather throws at it.