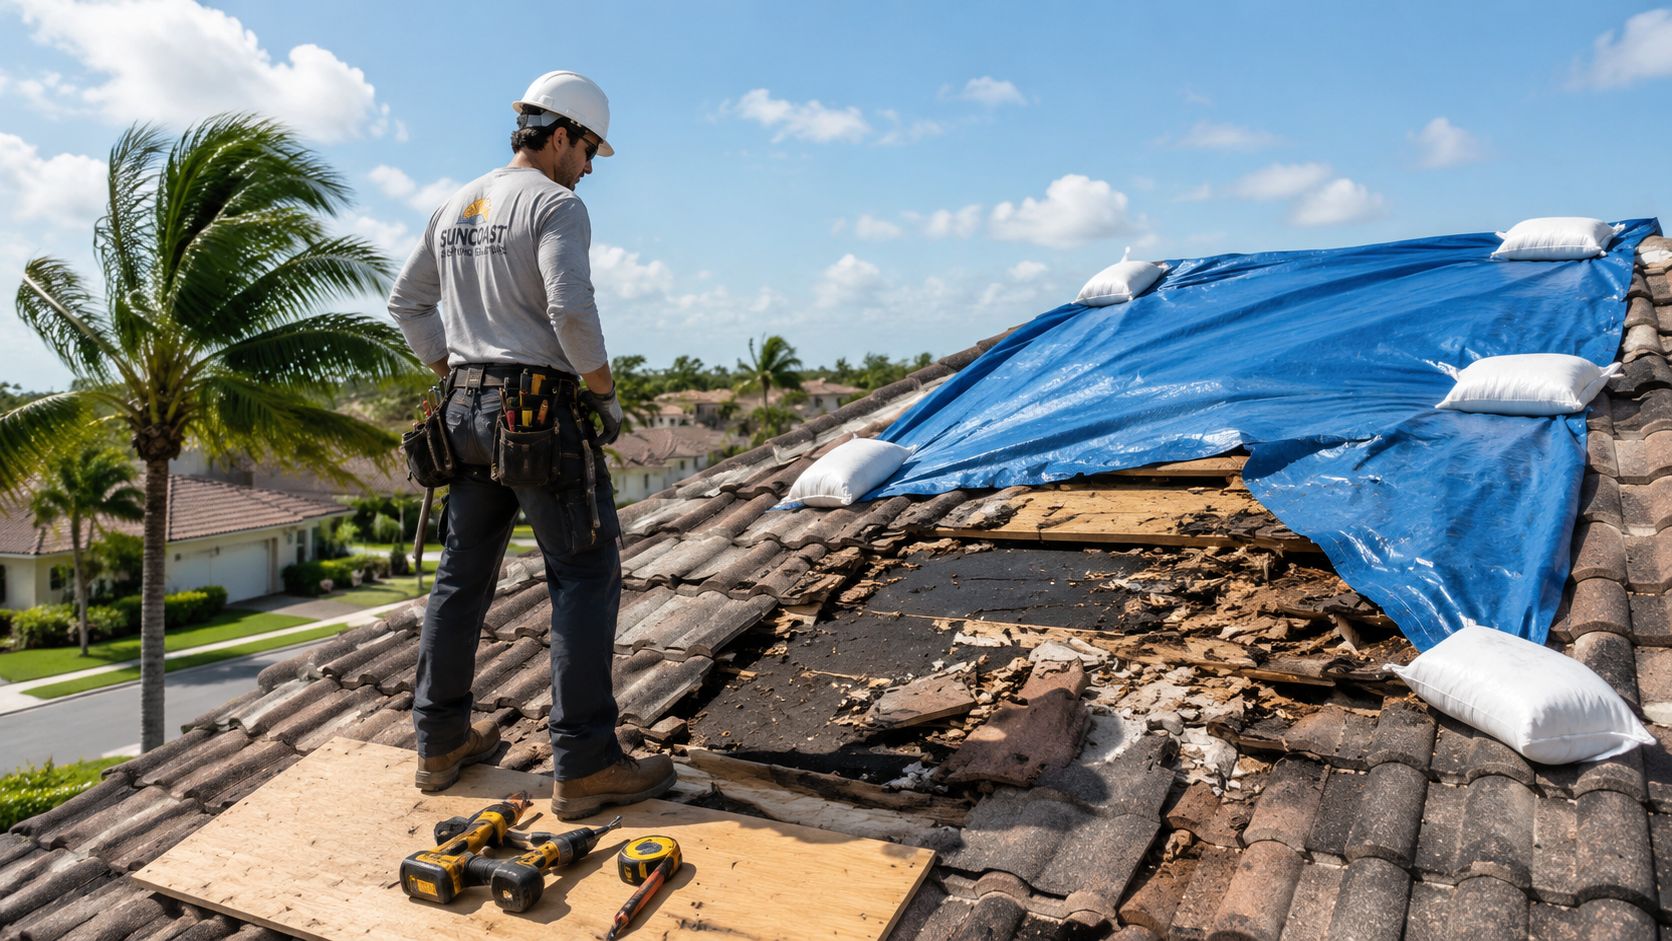
The wind has finally died down. The yard is full of palm fronds, the power may still be flickering, and you're standing outside looking up at a roof that doesn't seem quite right. That's a familiar South Florida morning after a hurricane. The hard part is that roof damage isn't always obvious from the driveway. A few lifted shingles, one loose ridge tile, or bent flashing can turn into an interior leak fast once the next rain band rolls through.
The right move is to stay calm and get methodical. Safety comes first. Water intrusion comes second. Paperwork comes third. If you handle those in that order, you give yourself the best chance of protecting the house and keeping the repair process from turning into a bigger financial hit than it needs to be.
Table of Contents
- Your South Florida Post-Storm Action Plan
- What to Do in the First 24 Hours
- A Homeowner's Roof Damage Inspection Checklist
- Common Repair Types Materials and Costs
- Navigating Insurance and Hiring a Licensed Roofer
- How to Prevent Future Wind Damage
- Frequently Asked Questions About Wind Damage
Your South Florida Post-Storm Action Plan
South Florida storms don't damage roofs in neat, predictable ways. One house loses ridge pieces. The next has no missing materials at all, but the wind has already broken the seal on shingles or loosened flashing around penetrations. That's why the first day after a hurricane should never be about guessing. It should be about getting control of the situation.
Start with the property as a whole. Walk the perimeter from the ground. Look for anything that creates an immediate hazard, including hanging limbs, fallen power lines, loose gutters, fence sections blown into the house, or visible debris impact at the roof edge. Then move to documenting what you can see before anything gets disturbed.
For homeowners who want a broader storm-recovery view beyond coastal wind events, this guide on understanding storm damage in Phoenix AZ is useful because it shows how hidden damage can develop even when the exterior doesn't look catastrophic. The climate is different, but the lesson carries over. Damage you can't see right away is often the damage that costs the most later.
Practical rule: Don't make repair decisions while you're still figuring out the damage pattern. First secure the property, then document it, then bring in a qualified inspection.
A solid wind damage roof repair process follows a simple order:
- Protect people first. No one goes on the roof just because the storm passed.
- Stop water intrusion. Temporary protection matters if the roof envelope has been compromised.
- Create a clean record. Photos, videos, notes, and receipts help later.
- Get a professional assessment. South Florida roofs often hide wind damage at seams, edges, valleys, and flashing transitions.
- Make the financial call carefully. The cheapest immediate patch isn't always the smartest long-term repair.
That's how you keep a bad storm from turning into months of preventable interior damage and claim headaches.
What to Do in the First 24 Hours
At 6 a.m. after a South Florida storm, the roof can look fine from the driveway and still be one gust away from leaking hard by afternoon. Hurricane winds do that here. They break seals, lift edges, crack tile corners, and leave behind subtle damage that gets missed until the next rain band comes through.
The first day is about control. Keep people safe, stop new water from getting in, and build a clean record before anything gets moved or patched. That record matters when an insurer starts asking whether the damage came from one wind event or from wear that was already there.
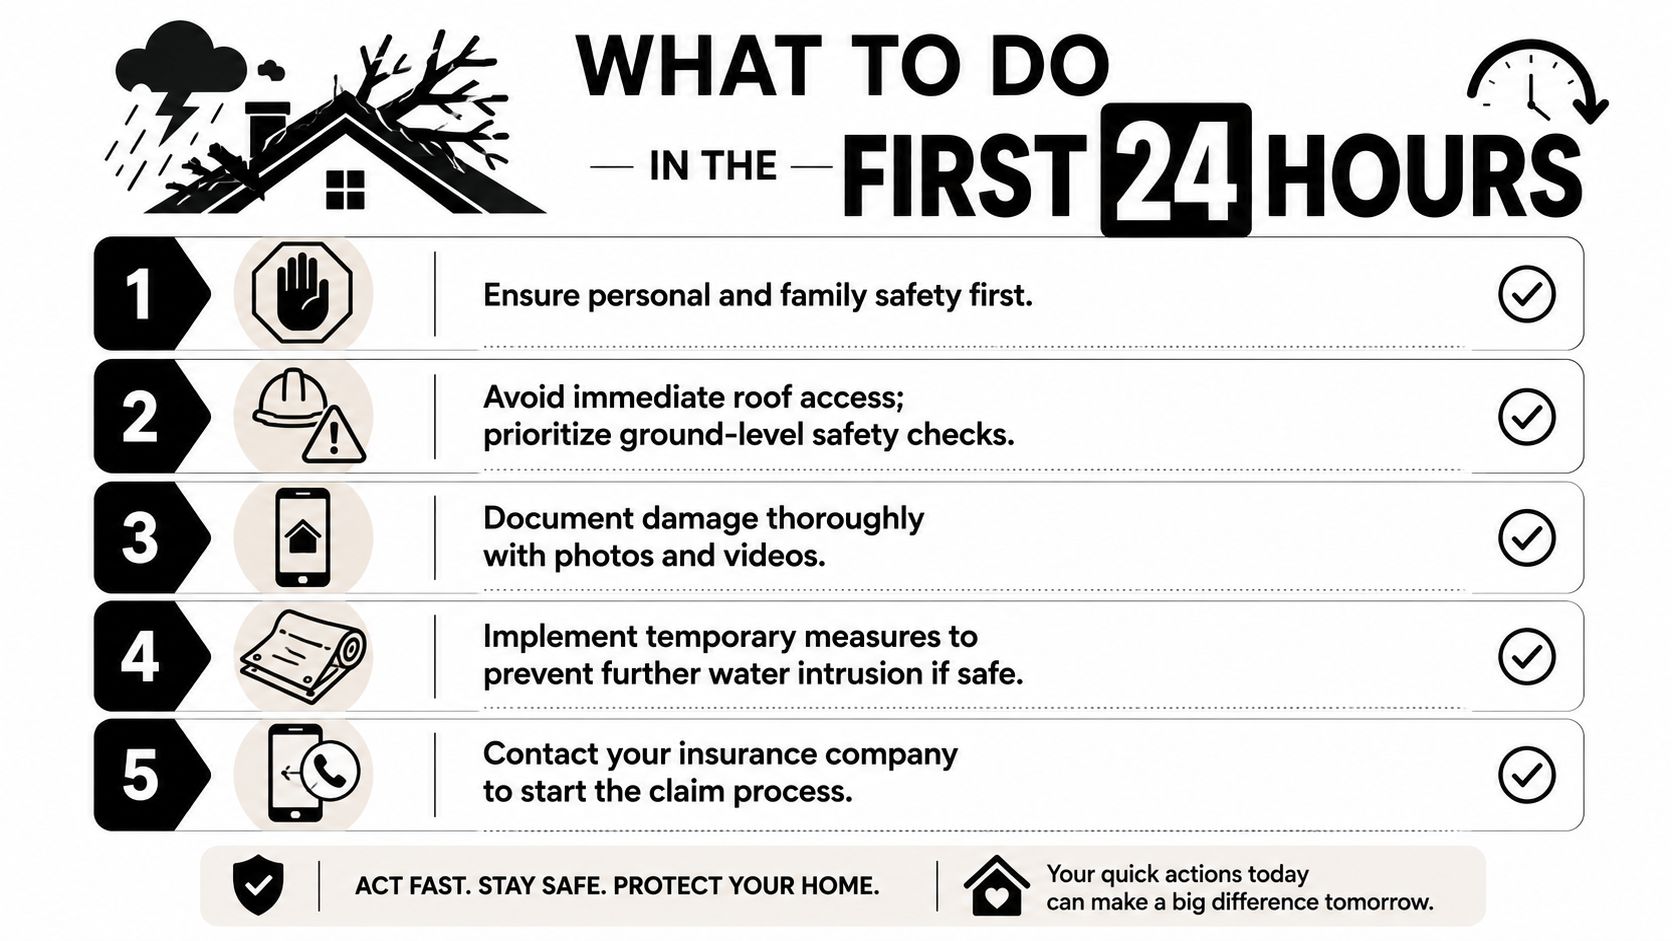
Safety comes before inspection
Stay off the roof.
After a hurricane, I assume every wet roof surface is unstable until proven otherwise. Underlayment may be torn loose. Decking may be soft around fasteners or penetrations. On tile roofs, one shifted tile can send your weight onto the tile below and break both. On shingles, a roof can look intact from the ground while the tabs have creased and lost their seal.
Work from the ground first. Use your phone to zoom in on eaves, ridges, valleys, roof-to-wall transitions, vents, skylights, and flashing. If you need a visual reference for what a storm inspection crew documents, this Paletz Roofing inspection image fits the kind of exterior review homeowners should expect before repair decisions get made.

Document before cleanup starts
Homeowners hurt their own claims when cleanup begins too soon. Once debris is bagged up and water stains are painted over, part of the story is gone.
Take photos in a clear order:
- Full elevation shots of each side of the house
- Roof areas visible from the ground with attention to lifted edges, missing materials, bent flashing, and exposed underlayment
- Close photos of debris impact on gutters, soffits, screens, and siding
- Interior signs of intrusion like ceiling stains, wet insulation, attic drips, damp drywall, or floor damage
- Temporary protection and receipts for tarps, emergency dry-in work, buckets, fans, or service calls
If shingles or tiles blew off into the yard, photograph them before stacking them aside. Keep a few representative pieces. On shingle roofs, look for creased tabs. The broken seal is a serious failure because the shingle will not reseal properly, even if it lies back down after the wind passes.
Stop active water intrusion
If water is entering the house, get it contained fast. Buckets, plastic protection for contents, and moving furniture out of the leak path buy time. Temporary roof protection matters too, but only if it is secured well enough to hold through another squall line.
A loose tarp is a problem, not a solution. It can flap, tear, pull fasteners loose, and open the damaged area wider. In South Florida, that risk is higher because storms rarely end with one clean, calm weather window. If the roof is steep, slick, structurally questionable, or has broken tile, call a licensed roofer for emergency dry-in.
Make the right calls, in the right order
Once the immediate leak is controlled, notify your insurance carrier and start the claim. Ask what emergency mitigation they want documented and whether they need photos before temporary repairs proceed. Then schedule a licensed roofer who knows local wind claims, Florida code requirements, and the difference between cosmetic disturbance and functional wind damage.
That distinction affects money. A quick patch may stop water today, but it can also complicate a claim if it hides creased shingles, displaced flashing, or uplift along edges and ridges. The smart move in the first 24 hours is simple. Stabilize the house, preserve the evidence, and get a real roof inspection before anyone guesses at the scope.
A Homeowner's Roof Damage Inspection Checklist
Homeowners don't need to diagnose every technical issue, but they do need to know what to ask about. Good inspections catch obvious storm damage. Great inspections catch the subtle damage that gets missed in a quick driveway look.
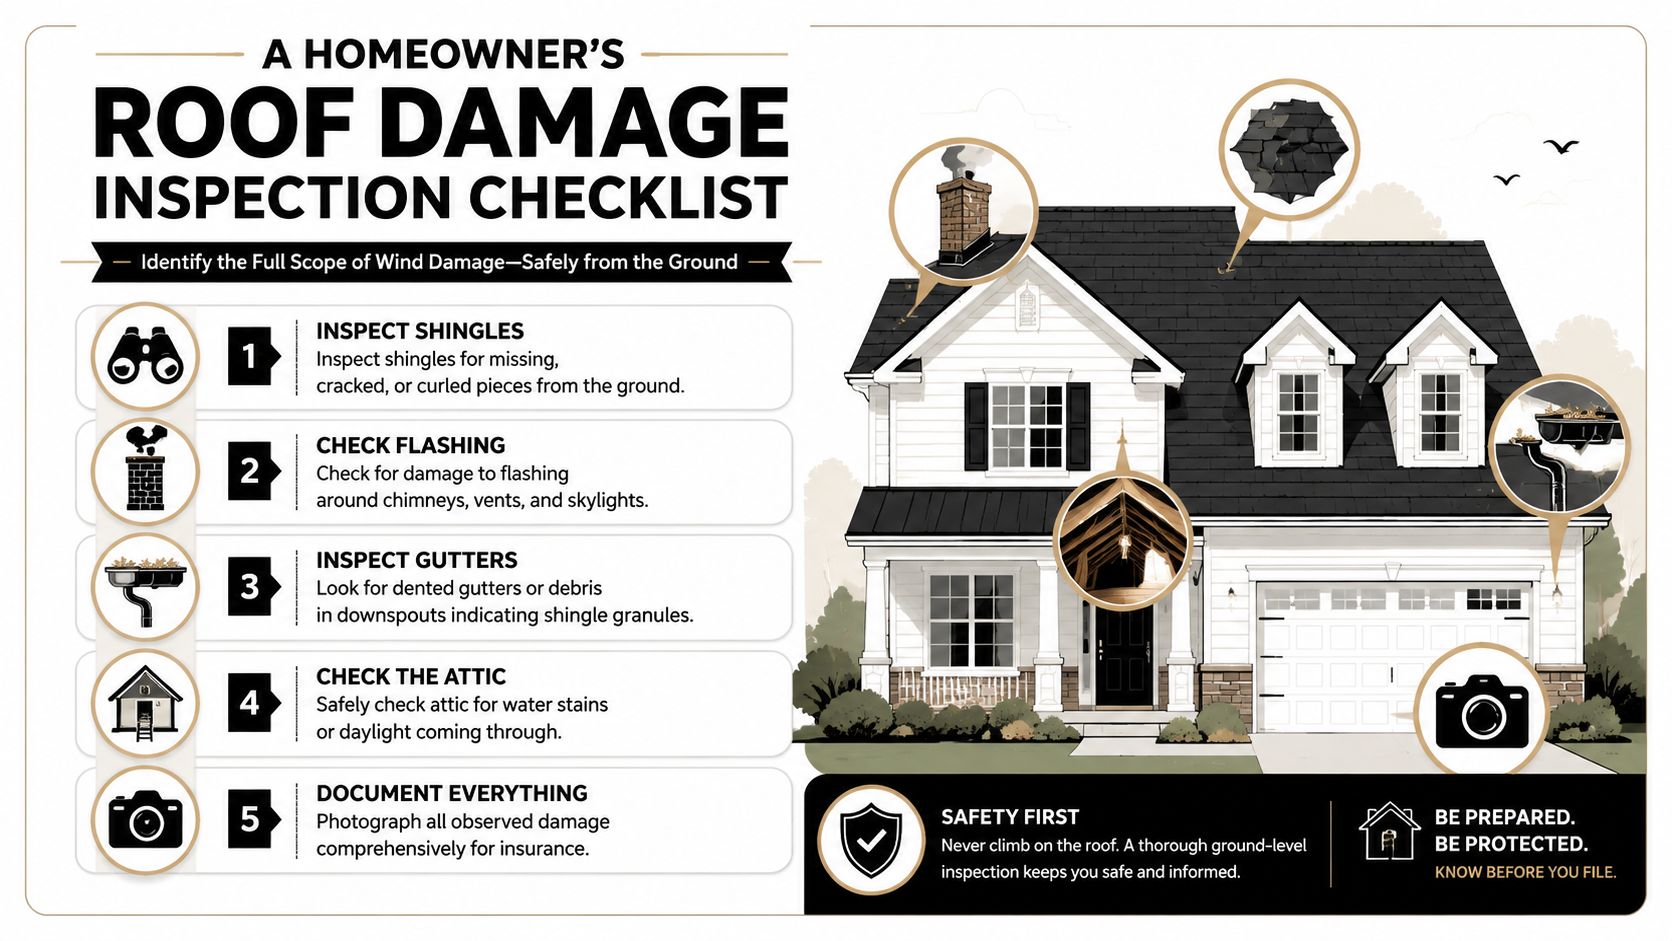
What you can spot from the ground
Stand back far enough to see the roof lines. In South Florida, wind often hits corners, eaves, ridges, and transitions harder than the field of the roof. Look for uneven lines, slipped materials, debris impact, and anything shiny that shouldn't be visible, like exposed fasteners or flashing.
Use this checklist:
- Shingle roofs look for missing tabs, lifted edges, curling, and sections that don't lie flat.
- Tile roofs check for cracked, displaced, or sliding tiles, especially at ridges and hips.
- Metal roofs watch for lifted panels, loose trim, and bent edge metal.
- Flat roofs scan for punctures, membrane movement, displaced coping, or standing water where it doesn't usually collect.
- Gutters and downspouts check for fresh dents, separation, or debris that suggests material loss from the roof above.
- Attic spaces look for damp decking, staining, or daylight at penetrations if it's safe to enter.
If you need a quick visual reference connected to local inspection work, this roof inspection image from Paletz Roofing and Inspections helps reinforce what a formal inspection process is centered on. The point isn't branding. The point is that inspections need to be systematic, not casual.
The damage most homeowners miss
Many homeowners miss creased shingles, also called clapped shingles. These show up as dark lines near the top of the shingle from wind flapping, and they're often invisible from the ground. They matter because the wind has permanently broken the shingle's seal, and it won't reseal properly, as explained in this creased shingle wind damage video.
That's one of the biggest blind spots in post-hurricane inspections. People look for what's missing. Professionals also look for what has failed but stayed in place.
A shingle can still be sitting where it belongs and already be functionally damaged.
Ask the roofer directly whether they checked for creasing, broken adhesive bonds, and lifted edges that won't reseal. If they only mention missing pieces, the inspection may be too shallow.
Roof type matters
The same wind event affects different roof systems in different ways. Tile may crack or shift without a dramatic leak on day one. Shingles may look mostly intact but have bond failure. Metal can survive the field of the roof well and still fail at trim, fasteners, or flashing transitions.
That's why a useful inspection report should identify:
- Damage location by slope, edge, valley, ridge, or penetration
- Damage type such as lifted, cracked, creased, punctured, displaced, or detached
- Water entry risk now versus likely later
- Recommended action temporary repair, permanent repair, or replacement evaluation
If the report is vague, ask for photos tied to specific locations. Good inspection notes make later repair decisions easier and cleaner.
Common Repair Types Materials and Costs
After a South Florida wind event, the right repair depends on more than what blew off. It depends on what lost its seal, what shifted out of line, and whether water got past the outer roofing material into the underlayment or deck. That is why two roofs with similar-looking storm exposure can need very different work.
Material choice matters too. Some products are built to handle higher wind loads than others, as outlined in Florida wind damage repair guidance. Still, published wind ratings are only part of the story. A roof can have a good product on it and still fail early because of age, fastener pattern, edge detail, previous repairs, or poor installation at valleys and penetrations.
What repairs usually involve
Shingle repairs are often the least expensive on paper, but they are also the easiest to underestimate. Replacing a few missing tabs is one job. Finding creased shingles across a wider field, broken seal strips, and lifted flashing is a different one. If the surrounding shingles will not reseal, a cheap patch usually turns into a repeat leak call.
Tile roofs bring a different problem. The broken tile you can see may be the small part of the bill. The bigger cost can be labor to lift and reset surrounding tiles safely, plus underlayment repair if wind-driven rain got underneath. In South Florida, matching older tile profiles and colors can also push the job from simple repair to partial reroof discussion.
Metal roofs usually hold up well in the field. Trouble shows up at trim, ridge details, exposed fasteners, wall transitions, and penetrations. A panel may still be usable while the edge metal or flashing around it has failed.
Flat roofs can fool homeowners after a storm. The membrane may show only a small opening, but once wind gets under a seam or flashing, water can travel. Wet insulation and trapped moisture below the surface change the scope fast.
For homeowners trying to budget, a key question is not only repair price. It is whether the repair will hold for years or only buy time through the next storm season. That is also where policy details matter. Professional Insurance Advisors hurricane protection is a useful reference if you want a plain-language look at how Florida windstorm coverage can affect the repair decision.
Wind Damage Repair Estimates for South Florida
| Roof Type | Common Repair | Estimated Cost Range | Estimated Timeline |
|---|---|---|---|
| Shingle | Replace missing or creased shingles, hand-seal affected area if appropriate, repair flashing | From about $350 for a small repair to $1,500 or more for larger sections, depending on shingle type, roof height, and matching issues | Small isolated repairs are often completed in 1 day. Broader section repairs can take several days |
| Tile | Replace cracked or displaced tiles, lift and reset surrounding tiles as needed, repair underlayment in affected areas | Often about $700 to $3,000 or more, depending on tile availability, breakage during access, and underlayment condition | Often several days to over a week, especially if matching tile has to be sourced |
| Metal | Refasten or replace loose panels, repair trim and flashing, correct uplift points | Often about $500 to $2,500 or more, depending on panel profile, fastener system, and custom trim work | Commonly 1 to 5 days for repair work, longer if fabrication is needed |
| Flat | Patch membrane, repair seams, reinforce flashing, replace wet insulation where needed | Often about $600 to $3,500 or more, depending on membrane type, moisture spread, and substrate condition | Usually 1 to 5 days for localized repair. Longer if insulation or decking is wet |
| Large-area storm damage | Multi-area repair, major section rebuild, or partial/full reroof if the system has widespread failure | $2,500 to over $10,000 for major Florida wind damage repairs, depending on size, material, and whether decking or structural work is involved | Commonly several days to a few weeks, depending on scope, permits, material lead times, and weather |
The lowest quote is not always the lowest cost. I have seen plenty of cheap post-storm repairs fail because the contractor priced only the missing pieces and ignored the damaged area around them.
A sound repair matches the actual failure. If the roof has isolated damage and the rest of the system is still solid, a targeted repair can make good financial sense. If hurricane winds have broken seals across a slope, shifted tile in multiple sections, or opened edge details around the roof perimeter, paying for repeated patchwork usually costs more in the end.
Navigating Insurance and Hiring a Licensed Roofer
The morning after a South Florida storm, the roof problem rarely comes in a neat package. You may see a few shingles in the yard, but the bigger issue is often the damage you do not spot from the driveway. Hurricane winds can crease shingles without tearing them off, break tile attachment points without dropping the tile, and loosen flashing along edges where uplift starts. Those details matter because they affect both the repair plan and the insurance claim.
Insurance is where many homeowners lose time and money. Before you sign anything, pull out your policy declarations page and confirm whether the storm falls under a hurricane or windstorm deductible. In Florida, that deductible is often a percentage of the insured value of the home, not a small flat number. I have seen owners approve work assuming the claim would cover most of it, then find out they were responsible for far more than expected.
If you want a plain-language overview of coastal policy concerns, this resource on Professional Insurance Advisors hurricane protection is useful because it explains how windstorm coverage can differ from what many homeowners expect after a hurricane.
Keep your paperwork tight from the start. Take date-stamped photos, save receipts for tarping or emergency dry-in, and ask the roofer for photos that show exactly what failed. A good claim file shows the location of the damage, the damaged material, and whether the problem is isolated or spread across multiple slopes. In South Florida, that distinction can change whether you are looking at a localized repair, a larger section rebuild, or a fight over matching and scope.
If a contractor says your deductible does not matter or promises to make it disappear, stop the conversation there.
Hiring the right roofer after a storm takes discipline. The trucks show up fast after a hurricane, and not all of them understand Florida code, local permitting, or high-wind repair details. A licensed roofer should be able to explain what they found in plain terms. On an asphalt roof, that may include creased tabs, broken seal strips, lifted starter, and damaged ridge caps. On tile, it may mean displaced field tile, cracked mortar, broken foam-set attachment, or loose hip and ridge pieces. On flat roofs, they should be checking seams, edge metal, flashing laps, and signs that wind-driven rain got under the membrane.
Ask direct questions and listen to how specific the answers are:
- Are you licensed and insured in Florida? Ask for the license number and proof of insurance.
- What storm damage did you find? The answer should identify slopes, edges, flashing, penetrations, and subtle damage such as creased shingles.
- Can you show me photos from my roof? Good contractors document what they see.
- Will I get a written scope of work? It should separate temporary protection from permanent repairs.
- Who is doing the work? You need to know whether crews are in-house or subcontracted.
- How will hidden damage be handled if it shows up after tear-off? That affects cost, timing, and claim documentation.
One local option homeowners often consider is Paletz Roofing and Inspections, which provides inspections, storm-damage assessments, and repair work across Broward, Miami-Dade, and Palm Beach. Whether you hire them or another licensed roofer, the standard is the same. The scope should match the actual roof condition, not just the most visible missing pieces.
Watch for warning signs that usually lead to trouble:
- Pressure to sign on the spot
- Promises of guaranteed claim approval
- Offers to waive deductibles
- A full replacement recommendation without photos or explanation
- No written material list, no scope, and no permit discussion
A careful hire usually costs less than a rushed mistake. In South Florida, storm repair is not just about patching what blew off. It is about proving what the wind did, fixing the full failure area, and keeping the next rainstorm from turning a roof problem into an interior rebuild.
How to Prevent Future Wind Damage
The smartest wind damage roof repair job is the one that reduces the chance of repeating the same problem next season. Prevention in South Florida isn't about making a roof hurricane-proof. It's about tightening the weak points before the next storm tests them.
Protect the weak points before storm season
Most failures start at transitions. Flashing around vents, skylights, valleys, wall tie-ins, and edges takes more abuse than the open field of the roof. Those are the places to inspect routinely, especially after any storm that produced visible debris movement on the property.
Periodic inspections matter because some wind damage doesn't show up right away from the ground. Lifted shingles, disturbed flashing, and early water entry often stay hidden until interior stains appear. Catching those problems early can help limit larger repair costs later, as noted in the earlier Florida wind damage guidance.
There's also an insurance threshold homeowners should understand. When wind damage affects 25% or more of a single roof slope, many insurers approve full replacement of that slope because the roof's functional integrity is considered compromised, according to this explanation of the 25% per slope standard.
That's why proactive maintenance is a financial decision, not just a maintenance chore.
- Keep flashing tight and sealed because small edge failures become leak points fast in wind-driven rain.
- Replace damaged materials early instead of waiting for a broader section to weaken.
- Trim overhanging limbs so debris impact doesn't turn moderate wind into roof puncture damage.
- Ask about stronger replacement materials when repairs are extensive enough to justify an upgrade.
A roof usually gives warnings before it gives out. The problem is that most warnings are easy to miss unless someone is looking for them.
Frequently Asked Questions About Wind Damage
Will a temporary tarp last until permanent repairs are done
It can, but don't treat a tarp as a long-term roof system. Wind, sun, and improper fastening shorten its useful life fast. It's an emergency measure meant to keep water out while permanent work is scheduled.
Can I repair wind damage myself
That's a bad idea in most cases. Roof work after a storm involves fall risk, unstable materials, and code-sensitive details. Poor repairs also complicate insurance claims and can create bigger leaks later.
What if I don't see missing shingles
You can still have claimable damage. Wind can break seals, crease shingles, loosen flashing, or shift materials without leaving a dramatic hole you can spot from the street.
Should I wait until the next rain to see if it leaks
No. By then, the damage may have spread into insulation, drywall, and framing. If you suspect wind damage, get it checked before the next weather event tests the same weak spot again.
What matters most when choosing a roofer after a hurricane
Licensing, insurance, storm documentation, and a written scope of work. Clear communication matters too. If a contractor can't explain the repair plainly, that usually doesn't improve once the job starts.
If your roof took a hit in Broward, Miami-Dade, or Palm Beach, Paletz Roofing and Inspections can inspect the damage, document the precise situation, and help you sort out the next step without guesswork. After a hurricane, speed matters, but accuracy matters just as much. A careful inspection and a clear repair plan give you the best chance of protecting the house and avoiding extra costs that didn't need to happen.