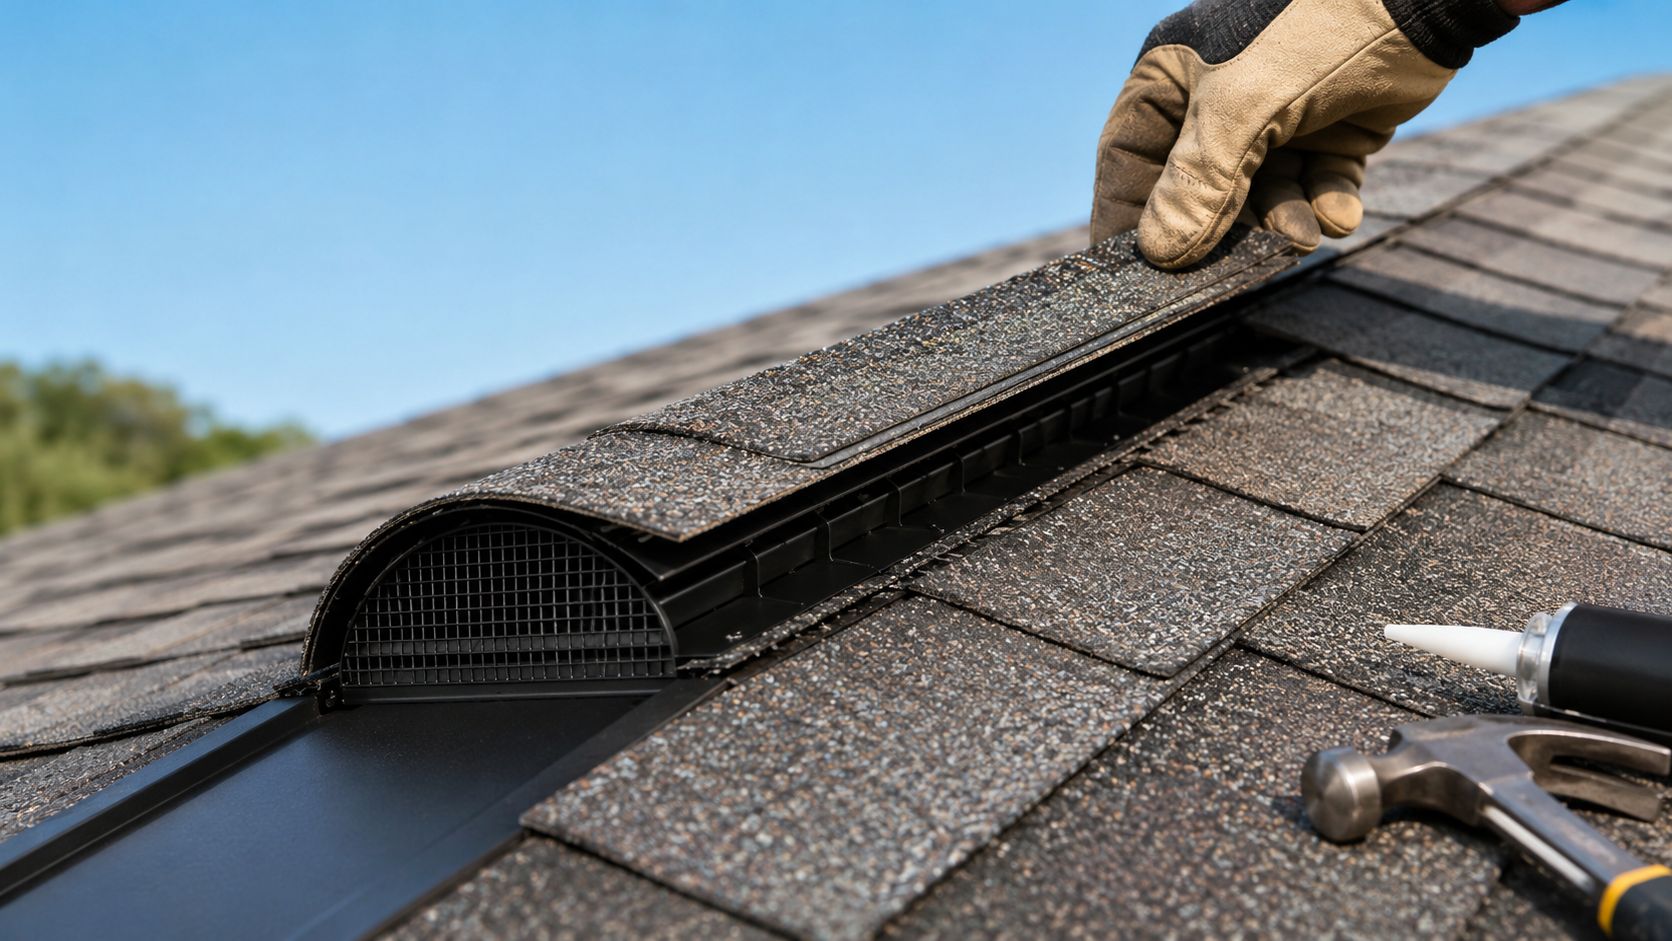
Yes, you can shingle over a roof vent when it's a ridge vent or another exhaust vent specifically designed for concealed installation. You can't bury every roof vent, and improper shingling is a common cause of leaks.
You're standing in the driveway looking up at the roof, probably because a reroof is scheduled or a vent has started to look loose. The question seems simple: should the new shingles cover that vent, or should they stop around it? In South Florida, the wrong answer can turn a ventilation upgrade into water damage, stained ceilings, and a difficult insurance conversation after the next storm.
The correct approach starts with identification. A ridge vent is built to sit beneath ridge-cap shingles. A box vent, turbine vent, or plumbing pipe boot has a different weather-sealing design and generally remains exposed, with shingles installed around its flashing. Before a knife, nailer, or saw touches the roof, confirm what assembly is already there and whether its installation method matches the product instructions and local requirements.
Table of Contents
- What Shingle Over a Roof Vent Actually Means
- Common Roof Vent Types and Which Can Be Shingled Over
- Ventilation Math and Code Requirements That Drive the Decision
- How to Shingle Over a Ridge Vent the Right Way
- Warning Signs of a Bad Shingle-Over Vent Installation
- Tools, Materials, and When to Hire a Pro
- Putting It All Together for a Healthy Roof
What Shingle Over a Roof Vent Actually Means
In roofing, shingle over means the vent is installed beneath the final layer of shingles rather than left visible. The most familiar example is a ridge vent. The roofer creates a continuous opening near the roof peak, places the ridge vent over that opening, and covers the vent body with compatible ridge-cap shingles. From the ground, the finished assembly looks like a normal capped ridge, while the concealed vent provides an exhaust path for attic air.
That doesn't mean the shingles are the ventilation device. They're the weather-shedding layer that protects the vent assembly, overlaps its edges, and keeps wind-driven rain from reaching the roof opening. Building-code guidance reflects this distinction. Ontario guidance, for example, calls for vent-pipe flashing on shingled roofs to be at least 500 mm by 500 mm, while Florida roofing guidance describes cutting shingles around vent pipes, placing the flashing flange over the pipe, and continuing the shingle courses so the flange is overlapped. See this roofing system guide from HIBCO ROOF LLC for useful context on how roof layers work together.
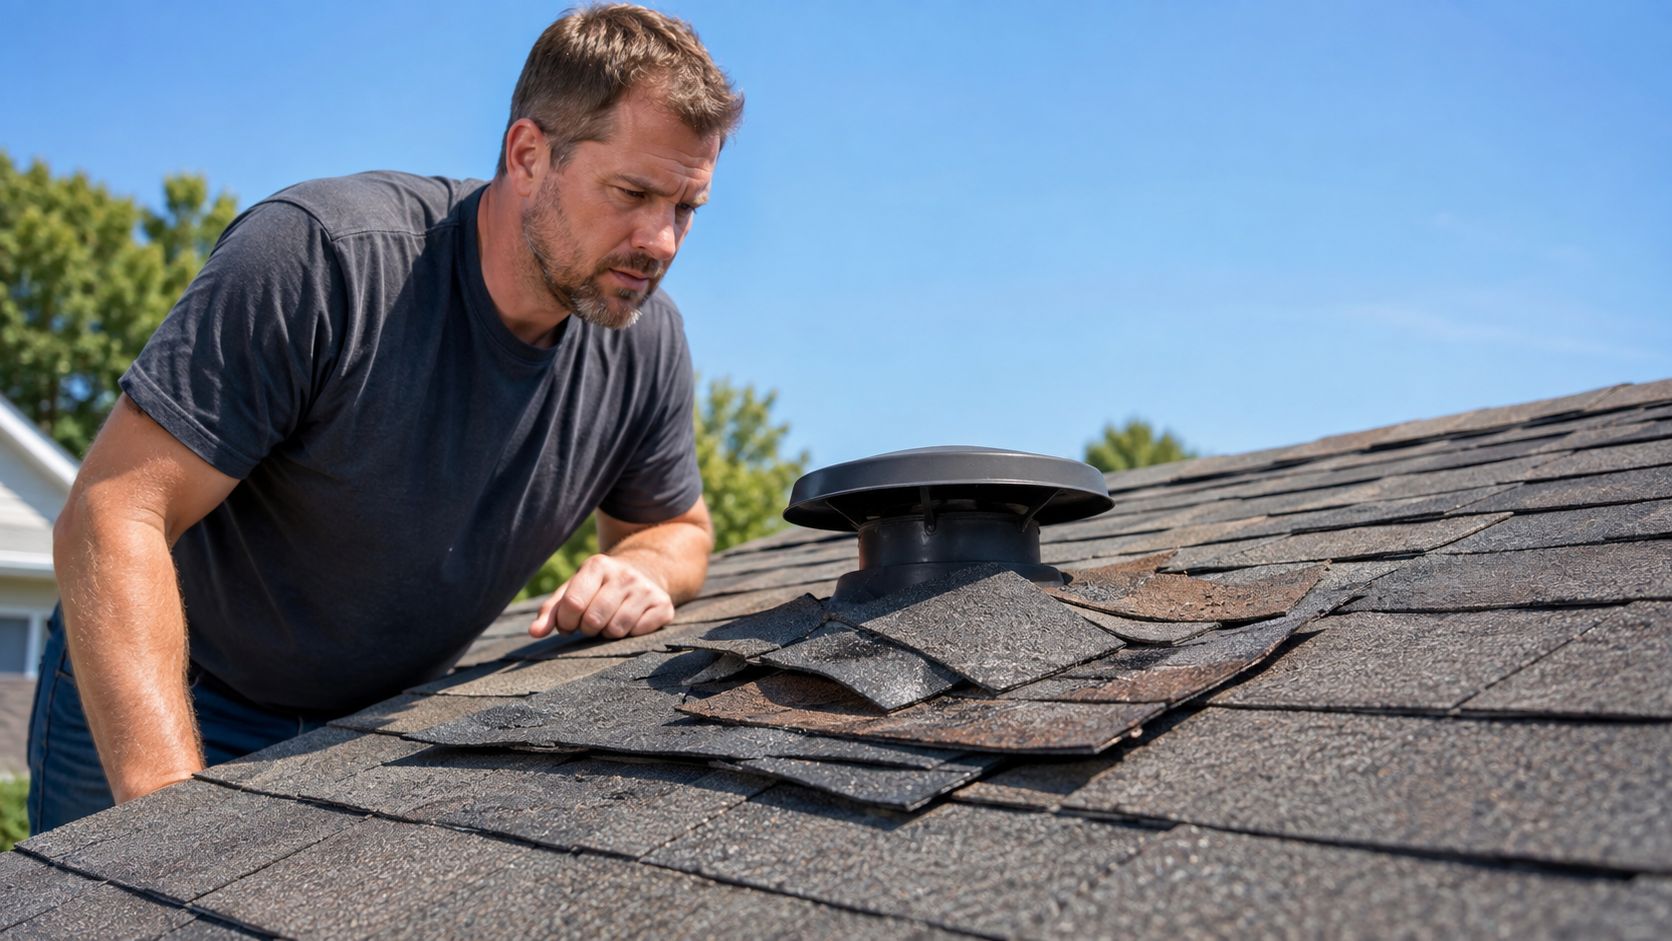
Why the vent type matters
A homeowner may see a dark strip at the ridge and assume every vent gets the same treatment. That assumption causes trouble. Ridge and shingle-over exhaust vents are made to be covered, but exposed vents depend on a flange, boot, hood, or turbine housing that must remain accessible to shed water and move air.
A concealed ridge vent also has to provide enough net free ventilating area, or NFA, for the attic. Covering an undersized or damaged vent with attractive ridge shingles won't fix poor airflow. It only hides the problem.
Practical rule: Never decide from the vent's color or shape alone. Identify the product, inspect the opening and flashing, then follow the installation method approved for that vent.
In a South Florida reroof, heavy rain, humidity, strong wind, and intense sun expose weak overlaps quickly. If the vent type is uncertain, leave the shingles in place and have a qualified roofer inspect the assembly before removing anything.
Common Roof Vent Types and Which Can Be Shingled Over
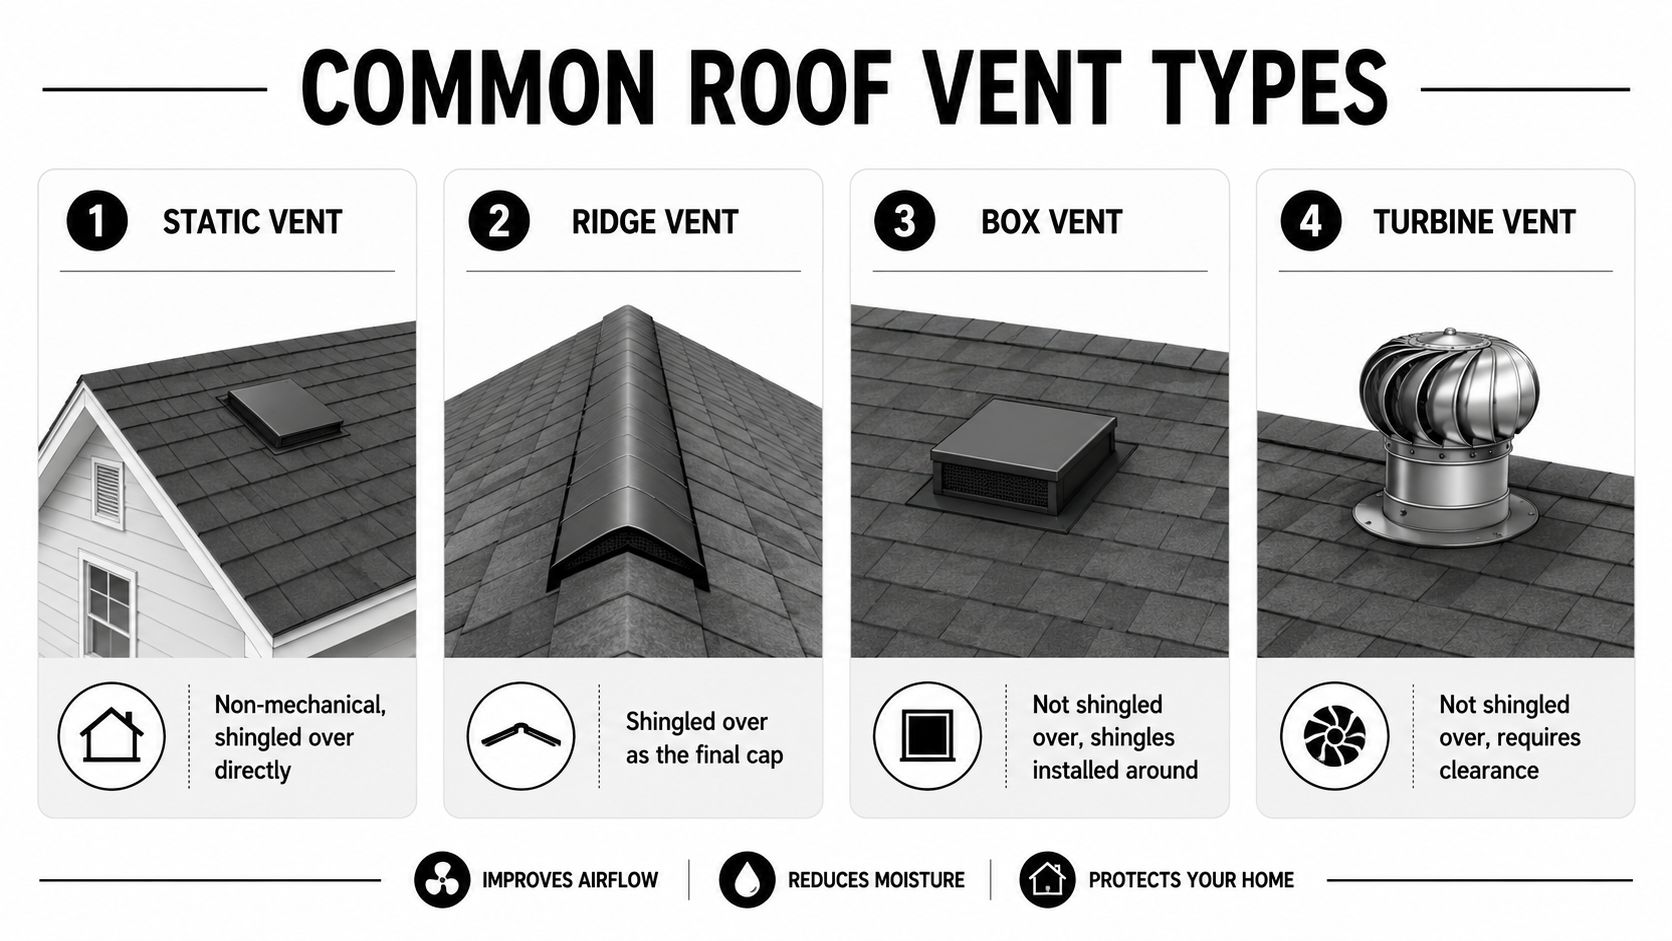
Most residential shingle roofs use one or more of four recognizable vent arrangements. Their appearance can help you narrow down the answer, but the product design and flashing still control the final decision.
Ridge and static vents
A ridge vent runs along the roof peak as a long, narrow strip. It's normally installed over a ridge slot and finished with cap shingles. This is the primary situation where the phrase shingle over roof vent applies. Some static exhaust vents also use low-profile housings that integrate with shingles, but the surrounding shingles are installed according to the manufacturer's flashing detail, not just laid on top.
Box vents
A box vent, sometimes called a static roof vent, looks like a small raised square or rectangular hood. It exhausts air through a roof-deck opening, but its metal or molded flange remains part of the weather seal. Shingles are woven or trimmed around that flange, with upper courses arranged to shed water over the vent. Don't cover the hood or bury the flange.
Turbine vents
A turbine vent has a rounded, spinning top. Wind turns the turbine and helps draw air from the attic. The housing needs clearance to rotate, and the base relies on exposed flashing integrated with the shingle courses. Shingles belong around the base, not over the moving head.
Plumbing pipe boots
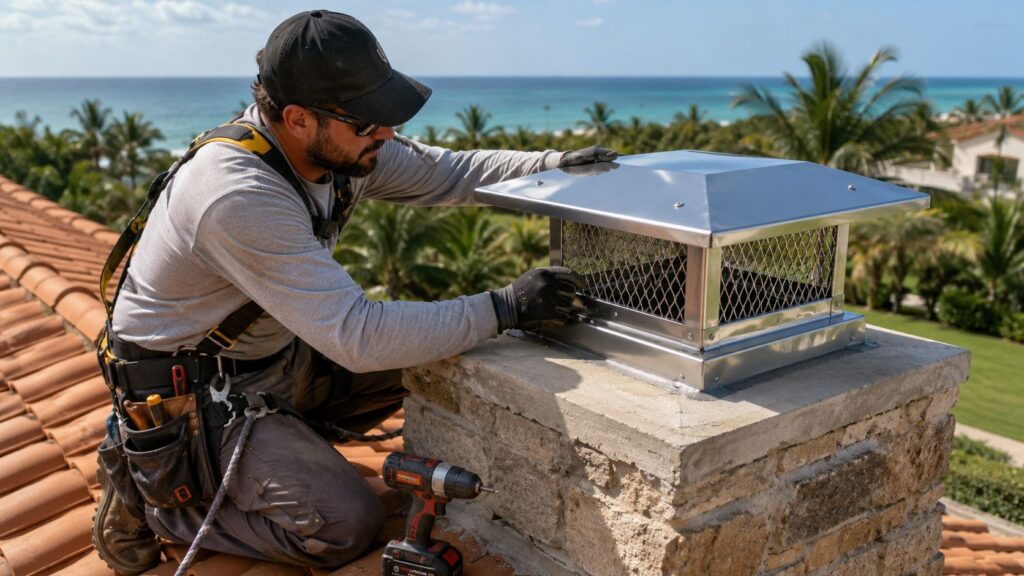
A plumbing stack usually appears as a vertical pipe with a rubber, metal, or combination boot around its base. It isn't an attic exhaust vent. The boot seals the roof penetration around the pipe, so shingles must overlap the flashing in the intended direction while leaving the pipe and upper collar exposed. A chimney-cap installation reference image can help homeowners recognize the broader principle that roof penetrations require purpose-built weatherproofing rather than a layer of shingles placed indiscriminately.
| Vent type | Can shingles cover it? | Correct treatment |
|---|---|---|
| Ridge vent | Yes, when designed for shingle-over installation | Cover the vent body with compatible ridge-cap shingles |
| Static or box vent | No, not the exposed hood | Install shingles around the flashing flange |
| Turbine vent | No | Keep the turbine clear and integrate shingles around its base |
| Plumbing pipe boot | No | Overlap shingles with the boot flashing and leave the pipe exposed |
If the roof has multiple exhaust types, don't assume more openings automatically improve performance. An attic works as a system, and competing exhaust paths can interfere with the intended airflow pattern.
Ventilation Math and Code Requirements That Drive the Decision
A shingle-over ridge vent isn't merely a cosmetic cap. It's the exhaust portion of an attic ventilation system, and its size has to match the attic area and available intake.
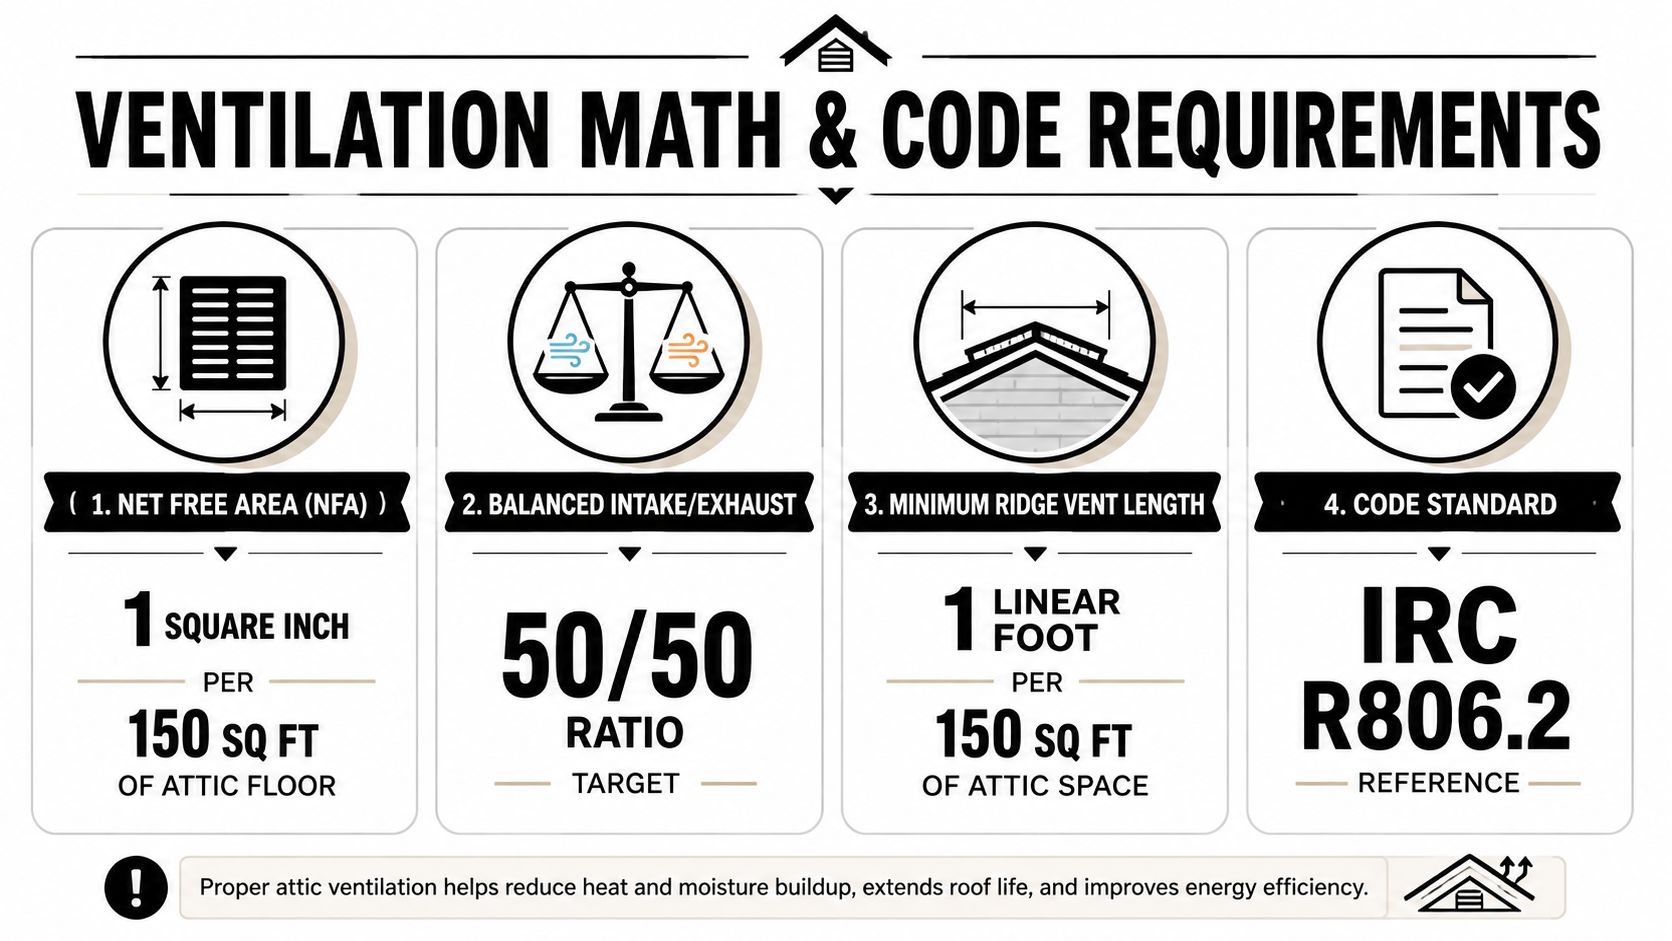
The commonly cited baseline in major markets is about 1 square foot of net free vent area for every 300 square feet of attic floor space when ventilation is balanced. The International Residential Code guidance cited for enclosed attics and rafter spaces uses 1 square foot per 150 square feet, with reduction to 1:300 only when specific intake and exhaust balancing conditions are met. The residential reroofing guide covering IRC ventilation guidance explains that openings also need protection against rain and snow.
A simple attic check
Suppose an attic contains 1,600 square feet of floor area. Using the balanced 1:300 approach, the system needs about 5.33 square feet of total NFA, calculated by dividing the attic area by 300. That total is split between intake and exhaust, so the ridge-side exhaust target is roughly half, with the soffit or eave intake supplying the other half.
A manufacturer example lists 18 square inches of NFA per linear foot of ridge vent and gives sizing guidance of 22 feet of vent for a 1,600 square foot attic. The exact product calculation still depends on the vent design, roof layout, intake availability, and applicable code, so don't use a generic length as a substitute for a site assessment. The 2026 home ventilation guide offers additional background for homeowners comparing intake and exhaust arrangements.
Balance matters more than appearance
Industry guidance commonly targets 50% intake and 50% exhaust, while roofing-science guidance identifies a 60/40 intake-to-exhaust split as a useful practical range. The important point is that the ridge vent can't do its job if soffit vents are blocked by insulation, paint, debris, or a poorly built eave.
The 2024 IRC residential reroof guide requires a minimum 1-inch space between insulation and roof sheathing at the vent location and warns that insulation must not block airflow at eave or cornice vents. Without that channel, the roof may have a continuous ridge slot and still lack meaningful soffit-to-ridge movement.
Other exhaust openings can also disrupt the plan. Installers are advised to disable or account for gable vents, roof louvers, turbines, and powered fans when a ridge exhaust system is installed, because uncontrolled competing exhaust can short-circuit airflow. A roofer should inspect the entire attic rather than judging the ridge vent from the roof surface alone.
How to Shingle Over a Ridge Vent the Right Way
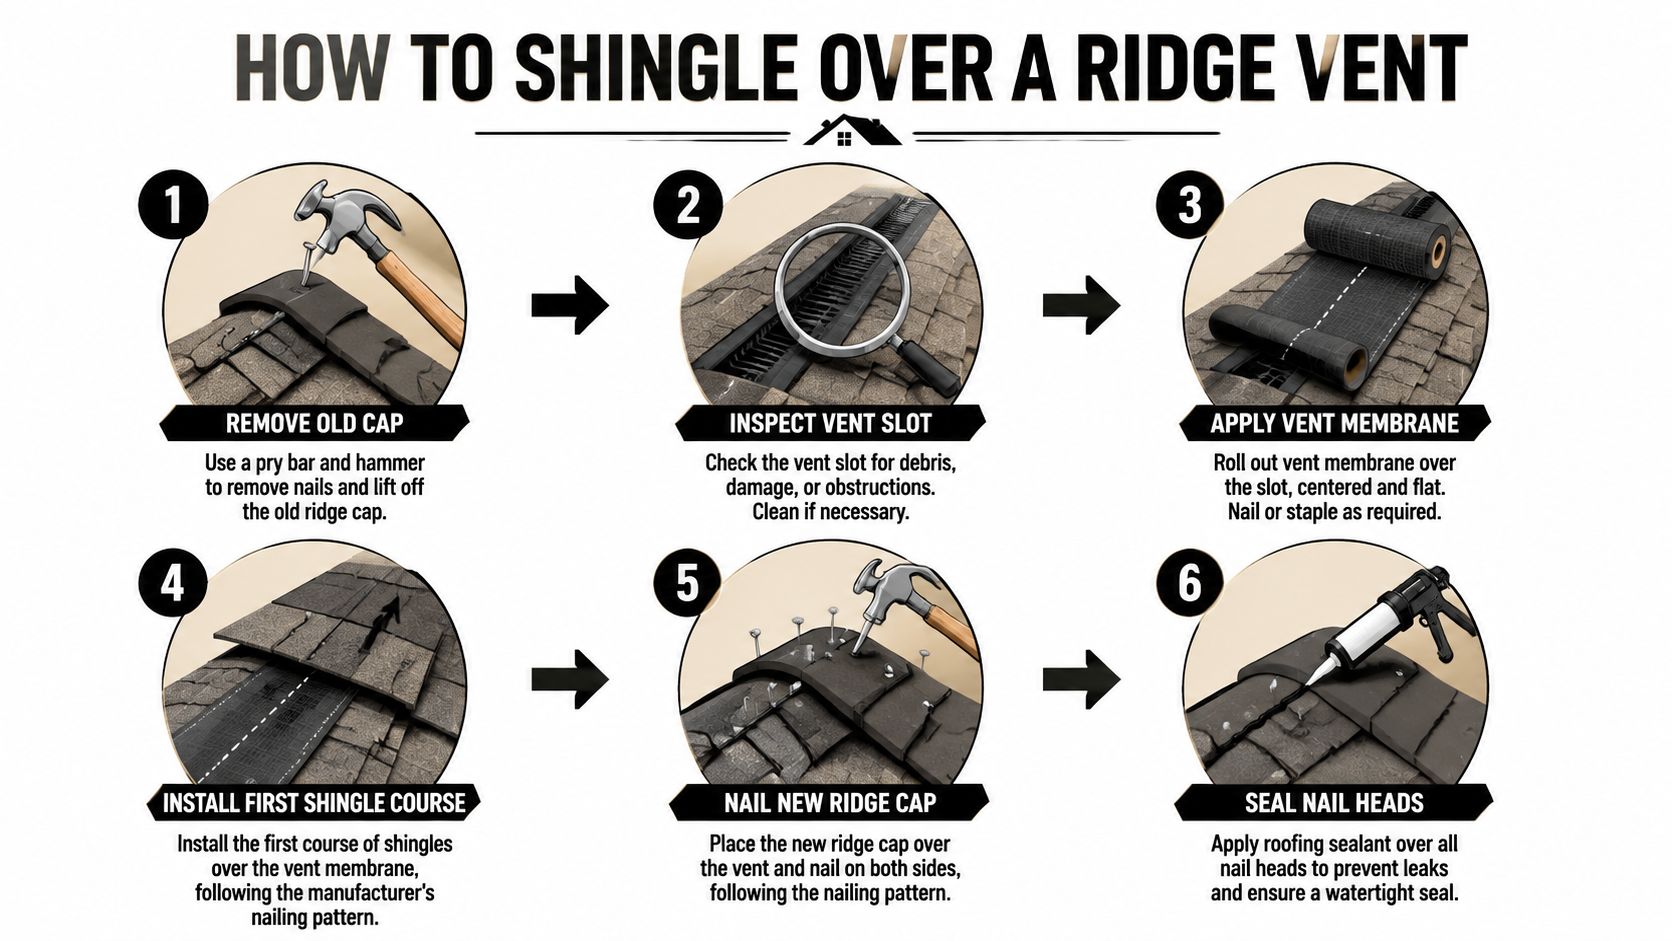
A proper ridge-vent installation begins after the old ridge-cap shingles have been removed and the roof deck has been inspected. Any soft decking, wet sheathing, loose fasteners, or damaged underlayment should be addressed before the new vent goes down. Installing over a defect only hides it beneath the finished ridge.
Prepare the ridge opening
The ridge slot must be continuous through the intended exhaust area and centered according to the vent manufacturer's layout. The cut has to connect with a functioning attic pathway, not stop against blocked insulation or a solid section of roof framing. Keep the opening clean, and remove sawdust, loose granules, and debris before placing the vent.
The vent then sits directly over the slot. It needs to lie flat, follow the ridge without kinks, and align with the roof pitch and shingle system. The manufacturer's fastening pattern controls the nail placement. Random fastening can distort the vent, miss framing, or leave the assembly vulnerable during high wind.
Integrate the shingles with the vent
After the vent is secured, trim the roof material back about 1 inch on the top and sides so water can drain freely. That setback is not an invitation to leave a wide open gap. It creates the drainage clearance specified by the installation method while the vent body and shingle courses protect the opening.
The cap shingles are then installed over the vent cover. Use locally approved peel-and-stick material, two-sided tape, or sealant where the manufacturer calls for it to attach the shingle courses to the vent. The cap pieces should sit evenly, follow the ridge line, and overlap so each course sheds water onto the next.
A ridge vent should disappear from view, not disappear from the drainage plan.
Nails belong in the approved fastening zones and must be covered by succeeding shingle pieces or sealed as required. Exposed nail heads, missed nail lines, and overdriven fasteners are small details that can become entry points under wind-driven rain.
Low vents also require attention. Manufacturer instructions specify that low vents should be installed at least 6 inches above attic insulation, so insulation doesn't choke the intake path. In a retrofit, inspect the soffit channel from the attic before assuming the exterior vent is working.
The most common shortcuts are cutting an intermittent slot, covering the vent with incompatible cap material, skipping the setback, and relying on caulk to compensate for poor shingle overlap. Sealant supports a sound installation. It shouldn't replace correct geometry, fastening, and flashing.
Warning Signs of a Bad Shingle-Over Vent Installation
A few years after a reroof, a homeowner may notice a faint ceiling stain below the ridge, dark marks on a soffit, or a musty attic smell after a heavy rain. From the driveway, the ridge may look finished and uniform, but the failure often sits underneath the cap shingles where the vent meets the roof deck.
The first outside clues are usually physical. Look for cracked or missing ridge-cap shingles, exposed nail heads, uneven cap lines, and visible gaps where the ridge vent meets the field shingles. Those conditions can indicate movement, poor fastening, inadequate overlap, or a vent that was never integrated correctly with the shingle courses.
What the attic reveals
From inside, check the roof sheathing around the ridge and along the eaves. Dark streaks may indicate recurring moisture, while rust on metal vent components can point to water exposure. Compressed insulation at the eaves often means the soffit-to-ridge pathway is restricted, even if the ridge cap looks intact from above.
A musty odor doesn't identify the exact leak source, but it deserves attention when it appears with staining or damp insulation. Roof water can travel along decking, rafters, or insulation before it becomes visible on a ceiling, so the stain's location isn't always directly below the failed detail.
| Visible symptom | Likely installation issue |
|---|---|
| Missing or cracked ridge caps | Poor fastening, movement, or weather damage |
| Exposed nail heads | Incomplete shingle coverage or missed sealing |
| Gap at the vent edge | Improper trimming, alignment, or overlap |
| Dark roof-deck streaks | Repeated moisture entry or condensation |
| Rusted metal components | Persistent water exposure |
| Compressed eave insulation | Blocked intake airflow |
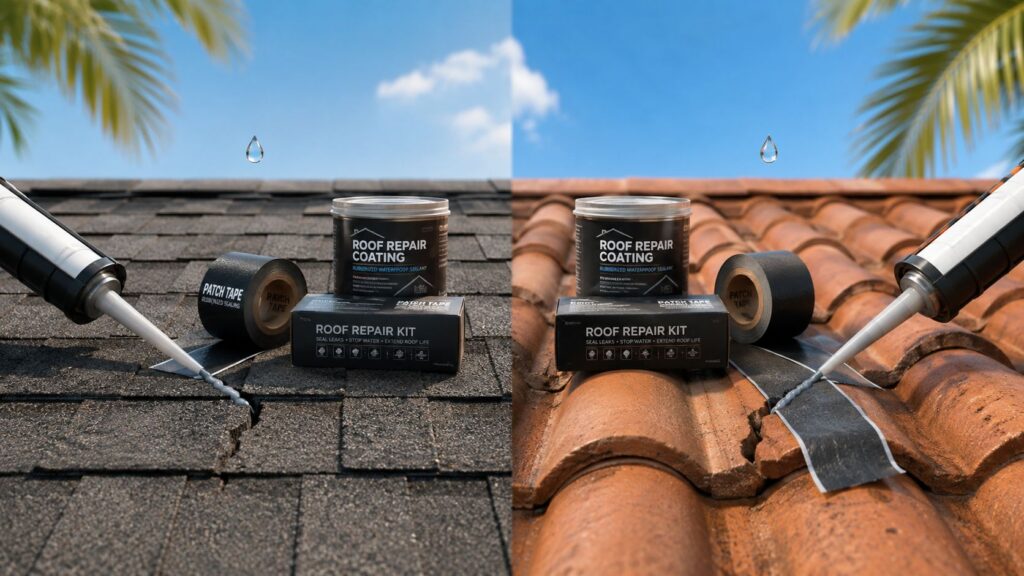
A roof leak repair reference image may help you recognize the kind of surface damage that deserves closer inspection, but patching the visible stain won't correct a failed ridge assembly. Any of these signs should prompt a professional inspection before the next major storm, especially if the roof has already experienced wind or heavy rain.
Tools, Materials, and When to Hire a Pro
A straightforward ridge retrofit on a single-story ranch with a walkable pitch can be manageable for a confident homeowner who understands roof safety and can follow the vent instructions precisely. The basic equipment includes a utility knife, chalk line, tape measure, hammer or roofing nailer, reciprocating saw or ridge-slot cutter, and appropriate fall-protection and personal safety gear.
Materials should match the roof system. Plan for the approved ridge vent, compatible cap shingles, corrosion-resistant roofing nails, and manufacturer-approved peel-and-stick material, two-sided tape, or sealant. Don't substitute general construction adhesive because it's convenient. Roof products need compatibility with asphalt shingles, weather exposure, and the vent manufacturer's fastening details.
| Condition | DIY Friendly | Hire a Pro |
|---|---|---|
| Single-story home with walkable pitch | Yes, if safety and instructions are clear | Advisable if access is difficult |
| Continuous ridge retrofit | Possible for an experienced homeowner | Preferred when slot or framing is uncertain |
| Multi-story home | No | Yes |
| Steep roof pitch | No | Yes |
| Tile or metal transition | No | Yes |
| Existing water damage | No | Yes, inspect and repair first |
| Unclear vent type | No | Yes |
| Blocked soffit or attic insulation | Not without resolving the airflow issue | Yes |
The hard line is safety and uncertainty. Multi-story roofs, steep pitches, tile or metal transitions, and any evidence of water damage are professional jobs. A licensed roofer can also evaluate flashing, intake paths, roof-deck condition, and local South Florida requirements as one system instead of treating the ridge as an isolated repair.
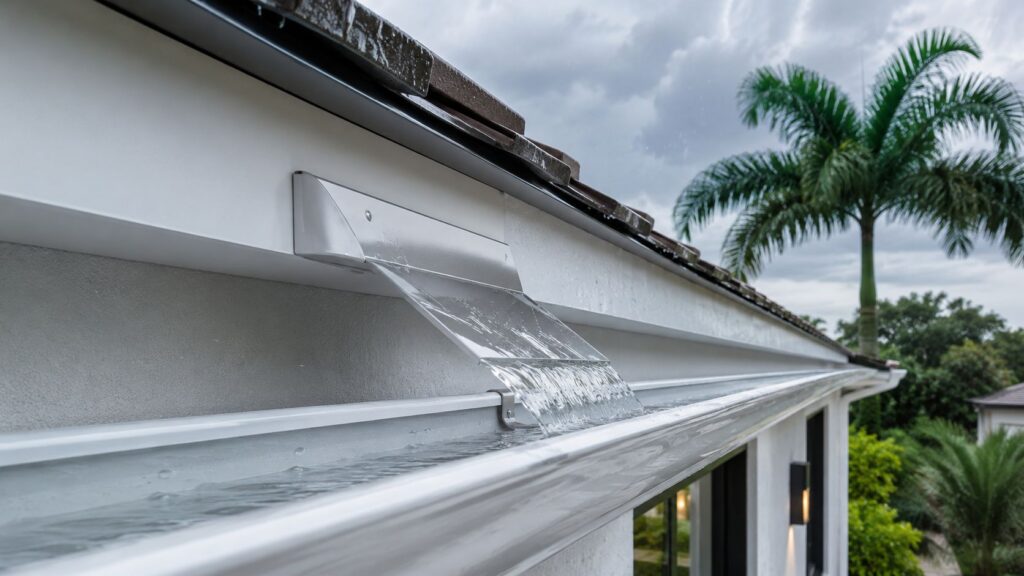
If you're comparing roof details while planning broader exterior work, a rain-diverter and gutter reference shows why water management around the roof edge matters alongside ventilation. Paletz Roofing and Inspections also performs roof inspections that include vent and flashing conditions, which can be useful when the installation history is unknown.
Putting It All Together for a Healthy Roof
The decision tree is simple, but each branch matters. Identify the vent, confirm it's designed for shingle-over installation, check the attic ventilation math, verify that intake and exhaust are balanced, and inspect the ridge slot, vent body, shingles, and fasteners before closing everything up.
South Florida roofs face persistent humidity, intense heat, heavy rain, and hurricane-related wind exposure. Those conditions make correct flashing, secure fastening, open soffit pathways, and compliance with applicable local requirements essential rather than optional. A ridge vent that looks neat from the street can still fail if insulation blocks intake or if the shingle courses don't shed water over the assembly.
For a broader example of how regional roof practices differ, review America Roofing in Phoenix as a comparison point, then rely on a licensed local roofer for Broward, Miami-Dade, or Palm Beach conditions. The practical next step is a free inspection that confirms whether your attic is breathing and whether the shingle-over vent is weather-tight.
Paletz Roofing and Inspections offers roof inspections, ventilation evaluations, repairs, and reroofing for shingle systems across South Florida. Visit Paletz Roofing and Inspections to request a free inspection and have a licensed local team check your ridge vent, flashing, soffit intake, and attic condition before the next storm.