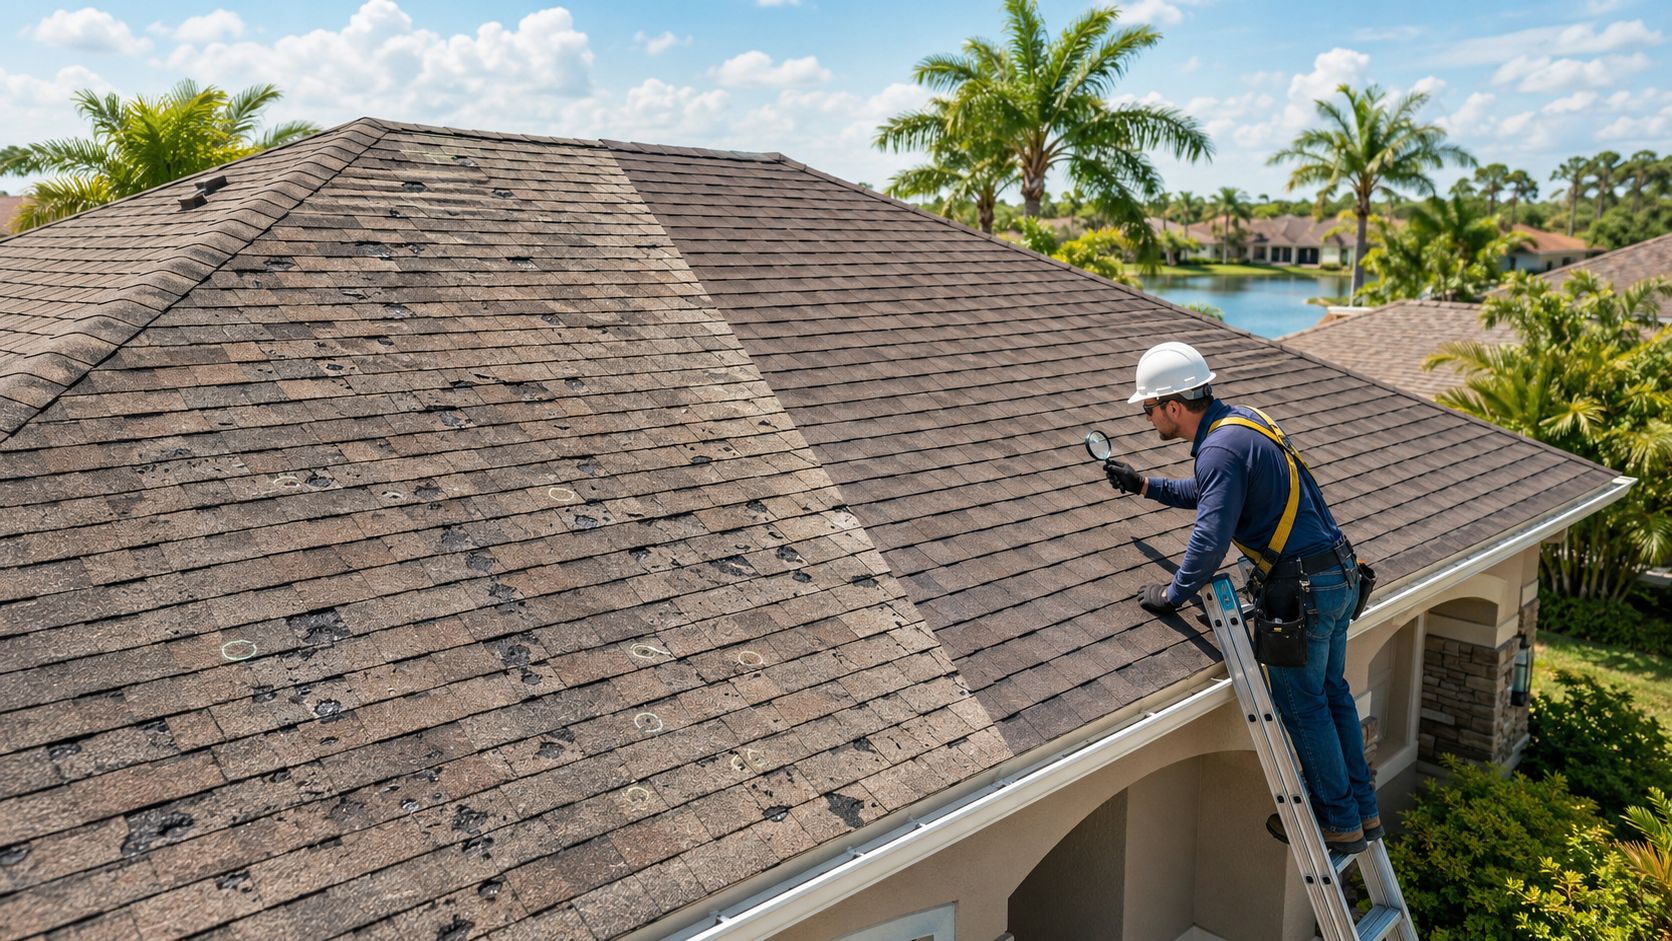
At 2 a.m., hail can sound like someone is throwing gravel at the roof. By sunrise, a Broward homeowner may find a few loose granules by the downspout, a dent in a vent cap, and nothing that looks urgent from the driveway. That first impression is often incomplete.
Cosmetic marks and functional damage aren't the same thing. A roof can show dents without losing its water-shedding ability, while bruised shingles, fractured reinforcement, exposed mat, damaged flashing, or failed seals may be difficult to see from the ground. A proper hail damage roof inspection uses measured test areas, tactile checks, collateral evidence, and interior observations to determine what the storm changed.
That distinction matters in Broward, Miami-Dade, and Palm Beach, where intense sun, humidity, salt air, and aging roof materials can make ordinary weathering resemble storm damage. The inspection should document the roof's condition clearly enough for a homeowner, contractor, and insurance adjuster to understand the same evidence. For additional preparation, these hail claim roof inspection tips offer useful questions to ask before an inspection begins.
Table of Contents
- What Hail Damage Roof Inspection Really Means After a Storm
- The Core Methods Behind a Hail Damage Roof Inspection
- How Hail Damage Looks on Shingle, Tile, Metal, and Flat Roofs
- Safe DIY Steps for a Hail Damage Roof Inspection at Home
- What Professional Inspectors Evaluate Beyond the Surface
- Documenting Hail Damage Roof Inspection Evidence for Insurance
- Repair Options, Timelines, and Severity Thresholds After Inspection
- South Florida Action Plan for Broward, Miami-Dade, and Palm Beach Homeowners
What Hail Damage Roof Inspection Really Means After a Storm
The homeowner who hears hail overnight usually starts with the right instinct, looking outside in daylight. The mistake is treating a driveway view as a conclusion. Scattered granules, a shallow-looking dent, or an intact row of shingles only tells you what is visible from one angle.
A hail damage roof inspection is a forensic assessment of impact evidence and roof performance. The inspector separates hail marks from normal aging, foot traffic, manufacturing characteristics, wind movement, and maintenance damage. On asphalt shingles, that means looking for circular bruising, pockmarked surfaces, fractures, and areas where granules and the asphalt coating have been removed. A soft spot that appears only when the shingle mat is pressed can matter more than a broad dent that affects appearance but not water shedding.
South Florida conditions complicate that reading. Ultraviolet exposure can dry and embrittle older shingles, while salt air can accelerate corrosion on metal components. A storm may reveal a weakness that wasn't obvious before, but the report still needs to connect the observed condition to hail rather than labeling every defect storm damage.
The vocabulary that prevents confusion
Inspectors typically distinguish cosmetic effects from functional impairment. Cosmetic effects may alter appearance without reducing expected service life or water-shedding capability. Functional damage can include bruising, punctures, fractures, compromised seams, or seal failures that reduce the roof's ability to perform.
The inspection should also extend beyond shingles. Gutters, vents, fascia, soffits, flashing, window wraps, skylight frames, and attic conditions can show whether the storm affected the property consistently. A roof that looks acceptable from the street may still need close evaluation, especially when small hail leaves subtle marks.
The aim isn't to promise claim approval. It is to create a defensible record of what hail did, what it didn't do, where the evidence appears, and whether repair or replacement is technically reasonable.
The Core Methods Behind a Hail Damage Roof Inspection
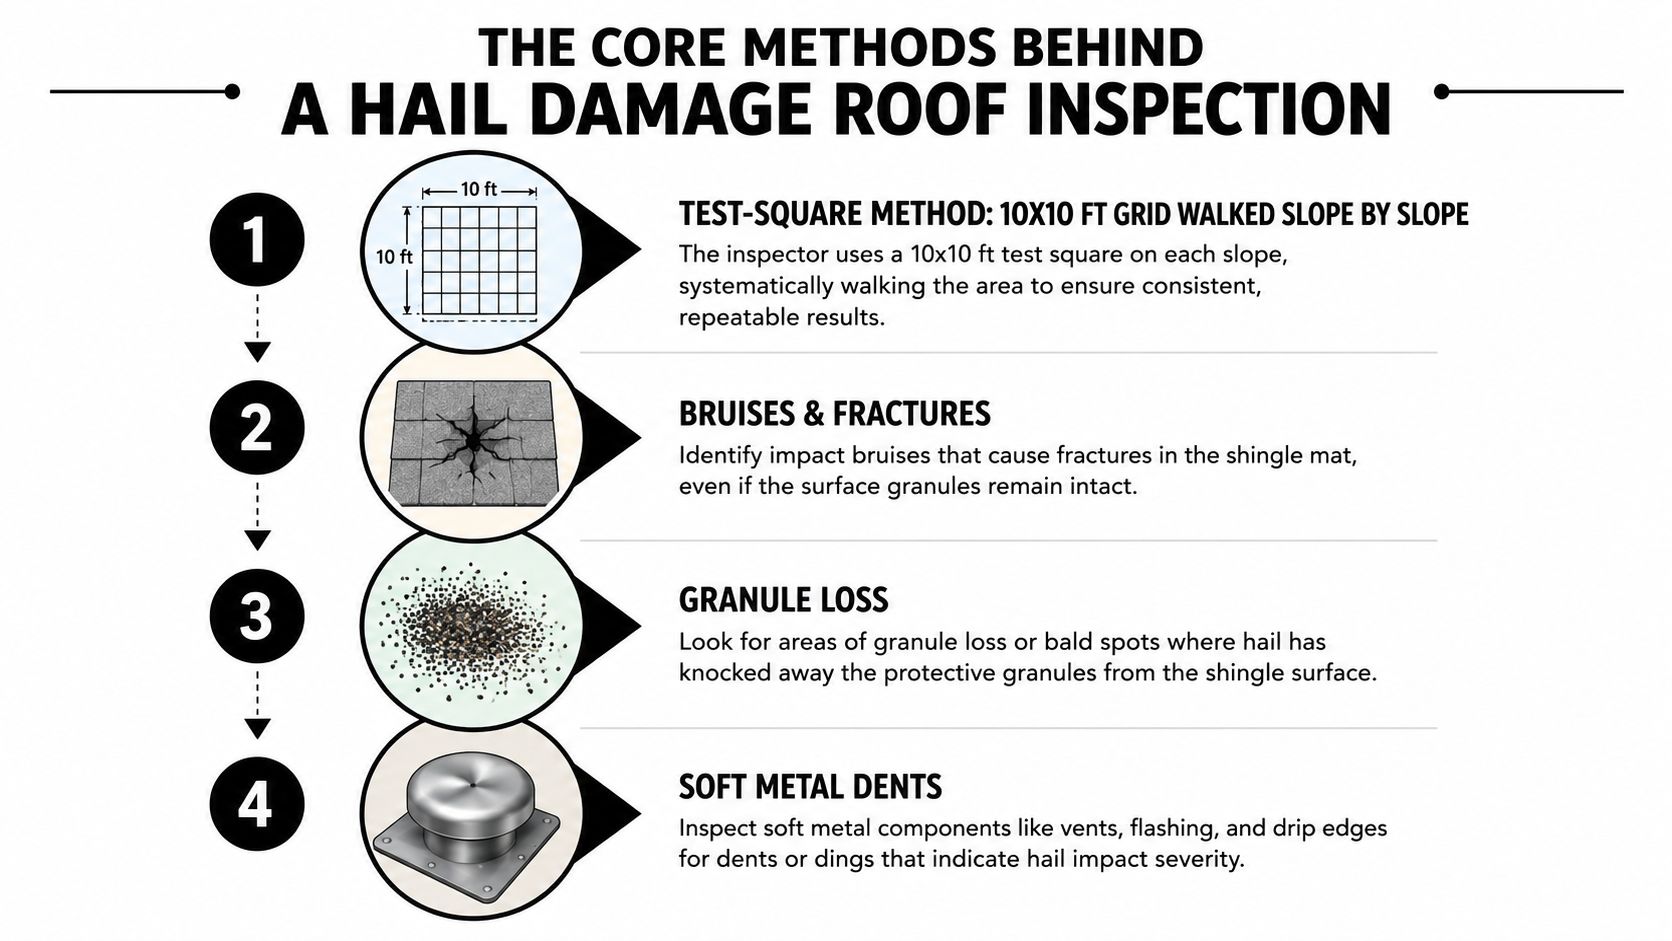
A reliable inspection converts a weather event into evidence that another person can review. Four methods work together: measured sampling, tactile testing, collateral checks, and a complete roof-system review.
Start with a measured test area
A common field method uses a 10-by-10-foot test square, equal to 100 square feet, examined closely on each roof direction. Haag's protocol calls for at least one test area in every roof direction, which helps inspectors map damage slope by slope rather than assuming one visible mark represents the entire roof. The inspector records bruises, fractures, punctures, exposed reinforcement, and other impact-related conditions inside each square.
Combine sight with touch
Visual inspection identifies pockmarking, granule displacement, and cracked tabs. Tactile inspection adds another layer. Pressing the shingle mat with a finger or thumb can reveal a soft bruise caused by impact and loss of internal support. That finding is different from a surface dent that leaves the reinforcement intact.
Use collateral surfaces as storm evidence
Soft metals can help establish direction and consistency. Inspectors compare dents on gutters, downspouts, vents, flashing, window wraps, and other exposed components with roof marks. A pattern that appears across roofing and adjacent metal provides stronger causation evidence than an isolated mark.
Apply thresholds carefully
Many adjusters and inspection guides commonly reference about 8 to 10 impacts per 100 square feet as a replacement-oriented benchmark for asphalt shingles, although the benchmark isn't universal. That figure must be interpreted with roof age, material condition, slope distribution, and the nature of each impact. Broader commercial property maintenance context is available in this guide to Facility Management Insights roof care.
Field rule: A count supports a conclusion, but the inspector still has to prove that the counted marks are hail-caused and functionally meaningful.
How Hail Damage Looks on Shingle, Tile, Metal, and Flat Roofs
Hail doesn't leave the same signature on every roof. A homeowner should first identify the material, then compare what is visible with the failure points that matter for that system.
| Roof Type | Key Hail Damage Signs | Ground-Level Indicator |
|---|---|---|
| Asphalt shingles | Granule displacement, exposed black asphalt mat, circular bruising, punctures, cracked tabs, or exposed reinforcement | Loose granules in gutters and downspouts, dark spots, or irregular marks visible through binoculars |
| Concrete and clay tile | Radial or starburst cracks, broken noses, fractured channels, and hidden breaks beneath overlapping tiles | Missing fragments, bright fracture lines, or displaced tiles |
| Metal roofing | Dents, coating scrapes, distorted seams, loose fasteners, and possible panel punctures | Repeated dents on broad panel areas, vents, gutters, or flashing |
| Flat and modified bitumen | Blisters, split cap sheets, punctures near seams and curbs, coating loss, and altered ponding areas | Dark punctures, lifted seams, damaged parapet flashing, or new areas that hold water |
| Cedar shakes | Splits along the grain, raised fibers, and broken or displaced pieces | Light-colored split wood, lifted edges, or scattered shake fragments |
Asphalt shingles
The most important shingle signs aren't always the most dramatic. Hail may remove ceramic granules and the asphalt top coating, exposing the fiberglass reinforcement beneath. A circular bruise can feel soft even when it looks like ordinary discoloration. Granules in a gutter are useful corroboration, but they don't prove roof-wide damage by themselves.
Tile and metal
Concrete and clay tile may crack in a starburst pattern or fracture in a water channel hidden by an overlapping tile. Don't lift or probe tiles from a ladder. Metal panels may show dents that are purely cosmetic, but distorted seams, backed-out fasteners, damaged coatings, or punctures can affect watertightness.
Flat systems and cedar
Flat roofs often hide impact damage near seams, curbs, drains, and parapet transitions. A puncture can be subtle until rain exposes it. Cedar shakes tend to split with the grain, leaving raised fibers and pale exposed wood. Each system requires a material-specific inspection, not a universal hail checklist.
Safe DIY Steps for a Hail Damage Roof Inspection at Home
A homeowner's safest role is evidence gathering from the ground and from accessible interior spaces. Roof walking introduces fall risk, especially after rain, on tile, near edges, and on two-story homes.
Begin where falling hazards are lowest
Wait until the storm has passed, the ground is stable, and visibility is good. Look for loose tiles, hanging metal, broken branches, exposed wiring, and debris near the service drop. Don't place a ladder against a damaged gutter, and don't climb near electrical lines or wet surfaces.
Walk the property perimeter and photograph gutters, downspouts, vents, fascia, window wraps, and air-conditioning fins. Capture both the full elevation and close-up details. Soft-metal dents can help an inspector compare the storm pattern with marks on the roof.
Scan from several viewpoints
Use binoculars from the yard and inspect the roof from each accessible side of the home. Look for missing granules, dark circular bruises, cracked tabs, displaced tiles, scraped metal coatings, lifted seams, or punctures. Avoid declaring a roof sound because you don't see missing shingles. Hail often bruises material without removing it.
Inside the home, check ceilings, upper-wall corners, attic decking, insulation, and areas around vents and penetrations. Photograph staining or damp insulation, but don't touch wet electrical equipment or enter an attic with unsafe access, heat, pests, or unstable decking.
If you need to walk the roof to confirm the finding, stop the DIY inspection and request a qualified professional assessment.
Don't climb tile roofs, steep roofs, wet roofs, or two-story structures without the training, equipment, and fall protection used by roof inspectors. A ladder inspection can't reproduce a slope-by-slope test square, and it can create new damage or put you in contact with electrical hazards. Your stopping point is simple: once ground-level evidence is recorded, leave roof access to a professional.
What Professional Inspectors Evaluate Beyond the Surface
A defensible report explains the path from observation to conclusion. It doesn't merely state that a roof is damaged. It identifies the roof material, slope, test location, impact characteristics, collateral evidence, and any interior condition that supports or weakens a storm-related explanation.
Sampling and tactile confirmation
Inspectors place test squares on each roof direction and record the number and type of impacts in each area. The commonly cited about 8 to 10 hits per 100 square feet benchmark can help frame replacement discussions for asphalt shingles, but it isn't a universal coverage rule. The inspector still has to distinguish hail bruises from blistering, foot traffic, manufacturing variation, deterioration, or mechanical damage.
Pressing a suspected bruise helps determine whether the shingle mat has softened. Visual pockmarks with loss of granules and asphalt coating are more meaningful when the underlying reinforcement is exposed or the mat has lost firmness. On tile, the inspection focuses on cracks, fasteners, channels, and concealed fractures. On metal, it focuses on seams, coatings, fasteners, and penetrations.
Correlation across the building
Gutters, vents, flashing, window wraps, soffits, fascia, and other soft-metal surfaces can show impact direction. Attic inspection adds a separate layer by identifying moisture entry, damaged decking, wet insulation, or staining around roof penetrations. Those observations don't automatically establish causation, but they can help connect exterior impact evidence with interior performance.
| Roof Material | Hits per Test Square | Key Test Points | Collateral Evidence |
|---|---|---|---|
| Asphalt shingles | About 8 to 10 impacts per 100 square feet is a commonly cited benchmark, not a universal rule | Bruising, soft mats, granule and coating loss, fractures, exposed reinforcement | Gutters, vents, flashing, downspouts |
| Concrete or clay tile | Counts must be interpreted by tile condition and slope | Radial cracks, channel fractures, fasteners, displaced pieces | Broken fragments, metal flashings, vents |
| Metal panels | A hit count alone doesn't establish functional failure | Seam distortion, coating rupture, punctures, fastener movement | Gutters, vent caps, window wraps |
| Flat membranes | Assessment depends on membrane and reinforcement condition | Punctures, split cap sheets, seam damage, blisters, curb transitions | Drains, parapets, flashings, attic moisture |
A roof report should include photographs, written notes, test-square locations, and clear descriptions of what hail did and did not do. For visual context when reviewing attic ventilation and roof components, see this roof vent and attic reference image.
Documenting Hail Damage Roof Inspection Evidence for Insurance
Insurance documentation works better when it records conditions rather than opinions. “The roof looks bad” gives an adjuster little to verify. A dated photo of a marked impact, paired with its slope location and test-square count, gives the claim file something concrete to evaluate.
Build the file in layers
Start with wide photographs showing the property elevation and roof orientation. Follow with close-ups of individual marks, soft-metal dents, granule accumulation, cracked tiles, damaged flashing, or interior staining. Keep original files with timestamps when available, and don't edit away surrounding context.
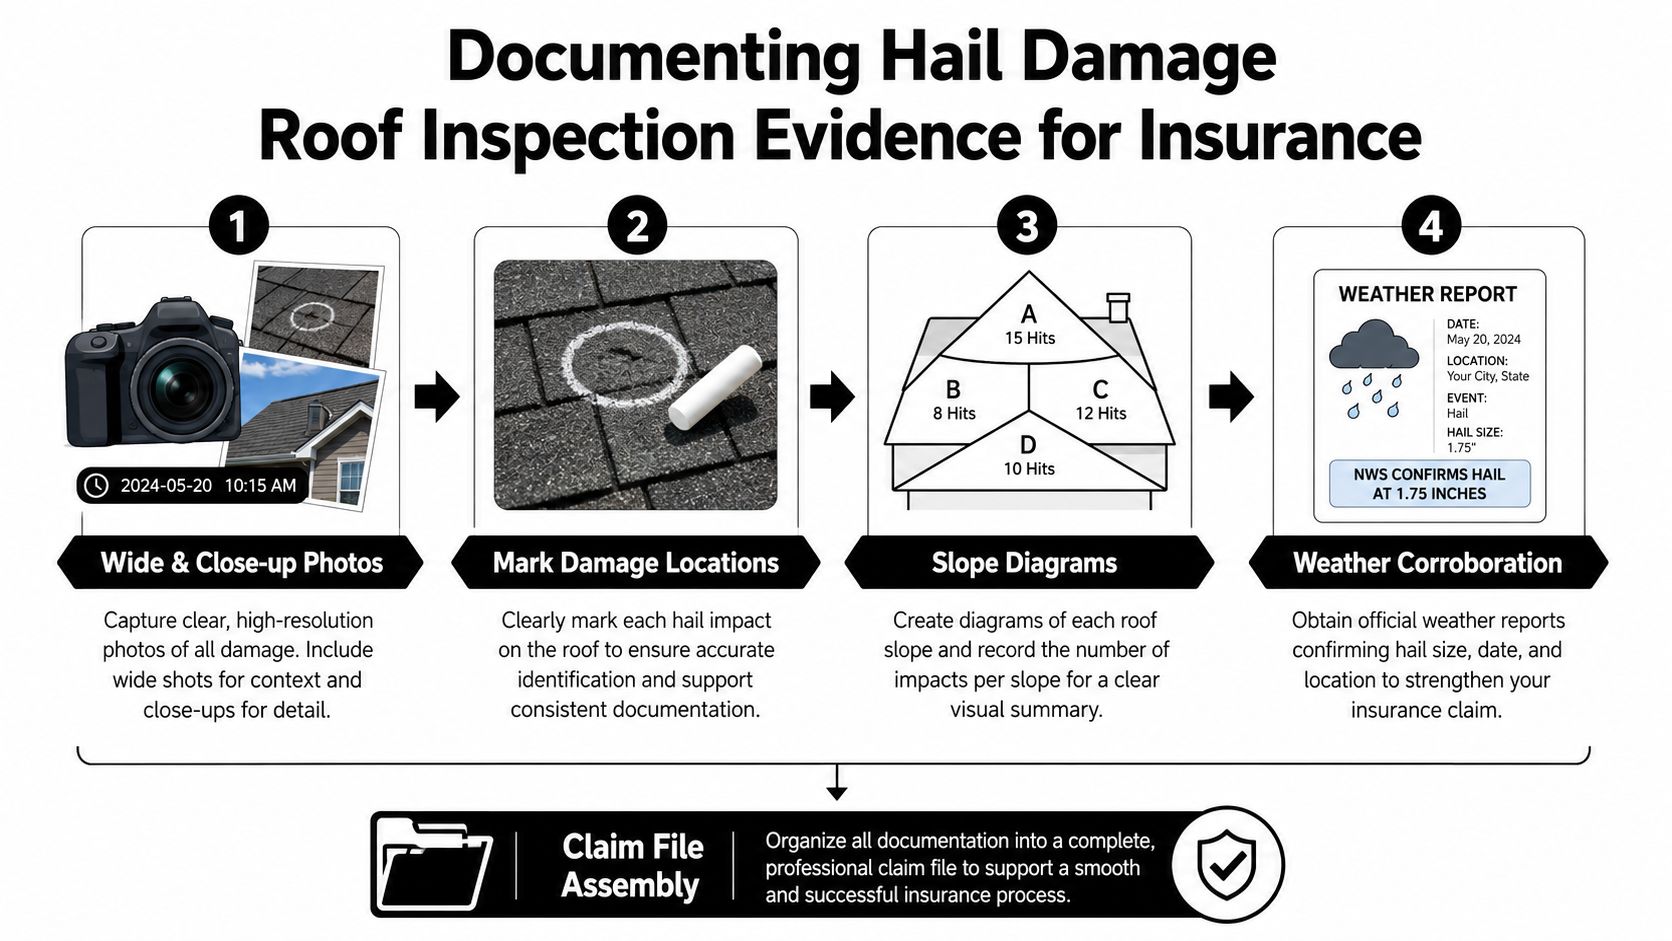
A professional can mark damage locations with removable chalk, create a slope diagram, and record impact counts for each test area. The file should also include the storm date, weather documentation, repair invoices, temporary protection records, inspection reports, and correspondence with the carrier. Keep scope-of-loss documents even when the initial estimate seems incomplete.
Meet the adjuster at the property
Request an on-site inspection when practical. Walk the adjuster through the roof directions, collateral evidence, attic observations, and marked test areas. If the adjuster sees only a few photographs without location notes, the conversation can become a disagreement over interpretation rather than a review of the same evidence.
A homeowner-focused overview of what homeowners should know can help organize questions about restoration and claim coordination. Also preserve records of any water mitigation, including photographs before and after temporary work. This water damage mitigation reference can help you identify the type of documentation that matters when interior moisture appears.
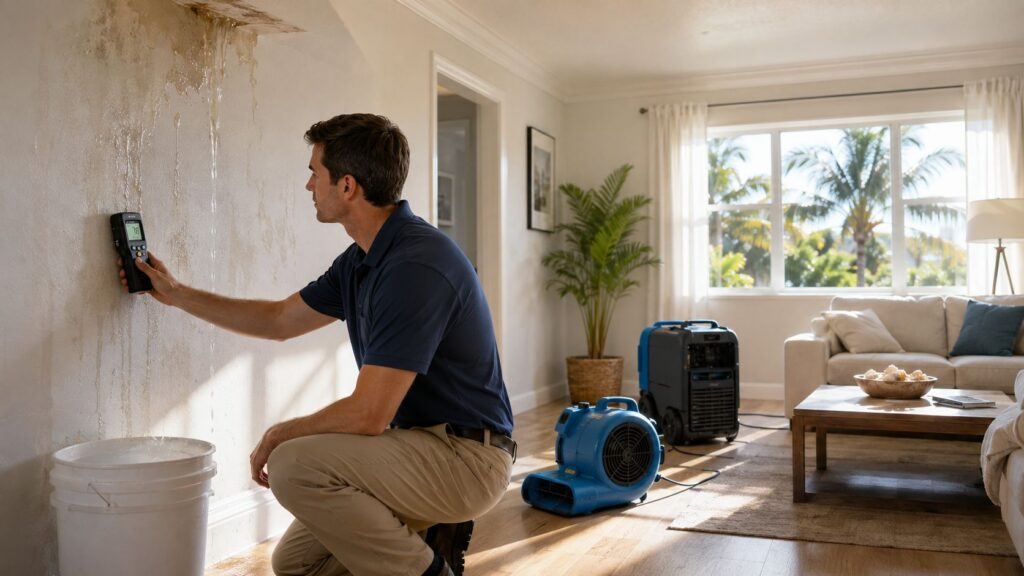
Documentation standard: Photograph the condition before temporary repairs, record where each mark is located, and keep the inspection report separate from the carrier's coverage decision.
Hail damage contributed to more than $876.8 million in insured property and automobile losses in the peer-reviewed analysis of the 24 May 2011 Dallas-Fort Worth hail event, including more than $545.2 million in residential-property losses. More than 90% of claim dollars in that event went to roofing damage, as reported in the peer-reviewed hail-loss analysis. The lesson for South Florida homeowners is practical: careful records matter because roofing evidence can represent a substantial part of a storm claim.
Repair Options, Timelines, and Severity Thresholds After Inspection
The repair recommendation should follow the evidence, not the other way around. An isolated bruise on an otherwise sound shingle may call for a limited repair, while repeated functional damage across several slopes can justify a broader scope. The roof's age, remaining service life, material availability, code requirements, and matching issues also affect the decision.
The thresholds below are useful planning language, not promises of insurance coverage. Policies differ, and the carrier decides coverage.
| Severity Benchmark | Typical Indicators | Recommended Scope | Realistic Timeline |
|---|---|---|---|
| Isolated, low-density findings | Limited bruising, intact surrounding granules, no demonstrated leak path | Targeted repair or replacement of affected components | Schedule depends on access and materials |
| Concentrated damage on one elevation | Repeated functional marks in one slope or roof direction | Partial slope replacement or focused system repair | Coordinate materials and permitting before work |
| Broad damage across multiple slopes | Functional compromise in several test areas, damaged accessories, or widespread fractures | Full reroof evaluation and replacement planning | Coordinate permitting, materials, and weather |
| Active interior water entry | Wet decking, ceiling staining, or leakage around penetrations | Emergency protection and dry-in, followed by permanent repair | Immediate temporary protection, permanent scope afterward |
A commonly cited replacement-oriented benchmark for asphalt shingles is about 8 to 10 impacts per 100 square feet, but the source guidance also cautions that the benchmark isn't universal. Another widely used historical screening reference treats 1-inch hail as a point where asphalt shingles can begin to bruise, while 1.75-inch hail is often associated with clearly claimable or consistent functional damage across many materials. Hail size helps establish plausibility, but it doesn't replace roof evidence.
Patching is a poor choice when the surrounding shingle field has widespread bruising or the repair can't restore the system's water-shedding design. Partial replacement can make sense when damage is concentrated on one slope and compatible materials are available. Full replacement becomes a technical discussion when several slopes show functional compromise, the roof is already vulnerable, or repairs won't restore reliable performance.
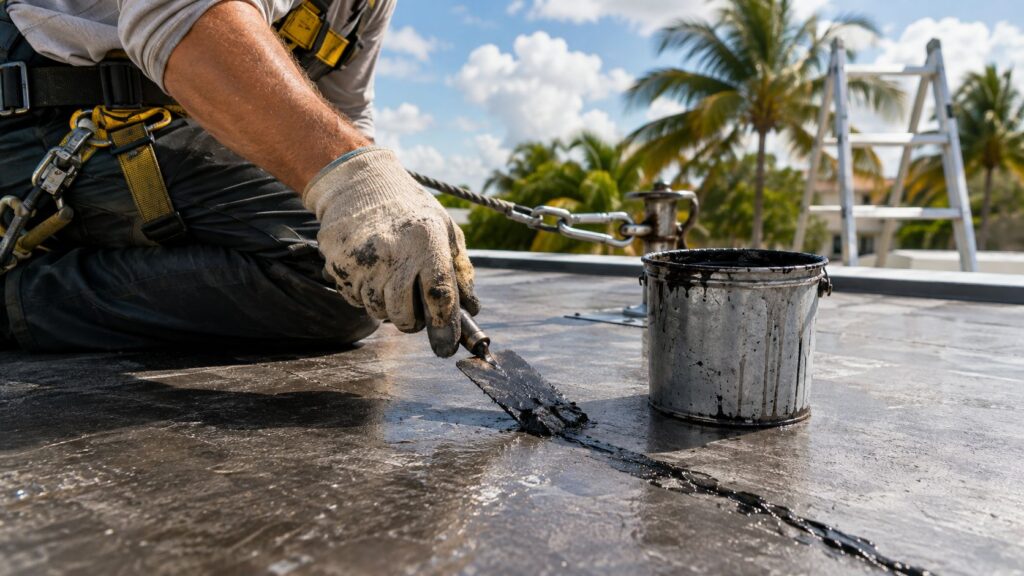
Don't let a roofer promise an emergency dry-in or a completed reroof on a fixed schedule without checking weather, permits, material supply, and the existing system. A practical written scope should identify the affected slopes, components, temporary measures, and the assumptions behind the recommendation. For an example of a roof-repair visual reference, see this roof leak repair image.
South Florida Action Plan for Broward, Miami-Dade, and Palm Beach Homeowners
A storm response should protect two things at once, the roof envelope and the evidence file. The first prevents avoidable interior damage. The second helps everyone evaluate the same conditions later.
First 48 hours
Stay on the ground for the initial sweep. Photograph the property from each elevation, then document gutters, vents, flashing, windows, downspouts, exposed debris, and any visible roof marks. If water is entering the home, use safe temporary protection and request emergency service. Don't climb onto a wet, damaged, tiled, steep, or electrically exposed roof.
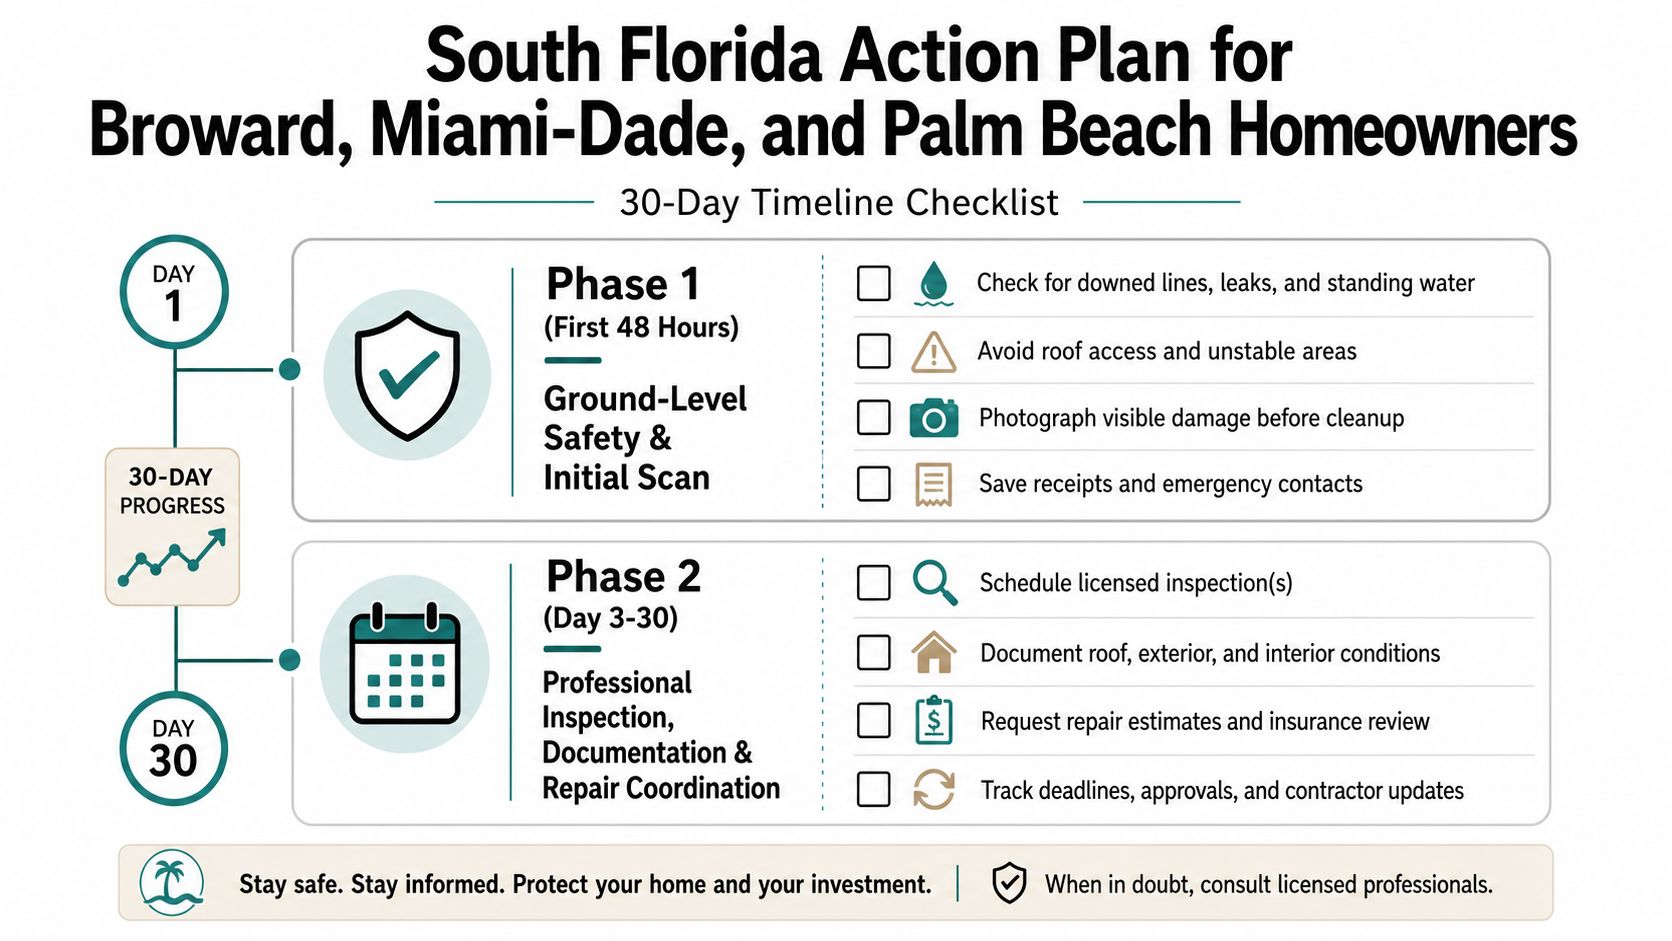
Write a short chronology while details are fresh. Record when the hail occurred, when you found granules or dents, when a leak appeared, and what temporary work was performed. Preserve photos before cleanup or repairs whenever doing so is safe.
Days 3 through 10
Arrange independent inspections and ask each inspector to provide slope-specific photographs, test-square locations, impact descriptions, collateral observations, and attic findings. If an insurance inspection is scheduled, attend the appointment and provide the same file to the adjuster.
Confirm that any contractor you consider is properly licensed and insured for the work and jurisdiction. Broward and Miami-Dade projects may involve high-velocity hurricane zone requirements, while Palm Beach work must account for applicable local wind-zone rules. Verify the requirements with the relevant building department and your insurer rather than relying on a verbal promise.
Days 10 through 30
File the claim using the storm date and your written chronology. Request written estimates that identify the roof material, affected slopes, test-square data, collateral damage, temporary protection, and proposed scope. Keep all claim correspondence in one folder, including reports that disagree with the first assessment.
Florida's 25% replacement rule is often discussed in relation to roof work and matching, but its application depends on the governing code, permit facts, roof configuration, and current local enforcement. Don't assume that a percentage automatically guarantees full replacement or coverage.
The practical checklist is short:
- Protect people first: Keep off unsafe roofs and stay clear of electrical hazards.
- Preserve evidence: Photograph wide views, close-ups, soft metals, and interior conditions.
- Measure the damage: Ask for slope-by-slope test squares and recorded impact counts.
- Coordinate locally: Confirm licensing, permitting, HVHZ requirements, and Palm Beach wind-zone considerations.
- Keep control of the file: Save reports, estimates, invoices, weather records, and adjuster communications.
Paletz Roofing and Inspections provides post-storm roof inspections, damage assessments, repairs, replacements, and emergency service for shingle, tile, metal, and flat roofing across Broward, Miami-Dade, and Palm Beach. If your roof took hail and the driveway view doesn't answer whether the damage is functional, visit Paletz Roofing and Inspections to arrange a documented inspection and discuss the next safe step.