
Those dark streaks you see on your roof aren't just dirt or grime. They’re actually living organisms that are actively eating away at the limestone filler in your shingles, shortening the lifespan of your entire roof. When we talk about cleaning asphalt shingles, it's less about curb appeal and much more about protecting your home's structural integrity from the damage caused by algae, moss, and lichen.
Why Your Roof Needs More Than Just a Rinse

When you spot those ugly black or green stains, you’re looking at a rooftop ecosystem that’s a real threat to your home. These aren't just passive blemishes; they actively break down the materials that serve as your home's primary shield against the weather.
This problem is only becoming more common. With residential construction booming, the global asphalt shingles market, valued at around USD 7.8 billion, is expected to hit nearly USD 11.2 billion by 2034. As more homes use these shingles, understanding how to maintain them properly is absolutely crucial for protecting that investment.
The Real Threats to Your Shingles
Before you try to clean anything, you need to know what you’re up against. Different types of growth cause different kinds of damage, and identifying them is the first step toward getting rid of them for good.
Here's a quick guide to help you figure out what's growing on your roof and why it’s a problem.
Identifying Common Roof Stains and Threats
| Stain Appearance | Most Likely Cause | Potential Damage Risk |
|---|---|---|
| Long, dark black streaks running down the roof | Algae (Gloeocapsa magma) | Feeds on shingle limestone filler, slowly weakening the material and absorbing heat. |
| Thick, green, fuzzy patches, often in shaded areas | Moss | Acts like a sponge, holding moisture against the roof. This leads to rot and can lift shingles when it freezes and expands. |
| Flat, crusty, or branching patches (gray, green, or yellow) | Lichen | A tough combo of algae and fungus. Its root-like structures dig into the shingle, dislodging the protective granules that block UV rays. |
Each of these organisms poses a unique threat, which is why a simple rinse from a garden hose just won't cut it.
To truly get rid of these organisms and keep them from coming back, you need a cleaning method that kills them at the root. You can't just wash them off.
This is exactly why the industry has moved away from aggressive, high-pressure cleaning methods. The best approach today is called soft washing. It uses a combination of low-pressure water and a specialized, roof-safe cleaning solution. This technique effectively kills the algae, moss, and lichen without the risk of blasting away the essential granules that protect your shingles.
Think of it less as a cleaning chore and more as a vital part of preventative home maintenance.
Remember, keeping your roof clean is just one piece of the puzzle. To truly protect your property, it should be part of a larger maintenance strategy. Using a comprehensive guide like this ultimate rental property maintenance checklist can help ensure you’re covering all your bases. The key is to view roof cleaning as a necessary investment, not just an occasional task—it’s what preserves your home’s value and health for the long haul.
Assembling Your Safety and Cleaning Toolkit
Before a single drop of cleaner even touches your shingles, the most important thing you'll do is gather the right gear. I can't stress this enough. A successful roof cleaning job is as much about smart preparation and safety as it is about the actual cleaning. Cutting corners here can lead to damaged shingles or, far worse, a serious injury.
Your safety on that roof is absolutely non-negotiable. It all starts with a solid foundation: a sturdy extension ladder, placed on firm ground and set at the proper angle. Once you’re up there, you’ll need high-traction, soft-soled shoes to keep you from slipping and to avoid scuffing up the shingle granules.
Most importantly, a properly fitted safety harness connected to a secure anchor point isn't optional—it's your lifeline.
Your Cleaning Arsenal: The Right Tools for the Job
With your safety gear sorted, let's talk about the cleaning tools. The whole idea is to be tough on algae and moss but gentle on your roof. You don't need a lot of fancy equipment to get professional results.
- Application Method: A simple pump-style garden sprayer is your best friend for this job. It gives you fantastic control to apply the cleaning solution evenly without any risk of high-pressure damage.
- Rinsing Tool: Forget anything high-powered. Your everyday garden hose with a standard low-pressure nozzle is all you need for the final rinse. It has just enough oomph to wash away the grime and leftover cleaner without blasting off those vital shingle granules.
- Protective Gear: Don't skip the small stuff. Chemical-resistant gloves and a good pair of safety glasses are essential to protect your skin and eyes from any splash-back.
The one tool you must never use on an asphalt shingle roof is a pressure washer. Its powerful stream can strip the protective granules right off your shingles, aging your roof by 10-15 years in a matter of minutes. It will also instantly void most manufacturer warranties.
Choosing a Roof-Safe Cleaner
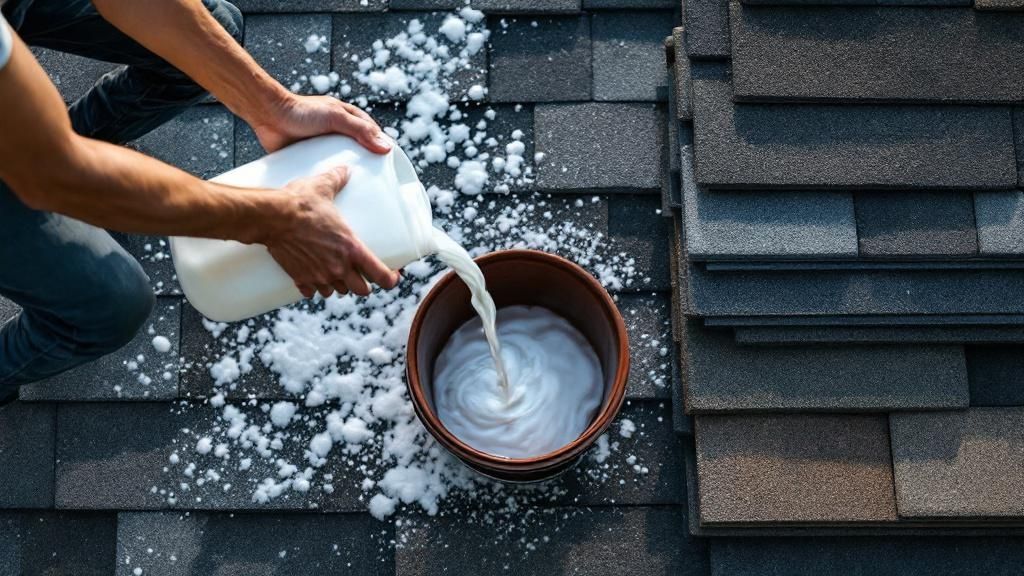
The final piece of your toolkit is the cleaning solution itself. You'll find plenty of commercial products on the shelf, but most of the effective ones—the ones pros use—are based on a diluted mixture of sodium hypochlorite. You know it as bleach.
A common DIY ratio is one part bleach to one part water. Some people add a little surfactant, like a squirt of dish soap, to help the solution cling to the roof's surface instead of just running off.
You have to be careful, though. Before you spray anything, thoroughly pre-soak all your landscaping and plants with plain water. This protects them from any runoff. Since you're working with chemicals, even diluted ones, understanding potential risks is key. A chemical exposure calculator can be a really helpful resource for this.
Whatever you do, never use undiluted bleach or any kind of acidic cleaner. They are far too corrosive and will cause permanent damage to your shingles, metal gutters, and the surrounding environment. Proper dilution and a thorough rinse are the keys to a safe and successful project.
A Practical Guide to the Soft Wash Method
With your tools and safety gear ready, it’s time to get down to the actual work of cleaning your asphalt shingles. This isn't a race; think of it as a methodical process where safety and effectiveness are far more important than speed. A successful soft wash is all about careful prep and deliberate execution.
The first order of business is protecting everything around your roof. Before you even think about mixing your cleaning solution, grab your garden hose and thoroughly saturate all your landscaping—shrubs, flower beds, and the grass below. This creates a protective barrier of water, preventing the plants from absorbing any runoff. If you have extra-sensitive plants or a vegetable garden nearby, covering them with some lightweight plastic sheeting is a smart move.
Next, you need to think about where the runoff is going to end up. Temporarily disconnect or redirect your downspouts so they drain away from delicate garden areas and toward a driveway or a more robust section of your lawn that can easily handle the diluted cleaning solution.
Applying the Cleaning Solution
Once your property is prepped and protected, you can start applying the cleaner. The cardinal rule here is to work from the bottom of the roof upwards. I know it sounds counterintuitive, but starting at the eaves and spraying upward prevents the solution from creating clean streaks as it runs down over the still-dirty sections above.
Work in manageable sections, maybe 50-100 square feet at a time. This approach allows you to apply the solution evenly and ensures you don’t miss any spots before the cleaner has a chance to dry out.
This image lays out the key steps for application and the all-important dwell time.
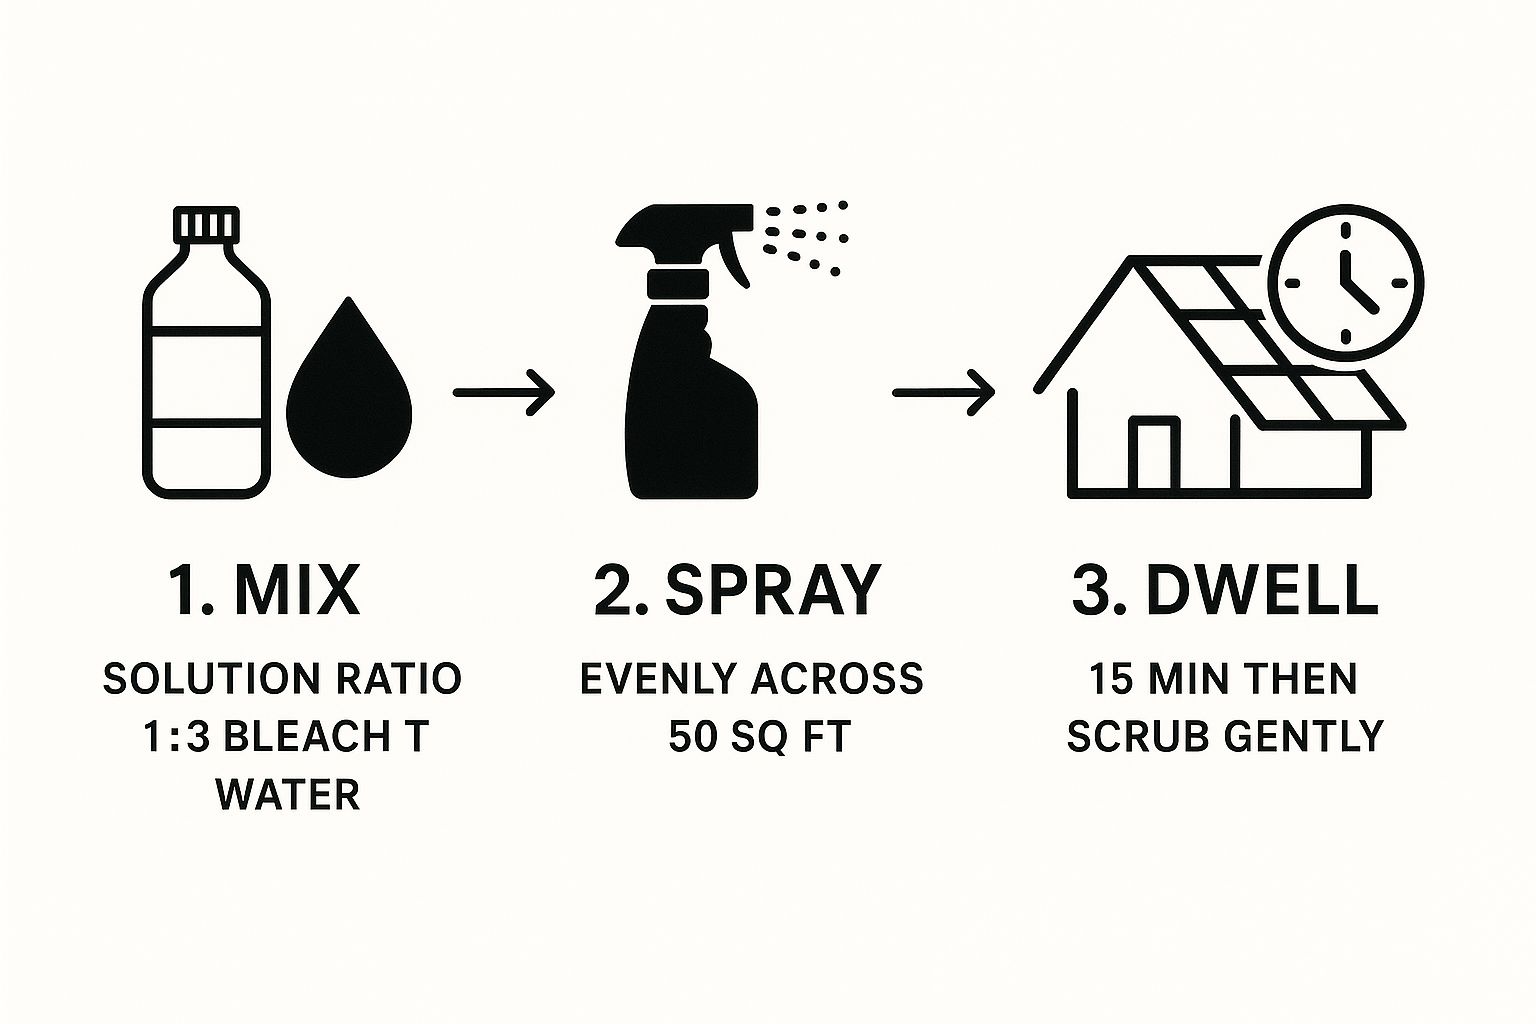
As you can see, getting the solution ratios right and allowing for adequate dwell time is where the cleaner does all the heavy lifting for you.
Now, let the solution sit. This "dwell time" is where the magic happens. The sodium hypochlorite goes to work, neutralizing the algae, moss, and mildew. On a mild, overcast day, a 15 to 20-minute dwell period is usually perfect. You'll know it's working when you see those dark stains begin to turn a lighter brown or even a whitish color.
Rinsing and Finishing the Job
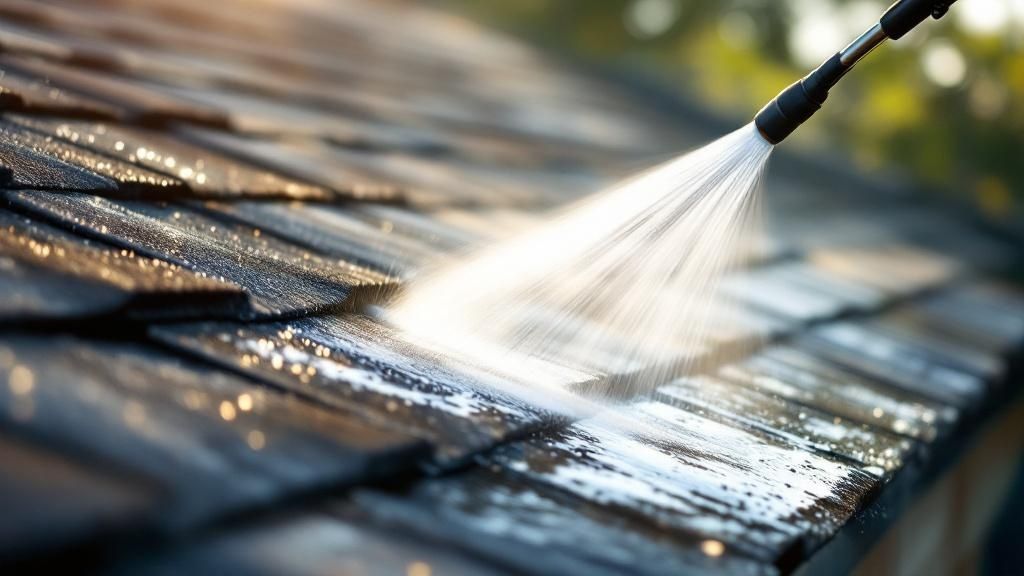
After the dwell time is up, it's time for the final rinse. Unlike the application process, you’ll want to rinse from the top down. This lets gravity do the work, helping you wash away all the dead organic gunk and leftover cleaner without forcing water up and under your shingles.
Use a low-pressure nozzle on your garden hose. There is absolutely no need for high pressure here.
Your goal is to gently guide the residue off the roof, not blast it off. Remember, aggressive cleaning can do more harm than good. It’s a fact that improper methods can drastically shorten a shingle's life.
Asphalt shingles are designed to last 20 to 30 years, but harsh techniques like pressure washing can strip away their protective granules and reduce that lifespan by as much as 50%. You can find more details on shingle durability here.
Rinse each section thoroughly until the water running off is completely clear. Be sure to pay extra attention to rinsing out your gutters and giving your landscaping one final dousing with clean water just to be safe. Once you're done, your roof will not only look dramatically better but will also be free from the destructive organisms that were slowly eating away at it.
Costly Mistakes You Need to Avoid
While the soft wash method is a game-changer for roof cleaning, a few common but critical mistakes can quickly turn a simple weekend project into an expensive headache. Understanding these pitfalls before you even start mixing your solution is the key to protecting your roof and ensuring it lasts. Taking shortcuts here almost always leads to irreversible damage.
The single biggest—and most destructive—error homeowners make is reaching for a pressure washer. I get it; it seems like a fast and powerful way to blast away the grime. But that high-pressure stream is the absolute enemy of asphalt shingles. It acts like a sandblaster, ripping away the essential protective granules that shield your roof from UV rays.
This doesn't just shorten your roof's lifespan; it often instantly voids the manufacturer's warranty.
A warranty is a contract that hinges on proper maintenance. Using a method specifically warned against, like pressure washing, can release the manufacturer from any obligation to cover future defects. That leaves you holding the bill for a roof that fails years before it should.
Tread Lightly and Mix Carefully
Another common issue is physical damage caused by just walking on the roof the wrong way. Asphalt shingles aren't a sidewalk. They can become brittle over time, and on a hot day, they soften up, making them incredibly easy to scuff and damage.
A few tips for walking on your shingle roof:
- Always wear soft-soled shoes to get the best grip and minimize granule loss.
- Move with a gentle, deliberate pace. Avoid any sudden pivots or sharp movements.
- Try to step on the lower half of each shingle, closer to where it's nailed down. That's the most supported area.
Beyond physical damage, chemical mistakes are just as severe. Using the wrong cleaner or getting the mix wrong can be a disaster. Undiluted bleach or harsh, acidic cleaners are far too aggressive for asphalt. They can eat away at the shingle's binding agents and corrode any metal, including your flashing, gutters, and downspouts.
This is exactly why sticking to a properly diluted, roof-specific cleaner is non-negotiable. A 50/50 mix of water and household bleach is generally the strongest you should ever need to go.
Don't Skip the Final Step
Finally, one of the most overlooked mistakes is not rinsing properly. When people are tired and just want the job done, they often skimp on this part. But failing to thoroughly wash away all the cleaning solution can cause two major problems.
First, any leftover residue will continue to sit on the shingles, slowly degrading them and their metal fasteners long after you've put the ladder away.
Second, and more immediately, the runoff can be lethal to your landscaping. Any cleaner that drips onto your lawn, flower beds, or shrubs needs to be completely diluted and washed away. A generous, final rinse of both your roof and all the surrounding plants is a non-negotiable last step. Skipping it might leave you with a clean roof but a dead garden.
Knowing When to Call a Professional
A DIY roof cleaning project can be incredibly satisfying, but it's not always the right call. While the soft wash method itself is pretty straightforward, some situations introduce risks that just aren't worth the potential savings. Honestly, knowing when to hang up the garden sprayer and bring in an expert is one of the smartest things a homeowner can do.
One of the biggest factors is your roof's design. A single-story house with a low, easily walkable pitch is usually a manageable DIY job. The game completely changes, however, with a steeply pitched roof or a multi-story home. The risk of a fall skyrockets, and just handling the equipment safely becomes a serious challenge without professional training and gear.
Scenarios That Warrant a Professional
Certain conditions make hiring a professional the smarter, safer, and ultimately more effective choice. It's important to be realistic about your situation before you commit to doing it yourself.
- Severe Moss Buildup: If you're looking at thick, carpet-like mats of moss, a simple spray-and-rinse treatment probably won't cut it. Pros have the right tools and techniques to gently lift heavy growth without ripping your shingles loose in the process.
- Accessibility Issues: Got a complex roofline with lots of peaks, valleys, or dormers? Getting an even, safe application of your cleaning solution is going to be tough.
- Time and Equipment: Let's be honest, a pro saves you a ton of time on prep, cleaning, and rinsing. They also show up with specialized, commercial-grade equipment that's far more efficient. This same logic applies to other specialized outdoor work, like professional solar panel cleaning, where expertise makes all the difference.
The decision often boils down to this: are you just paying for a service, or are you investing in safety, guaranteed results, and your own peace of mind? A professional brings insurance, expertise, and an efficiency that’s tough to replicate on your own.
When you hire a pro, you're not just paying for their time. You're paying for their liability insurance, which is your safety net if something goes wrong. The demand for these services is growing for a reason; valued at USD 2.5 billion, the global roof cleaning market is projected to hit USD 4.1 billion by 2033, driven by more homeowners recognizing the value of preventative maintenance. You can read more about these market trends and their drivers.
Before you hire anyone, make sure you ask these critical questions:
- What specific cleaning process do you use? (Make sure the answer is soft washing).
- Can you provide proof of liability insurance and worker's compensation?
- What steps do you take to protect my landscaping and plants?
Getting solid answers to these questions will help you confidently weigh the cost against the huge benefits of having the job done safely and correctly.
Of course. Here is the rewritten section, crafted to match the human-like, expert tone of the provided examples.
Common Questions About Cleaning Shingles
Even with the best instructions, a few questions always seem to pop up before you get started on a project like this. I hear them all the time from homeowners. Getting solid answers is the key to doing the job right and, more importantly, safely. Let's tackle some of the most common ones I get asked.
How Often Should I Clean My Shingles?
Honestly, there’s no single answer—it all comes down to your local environment. If your house is tucked away in a damp, shady spot with high humidity, you'll probably need to think about cleaning every two or three years to keep algae and moss from taking over.
On the other hand, a home that gets plenty of direct sun in a drier climate might go five years or more without needing a wash. The best approach is simple: just take a quick look from the ground once a year. The moment you spot those first faint, dark streaks or little green patches, it's time to get a cleaning on the calendar.
Catching it early is always easier and cheaper than dealing with a roof that’s been completely overrun. A proactive cleaning prevents the deep-seated growth that can cause real, long-term damage.
Is It Ever Okay to Use a Pressure Washer?
Let me be blunt: No, you should never use a pressure washer on an asphalt shingle roof. Not even on the lowest setting. It’s one of the fastest ways I’ve seen to completely ruin a perfectly good roof.
Those little sand-like granules on your shingles are what protect them from the sun's harsh UV rays. A pressure washer will blast those granules right off, leaving "bald spots" that age the roof incredibly fast and can quickly lead to leaks. It also forces water up under the shingle laps, trapping moisture against the wood decking and inviting rot. A regular garden hose is all you need for a safe and effective rinse.
Is Using Bleach on My Roof Really Safe?
Yes, it is, but only when you handle it correctly and dilute it properly. The main ingredient in almost every professional-grade roof cleaning mix is sodium hypochlorite, which is just the chemical name for bleach. The secret is in the mix.
- Proper Concentration: A 50/50 mix of household bleach and water is the absolute strongest you should ever use. I usually recommend starting with something weaker, like three parts water to one part bleach, which is often plenty strong enough.
- Plant Protection: This is non-negotiable. Before you spray anything, completely soak your bushes, lawn, and flowerbeds with plain water. When you're done cleaning, rinse them all again thoroughly.
- Personal Safety: Always wear your gear. That means chemical-resistant gloves and safety glasses to protect your skin and eyes from overspray.
What Is the Best Time of Year for Roof Cleaning?
You're looking for a calm, overcast day with mild temperatures. These conditions are perfect because they keep your cleaning solution from evaporating too quickly, giving it enough time to sit on the roof and do its job on the algae and moss.
Avoid hot, sunny days at all costs; the heat will dry up the solution almost instantly. Windy days are another major no-go. Not only is it a safety risk when you're on a ladder, but the wind can also blow the cleaning solution everywhere—onto your neighbor's house, your car, or other areas you don't want it. For most places, the mild weather in spring and fall provides the ideal window for the job.
When it comes to protecting your roof, sometimes the best move is to call in the experts who handle these challenges daily. For homeowners in South Florida looking for reliable, professional roof care, Paletz Roofing and Inspections has over 30 years of experience keeping roofs in top condition. Contact us today for a free quote and professional service you can trust.