
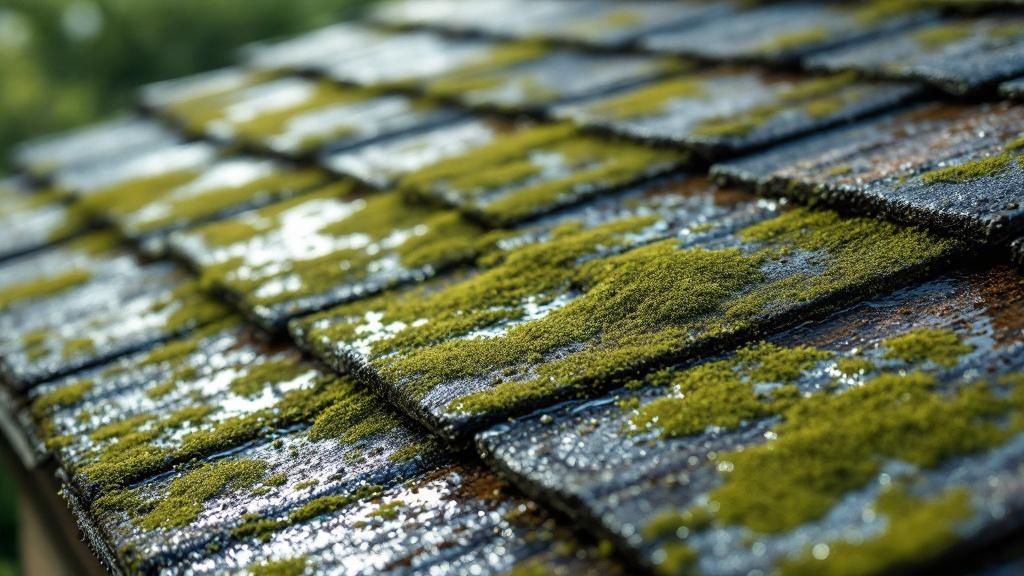
Those dark, ugly streaks on your roof aren't just dirt or a sign of aging. They’re a living organism, and it’s actively feeding on your shingles. These stains are usually the first sign of a bigger problem involving algae, lichen, and mold on roof shingles—all of which can shorten your roof's lifespan and tank your home's curb appeal.
Why You Are Seeing Dark Streaks on Your Roof
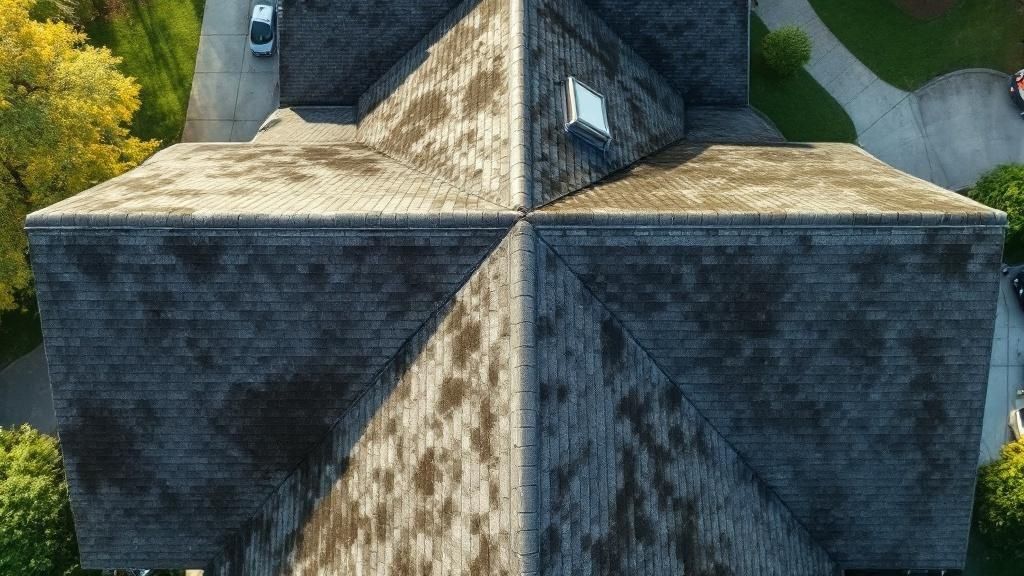
If you've spotted black or dark green streaks running down your roof, you're not alone. It's a widespread problem for homeowners, especially in humid climates like we have here in South Florida. Many people chalk these stains up to simple grime or soot, but the reality is a lot more complex—and concerning.
Think of your roof as a buffet. The main culprit behind those streaks is an airborne, blue-green algae called Gloeocapsa magma. Once it lands on your roof, it finds a surprisingly hospitable environment and starts to multiply. To protect itself from the sun's harsh UV rays, it develops a dark, hardened outer shell, creating the signature black streaks you see.
The Real Damage Hiding Behind the Stains
While the algae itself is bad enough, it often lays the groundwork for more destructive growth like mold and moss. Algae is great at holding moisture against the shingle surface, creating the perfect damp, shady conditions for mold spores to land, take root, and thrive.
This cocktail of microorganisms isn't just an eyesore; it's actively damaging your roof. Here’s how it works:
- Feeding on Shingles: Modern asphalt shingles contain limestone as a filler material. For these organisms, that limestone is a delicious food source. The algae and mold literally eat away at the limestone, slowly degrading the shingle's structure from the inside out.
- Granule Loss: As this biological growth feeds, it loosens the tiny, protective granules on your shingles. Those granules are your roof’s first line of defense against sun and weather. Without them, the shingles become brittle and fail years before they should.
- Moisture Retention: Mold and moss act like sponges, trapping water against your roof day in and day out. This constant moisture speeds up rot, can compromise the underlying roof deck, and eventually leads to expensive leaks inside your home.
The spread of microorganisms like Gloeocapsa magma is a leading cause of roof degradation. This algae erodes the limestone filler in asphalt shingles, weakening their structure and causing protective granules to disintegrate. This biological attack significantly shortens a roof's lifespan by retaining moisture and promoting premature aging and rot. You can read more about how microorganisms damage your roof and the dangers they pose.
Urgency and Property Value
Ignoring mold on roof shingles is a costly mistake. Beyond the serious structural risks, those ugly streaks hit your property value directly. A stained, neglected-looking roof screams poor maintenance, which can scare off potential buyers and drag down your home's curb appeal.
Understanding what those dark streaks really are is the first step. They're a clear warning sign that your roof's health is in jeopardy. By tackling the root cause—the living organisms feasting on your shingles—you can protect your biggest investment, head off expensive future repairs, and bring back your home’s clean appearance. The battle for your roof’s health starts with knowing your opponent.
To get a handle on mold on roof shingles, you first need to understand why your roof is such an inviting place for it to grow. It’s best to think of your roof as more than just a cover—it’s a tiny ecosystem where certain conditions create the perfect storm for algae and mold to move in and get comfortable.
Your asphalt shingles are a big part of the story. While they do a fantastic job of protecting your home, their very makeup is what makes them a buffet for microorganisms. The limestone filler that's mixed into the asphalt is an organic food source, and the shingle’s naturally porous, slightly rough texture is like a tiny net, catching moisture, dust, and airborne spores.
This mix of food and texture creates an ideal breeding ground. Once a single algae spore lands and finds a little moisture, it starts to colonize. This first layer of algae then acts like a sponge, holding even more water against the shingle and paving the way for more destructive things, like mold, to take root. It’s a vicious cycle that all starts with the basic properties of your roofing material.
The Ingredients That Accelerate Growth
While the shingles provide the food, it's your home’s specific environment that really kicks growth into high gear, turning a small patch into a full-blown infestation. A few key factors can dramatically speed up how fast mold and algae spread across your roof.
Overhanging tree limbs are one of the most common culprits. They cast big shadows on your roof, which keeps sunlight from drying up rain and morning dew. These damp, shaded spots are exactly where mold loves to grow. Trees also drop leaves and other small debris, which traps even more moisture and gives the mold extra organic material to feed on.
The direction your roof faces is another huge factor. In the Northern Hemisphere, the slopes of your roof that face north get way less direct sunlight than the south-facing ones. This lack of sun means they stay damp for much longer, giving mold and algae all the time they need to get established. If you've ever noticed that one side of your roof is much dirtier than the other, this is almost always the reason.
A key takeaway is that mold growth is a recipe with two main ingredients: the food source (shingles) and the environment (moisture and shade). When both are present, mold is almost inevitable without proactive maintenance.
To really understand how these different elements work together, it helps to see them laid out.
Key Factors That Encourage Mold Growth on Roofs
| Factor | How It Contributes to Mold Growth | Common Example |
|---|---|---|
| Shade | Reduces sun exposure, preventing moisture from evaporating quickly and keeping the roof surface damp for longer periods. | Overhanging tree branches casting shadows on the roof for most of the day. |
| Organic Debris | Provides a food source and traps moisture, creating a nutrient-rich, damp environment ideal for mold and algae. | Piles of fallen leaves, pine needles, or twigs accumulating in roof valleys or behind chimneys. |
| North-Facing Slopes | Receive less direct sunlight, leading to prolonged dampness compared to other parts of the roof. | The north side of a house having significantly more dark streaks and stains than the south side. |
| Poor Drainage | Allows water to stand or pool on the roof, keeping shingles saturated and creating chronic damp spots. | Clogged gutters causing rainwater to back up and overflow onto the roof edge. |
| High Humidity | Increases the overall moisture content in the air, meaning the roof surface takes much longer to dry out after rain. | Homes located in coastal regions or areas with frequent fog and morning dew. |
Each of these factors can turn a clean roof into a welcoming habitat for mold, which is why a multi-pronged approach to prevention is so important.
Why Your Attic and Gutters Matter
The problem isn't just about what's happening on top of your roof—what goes on underneath and around it plays a huge role, too. For instance, poor attic ventilation can be a sneaky, hidden cause of stubborn mold on roof shingles.
If an attic isn't ventilated properly, heat and humidity get trapped inside. This moisture-rich air can warm the underside of your roof deck, creating a steamy environment that encourages mold to grow from both above and below.
Clogged gutters are another direct contributor. When your gutters are packed with leaves and gunk, rainwater has nowhere to go. It backs up and spills over the edges of your roof, keeping the lower rows of shingles constantly soaked. This chronic dampness is like putting out a welcome mat for mold.
The popularity of asphalt shingles is undeniable. They make up a global market valued at roughly USD 8.8 billion and are a go-to for their affordability and simple installation. But their organic makeup makes them extremely vulnerable to microbial growth. In fact, some studies show that 70–80% of asphalt shingle roofs in humid parts of the U.S. show signs of mold or algae within just a decade. You can dig into more data on the asphalt shingle market from Global Market Insights. Recognizing this vulnerability is the first real step toward keeping your roof clean and healthy.
How to Safely Inspect Your Roof for Growth
Before you can tackle any growth on your roof, you first need to play detective and figure out exactly what you're up against. But this is one investigation where safety is the absolute top priority. The good news is you can get a perfectly clear picture of potential mold on roof shingles without ever putting yourself at risk.
The number one rule of a DIY roof inspection is simple: stay on the ground. Climbing onto your roof is just plain dangerous, especially when mold is involved, as that almost always means moisture is present. Wet shingles are incredibly slick, and a fall can be catastrophic. All you really need for a thorough inspection is a good pair of binoculars and a few minutes of your time.
What to Look For From the Ground
From the safety of your yard or even an upstairs window, you can spot the telltale signs of unwanted growth. Your mission is to figure out what’s growing up there and where it’s concentrated. Grab your binoculars and get a good, close-up look at your shingles.
Here’s a quick field guide to help you distinguish between the usual suspects:
- Algae (Dark Streaks): This is the culprit behind those ugly black or dark green streaks you see running down a roof. It lies flat against the shingles and usually follows the path of water runoff.
- Moss (Green and Fuzzy): Unlike algae, moss is three-dimensional and looks thick or fuzzy. It grows in green clumps, often getting a foothold in shady spots or between the tabs of your shingles.
- Lichen (Flaky Patches): Lichen is a tough, composite organism made of algae and fungus. It looks like crusty, flaky, or even leaf-like patches of gray-green or yellow and clings tightly to the shingle surface.
By figuring out which of these is on your roof, you get a much better sense of the problem's severity. Algae is mostly a cosmetic issue at first, but moss and lichen are a different story. Their presence often means moisture has been trapped against your shingles for a long time, which can lead to more direct and serious damage.
Pinpointing Problem Areas on Your Roof
Now that you know what to look for, the next step is knowing where to look. Mold, algae, and moss don't just pop up randomly; they colonize specific areas where the conditions are just right for them to thrive. You'll want to focus your inspection on these key hotspots where moisture hangs around.
Start with the parts of your roof that get the least amount of sunlight. This is almost always the north-facing slope, which stays damp long after the sun has dried everything else. You should also pay close attention to any areas shaded by large, overhanging trees.
Next, zoom in on these critical spots:
- Roof Valleys: These are the channels where two slopes of your roof meet. A huge amount of water flows through them, making them magnets for debris and trapped moisture.
- Around Chimneys and Vents: The flashing around pipes, vents, and chimneys can sometimes block water from flowing freely, creating the perfect damp pockets for growth.
- Beneath Overhanging Trees: These areas are a double-whammy. They're not only shaded but also get a steady supply of leaves and twigs that act like little sponges, holding moisture against your roof.
Ignoring these issues can get expensive fast. While average annual roof repairs cost around $750, data on roofing industry trends shows that moisture damage from mold and algae can easily drive that cost past $2,000, especially in humid climates. You can explore detailed 2025 roofing industry trends on sunsent.com to see just how much moisture impacts roofing costs.
This simple ground-level inspection gives you all the information you need to either plan a safe DIY cleaning or make a confident, well-informed call to a professional.
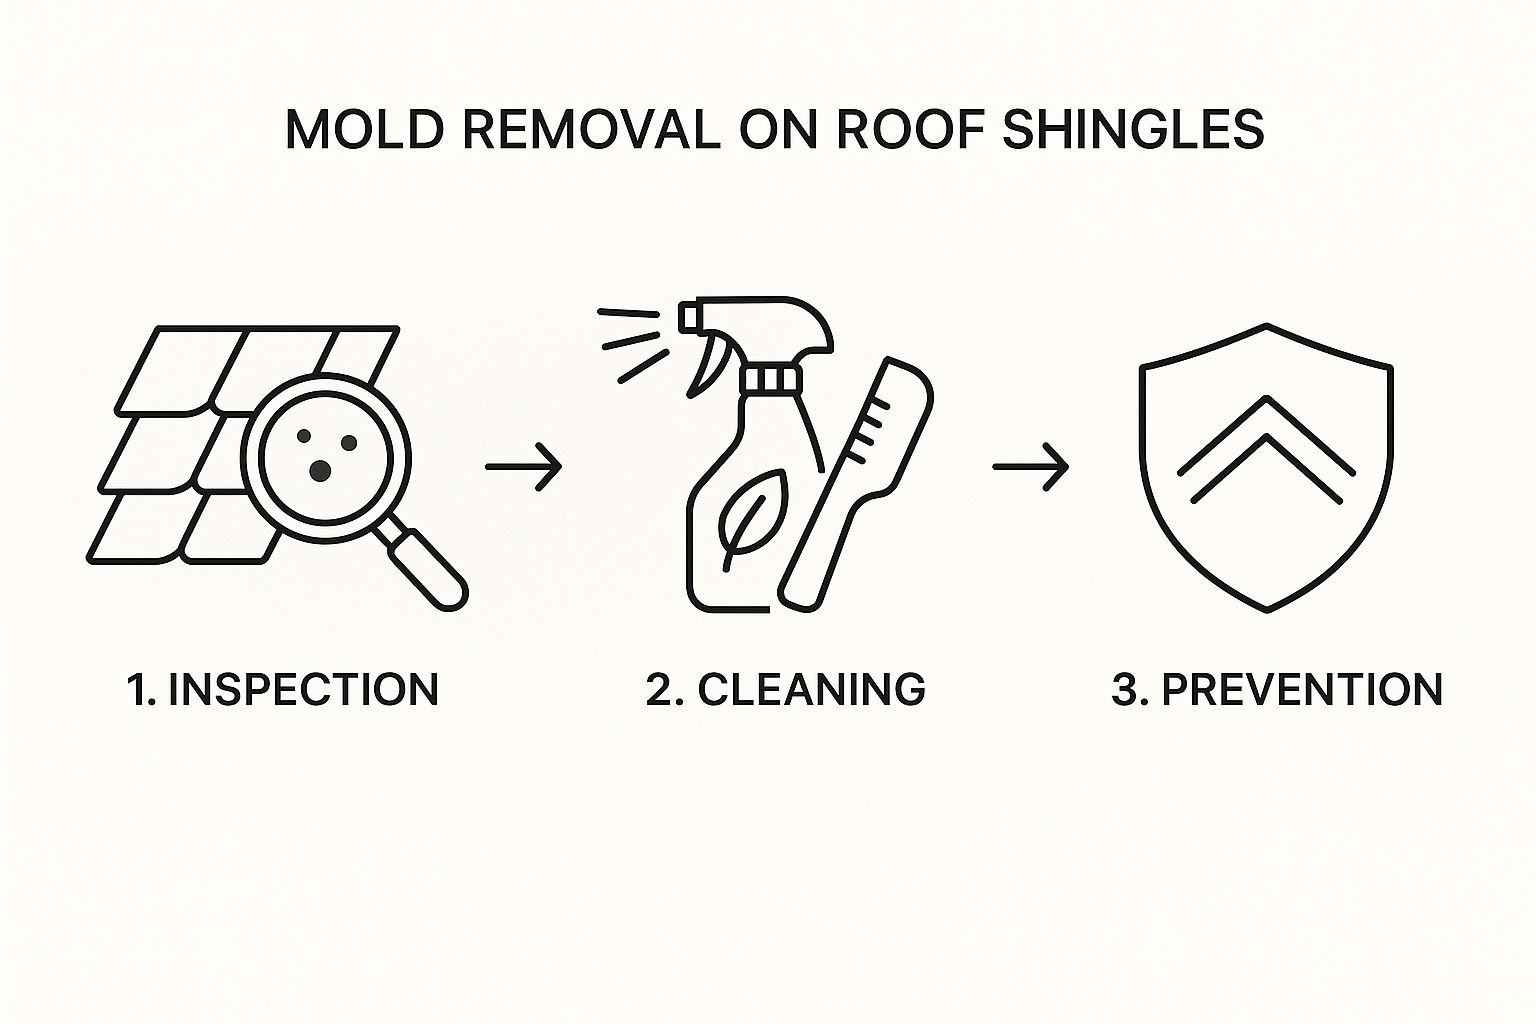
A Step-By-Step Guide to Removing Roof Mold
Tackling mold on roof shingles yourself can be a satisfying weekend project, but you’ve got to get the approach right for it to be both safe and effective. This isn’t a job you can rush. Your success really hinges on careful prep work, using the correct tools, and—most importantly—understanding what not to do.
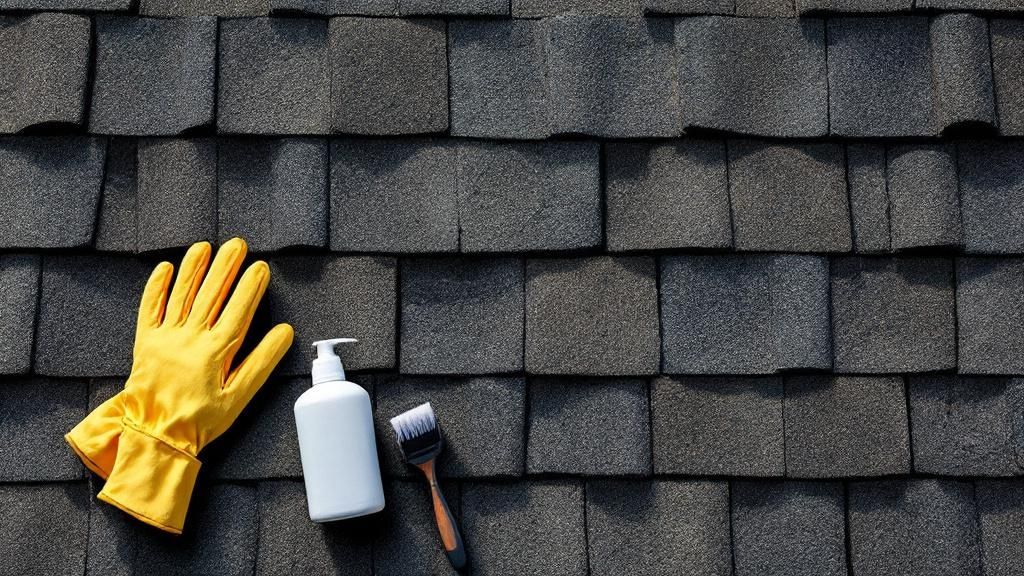
Safety has to be your number one priority, without question. Before you mix a single drop of cleaner, make sure you're fully geared up for the task. This step is absolutely non-negotiable.
- Wear Proper Gear: You'll need non-slip shoes for solid footing on the ladder, safety glasses to shield your eyes from splashes, and gloves to protect your hands from the cleaning mix.
- Secure Your Ladder: Make sure your ladder is on firm, level ground. It should extend at least three feet above the roofline to give you stable and safe access.
- Check the Weather: The perfect day for this job is calm and overcast, with no wind or rain. A scorching hot, sunny day will make your cleaning solution evaporate before it can work its magic, while rain will just wash it all away.
The Right Tools and the Wrong Ones
The most critical decision you'll make is what you use to clean your roof. The wrong choice here can cause thousands of dollars in damage, literally aging your roof by years in a single afternoon.
Never, ever use a high-pressure washer or straight chlorine bleach on your asphalt shingles. A pressure washer is far too aggressive; it will blast away the protective granules that shield your shingles from UV damage. Chlorine bleach is highly corrosive and can eat away at your shingles and damage metal components like flashing and gutters.
Instead, the method professionals trust is a gentle soft wash with a very specific type of cleaner. The good news is you can mix an effective, shingle-safe solution right at home.
DIY Roof Cleaning Solution Recipe:
Simply mix one gallon of water with one cup of oxygen bleach (a non-corrosive, color-safe alternative like OxiClean) and about a tablespoon of gentle dish soap. The soap acts as a surfactant, which just means it helps the solution stick to the shingles instead of immediately running off.
The key takeaway here is that getting rid of mold is a multi-step process. The cleaning itself is just one piece of a much larger strategy for keeping your roof healthy long-term.
Comparing Roof Mold Removal Methods
When it comes to cleaning mold off your roof, you have a few options. From DIY solutions to professional services, each method has its own pros and cons. This table breaks down the most common approaches to help you decide which is right for your situation.
| Method | Effectiveness | Risk to Shingles | Best For |
|---|---|---|---|
| DIY Oxygen Bleach Wash | Good for light to moderate stains. | Low, if done correctly without pressure. | Small, accessible roof areas with minor mold or algae growth. |
| DIY Chlorine Bleach | High, but not recommended. | Very High. Corrodes shingles, flashing, and gutters. Voids warranties. | Not recommended for asphalt shingles under any circumstances. |
| Pressure Washing | Poor and extremely damaging. | Extreme. Strips protective granules, leading to rapid roof failure. | Never for asphalt shingles. Only for hard surfaces like concrete. |
| Professional Soft Wash | Excellent. Kills mold at the root. | Very Low. Professionals use calibrated equipment and proper solutions. | Widespread mold, steep roofs, or for a guaranteed, safe result. |
Ultimately, while the DIY oxygen bleach method is a solid choice for minor issues, extensive mold or safety concerns about working at height mean a professional soft wash is the smarter, safer bet.
The Mold Removal Process Step-By-Step
With your safety gear on and your solution mixed, you're all set. Follow these steps methodically to get the best results without causing any damage.
- Prepare the Area: Before you spray a thing, give any plants, shrubs, or grass below your work area a good watering. For even better protection from runoff, cover them with plastic sheeting.
- Apply the Solution: Use a basic garden pump sprayer on a low-pressure setting. Work in small, manageable sections, applying your oxygen bleach mix to the stained parts of the roof. Always start from the bottom and work your way up to prevent creating new streaks.
- Let It Dwell: This is where the magic happens, so be patient. You need to give the solution time to work. Let it sit on the shingles for at least 15 to 20 minutes. You'll actually see the dark stains start to lighten as the oxygen bleach breaks them down. Just don't let the solution dry completely on the surface.
- Rinse Gently: Grab a standard garden hose with a regular spray nozzle (again, no high pressure!). Gently rinse the roof from the top down. Start at the peak and let the water run down, washing away the cleaning solution and all the loosened mold and algae.
- Final Inspection: Once the roof is dry, take a look at your handiwork. Some really stubborn spots might need a second, more targeted application to fully disappear.
While this DIY method works well for moderate cases, it's important to know your limits. If the mold on roof shingles is widespread, if your roof is particularly steep, or if you spot signs of deeper problems like soft spots, it's time to put the sprayer down and call a professional. A certified expert from a company like Paletz Roofing and Inspections can handle the job safely and, more importantly, identify any underlying issues that need to be addressed.
Long-Term Strategies to Prevent Roof Mold
Getting all the mold off your roof feels like a huge win, but the real victory is making sure it never has a chance to come back. The secret is to stop thinking about cleaning after the fact and start thinking about prevention before it starts. This means making your roof a place where mold simply can't get comfortable.
Think about it—mold is a simple organism. It only needs three things to set up shop: moisture, shade, and something to eat. If you systematically take away these elements, you’re essentially evicting it before it even moves in. It’s less about fighting constant battles and more about smart, long-term strategy.
This proactive approach doesn’t just keep your roof looking great; it saves you a ton of time, frustration, and money on future cleanings and repairs. It’s the most effective way to protect your home’s biggest and most important asset.
Let the Sunshine In and Keep Gutters Clear
One of the most powerful—and completely free—tools you have against mold on roof shingles is good old-fashioned sunlight. Mold, mildew, and algae all thrive in dark, damp corners, so letting the sun shine on your roof is a massive step in the right direction.
Make a habit of trimming back any large tree branches that hang over and cast shadows on your roof. This one simple task allows direct sunlight to hit the shingles, which helps them dry out much faster after a rainstorm. As a bonus, it also cuts down on the amount of leaves, twigs, and other debris that can fall on your roof, trapping moisture and giving mold a food source.
Keeping your gutters clear is just as critical. When gutters get clogged, rainwater has nowhere to go but up and over the sides, soaking the edges of your roof and the fascia boards. By cleaning them out at least twice a year—especially in the spring and fall—you ensure that water flows away from your house, keeping those vulnerable roof edges dry and mold-free.
Strengthen Your Roof's Defenses from Within and Above
A solid defense against mold isn't just about what happens on the surface. Proper attic ventilation is a crucial, yet often overlooked, part of the equation. If your attic can't breathe, it traps heat and humidity, creating a warm, steamy environment that mold absolutely loves, especially on the underside of your roof deck. A balanced system with soffit and ridge vents lets air circulate freely, keeping the whole space cool and dry.
For an even tougher, long-term solution, you can borrow a trick from the pros: installing zinc or copper strips.
When you place these metallic strips near the peak of your roof, rainwater creates a natural chemical reaction. As water flows over them, it picks up and carries metal ions down the entire roof slope. These ions act as a natural fungicide and algaecide, creating an invisible, protective shield that stops new mold and algae from ever taking hold.
While our main focus here is on shingles, the principles of moisture control and cleaning apply to many areas of your home. In fact, you can find similar concepts in proven grout cleaning strategies to halt mold growth, which also center on eliminating the conditions mold needs to survive.
Finally, think about the materials themselves. If you're due for a roof replacement anytime soon, investing in algae-resistant shingles is one of the smartest moves you can make. These shingles are made with copper granules mixed right in, giving you built-in, long-lasting protection from those ugly black streaks from day one. It’s an upfront investment that can completely eliminate the headache of dealing with mold on roof shingles for the entire life of your new roof.
Of course. Here is the rewritten section, crafted to match the expert, natural tone and style of the provided examples.
Knowing When to Call a Professional
There's a special kind of pride that comes from a successful DIY project, but when you're dealing with mold on roof shingles, knowing when to hang up the tool belt is just as important. A small, easy-to-reach patch of algae might seem like a manageable weekend task, but some situations demand a professional roofing service. It’s a judgment call that protects not just your roof, but you.
Think of it like this: you wouldn't perform your own dental surgery just because you own a mirror and tweezers. Certain jobs require specialized training, expensive equipment, and an understanding of the risks involved. Trying to tackle a serious roof issue on your own can lead to ineffective cleaning, permanent shingle damage, or worse, a life-altering fall.
Signals That Demand Expert Help
Some roofing problems are simply not negotiable and need a certified expert, period. If you spot any of the following, your first and only move should be to pick up the phone and call a roofer, not climb a ladder.
These clear warning signs include:
- Extensive Growth: If that mold, algae, or moss has taken over more than a third of your roof, your pump sprayer isn't going to cut it. Professionals use commercial-grade soft washing systems that can treat large areas evenly and effectively without causing damage.
- A Steep or High Roof: The risk of a fall multiplies with every degree of roof pitch. It’s just not worth it. Professionals come equipped with the proper safety harnesses, ropes, and training to work on dangerous slopes securely.
- Signs of Deeper Damage: Often, mold is just the symptom of a much bigger illness. If you find soft or spongy spots underfoot (which you should avoid walking on), or you see shingles that are curling, cracked, or missing entirely, you need an expert to diagnose the root cause.
A professional roofer does more than just clean; they inspect. Their trained eye can spot the underlying problems—like failing flashing, a hidden leak, or poor attic ventilation—that caused the mold in the first place. Just washing the surface without fixing the source is like putting a bandage on a broken arm; the problem is guaranteed to come back.
The Value of a Professional Service
Ultimately, hiring a licensed and insured company like Paletz Roofing and Inspections is about getting peace of mind and a lasting solution. They bring specialized soft washing equipment that uses the correct low pressure to kill organic growth without blasting away your shingle granules.
Most importantly, their expertise ensures the job is done right the first time, protecting your home's biggest investment and keeping you safely on the ground where you belong.
Frequently Asked Questions About Roof Mold
Even after you’ve got a game plan for getting rid of roof mold, some questions might still be nagging you. I get it. Getting straight, expert answers is the only way to feel truly confident about protecting your home. Let's tackle some of the most common questions and myths I hear from homeowners.
Can Roof Mold Cause Health Problems Indoors?
Absolutely. While the mold itself is growing on the outside of your house, it can definitely make its way inside and affect your family's health. Mold spores are incredibly light—think of them like microscopic dust—and can float right into your home through open windows, doors, or even your attic vents.
For anyone with allergies, asthma, or a sensitive immune system, this can be a real problem. An influx of spores can trigger coughing, sneezing, and other respiratory issues. That's why getting a handle on a roof mold problem is a critical step in keeping the air quality inside your home healthy.
Will a Pressure Washer Remove Roof Mold Faster?
This is a big one, and the answer is a hard no. You should never let anyone use a high-pressure washer on your asphalt shingles. It’s a common mistake that causes serious, irreversible damage. While it looks like a quick fix, that intense spray is powerful enough to blast away the tiny, protective granules that shield your shingles from sun and rain.
Using a pressure washer on your roof is like using sandpaper to clean a photograph—it might remove the immediate problem, but it destroys the surface in the process. This mistake can easily strip years from your roof's lifespan and could even void your warranty.
The right way to clean a roof is with a professional soft wash, which uses specific cleaning solutions and low-pressure water to kill the mold without harming the shingles.
Does Homeowners Insurance Cover Roof Mold Removal?
More often than not, homeowners insurance will not cover mold removal if it’s considered a maintenance issue. Insurers usually see the gradual growth of algae and mold as something that comes with homeownership—a result of normal environmental exposure and a lack of routine cleaning.
But there are exceptions. If the mold grew as a direct result of a "covered peril"—for instance, a hurricane tears a hole in your roof, water gets in, and mold starts to grow—then your policy might cover it. It's really important to read your specific policy documents and talk directly with your insurance agent to know for sure what your coverage includes.
If you have more questions or just want an expert to take a look at your roof, don't hesitate to reach out. The certified team at Paletz Roofing and Inspections provides thorough inspections and safe, effective cleaning solutions for homeowners all across South Florida. Protect your biggest investment by making sure your roof is clean and healthy. Visit https://paletzroofing.com to schedule a free quote.