
Those dark, ugly streaks running down your roof aren't just dirt. They’re actually a living organism—a type of algae called Gloeocapsa magma. This stuff loves humid climates and literally eats your roof for breakfast, feeding on the limestone filler used in modern asphalt shingles. It’s more than a cosmetic problem; leaving it alone can seriously shorten the life of your roof.
Why Your Roof Has Dark Streaks
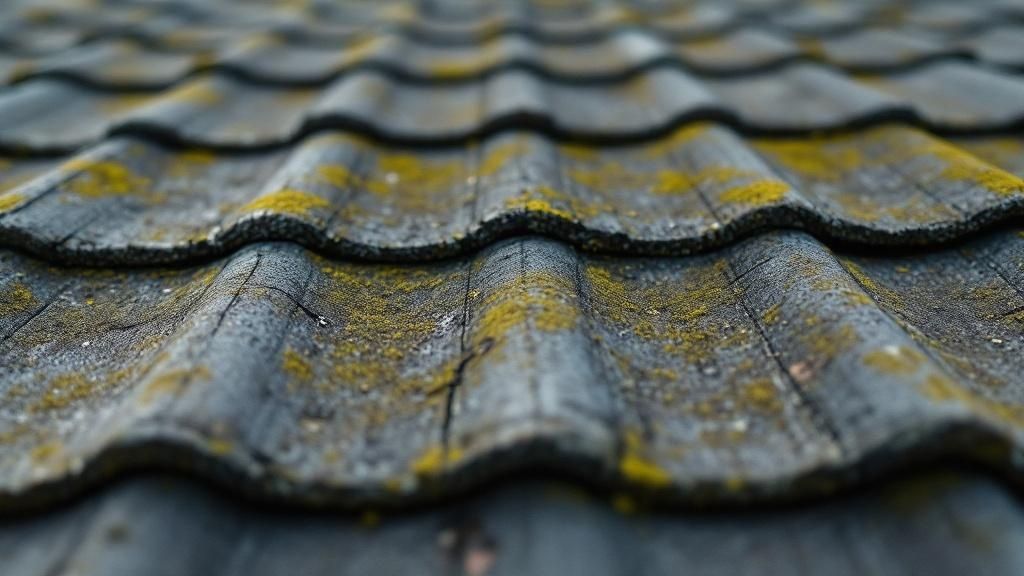
The main culprit behind those stains is a tough little cyanobacteria. While many people call it mildew on shingles, it’s really an alga that found an unlikely food source right on top of your house. Asphalt shingle manufacturers add limestone as a filler, which turns out to be a buffet for Gloeocapsa magma.
This algae first became a major headache for homeowners in the southeastern U.S. back in the 1990s. Since then, its airborne spores have traveled across the country, landing on millions of roofs, especially where humidity is high. You can learn more about how it breaks down shingles from the experts at Greenworks Pro.
This growth isn’t random, either. It tends to show up in specific spots based on environmental conditions.
Common Hotspots For Roof Algae
- North-Facing Slopes: You'll almost always see the worst staining on the north side of a roof. It gets the least amount of direct sunlight, meaning it stays damp far longer and creates a perfect breeding ground.
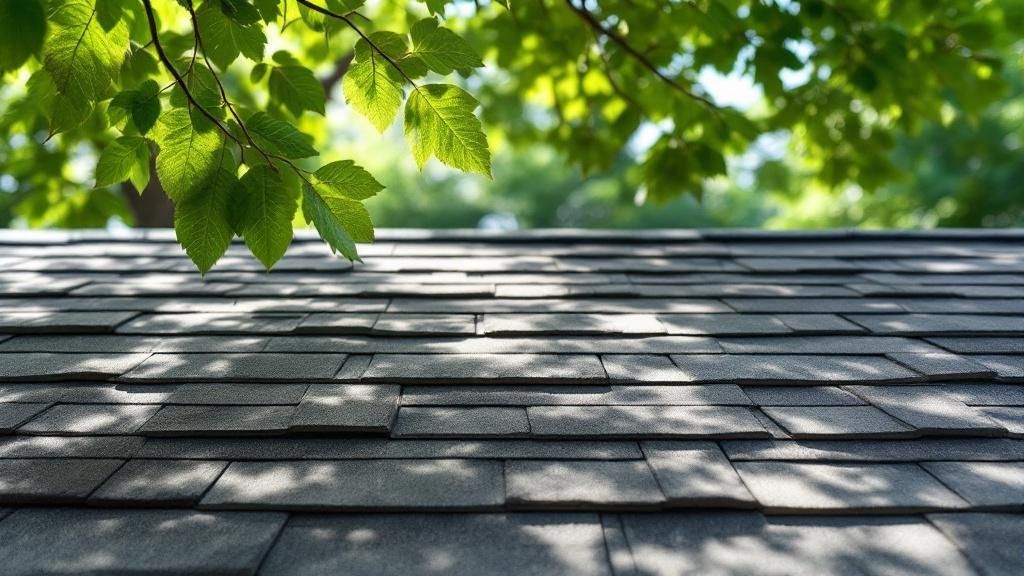
- Overhanging Trees: Big, beautiful trees can be great, but they also cast shadows that block sunlight and stop air from flowing freely. This keeps your shingles from drying out properly after it rains, inviting algae to move in.
- Humid Climates: If you live in a region with high humidity, like South Florida, the air itself provides enough moisture for this algae to thrive, even if it hasn't rained in a while.
The real danger here is that this growth acts like a sponge, trapping moisture against the shingle's surface. This constant dampness makes your roof shed its protective granules much faster, leading to premature aging and, eventually, leaks.
Distinguishing Mildew From Dirt
At first glance, it can be tough to tell if you’re looking at organic growth or just a layer of grime. One is a living colony actively damaging your roof, while the other is just an eyesore. Knowing the difference is crucial for getting rid of it the right way.
To figure out what you’re dealing with, pay attention to the pattern. Is the staining worse in damp, shady areas? That’s a huge clue you’re dealing with something alive. Mildew and algae also tend to form dark, vertical streaks that look like they're running down the roof. Plain old dirt, on the other hand, usually gathers more evenly or in patches around vents and chimneys, without that distinct "running" pattern.
Here’s a quick guide to help you tell the difference.
Mildew vs Dirt Quick Identification Guide
| Characteristic | Mildew/Algae (Gloeocapsa magma) | Dirt or Debris |
|---|---|---|
| Appearance | Dark, vertical streaks or fan-like patterns. | Uniform layer of grime or patchy, irregular spots. |
| Color | Black, dark brown, or sometimes dark green. | Typically gray or brown. |
| Location | Worst on north-facing slopes and in shaded areas. | Can appear anywhere, but often collects near vents or low points. |
| Texture | Can feel slightly slimy or slick when wet. | Feels gritty or dusty when dry. |
| Growth Pattern | Follows water runoff paths down the roof. | Appears more random and doesn't follow a clear path. |
Once you've confirmed it's mildew or algae, you know you need a specific treatment plan. Simply trying to wash it away like dirt won't solve the underlying problem. You need an approach that actually kills the organism to stop it from coming back.
Safety and Prep Work Before You Start
Before you even think about mixing up your cleaning solution, let's talk about what really matters: safety and prep work. I've seen too many homeowners get so focused on the mildew that they overlook the basics. Working on a roof, even a low-slope one, has real risks, but you can manage them with a bit of planning. This isn't a step to rush; it’s the foundation for getting the job done right and without any accidents.
First things first, check the weather forecast. Trying to tackle this job on a hot, sunny, or windy day is setting yourself up for failure. Direct sunlight will evaporate your cleaning solution almost instantly, long before it has a chance to work on the mildew. And a windy day? That’s just asking for the spray to blow back in your face or onto your neighbor’s prize-winning roses.
The perfect conditions are an overcast, cool, and calm day. This gives the cleaning solution the 15-20 minutes it needs to stay wet on the shingles and actually neutralize all that nasty biological growth.
Gearing Up With Personal Protective Equipment
Your Personal Protective Equipment, or PPE, is completely non-negotiable for this job. You're going to be working with chemicals, and you're going to be up high. Protect yourself.
- Slip-Resistant Footwear: Roofs get incredibly slick, especially once they're wet. You need soft-soled shoes with high-traction grips to stay steady on the shingle surface.
- Safety Goggles: A chemical splash to the eye is a serious, serious risk. Always wear wrap-around safety glasses or, even better, a pair of goggles.
- Chemical-Resistant Gloves: The cleaning agents you’ll be using can easily irritate or even burn your skin. Protect your hands with a pair of sturdy, waterproof gloves.
- Old Clothing: It’s a good idea to wear long sleeves and pants that you don't mind getting stained or damaged, especially if you're using a bleach-based cleaner.
Look, the goal here is to get the mildew off your shingles, not to end up in the emergency room with a preventable injury. Taking a few extra minutes to gear up properly is the smartest move you'll make all day.
Secure Your Ladder and Work Area
Ladder safety is another area where you absolutely cannot cut corners. A fall can have devastating consequences, so treat this part with the seriousness it deserves. Always place your ladder on firm, level ground. If the ground is a bit soft, slide a wide, flat board under the ladder’s feet to give it a stable base.
When you're setting it up, make sure the ladder extends at least three feet above the roofline. This gives you something secure to hold onto as you transition on and off the roof. And always maintain three points of contact—that means two feet and one hand, or two hands and one foot, are on the ladder at all times. If you can, have a spotter at the bottom to hold the ladder steady. It provides an incredible layer of security.
Finally, take a look at what’s directly below your work area. That cleaning solution has to go somewhere, and it will eventually rinse off your roof, into the gutters, and down onto your property.
Protect your landscaping and outdoor stuff by taking these simple steps:
- Water Your Plants: Give everything a good, deep watering first. Saturate the soil around any bushes, flower beds, and grass that sit below the roofline. Wet soil and plants are far less likely to absorb any chemical runoff.
- Cover with Plastic: For any particularly delicate plants, outdoor furniture, or sensitive deck surfaces, just cover them with plastic sheeting. It creates a simple physical barrier that works wonders.
Taking these precautions ensures that the only thing you’re cleaning is the unwanted gunk on your shingles. A little prep work really does go a long way.
Choosing the Right Cleaning Solution
Picking the right cleaner for the mildew on your shingles is easily the most critical decision you'll make in this whole process. It's a delicate balance. The wrong choice won't just fail to kill the algae; it could actively damage your roof or poison the landscaping around your home.
You're essentially looking for the sweet spot between raw cleaning power and overall safety. The three main players on the field are oxygen bleach, commercial roof cleaners, and good old chlorine bleach. Each one comes with its own set of pros and very serious cons that you need to weigh before you even think about mixing a batch.
The Gentler, Eco-Friendly Option
For most homeowners tackling this themselves, oxygen bleach is the best place to start. Its active ingredient, sodium percarbonate, works wonders. When you mix it with water, it fizzes up, releasing oxygen and creating a gentle but potent cleaning agent that's fantastic at killing mildew and algae without being overly aggressive.
Honestly, it’s a much safer bet for your shingles, your prized rose bushes, and any pets that might wander through the yard. The trade-off? You might need a little more patience. Stubborn, deep-set stains could require a second pass, but the peace of mind its safety profile provides is usually well worth it.
Oxygen bleach is my go-to recommendation because it targets the organic growth without causing a bunch of collateral damage. It breaks down into harmless water, oxygen, and soda ash, so you don't have to stress about toxic residue running off into your lawn.
The Power of Commercial Formulations
Walk into any hardware store, and you'll find a whole aisle of dedicated roof cleaning products. These have been cooked up in a lab specifically to go after Gloeocapsa magma and other biological growth. Their biggest selling point is that the chemists have already done the hard work, creating a balanced product designed for this exact job.
When you look at products like specialized stain and mildew removers, you see the appeal. While that one is for boats, the idea is the same: a targeted, ready-to-use formula. Many commercial roof cleaners also contain surfactants, which are additives that help the liquid cling to the slope of the roof, giving it more time to work its magic.
The Chlorine Bleach Debate
And then we come to the most controversial choice: a simple, diluted solution of chlorine bleach (sodium hypochlorite) and water. Even the Asphalt Roofing Manufacturers Association (ARMA) notes that a 50:50 mix can be effective. And let’s be clear, it works. It will annihilate mildew on shingles, and it will do it fast.
But—and this is a big but—chlorine bleach is incredibly corrosive. It can eat away at metal gutters, flashing, and the fasteners holding your roof together. It will absolutely kill any plant life it touches, and the runoff is toxic to fish and other aquatic life. If you decide to go this route, you must be meticulous about pre-soaking and covering all your landscaping. Because of these serious risks, most pros and savvy homeowners I know have moved away from it, favoring the safer alternatives.
How to Clean Shingles Without Causing Damage
Alright, you've picked your cleaning solution. Now comes the part where technique is everything. This is where a gentle, methodical approach will save your roof, while a heavy-handed one could cause some serious, irreversible harm.
The absolute biggest mistake I see homeowners make is reaching for a pressure washer. I get the temptation, but it's a guaranteed way to destroy your roof. That high-pressure stream will blast away the protective granules that shield your shingles from the sun, which drastically shortens their lifespan. It can also force water up and under the shingle overlaps, creating hidden leaks you won't find until it's too late.
Instead, your best friend for this job is a simple, low-pressure applicator. A basic pump-style garden sprayer is the perfect tool. It gives you just enough force to coat the shingles thoroughly without causing any damage.
The Professional Application Method
Once you've mixed your cleaning solution according to the directions, it's time to get it on the roof. The key here is to work methodically to avoid ugly streaks and ensure you get complete coverage.
Here's a pro tip that might seem backward at first: always start applying the cleaner from the bottom of the roof and work your way up. If you start at the top, the cleaner will run down the dry, dirty shingles below, creating clean lines that are nearly impossible to get rid of later. By working from the bottom up, you're always applying the solution to a pre-wetted surface, which is the secret to an even, professional finish.
Apply a generous, even coat to all the affected areas. You want to fully saturate the shingles so the solution can get deep into the algae and mildew colonies. Don't be shy about applying a little extra to those really dark, heavily stained spots.
Now, let it sit. This is where the cleaning solution does all the heavy lifting. You need to give it time to work its magic, which is typically between 15 and 20 minutes. Just make sure it doesn't dry out. If you're working on a hot day and notice it drying too quickly, just give the area a light mist of either more solution or plain water to keep it active.
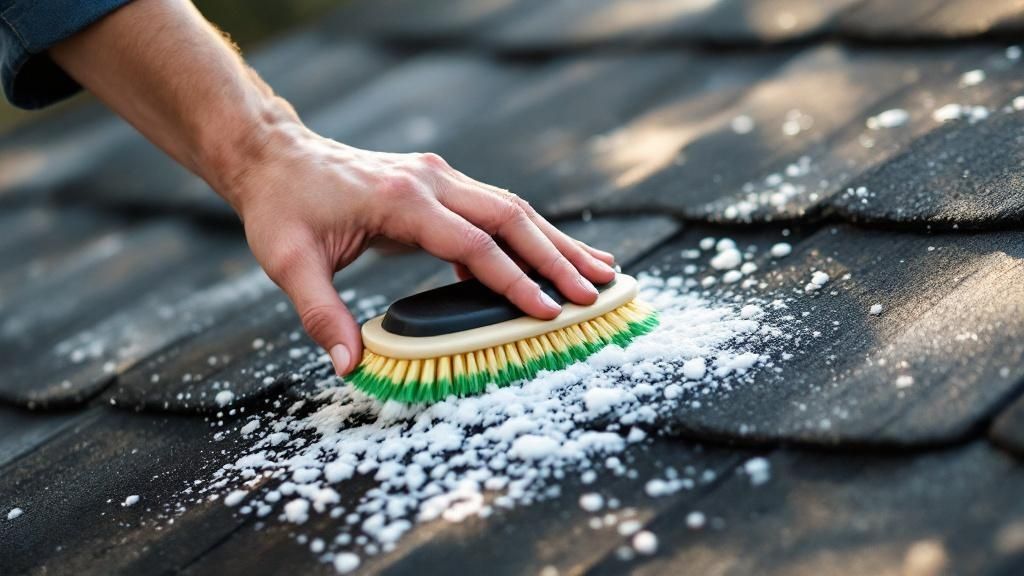
The most critical rule of roof cleaning is patience. Resist the urge to scrub or rush things. Let the cleaning solution do the work. Aggressive scrubbing will only scrape off the essential shingle granules, aging your roof in a hurry.
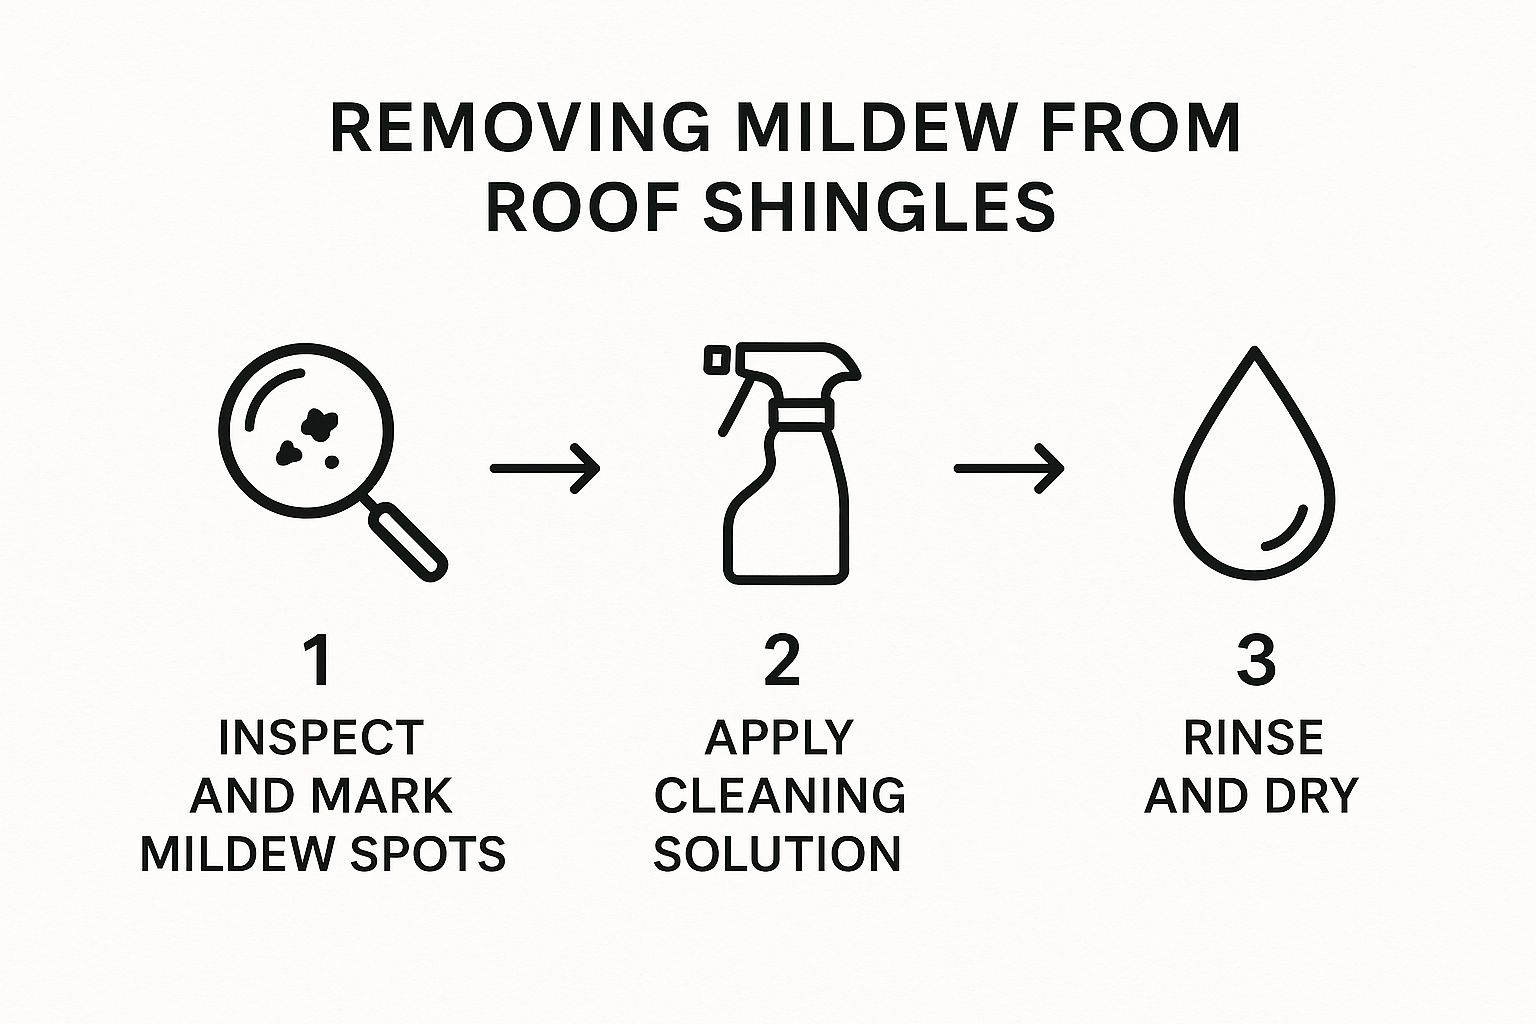
As you can see, a successful roof cleaning project really boils down to three simple parts: a careful inspection, a low-pressure application, and a gentle rinse.
The Final Rinse and What to Expect
After the solution has soaked for about 15-20 minutes, it’s time to rinse. Again, low pressure is the name of the game. A standard garden hose with a regular spray nozzle is all you need—definitely not a high-pressure jet setting.
This time, you’ll work from the top of the roof down. Start at the very ridge and gently rinse the shingles, letting the water flow down naturally and carry away the dead algae and cleaning residue. This top-down approach ensures you're washing everything cleanly off the roof and down into the gutters, leaving no dirty patches behind.
Rinse the roof completely until you don't see any more suds or residue. Be patient and systematic. As a final step, make sure to give any surrounding siding, windows, and the landscaping below one last rinse to dilute any cleaner that might have splashed over. While this guide is all about roofs, many of these principles apply elsewhere; for instance, you can find more on effective strategies for cleaning your home's siding.
Don't be alarmed if the dark streaks don't vanish instantly. The cleaner’s primary job is to kill the Gloeocapsa magma organism. Once it's dead, it will take some time for normal rain and weather to wash the dark, dead residue away. You should see a big improvement right away, but the final, truly clean results will often reveal themselves over the next few weeks. With each rainfall, your roof will get a little brighter and cleaner.
Keeping Mildew From Coming Back
Getting your shingles clean is a great feeling, but the real win is making sure that mildew doesn’t just grow right back. Once the cleaning is done, the focus has to shift from a one-time fix to long-term prevention. This proactive approach is what saves you from having to do this all over again in a few years.
It all comes down to creating an environment where mildew and algae can't get a foothold in the first place. That means disrupting the three things these organisms need to thrive: moisture, shade, and organic debris to feed on.
The battle against mildew is definitely influenced by where you live. Those ugly black streaks are a common sight, affecting 40% or more of homes in humid, temperate parts of the country. The mix of moisture in the air, shade from nearby trees, and poor roof ventilation creates a perfect storm for growth. You can dive deeper into the environmental factors in this report from the World Health Organization.
Proactive Roof Modifications
One of the most powerful long-term solutions you can implement is installing zinc or copper strips along the ridge of your roof. This isn't just a physical barrier; it’s an active defense system that works for you.
Here’s how it works: when it rains, water washes over these metal strips. As it does, it picks up metallic ions and carries them down the entire roof surface. These ions are toxic to mildew and algae, essentially creating an invisible, "poisoned" shield where they can’t set up a new colony. It’s like having a permanent, rain-activated cleaning crew on duty 24/7.
Think of zinc or copper strips as your roof's personal bodyguard. They create an invisible shield that runs from the ridge to the eaves, preventing growth before it even has a chance to start. It’s a classic case of an ounce of prevention being worth a pound of cure.
Environmental Control and Maintenance
Beyond adding hardware to your roof, you can make a huge difference just by managing the area around your home. Simple landscaping and a bit of routine maintenance are incredibly effective preventative tools.
Start by looking up. Are there big tree limbs hanging over your roof? They need to go. Overhanging branches do two things that mildew absolutely loves: they cast long shadows that block the sun, and they kill the airflow, both of which keep your shingles damp far longer than they should be.
- Let the Sun In: Pruning back trees allows direct sunlight to hit your roof. Nothing dries out a damp roof faster.
- Improve Air Circulation: Better airflow helps whisk moisture away, denying mildew the dampness it needs to survive.
- Cut Off the Food Supply: Trimming branches also means fewer leaves, acorns, and twigs falling onto your roof and clogging your gutters. This removes a key food source for mold and mildew.
Finally, don't forget about your gutters and attic. Clogged gutters are a huge problem, trapping moisture right at the edge of your roof and creating a perpetually damp zone perfect for growth. In the same way, a poorly ventilated attic can trap heat and moisture, which can cause issues from underneath the roof deck. Making sure your gutters are clean and your attic has proper intake and exhaust vents are fundamental pieces of the prevention puzzle.
Answering Your Top Questions About Cleaning Roof Shingles
When you’re staring up at a roof covered in dark, ugly streaks, a lot of questions pop into your head. It’s natural. Getting this job done right means getting the right answers first. Let’s tackle the most common questions I hear from homeowners.
Can I Just Use a Pressure Washer to Clean It?
This is easily the most common question, and my answer is always a hard no. Pointing a pressure washer at your asphalt shingles is a surefire way to do serious, irreversible damage. That high-pressure jet will strip away the tiny, protective granules that are essential for blocking UV rays.
Once those granules are gone, your roof's lifespan plummets. You’ll also likely void your manufacturer's warranty. Even worse, the intense pressure can force water up and underneath your shingles, setting the stage for hidden leaks and rot in your roof deck. Always, always stick to a low-pressure method like a simple garden sprayer.
Here's the bottom line: The goal is to kill the mildew with a cleaning solution, not to blast it off with force. You'll take the top layer of your shingle right along with it.
How Often Will I Have to Do This?
How often you’ll need to clean your roof really comes down to your local climate and your specific property. If you're in a humid, shady part of the country, you might see those dark streaks creep back in as little as 3 to 5 years.
But you’re not powerless here. Taking a few preventive steps can make a huge difference. If you trim back those overhanging tree limbs to let more sunlight hit your roof and install zinc or copper strips near the peak, you can dramatically slow down regrowth. With good prevention, it's not uncommon to go 7 years or more before needing another cleaning. Your best bet is to give your roof a quick visual check once a year and plan a cleaning when you first spot those streaks returning.
When Should I Call a Professional Instead of Doing It Myself?
The DIY versus pro debate boils down to two things: safety and the type of roof you have. If you’ve got a single-story house with a gentle slope and you’re perfectly comfortable and safe on a ladder, then tackling this yourself is definitely doable.
However, the minute you’re looking at a multi-story home or a roof with a steep pitch, the risk factor skyrockets. If you have any fear of heights, don't even think about it. In these cases, hiring a fully insured professional is the smartest—and safest—call you can make. Pros have the right safety gear, the training, and the experience to handle the job without risking injury or damaging your property. They know how to work with the chemicals safely and protect your home and landscaping from runoff.
If you're in South Florida and would rather have the peace of mind that comes with hiring seasoned experts, Paletz Roofing and Inspections has over 30 years of experience keeping local roofs clean and protected. You can contact us for a free quote.