
A successful metal roofing installation hinges on the prep work you do long before the first panel goes up. This is where you lay the foundation for a leak-free, long-lasting roof. Getting the inspection, measurements, and tools right from the start is what separates a professional-grade job from a DIY disaster.
Setting the Stage for a Flawless Installation
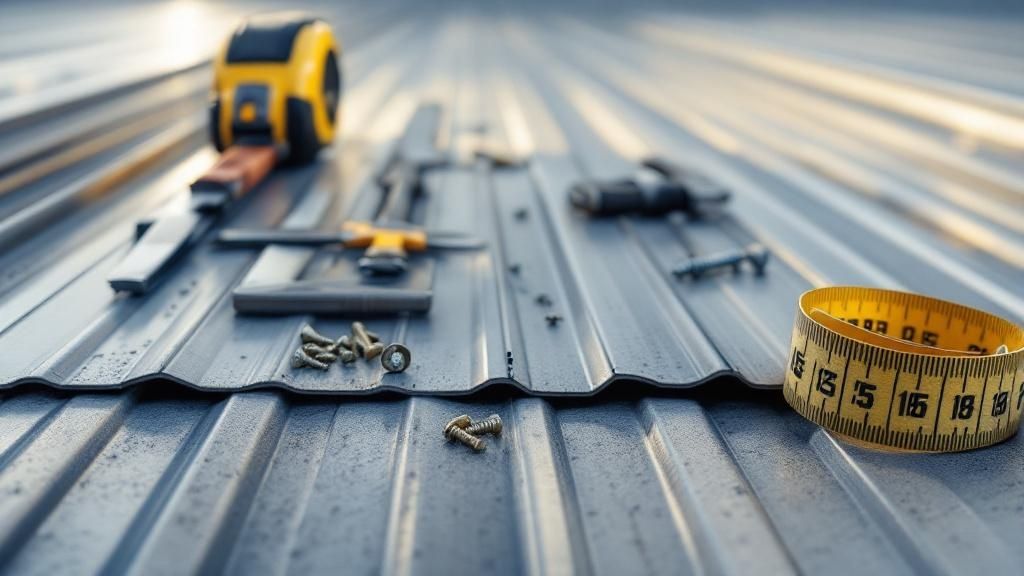
Before you even think about ordering materials, you need to get up on your roof and give it a thorough assessment. This isn't just a quick glance—it's a critical diagnostic step that will save you from some serious headaches and costly surprises down the road. You need to know exactly what you're working with.
Your first big decision is whether to tear off the old roofing or install the new metal panels right over it (an overlay). An overlay can definitely save you a ton of time and labor, but it's only an option if your current roof deck is in solid shape and your local building codes allow it.
Inspecting Your Current Roof Deck
Start by carefully walking the roof. Do you feel any soft, spongy, or bouncy spots under your feet? Those are tell-tale signs of rot or water damage in the plywood or OSB sheathing underneath. You'll also want to pop into the attic for a look. Check for dark water stains, any signs of mold, or daylight peeking through—all clear indicators of leaks or structural issues.
If you find just one or two small bad spots on an otherwise solid deck, you can probably get away with just cutting out and replacing those sections. But if the damage is widespread or you've already got more than one layer of old shingles, a complete tear-off is the only right way to go.
To Tear-Off or Overlay?
Here's what you need to weigh when making the call:
- Structural Integrity: An overlay adds significant weight. If your roof framing is already compromised, it simply can't handle another load.
- Code Compliance: Check with your local building department. Many places limit you to two layers of roofing, period. You have to know the rules before you start.
- Creating a Flat Surface: Metal panels need a perfectly flat plane to sit on. Trying to overlay them on top of badly curled or deteriorating shingles will create an uneven surface, which can cause "oil canning" (that wavy, rippled look) and problems with your fasteners.
Pro Tip: When in doubt, tear it off. Starting with a clean, inspected deck is the only way to be 100% sure your new metal roof will perform like it's supposed to and meet warranty requirements. It’s more work upfront, but it prevents a world of potential problems later.
Assembling the Right Tools
Having the right tools for a metal roofing job isn't just about making things easier; it's about precision and safety. Your standard toolbox isn't going to cut it here. For instance, you must never use a grinder or any abrasive-blade saw to cut metal panels. The sparks it creates will burn right through the protective galvanized and painted coatings, inviting rust to take hold and ruin the panel.
The right toolkit requires specialized equipment. Having the right tools isn't just a suggestion; it's a necessity for achieving a professional, watertight finish. It’s also a key factor in the market’s projected 4.6% annual growth, as more homeowners seek durable, expertly installed roofing solutions. You can learn more about the factors driving the metal roofing market's growth and see why so many are making the switch.
To get the job done correctly, here's a look at the gear you'll need.
Your Essential Metal Roofing Toolkit
This table breaks down the crucial tools you'll need, separating them by what they do. Getting these items together before you start is one of the most important steps.
| Tool Category | Essential Tools | Why You Need It |
|---|---|---|
| Cutting Tools | Electric Metal Shears, Aviation Snips (Left/Right/Straight) | Provides a clean, burr-free cut that won't damage the panel's protective coating and cause rust. |
| Fastening Tools | Torque-Adjustable Screw Gun, Hex Head Driver Bits | Prevents over-tightening screws, which can crush the washer and create a leak point. Ensures a perfect seal. |
| Measurement & Layout | Tape Measure, Chalk Line, Speed Square, Framing Square | Guarantees straight lines, square panels, and accurate cuts for a professional, watertight finish. |
| Safety Gear | Harness & Lanyard, Hard Hat, Gloves, Safety Glasses | Non-negotiable for working at heights. Protects you from falls, falling debris, and sharp metal edges. |
| Bending & Forming | Hand Seamer, Bending Brake | Crucial for creating clean, crisp bends for drip edges, flashing, and ridge caps. |
| Miscellaneous | Caulking Gun, Butyl Tape, Drill & Bits, Ladders | Used for sealing joints, pre-drilling holes, and safe roof access. These are the supporting cast for the job. |
Gathering this specific equipment is an investment in the quality and longevity of your roof. For example, aviation snips (also called tin snips) are absolutely essential for making those tricky, intricate cuts around roof vents, pipes, and chimneys. For the long, straight cuts on your panels, a good pair of electric metal shears will give you a fast, clean edge that keeps the factory finish intact.
Likewise, a torque-adjustable screw gun is a real game-changer. One of the most common rookie mistakes is over-driving the screws, which crushes the little rubber washer and breaks the seal. A screw gun with a clutch lets you set the perfect torque every time, so the fastener is secure without ever compromising that all-important washer.
Of all the steps in a metal roof installation, getting the underlayment and trim right is where the pros separate themselves from the amateurs. While those shiny new panels get all the attention, it’s these foundational layers that do the heavy lifting—they’re your primary defense against water, condensation, and wind.
Nailing this stage creates a completely weatherproof seal that protects your roof deck for decades. It also gives your panels a solid, straight, and professional-looking edge to fasten to. Think of it as building a flawless frame before you stretch the canvas.
Choosing and Laying the Underlayment
Your first move is to lay down a high-quality synthetic underlayment. Don't even think about using standard asphalt felt paper here. Metal roofing gets incredibly hot, and that intense heat will cook traditional felt until it’s dry, brittle, and useless. For a job that lasts, a high-temperature synthetic underlayment is non-negotiable.
This layer does two critical things. First, it’s your backup water barrier, catching any wind-driven rain that might sneak past the panels. More importantly, it’s your key to managing condensation. Metal roofs go through big temperature swings, which causes moisture—"roof sweat"—to form on the underside of the panels. The underlayment stops this moisture from soaking your wood sheathing and causing rot.
Always start at the bottom of the roof, what we call the eave. Roll out your first course of underlayment horizontally, keeping it parallel to the eave. Your goal is to get it perfectly flat and smooth, with zero wrinkles. Fasten it to the roof deck with cap fasteners or cap staples; those little plastic caps are essential for preventing tear-through and sealing the fastener holes.
Every row you add needs to overlap the one below it. Always check the manufacturer's specs, but a minimum of a 6-inch horizontal overlap is a solid rule of thumb. This shingle-style layering guarantees that any water on the underlayment flows down and off the roof, never sneaking under a seam.
When you get to hips and valleys, just run the underlayment right through them continuously. For any vertical seams where two rolls meet end-to-end, give yourself an even wider overlap—12 inches is what you’re looking for.
Field-Tested Advice: Be extra careful around tricky spots like vent pipes, chimneys, or skylights. Cut a simple "X" over the pipe or penetration, then fold the flaps up against the object. Use a high-quality construction tape (one that’s recommended for your specific underlayment) to seal the seams. This little bit of extra work is what separates a leak-proof job from a costly callback.
The Critical Sequence for Installing Trim
With the underlayment down, it’s time to install the perimeter trim. The order you install these pieces in is absolutely critical. Get it wrong, and you can actually trap water instead of shedding it.
- Eave Trim (or Drip Edge): This piece is always first. It fastens directly to the roof deck right along the bottom edge, going over the underlayment. Its job is to kick water away from the fascia and straight into the gutters.
- Gable Trim (or Rake Trim): Next up are the sloped sides of the roof. This trim is installed after the eave trim so that it can overlap it at the corners. This creates a clear downhill path for water to flow over the eave trim, not behind it.
- Valley Trim: If your roof has valleys, this specialized V- or W-shaped channel goes in now. It sits on top of the underlayment and is built to handle the massive volume of water that funnels down from two converging roof planes.
- Sidewall and Endwall Flashing: Finally, you’ll install flashing wherever a roof slope butts up against a vertical wall. These pieces go in before the panels to make sure water running down the wall is directed out onto the roofing panels, not behind them.
Putting It All Together
Let's walk through a common scenario: a simple gable roof. You'd start by installing the eave trim along both horizontal bottom edges. With that done, you’d move to the sloped sides and install the gable trim, working your way up from the eave to the peak.
This bottom-up, layered approach is fundamental to the entire installation process. Securing these trim pieces properly with the right sealant and fasteners builds a rigid, watertight frame for your panels. This isn't just for looks; it's a core part of building a roofing system designed to last 50 years or more. Time spent here pays you back for decades.
Nailing Your Panel Placement and Fastening
This is it—the moment your project starts looking less like a pile of materials and more like an actual roof. Getting your panel placement and fastening right isn't just about looks; it's the very heart of your roof's ability to shed water and laugh off high winds. This is a non-negotiable step, and getting it perfect is what separates a pro job from a disaster waiting to happen.
This process really highlights how critical precise alignment and correct fastening are.
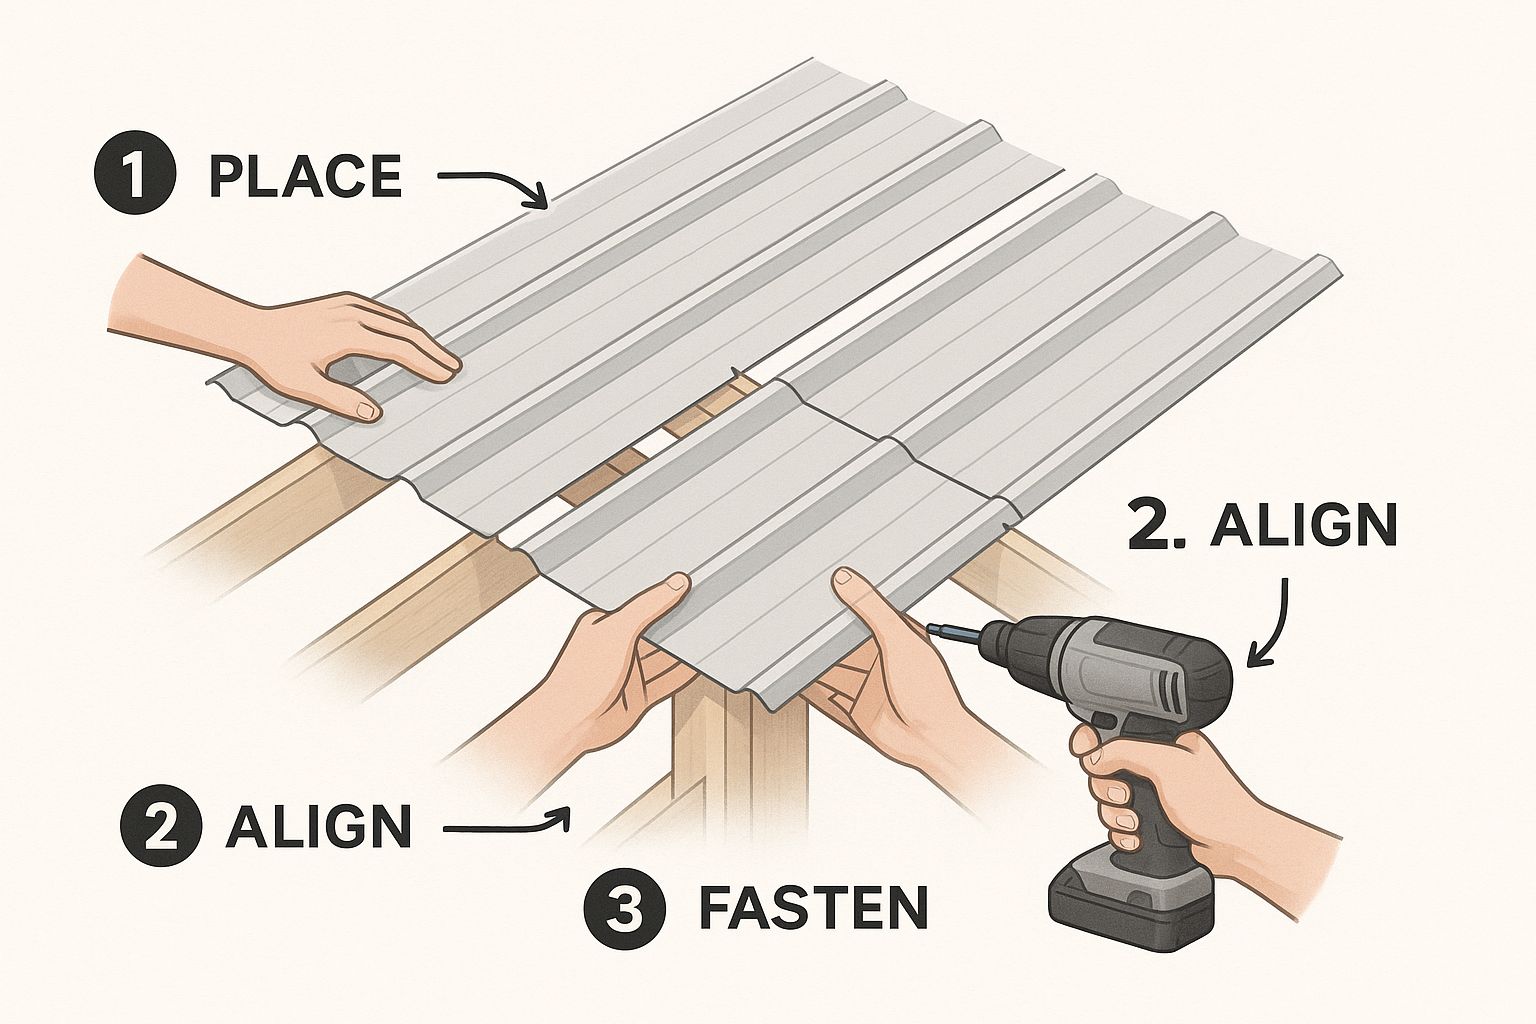
As you can see, it's a systematic approach. Each panel locks into the last one, all following a grid set by perfectly square lines and consistent fastener placement.
The most important panel you will ever lay is the very first one. I can't stress this enough. Its alignment sets the stage for every single panel that comes after. If that first piece is even slightly crooked, the error will telegraph across the entire roof, creating a skewed, ugly finish that can compromise every seam along the way.
Crucial Takeaway: Your first panel absolutely must be perfectly square to the eave (the bottom edge of the roof). Don't trust your eyes, and definitely don't trust the old roofline. Measure from the peak down to the eave at both ends of where the panel will sit. Once you've confirmed the eave is straight, use a big framing square to align the panel's edge.
With the panel squared up, let it hang over the eave by the distance your manufacturer recommends, which is usually between 1 and 1.5 inches. This overhang is what kicks water away from your fascia and straight into the gutters where it belongs. Go ahead and put in a few tentative screws, then step back and check your measurements again. Only when you are 100% certain it's perfect should you fasten it down for good.
Mastering Your Fastening Technique
How you drive the screws is just as vital as where you put them. This is where a good torque-adjustable screw gun earns its keep. The whole point is to seat the fastener so the little rubber washer creates a tight seal without getting squished or twisted out of shape.
Over-tightening is a classic rookie mistake. Drive that screw too hard, and the washer bulges out and splits, making it totally useless at keeping water out. On the flip side, under-tightening is just as bad—it leaves a gap where water can happily seep right under the screw head.
A perfectly driven screw will have the washer slightly compressed, just enough to form a little "donut" seal around the base of the head. I always recommend practicing on a scrap piece of panel first. It lets you dial in the clutch setting on your screw gun before you start punching holes in your actual roof.
Exposed Fastener vs. Standing Seam Panels
The type of panel you're using will completely change your fastening strategy. The two most common systems are worlds apart.
- Exposed Fastener Panels: For systems like PBR or R-Panel, you’ll drive screws right through the face of the panel into the roof deck. Here's the key: always drive the screws into the high "rib" or corrugation. Never, ever screw into the flat "pan" where water is designed to run.
- Standing Seam Panels: With a standing seam roof, all the fasteners are hidden. You secure one panel to the deck with special clips, and the next panel snaps or gets mechanically seamed right over it. This hides the clips and screws completely, giving you that clean, architectural look.
The choice between them often boils down to the job itself. For big industrial and commercial projects, standing seam is a clear favorite because its hidden fasteners and superior interlocking design promise a longer life with less maintenance. This trend is a major driver of market growth worldwide. You can actually read the full research on metal roofing market trends to see how demand from sectors like manufacturing and logistics is shaping the future of roofing.
Real-World Scenario: Adjusting for an Uneven Roof
So, what happens when you lay down your perfectly square first panel and realize the roof deck has a dip in it? You might see a slight gap under the middle of the panel. Whatever you do, don't try to "suck it down" by over-tightening the screws. This will just warp the panel and create an ugly, wavy distortion called oil canning.
Instead, work from one end of the panel to the other, fastening it down sequentially. This lets the panel naturally follow minor bumps in the deck without putting stress on the metal. If you run into a more significant dip, you might need to use shims under the panel ribs to build up a level plane. It takes a little extra time, but it's the only way to ensure your lines stay straight and true across the entire roof.
Handling Hips, Valleys, and Roof Penetrations
The clean, straight runs of a metal roof are one thing, but the real test of craftsmanship is where the geometry gets complicated. Hips, valleys, and penetrations are where water loves to find a way in. These are the areas that truly separate a professional, long-lasting job from a leaky amateur one.
Getting these specific details right is non-negotiable if you want a roof that will stand the test of time.
Valleys, in particular, demand absolute precision. Think of them as high-capacity channels designed to handle a massive volume of water. A single mistake in measuring or sealing can have disastrous consequences down the road. The goal is simple: create a bulletproof, continuous channel that directs every drop of water safely off the roof.
Securing Roof Valleys for Maximum Water Flow
You'll tackle your valley installation right after the underlayment is down but before laying any of the adjacent roof panels. The process starts with installing a pre-formed metal valley flashing, usually one with a "W" profile. This design is brilliant—the central rib acts as a high-speed barrier, preventing water rushing down one roof plane from shooting up and under the panels on the other side.
Once that flashing is centered and fastened, it's time to cut the panels that will meet in the valley.
- Measure and Mark: Lay your panel so it overlaps the center of the valley. Get underneath the panel and use a straightedge to mark a clean cut line. This line should run parallel to the valley's centerline, typically about 2-3 inches away from it.
- Cut the Angle: Grab your aviation snips (never a grinder!) and carefully cut the panel along the line you marked. This angled cut needs to be perfectly straight.
- Hem the Edge: This is a pro-level technique that many DIYers skip, but it makes a huge difference. Using a hand seamer, bend the freshly cut edge of the panel back under itself to create a 1-inch hem. This simple fold adds incredible strength and stiffness to the panel's edge, preventing it from ever being bent up by sliding snow or fierce winds.
Before you fasten the panel down, run a thick bead of high-quality butyl tape along the valley flashing. Position it so the hemmed edge of the panel will press directly down on it, creating a compressed, permanently watertight seal.
Key Insight: The combination of the hemmed edge and butyl tape creates a powerful, multi-layered defense. The hem provides structural muscle, while the tape forms a flexible, permanent seal that moves with the roof as it expands and contracts.
Proper Flashing for Hips and Ridges
Hips are the opposite of valleys; they're the raised external angles where two roof planes come together. Much like the main peak of the roof, these areas are capped with a ridge cap. The real challenge here is making sure the space underneath that cap is completely sealed off from wind-driven rain and pests.
This is where Z-closures and foam inserts become your best friends. A Z-closure is a thin metal strip bent into a Z-shape that you'll install along the hip line before the cap goes on. It provides a solid, clean surface for the ridge cap to rest on.
Beneath the ridge cap and sitting right on top of the Z-closure, you’ll install either vented or solid foam closure strips. These are cut to perfectly match the profile of your roofing panels, filling every single gap to create a formidable barrier. Always use fasteners that are long enough to drive through the ridge cap, the closure strip, and bite securely into the roof decking below.
Sealing Roof Penetrations
Anywhere something pokes through your roof—a plumbing vent, a chimney, a stove pipe—is a prime suspect for future leaks. Each one needs a specific type of flashing boot made for metal roofing. These boots are typically made of EPDM rubber or silicone and have a flexible cone that seals tightly around the pipe, along with a wide, flat base that gets sealed to the roof panel.
When planning these penetrations, it's also smart to think about any other equipment you might mount on the roof. For example, a comprehensive guide to lightning protection systems can be invaluable, as those systems often require their own roof-mounted hardware that must be properly flashed and integrated.
For a standard vent pipe, just slide the flashing boot over the pipe and trace its base onto the panel. Apply a high-grade sealant around the traced outline, press the boot down firmly into the sealant, and then secure its base to the panel with gasketed screws.
Chimneys, however, are a different beast and require a multi-part flashing kit. This usually includes:
- An apron flashing for the downhill side.
- Step flashing that gets woven into the panels along the sides.
- A cricket (or saddle) on the uphill side to divert water around the chimney.
- Counter-flashing that is cut directly into the chimney’s mortar joints to cover the top edges of all the other flashing pieces.
This meticulous, no-shortcuts approach is exactly why metal roofing has become the go-to solution for long-term durability. Its resilience to extreme weather—often withstanding winds up to 140 mph—is a huge driver behind the market’s growth, which hit an estimated $22.55 billion in 2024. As severe weather becomes more common, it's no surprise that homeowners are gravitating toward materials that promise decades of protection. You can find more insights about the rise of resilient roofing solutions on databridgemarketresearch.com.
Adding the Final Touches for a Perfect Finish
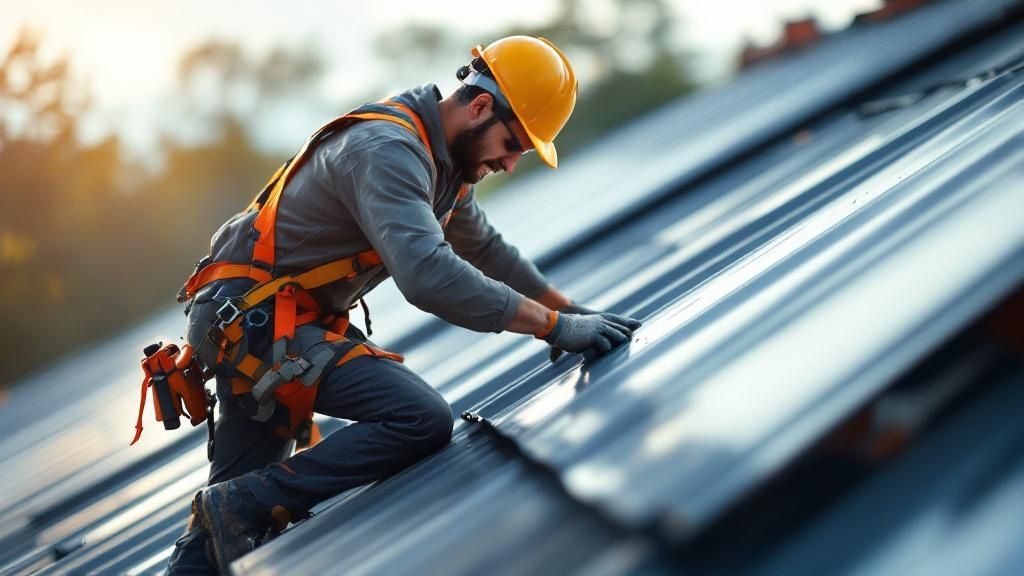
With the panels securely fastened and the tricky flashing handled, your project is on the home stretch. But don't get complacent now. The final details are what separate a decent roof from a professional one—and determine its ultimate quality and longevity. This is where you polish the job and make it count.
A rushed finish can undermine all the careful work you’ve put in so far. This last phase is all about finishing strong, from installing the ridge cap to performing a meticulous cleanup and final inspection. These steps ensure every seam is sealed, every fastener is perfect, and your roof is truly ready to provide decades of protection.
Installing the Ridge Cap for a Weatherproof Peak
The ridge cap is the crown jewel of your roof—it’s the final piece of trim that seals the peak against rain, snow, and wind. Before you can install it, you have to prep the ridge with closure strips. These are foam or metal pieces profiled to match your panels, and their job is to seal the gaps under the cap to block wind-driven rain and keep pests out.
With the closure strips in place, it’s time to lay the ridge cap sections. Always start at one end of the roof, making sure that first piece is perfectly centered over the peak. Fasten it down with gasketed screws that are long enough to bite firmly into the wood purlins or decking below.
As you add more sections, overlap them according to the manufacturer's specs—usually by about 6 inches. This shingling effect is crucial; it ensures water always flows over the joint, not into it. For an extra layer of waterproofing, I always run a bead of high-quality butyl tape inside the overlap before fastening the next piece down. It's a small step that adds a lot of peace of mind.
The Critical Importance of Metal Shavings Cleanup
This next part is one of the most overlooked yet absolutely critical tasks in the entire installation: cleaning up the swarf. Swarf is just a technical term for the tiny metal shavings and filings created when you cut and drill the panels. These little flecks of raw steel are a new roof’s worst enemy.
If you leave them on the surface, they’ll rust almost instantly with the first morning dew. This rust then bleeds onto your brand-new panels, creating ugly orange stains that are nearly impossible to remove. Over time, these rust spots can even eat through the panel's protective coating, leading to premature failure.
Expert Warning: Whatever you do, don't use a wire brush or anything abrasive to clean the panels. You'll just scratch the finish you worked so hard to protect. The best method is simple: use a soft-bristle brush and a leaf blower to gently sweep and blow every single shaving off the roof and out of the gutters.
Your Final Walkthrough Checklist
The ridge cap is on and the swarf is gone. Now it’s time for one last, detailed inspection. This is your final quality control check to guarantee the job is done right. Put on a pair of soft-soled shoes and walk every inch of your new roof, looking for anything that seems out of place.
A thorough final walkthrough is the best way to catch minor issues before they become major headaches. Here’s a practical checklist to guide your final once-over:
- Check Every Fastener: Look at the washer on every single screw. Is it perfectly compressed—not squished out or sitting too loose?
- Inspect All Seams: Double-check every panel seam, ridge cap overlap, and flashing joint. You’re looking for tight, properly sealed connections.
- Examine Sealant Beads: Verify that all the sealant you applied around vents and flashing is smooth, consistent, and fully cured.
- Look for Scratches: Check for any deep scratches that might have happened during installation. Touch them up immediately with manufacturer-approved paint to prevent rust.
- Clear the Gutters: Make one final pass to ensure your gutters are completely free of stray fasteners, debris, and, most importantly, swarf.
Completing this final checklist confirms your project isn’t just done, but done to a professional standard. It's the last step in a successful metal roof installation, ensuring your investment is beautiful, durable, and ready to protect your property for years to come.
Of course. Here is the rewritten section, crafted to sound like an experienced human expert while adhering to all your requirements.
Common Questions About Metal Roof Installation
Even with the most detailed guide, some questions always seem to come up mid-project. Let's tackle some of the most frequent ones we hear from the field. Getting these answers straight from the start can save you a world of trouble and make sure your new roof performs exactly as it should.
Getting these details right is what separates a professional, leak-free job from one that causes headaches down the road.
Can I Install a Metal Roof Over My Existing Asphalt Shingles?
In many cases, yes, you absolutely can. This method is called an overlay (or a "roof-over"), and it's a great way to save a ton of cash and avoid the massive mess of a full shingle tear-off. But hold on—it's not a universal green light for every project.
First thing's first: you have to check your local building codes. Many cities and counties have a hard limit on how many layers of roofing are allowed on a house, so a quick call to your building department is a must.
For an overlay to even be an option, your existing shingle roof needs to be in pretty decent shape. That means you’re looking at a single layer of shingles that are lying mostly flat. If you have widespread curling, heavy granule loss, or any soft, spongy spots, an overlay is off the table. Remember, you can't put a new roof on a rotten deck.
If you get the all-clear, you’ll roll out a high-quality synthetic underlayment right on top of the old shingles. This step is critical. It creates a smooth, even surface for your new metal panels and acts as a crucial secondary barrier against moisture and condensation.
What Is the Biggest Mistake DIYers Make?
Hands down, improper fastening is the most common and costly error we see. This one mistake is the culprit behind the vast majority of leaks on a brand-new metal roof. It usually plays out in one of two ways: driving the screws too tight or not tight enough.
When you over-tighten a screw, you obliterate the little rubber washer that's designed to create the seal. It gets squished out from under the screw head and often splits, creating a perfect little funnel for rainwater. On the flip side, an under-tightened screw never compresses the washer enough to form a seal, leaving a gap for water to sneak right in.
Another huge, and surprisingly common, mistake is screw placement. On an exposed fastener roof, screws must always be driven into the raised "rib" of the panel. Never, ever put a screw in the flat "pan" where all the water is designed to run. Sticking a screw in the pan is basically like drilling a hole in the bottom of a gutter—it’s guaranteed to leak.
Key Takeaway: The sweet spot is a "just right" compression where the washer is snug but not bulging. I always tell new guys to practice on a scrap piece of metal first. This helps you get the feel for it and lets you set the clutch on your screw gun perfectly.
How Should I Cut Metal Roofing Panels?
The tools you use to cut your panels will have a direct impact on how long your roof lasts. For clean, professional results that won't compromise the panel's protective finish, your go-to tools should be electric metal shears for long, straight cuts. For the smaller, more detailed cuts around pipes and flashing, a good pair of aviation snips (tin snips) is what you need.
These tools shear the metal cleanly without creating heat, and that’s the most important part.
Here's a warning I can't stress enough: never use a grinder or any kind of abrasive-blade circular saw to cut your panels. The shower of hot sparks and extreme heat these tools generate will instantly burn away the galvanized and painted coatings along the cut edge. This leaves the raw steel exposed to the elements, which means rust is not a matter of if, but when. It’s a shortcut that will absolutely ruin your investment and stain your beautiful new roof.
Navigating the specifics of a metal roofing installation guide requires expertise and attention to detail. At Paletz Roofing and Inspections, we bring over 30 years of experience to every project in South Florida, ensuring your roof is installed perfectly the first time. For a professional consultation and a free quote, visit us at https://paletzroofing.com.