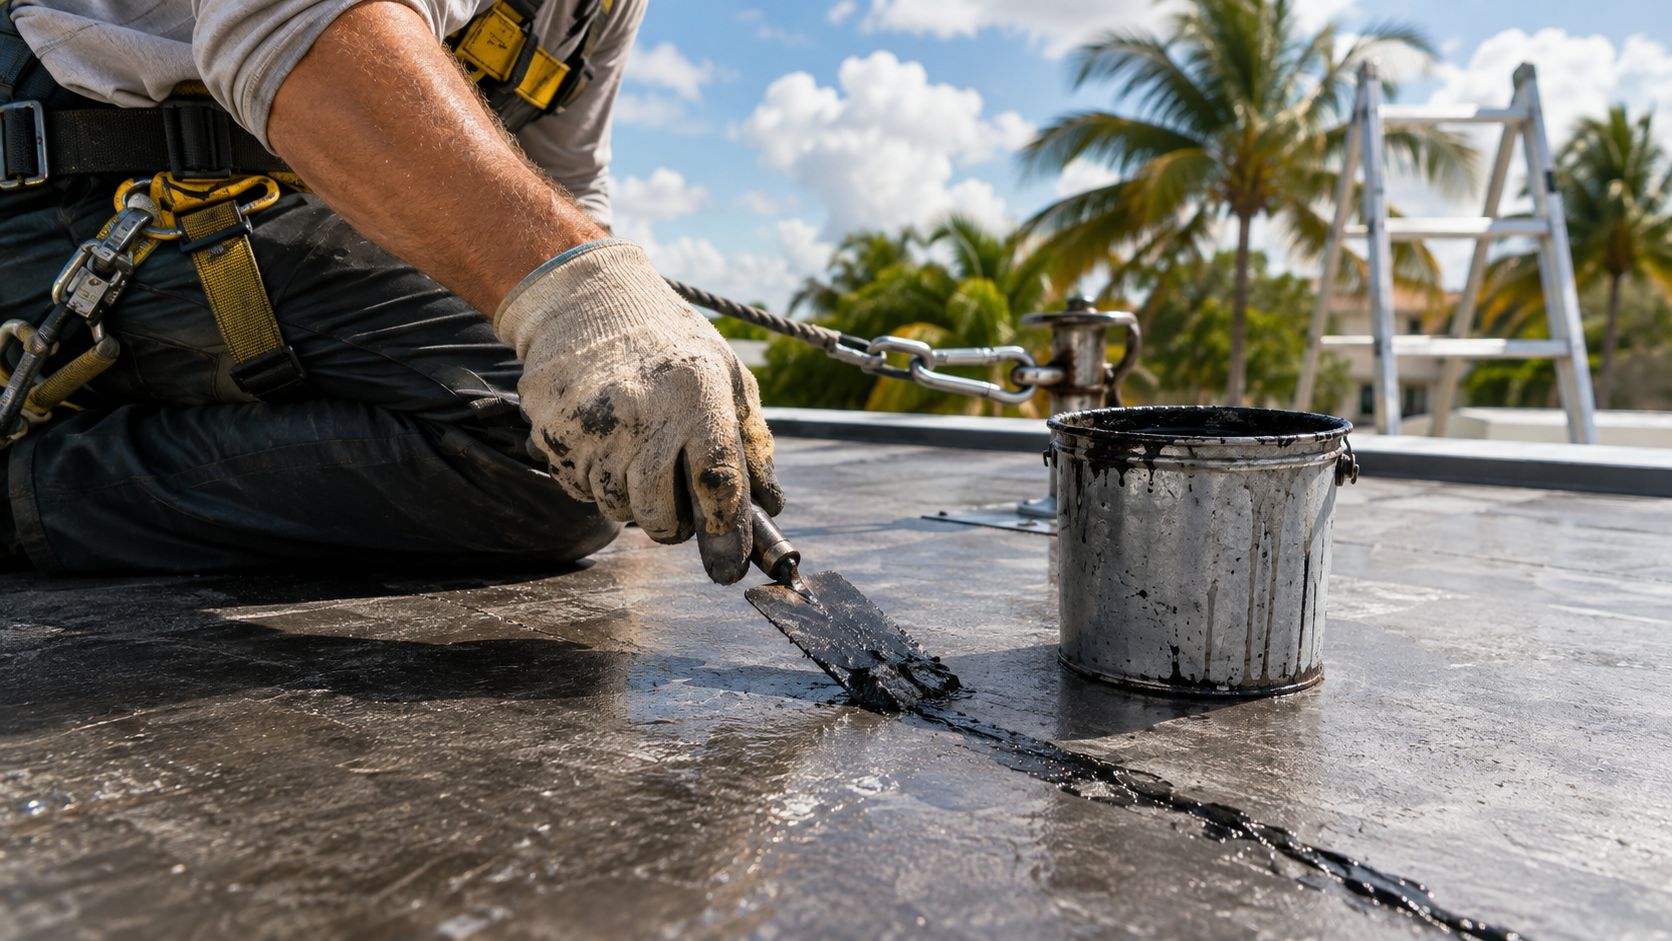
The drip usually starts during the worst possible weather. A July thunderstorm rolls over Broward or Miami-Dade, water taps onto the floor, and a brown ceiling stain begins spreading before you can find a bucket. On a flat South Florida roof, the first instinct is often to grab a tub of roofing tar and stop the water immediately.
That instinct makes sense, but tarring a roof leak is a temporary control measure, not a permanent roof repair. Intense UV exposure, afternoon downpours, ponding water, humidity, and salt air all work against an improvised patch. Used on a compatible asphalt-based roof, tar or roofing cement can buy valuable time. Used on the wrong roof system, applied over moisture, or treated as a finished repair, it can make the next repair harder and more expensive.
Table of Contents
- When Tarring a Roof Leak Is the Right Call
- Tools and Materials You Need Before You Climb
- Safety and PPE for Working on a Wet Roof
- Preparing the Surface So the Patch Actually Sticks
- Applying the Tar Patch Step by Step
- How Long a Tar Patch Will Actually Last
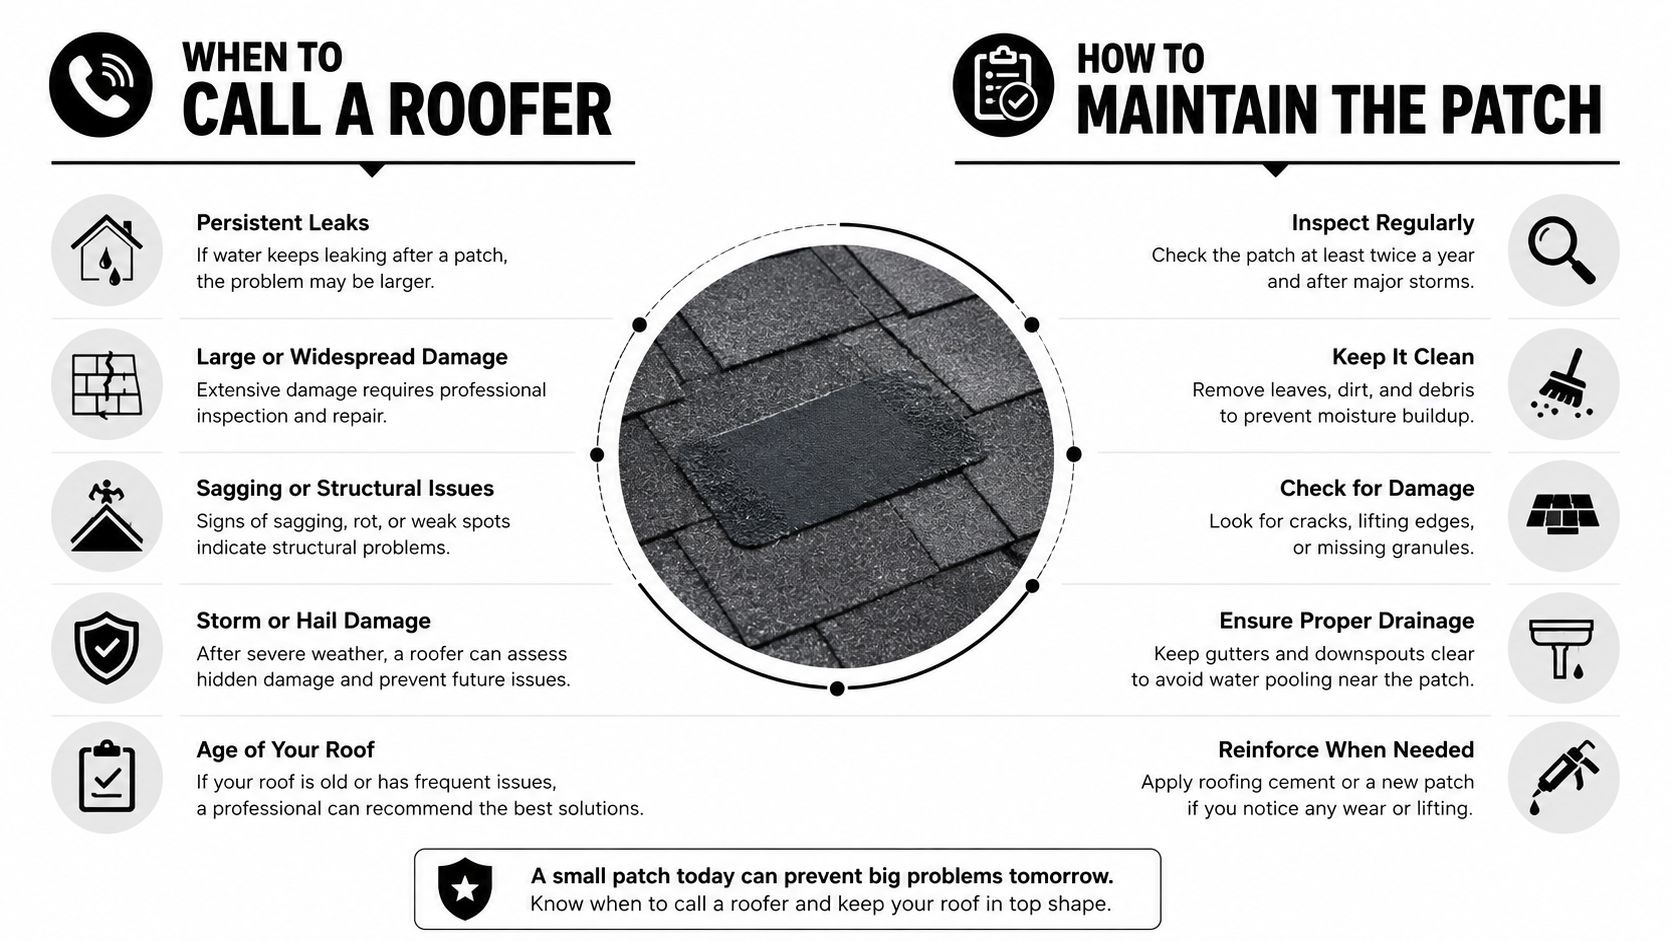
- When to Call a Roofer and How to Maintain the Patch
When Tarring a Roof Leak Is the Right Call
The homeowner hears drip, drip, drip during a July storm and finds the ceiling stain directly below a flat-roof area near an air-conditioning penetration. The roof is still receiving rain, the roofer can't safely reach it, and water is moving toward furniture. In that moment, the job isn't to rebuild the roof. The job is to divert water and reduce interior damage until the roof can be inspected.
Traditional built-up roofing, often called BUR or a tar-and-gravel roof, is the system most closely associated with tar-style emergency repairs. Its history reaches back to the 1840s, when melted asphalt was recorded as an impregnating material for duck cloth, while commercially marketed asphalt-prepared roofing appeared by 1893. The industry gradually moved from pine tar and coal tar toward asphalt because asphalt was easier to handle and performed across a wider temperature range. Historical roofing accounts from IIBEC trace that evolution.
Flat and low-slope roofs in Broward, Miami-Dade, and Palm Beach face a difficult combination. Rain doesn't shed as quickly as it does on a steep roof, afternoon storms can arrive before a surface dries, and ponding can keep water pressed against a weak seam. Salt air adds another source of exposure around coastal properties. These conditions make a tar patch useful for immediate triage, but they also shorten its margin for error.
First, rule out the obvious confusion
A ceiling stain doesn't always identify the roof opening. Water can travel along sheathing, framing, insulation, or a roof layer before it appears indoors. Condensation from an attic or air-conditioning system can also mimic a roof leak. Look for a pattern tied to rainfall, wet insulation, active drips, or staining around roof penetrations before spreading material over the first dark mark you see.
A homeowner doing a one-off patch should generally choose canned roofing cement or a compatible roof sealant, not hot-applied tar. A property owner trying to buy time until a roofer arrives may use roofing cement reinforced with mesh on a small, accessible defect. Larger breaches need water diversion, and a tarp is usually more dependable than tar alone for that purpose. If you're documenting damage, photos and notes can also help with a file roof leak insurance claim.
Before climbing, confirm that the problem is on a roof surface compatible with asphalt-based material. Don't smear tar on an unidentified white single-ply membrane, rubber membrane, tile assembly, or metal roof and assume the dark coating is harmless. A temporary patch should preserve the option for a proper repair, not contaminate the area a roofer needs to bond or weld later.
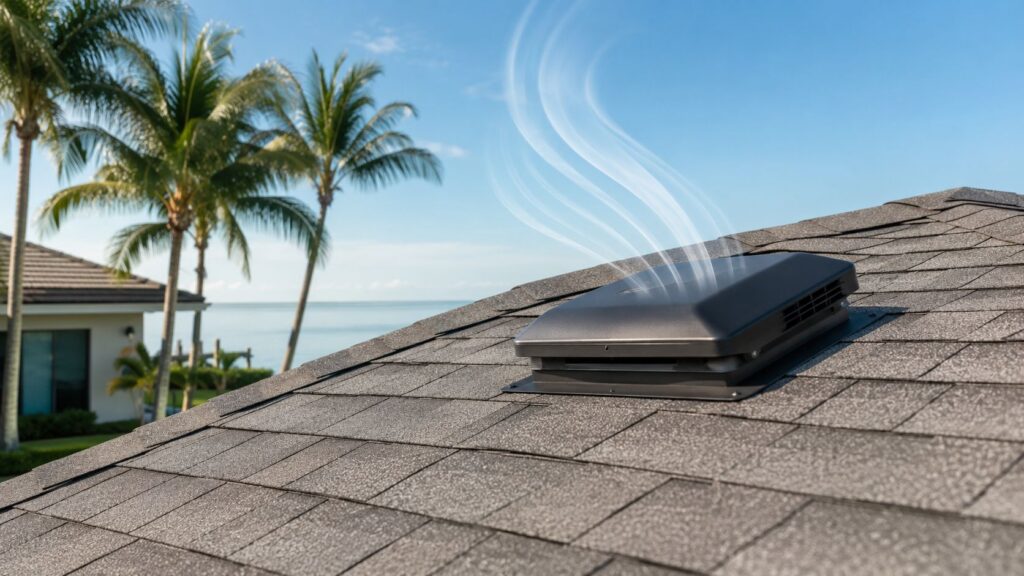
For attic airflow context, homeowners can also review this roof ventilation reference image, especially when moisture may be condensation rather than rain entry.
Tools and Materials You Need Before You Climb
Put everything on the ground before the ladder comes out. A wet South Florida roof turns small interruptions into unnecessary trips, and every trip increases exposure to slippery surfaces, heat, and roof-edge hazards.
For a small asphalt-roof patch, use roofing cement or a compatible roof sealant, fiberglass mesh or roof patch fabric, a stiff brush, a wire brush, rags, a bucket, a utility knife, a putty knife, and a trowel. The stiff brush removes loose gravel and surface debris. The wire brush helps break up stubborn dirt or light surface residue, but it shouldn't be used aggressively enough to gouge sound roofing. Rags remove the remaining dust and surface moisture.
A utility knife cuts mesh cleanly and trims lifted roofing material back to a firm edge. The putty knife presses cement into cracks and feathers the perimeter. A trowel is useful when the repair area is broad or the cement is too stiff for a small knife. Fiberglass mesh matters because tar alone can split as the roof moves, especially under repeated heat and cooling cycles.
For roofing cement, a common application guide calls for about 1/8 inch of material, extending 2 to 3 inches beyond the damaged area to limit water tracking beneath the repair. Follow the product label if it specifies a different method, but don't replace a reinforced patch with a thick, unreinforced blob.
Choose cold-applied material for most homeowner patches
Canned roofing cement or a caulk-tube sealant is easier to control than hot-applied tar. It avoids the need to heat a kettle, manage an open flame, and transport a container of hot material across a roof. Hot asphalt also creates a serious fire hazard. Washington State labor guidance lists asphalt's flash point at 560°F and recommends keeping kettle temperature at least 25°F below the flash point. See the Washington asphalt safety facts before considering any hot process.
Never substitute household caulk, construction adhesive, drywall compound, or wet roofing debris. Those materials may look workable in the moment, but they aren't selected for roof exposure, water movement, or compatibility with the existing assembly.
| Item | Purpose | South Florida Note |
|---|---|---|
| Roofing cement or roof sealant | Seals a prepared crack or opening | Use a product compatible with asphalt roofing, and keep it out of standing water |
| Fiberglass mesh or roof patch fabric | Reinforces the repair | Cut it cleanly so stormwater can't catch a loose edge |
| Putty knife | Presses cement into defects and feathers edges | A flexible blade helps avoid ridges that collect rain |
| Trowel | Spreads material over a wider patch | Keep the coat controlled rather than building one heavy mound |
| Stiff brush | Removes loose dirt, gravel, and debris | Surface grit quickly ruins adhesion in humid weather |
| Wire brush | Breaks up stubborn residue | Don't scrape through sound membrane |
| Utility knife | Trims lifted material and cuts fabric | Retract the blade before carrying it across the roof |
| Rags and bucket | Collect debris and dry the repair zone | Keep the work area organized during sudden showers |
| Ladder and safe access equipment | Provides controlled entry and exit | Never improvise with unstable furniture or a wet ladder |
Safety and PPE for Working on a Wet Roof
A roof patch can wait. A fall cannot. Wet coating, algae, loose gravel, and storm debris create a sliding surface, while heat can impair judgment before you notice it.
Wear closed-toe shoes with a solid grip, long sleeves, work gloves, and eye protection. Keep the utility knife sheathed or retracted when it isn't in use. Have a partner remain on the ground, control access around the ladder, and call for help if weather changes. A bucket of roofing cement can shift on a sloped surface, so never set it where it can slide into your path or toward an edge.
Wait until rain has stopped and the work area is as dry as possible. A cloudy morning or cooler day is a smarter window than mid-afternoon in peak South Florida summer, when the roof surface can become punishingly hot and thunderstorms may rebuild quickly. Heat also changes the consistency of roofing materials, making a controlled application harder.
Hot asphalt requires a different level of control
Hot-applied asphalt is not a casual alternative to a tube of roof cement. Heated kettles, torches, and hot-air tools can ignite vapors or nearby combustibles. Zurich's hot-tar fire-safety guidance emphasizes temperature control, ventilation, and separation from ignition sources.
If someone is attempting a hot process, the kettle must remain at least 25°F below asphalt's 560°F flash point, as described in the Washington State safety guidance. For most homeowners, that fire and handling risk outweighs the convenience of using hot material for a small leak.
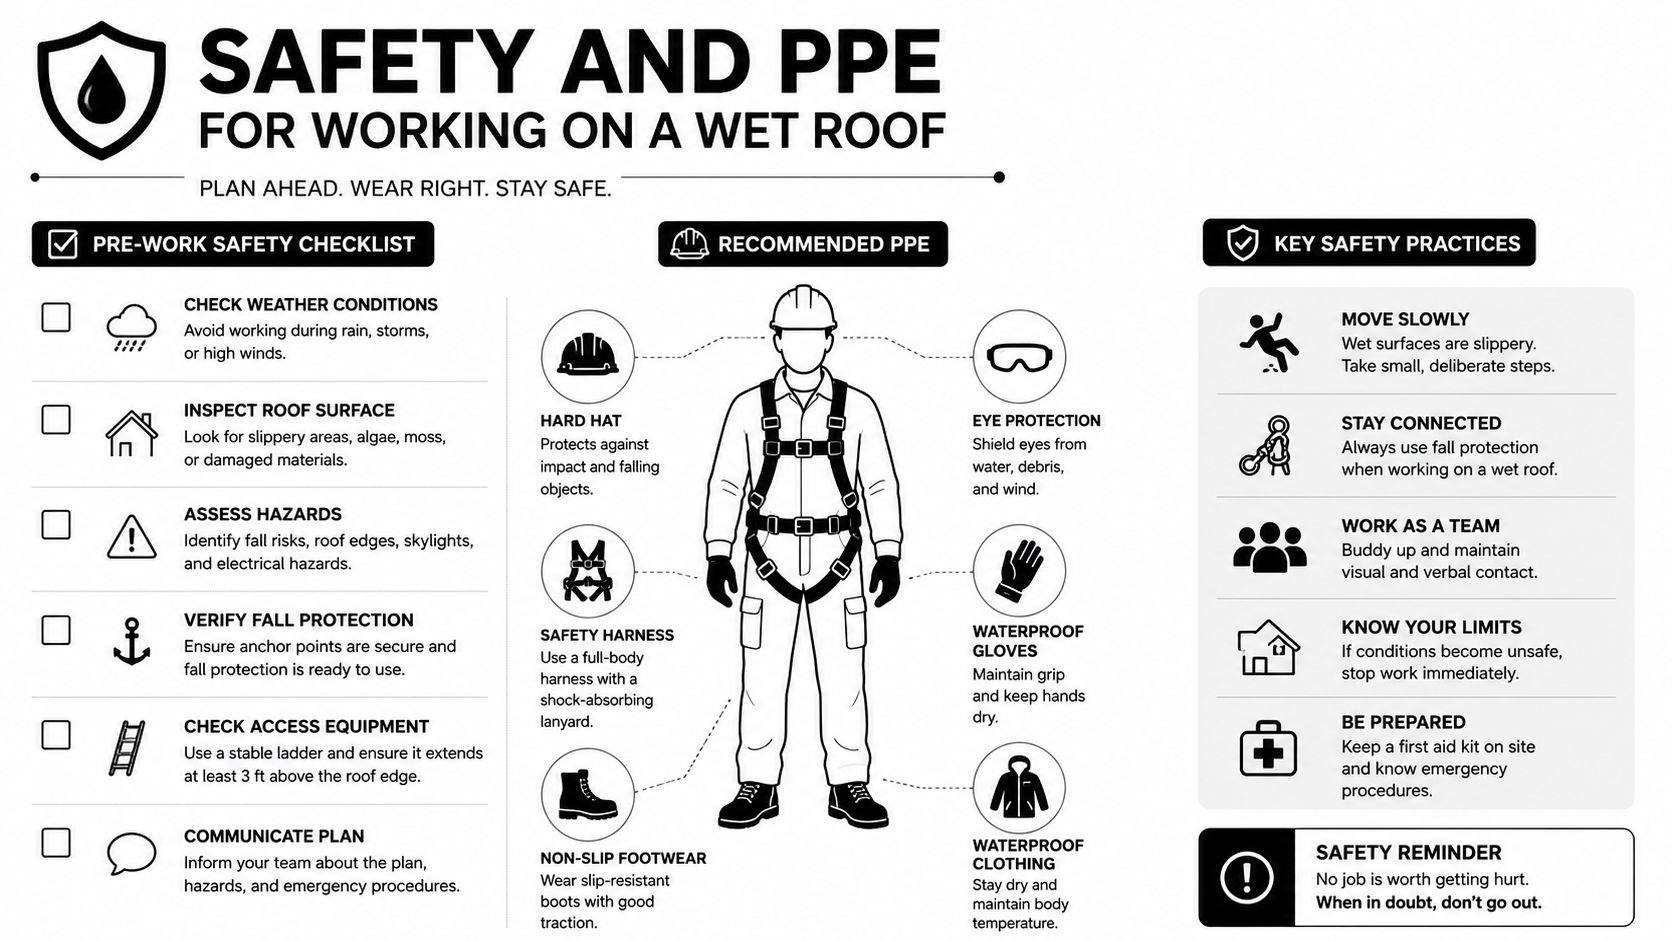
Review practical heights safety compliance tips before planning roof access. If the roof is too steep, too wet, too high, or visibly damaged, stay on the ground and call a roofer.
Preparing the Surface So the Patch Actually Sticks
Most failed tar patches fail before the first trowel stroke. In South Florida, humidity, salt residue, algae, and a fast-moving storm can leave a surface that looks dry while holding moisture in a seam or porous roofing layer.
Start by locating the likely entry point, not just the interior stain. Inspect seams, penetrations, roof-to-wall transitions, drains, and areas where water ponds. Water may travel along the roof deck before it drops into the ceiling cavity, so the patch often needs to extend uphill from the visible leak.
Sweep away loose gravel, leaves, and dirt. Scrape blistering or cracked material with a putty knife, and brush moss or algae away with a stiff brush. If a seam has lifted, cut back only the loose material until you reach a firm edge. Don't bury a loose flap under cement and expect it to become stable.
Drying matters more than adding material
The surface must be as dry as possible. A patch placed over trapped moisture can peel away as heat expands the moisture beneath it. Use clean rags first, then allow the area to air out. A hair dryer or heat gun on low can help push moisture from a small repair zone, but keep the tool moving, avoid overheating the membrane, and never use an open flame.
Hairline cracks sometimes need to be opened slightly so the cement can key into the substrate. The goal isn't to create a larger hole. The goal is to remove brittle edges and expose a sound channel that can accept sealant. Stop if the material feels soft, hollow, or broadly detached, because that indicates a condition beyond a simple surface patch.
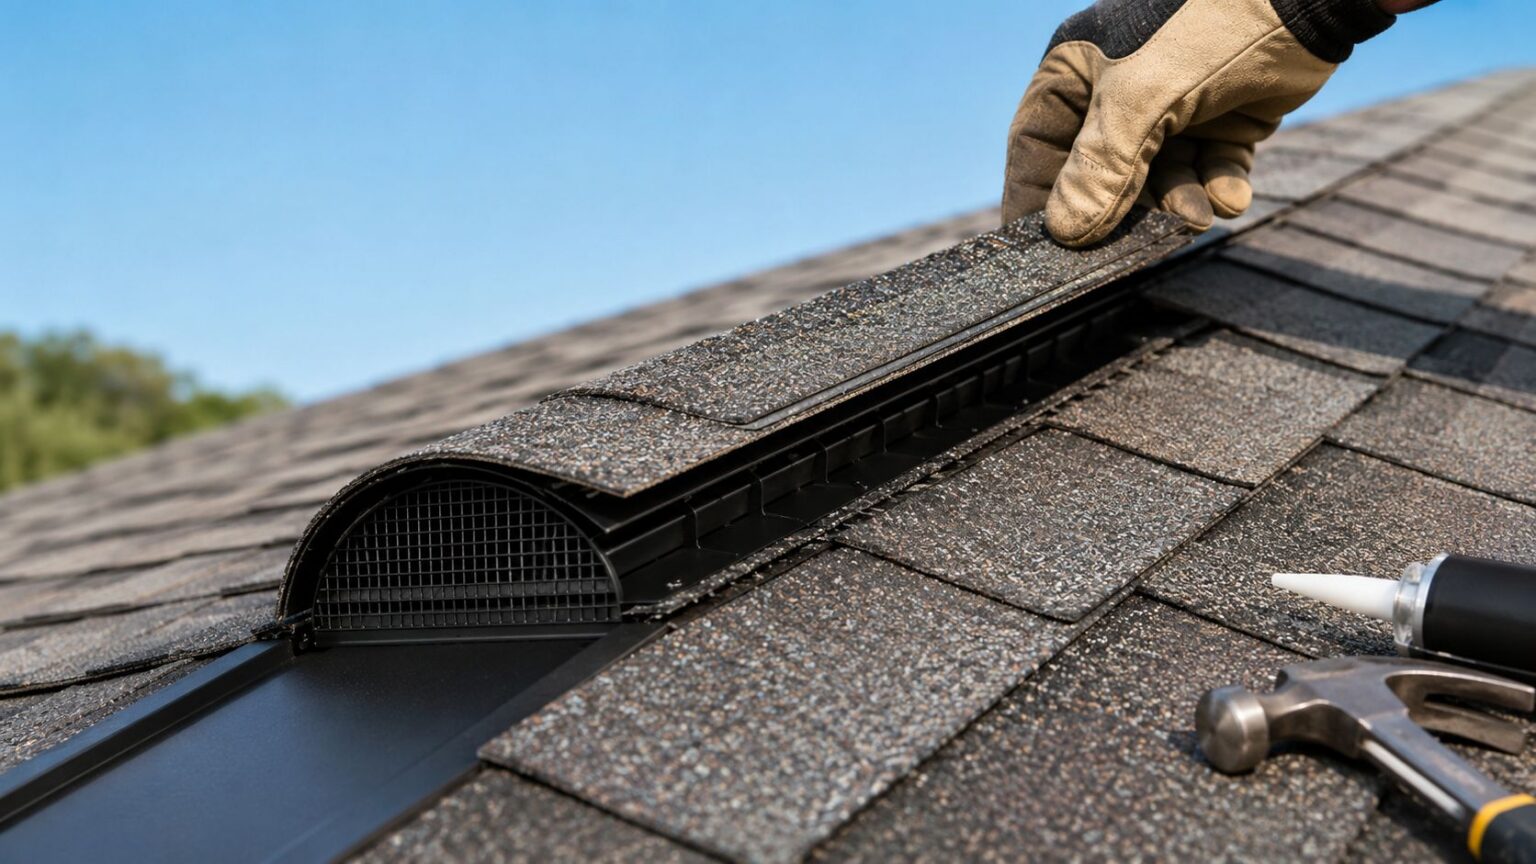
The same preparation principle applies around roof ventilation details. This shingle-over roof vent reference can help identify the kind of roof component that shouldn't be covered blindly with tar.
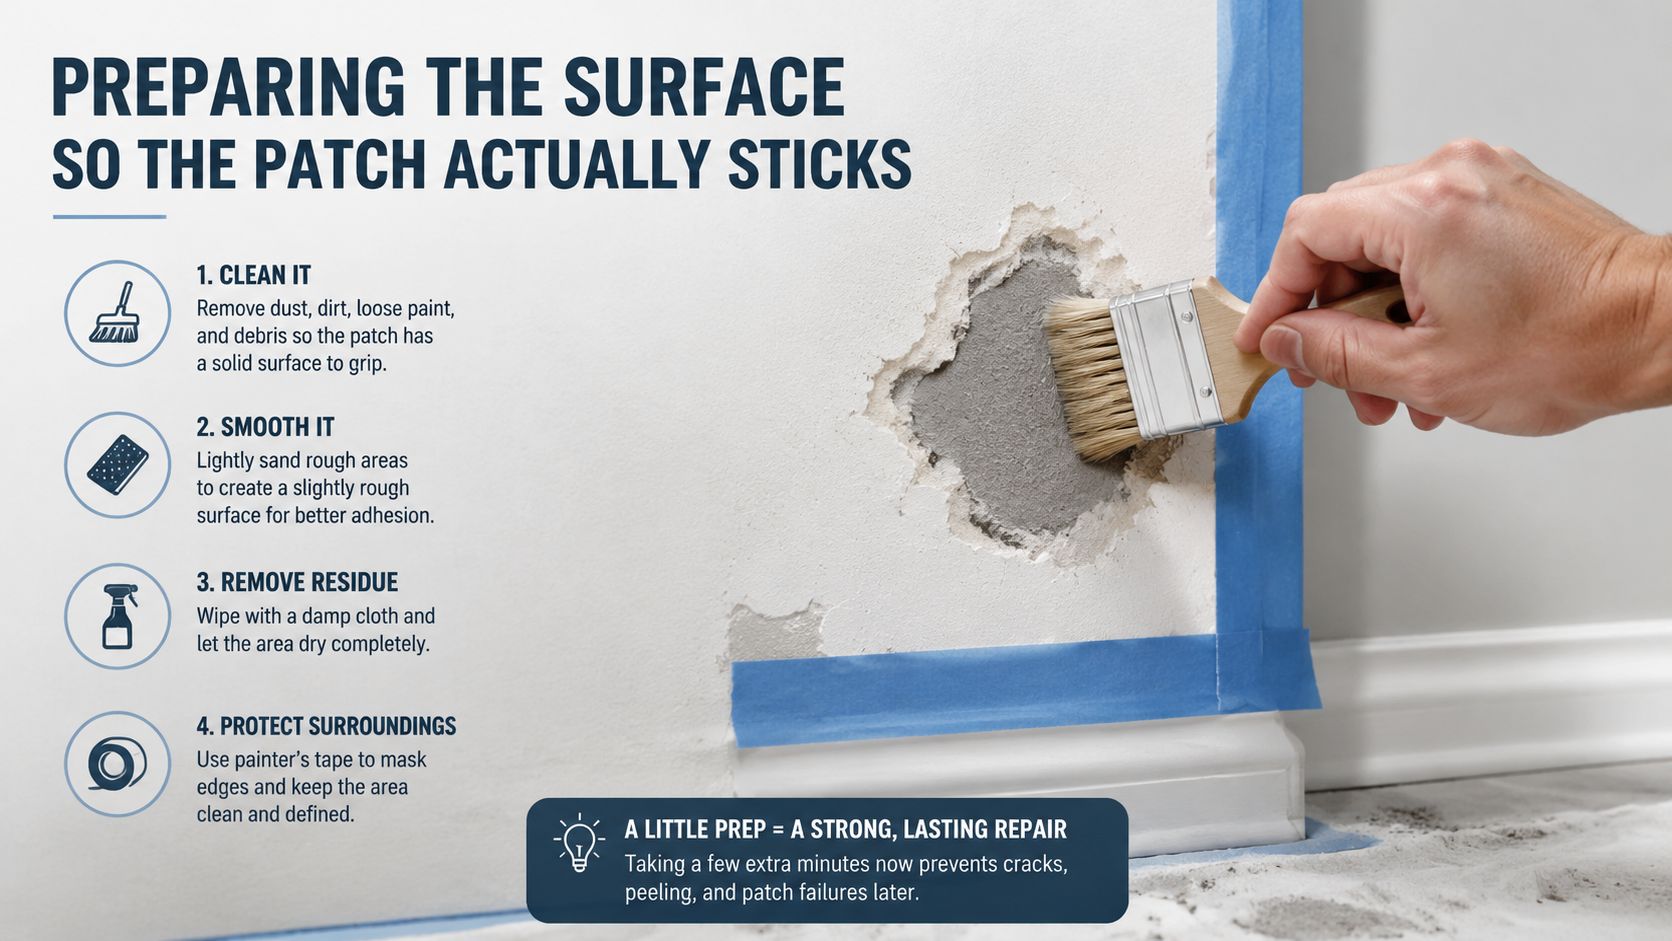
Practical rule: If you can still feel dampness, see a glossy water film, or pull dirt from the seam with a finger, the area isn't ready for cement.
Applying the Tar Patch Step by Step
Once the cleaned area is dry, the repair should look more like a small reinforced membrane than a pile of black material. Start with a generous bead of roofing cement pressed into the crack or opening. Work it into the defect with the putty knife so there are no hollow pockets beneath the surface.
Cut fiberglass mesh or roof patch fabric so it overlaps the damaged area by 2 to 3 inches on every side. Lay the fabric into the first coat while the cement is still workable. Press from the center outward, embedding the mesh without stretching it or leaving wrinkles that can catch water.
Spread a second coat over the fabric until the reinforcement disappears. Feather the edges with the knife, thinning the perimeter into the surrounding roof. A raised rim gives water a place to sit, while a feathered edge lets stormwater flow across the repair rather than track beneath it.
Build the patch in controlled layers
Two or three thin coats usually behave better than one thick glob. A heavy coat can skin over while the material beneath remains soft, trapping solvent and moisture. Thin layers also make it easier to see whether the mesh is fully covered and whether the perimeter is bonded.
For a larger breach, a small piece of sheet metal or a shingle can provide rigidity beneath the mesh, but it must sit flat and have sound roofing around it. Extend the repair uphill of the entry point. On a flat roof, uphill may mean toward the higher side of the ponding area or toward the penetration where water is entering. The patch should direct water over its surface, not invite water under its upper edge.
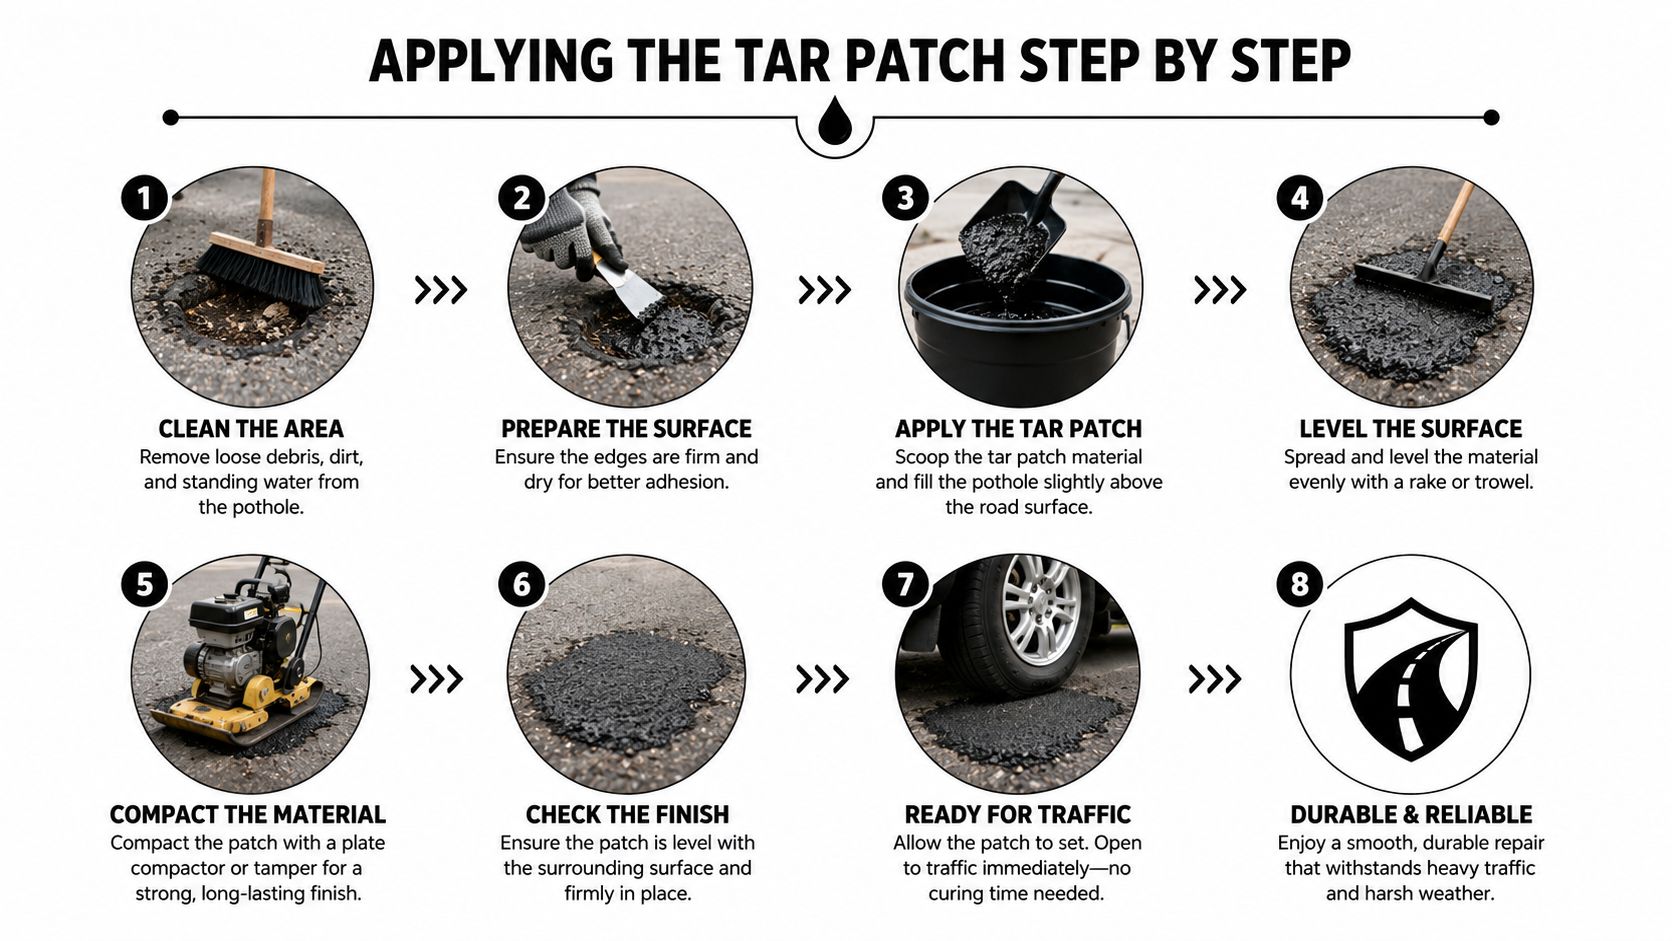
Don't test the repair by flooding it immediately. Give the material time to set according to the product label, and keep an eye on the weather. The patch is ready for a cautious visual check when it no longer looks wet or shifts under light contact. It isn't proof of a permanent repair, especially if the next storm produces ponding around the area.
How Long a Tar Patch Will Actually Last
A properly applied tar patch may last only 6 months to 2 years, according to recent repair guidance on temporary tar patches. This discussion of tar roofing repair also warns that extreme heat, cold, moisture, poor preparation, and recurring leaks can shorten that service life.
South Florida is not a mild test environment. UV exposure dries and stresses exposed material, afternoon thunderstorms repeatedly wet the repair, and ponding keeps water against its edges. Salt air can add to the general weathering burden, particularly near coastal properties. A patch that appears sound after a dry week can crack or pull away after repeated storm cycles.
Read the failure pattern
A crack through the patch usually means the repair couldn't accommodate movement or the underlying roof remains unstable. Peeling around the perimeter points toward poor adhesion, contamination, or moisture beneath the cement. A dark ceiling stain that reappears after rain means the water path wasn't found or the patch has opened again. When the patch pulls away in one broad sheet, the surface preparation or substrate condition deserves closer inspection.
For a larger breach, a heavy-duty tarp is often the better emergency barrier than tar alone. Guidance recommends at least 6-mil thickness, extending 3 to 4 feet beyond the damaged perimeter, with weights or non-penetrating anchors that won't create new holes. Commercial roof leak guidance describes temporary sealing as lasting roughly 24 to 48 hours to several days, depending on dryness and weather.
That performance window is useful during hurricane season, when a broad opening needs water diverted immediately and a proper repair can't happen during active weather. It isn't permission to leave the tarp or tar patch unattended. Check the area after weather clears, photograph changes, and schedule a permanent assessment.
Tar buys time. It doesn't buy certainty.
When to Call a Roofer and How to Maintain the Patch
A DIY patch has a narrow role. Call a roofer when the decking feels soft or sags, when several leak points appear, when interior mold or a musty odor develops, or when the ceiling stains return after every storm. Those signs suggest that the issue may involve wet structure, widespread moisture, failed drainage, or more than one opening.
Stay off the roof entirely if the home is two stories, the roof is steep, or the surface is tile or metal and you aren't trained to work on it. Structural damage, exposed wiring, unstable decking, and unprotected edges also move the job beyond emergency patching. A professional can inspect the roof system without turning a water problem into a fall injury.
Use a storm-focused inspection rhythm
For a flat roof in South Florida, make a visual check every few months. Look from a safe location for new ponding, displaced surface material, open seams, cracked patches, and debris around drains. Inspect more closely after every named storm or hurricane, but don't climb onto a wet roof immediately after the event.
Arrange a professional inspection every 1 to 2 years for a flat roof. Keep photos of each patch, note when the leak first appeared, record whether it occurs during light rain or a heavy downpour, and mark any room where staining returns. A photo of the roof penetration or seam can help a roofer understand the likely water path before arriving.
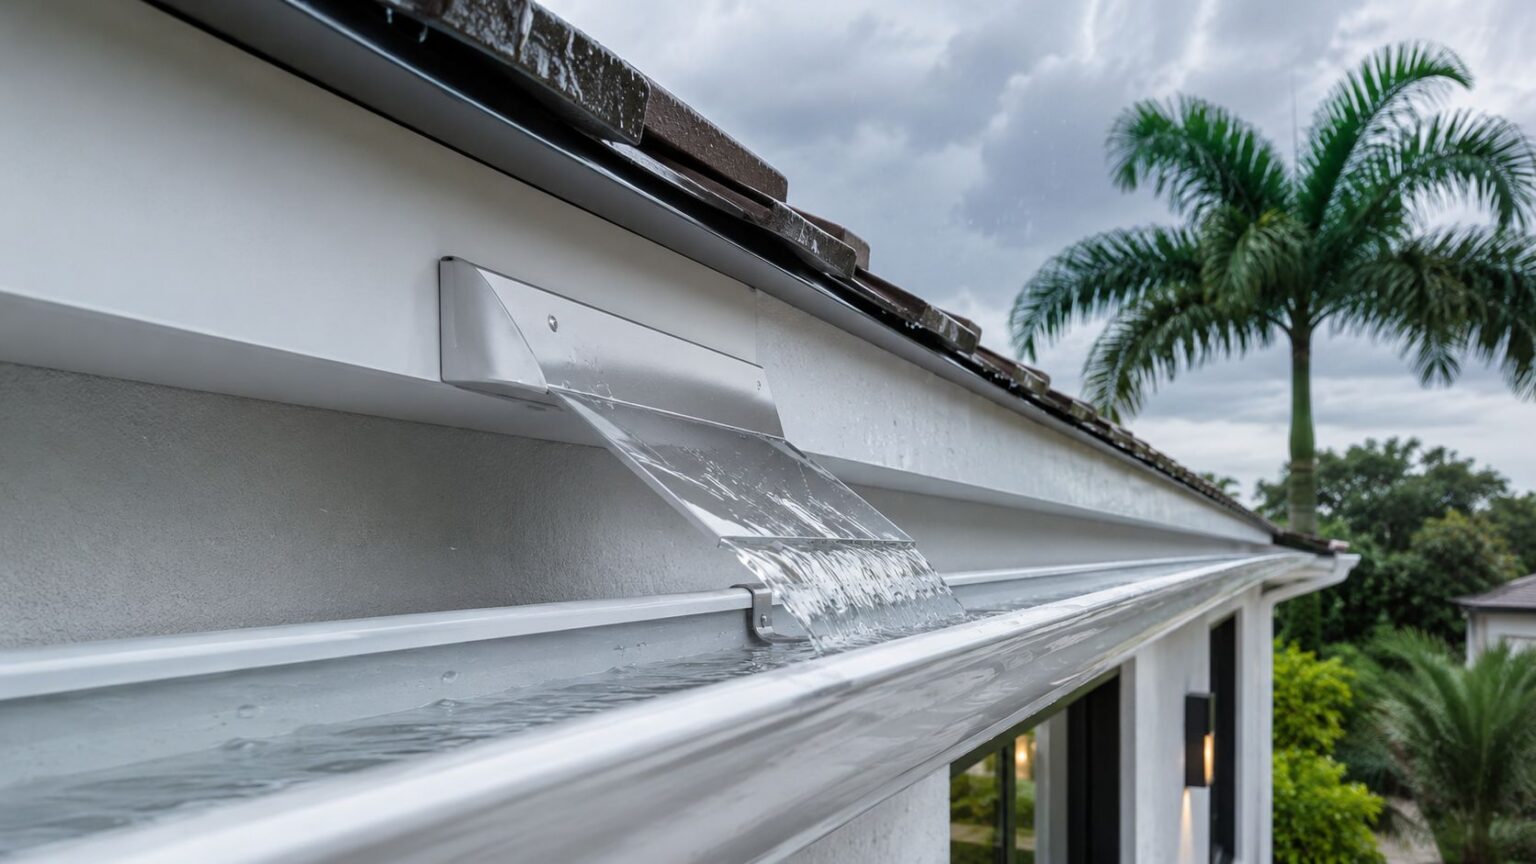
Drainage deserves special attention on low-slope roofs. This rain diverter and gutter reference illustrates why water control around roof edges and discharge points matters, but a diverter won't correct a damaged membrane or a roof deck that has begun to fail.
The next step is a licensed, insured local roofer who can provide a written assessment. Ask whether the existing roof is asphalt-based, whether the leak is localized, whether moisture has reached the deck, and whether the temporary patch should be removed as part of the permanent repair. Paletz Roofing and Inspections can evaluate roof leaks, document storm damage, and recommend repair or replacement options for properties across Broward, Miami-Dade, and Palm Beach counties.
If a tar patch is only buying time, contact Paletz Roofing and Inspections for a local roof leak inspection and written repair assessment. Share your photos, the date the leak appeared, and how the roof behaved during recent storms so the team can focus quickly on the likely entry point and permanent solution.