
That faint, brownish water spot on your ceiling is more than just an ugly blemish—it’s your first clue in the hunt for a hidden roof leak. The biggest mistake homeowners make is assuming the leak is right above the stain. From my experience, that’s rarely the case. Water is tricky; it can sneak in, travel along a rafter or beam, and only decide to drip down once it hits a low point, often several feet away from where it actually entered.
This is why your investigation should always start inside your home, not up on the roof. Your attic is the real crime scene, and it’s the best place to find the hard evidence you need. Before you even think about grabbing a ladder, a thorough look around up there will tell you most of the story.
Your First Clues Uncovering Hidden Water Damage
So, where do you begin? The key is to trace the water's path backward from the visible damage on your ceiling or walls. You're looking for the source, and the attic holds all the secrets.
Essential Tools for Your Internal Inspection
You don’t need a truck full of professional gear to get started. A successful initial search just takes a few basic items you probably already have lying around.
- A powerful flashlight: Seriously, your phone's light won't cut it. You need a bright, focused beam to spot faint water tracks, subtle discoloration on wood, and damp spots in dark, dusty corners.
- Protective gear: At a minimum, wear a good dust mask. You don't want to be breathing in decades of dust, insulation particles, or mold spores. A pair of gloves is a good idea, too.
- A camera or smartphone: Document everything. Take clear photos of stains, damp insulation, and any spot you suspect is an entry point. These pictures will be invaluable, whether you decide to tackle the fix yourself or need to show them to a pro.
What to Look For in the Attic
Once you're safely situated in the attic, the first thing to do is switch off your flashlight. Let your eyes adjust and look for any slivers of daylight poking through the roof deck. Even a pinhole of light is a dead giveaway for a water entry point.
Next, flick your flashlight back on and start methodically scanning the underside of the roof sheathing and the rafters. You’re looking for:
- Dark stains or water tracks running down the wood.
- Damp, compressed, or discolored insulation. Healthy insulation is fluffy; wet insulation gets matted and dark.
- A musty, mildew-like smell. Your nose is a great tool here—that unmistakable scent is a huge red flag for persistent moisture.
Pay special attention to anything that penetrates the roof: vent pipes, chimneys, skylights, or exhaust fans. In my experience, the seals around these are the most common failure points and often the first to go.
It's also worth noting that sometimes, what looks like a roof leak is actually an internal moisture problem. A detailed condensation risk assessment can help figure out the difference. This is especially common in poorly ventilated attics where warm, moist air from your living space rises and condenses on the cold underside of the roof.
The growing awareness of these issues is driving major investments in home protection. The market for water leak detection systems is projected to hit USD 8.43 billion by 2032, a clear sign that homeowners are getting serious about smart water management. You can discover more about this growing market on Metastat Insight. Taking the time to trace the source now can save you from becoming just another statistic later.
How to Perform a Safe Rooftop Inspection

Alright, you’ve checked the attic and ruled out any inside culprits. Your search for how to find roof leaks now takes you outside and onto the roof itself. This is where things get serious. Getting up on your roof is a task that demands respect and careful preparation. I can't stress this enough: safety is completely non-negotiable. A few simple rules can be the difference between finding the source of your leak and taking a trip to the emergency room.
First things first, pick the right day. Never, ever climb onto your roof during or right after it rains. Wet shingles are incredibly slick. You’ll want to choose a clear, calm, and dry day to make sure you have solid footing.
Gearing Up and Getting Started Safely
Before that ladder even comes out of the garage, you need the right gear. Your choice of footwear is surprisingly critical. Go for soft-soled, high-traction shoes like a good pair of work boots or even sneakers. Hard, smooth-soled shoes are a recipe for disaster—they can slip on shingles in an instant.
Now, let's talk about the ladder. This is your single most important piece of safety equipment. Always make sure it’s placed on firm, level ground. A good rule of thumb I always follow is to extend the ladder at least three feet above the roofline. This gives you something secure to hold onto as you transition from the ladder to the roof and back again.
Remember this: Your personal safety is far more important than finding a leak yourself. If your roof has a steep pitch, is more than one story high, or you just feel the slightest bit uneasy about it, stop. That’s your sign to call a professional roofer who has the training and proper safety equipment for the job.
Before you head up, it's smart to run through a quick safety check. Having the right gear and mindset is crucial for preventing accidents. Here's a simple checklist I use to prepare for any rooftop work.
Roof Inspection Safety Checklist
| Safety Check | Why It's Important | Required Gear |
|---|---|---|
| Check Weather Conditions | Avoids slippery surfaces from rain, frost, or dew. High winds can cause loss of balance. | N/A |
| Inspect Your Ladder | Ensures the ladder is stable and free from defects before you climb. | A sturdy, well-maintained ladder |
| Secure the Ladder | Prevents the ladder from slipping or shifting while you're on it. | Ladder stabilizers (if needed) |
| Wear Proper Footwear | Provides crucial grip on shingles and prevents slips. | Soft-soled, high-traction shoes |
| Use a Spotter | A second person can hold the ladder, call for help, and pass up tools. | A reliable helper |
| Have a Fall Protection Plan | Essential for steep or high roofs. Could save your life. | Safety harness and rope |
| Clear Your Pockets | Prevents dropping objects that could fall and hit someone or something below. | N/A |
| Know Your Limits | Recognizes when the job is too risky for a DIY approach. | A professional roofer's phone number |
Taking a few extra minutes to go through this list can make all the difference. Never rush safety.
What to Look For on the Roof
Once you're safely on the roof, it’s time to play detective. Your goal is to spot any potential entry point for water. From my experience, it’s almost always the small, easily overlooked details that cause the biggest headaches.
Start with a general scan of the "field" of your roof—the main expanse of shingles. You’re looking for any shingles that are:
- Cracked or broken: Even a tiny crack is an open invitation for water to seep underneath.
- Curled or cupped: This is a classic sign of aging. It means the shingle’s edges are lifting and the seal has been broken.
- Missing entirely: This one’s obvious. A missing shingle is a gaping hole in your roof's armor that needs immediate attention.
After checking the shingles, turn your focus to the areas where things stick out of your roof. We call these "roof penetrations," and they are notorious weak spots and the most common source of leaks. You'll need to carefully inspect the flashing and sealant around chimneys, plumbing vent pipes, exhaust fans, and skylights. Over time, that sealant can dry out, crack, and pull away from the surface, creating a direct path for rainwater to get in.
The global market for leak detection is a massive industry, a testament to just how critical these systems are for protecting our homes and infrastructure. Valued at USD 2.92 billion in 2024, it shows the immense focus on preventing water damage in every sector. You can read more about leak detection market trends to see how technology is evolving to tackle this universal problem. By carefully inspecting your own roof, you're performing a vital form of leak detection yourself, safeguarding your most valuable asset from preventable and costly damage.
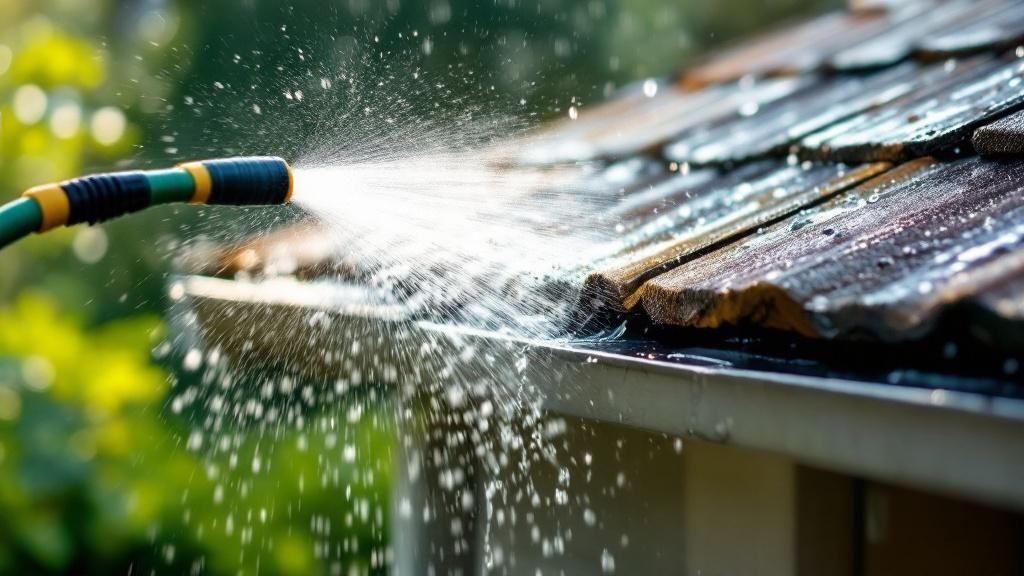
Using a Water Test to Pinpoint the Leak Source
Sometimes, even after a thorough check in the attic and on the roof, the leak’s entry point remains a mystery. When a visual inspection comes up empty, it’s time to bring out the big gun: a controlled water test. This is a classic technique we pros use to force a leak to show itself on your terms, not during the next torrential downpour. It’s an incredibly effective way to find those sneaky leaks that are otherwise impossible to spot.
The process is straightforward, but it demands patience and, crucially, a helper. You'll need one person outside with a garden hose and another person inside the attic, ready to spot the very first sign of a drip. Good communication between the two of you is everything.
This infographic lays out the methodical approach needed for a safe rooftop inspection, which is a vital step before you even think about starting a water test.
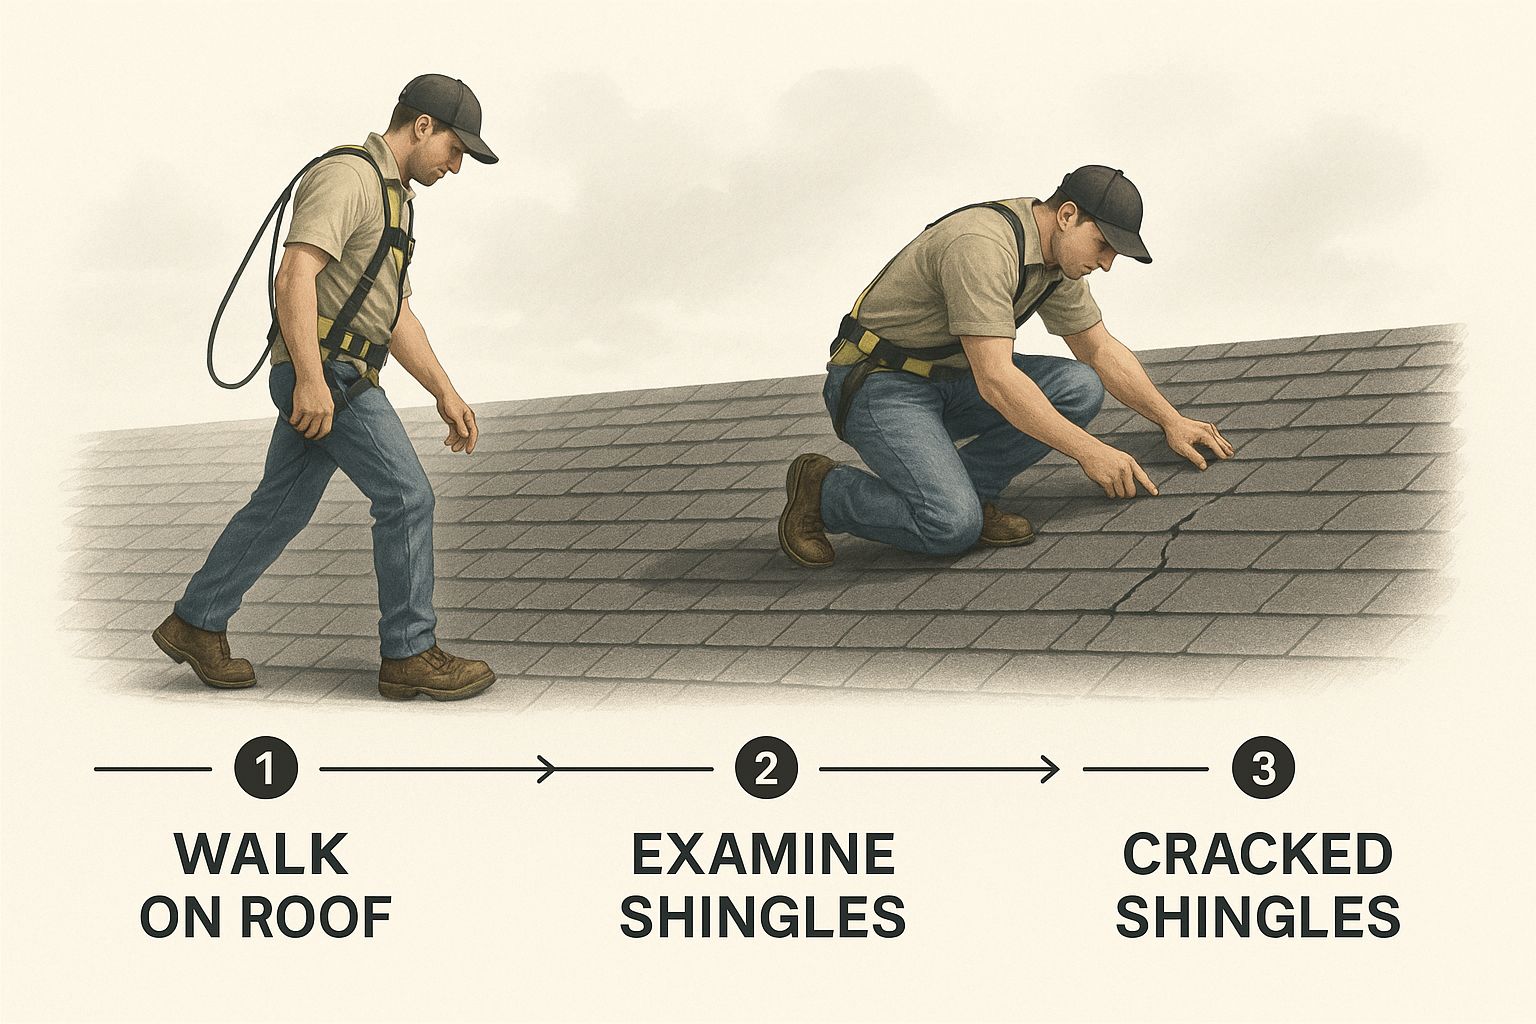
This visual guide highlights why careful movement and a detailed look are so important, especially around common problem spots like cracked shingles. A water test is what will ultimately confirm if those spots are the true culprits.
Conducting the Test Methodically
Here’s the golden rule of the water test: start low and work your way up. Whatever you do, don't start by soaking the entire roof or beginning at the very peak. This is a rookie mistake that will send you on a wild goose chase. Because water always runs downhill, soaking a high spot first means the water will flow over other potential leak areas, making it impossible to know where it actually got in.
Instead, you need to isolate small sections of the roof. Begin just above the area where you see the leak showing up inside. Have your helper on the roof gently run water over that one spot for several minutes—give it at least 5 to 10 minutes—before moving higher. And don’t use a high-pressure nozzle. You’re trying to mimic rainfall, not power-wash your shingles off the roof.
The person inside the attic needs to be vigilant, ready to shout the second they see a drip. Once water appears, you've hit the jackpot. This part requires patience, as it can sometimes take a while for water to work its way through the roofing layers and finally become visible.
Interpreting the Results
The moment your spotter confirms a drip, the person on the roof needs to stop the water immediately. Now you can zero in your inspection on that precise area. More often than not, you’ll find the culprit you missed during your first look:
- A hairline crack in a shingle you couldn't see before.
- A failed sealant around an old nail head.
- A tiny gap in the flashing that was easy to overlook.
Mark the area clearly with chalk so you can find it again later. This systematic approach takes all the guesswork out of the equation. You're no longer just guessing where the leak might be; you're recreating the exact conditions that cause it and getting 100% confirmation of the entry point. This methodical process ensures you’re preparing to fix the actual problem, not just a symptom of it.
Inspecting Common Roof Leak Culprits
Once you’ve done a visual check or a water test, your hunt for a roof leak usually leads to a small group of usual suspects. Leaks are rarely random. They almost always pop up where something interrupts the smooth, uniform surface of your roof.
These "penetrations" are the most vulnerable points because they rely on seals and flashing that break down over time. In my experience, the vast majority of residential leaks start in these exact spots. Knowing where to look—and what to look for—is half the battle.
The Most Common Trouble Spots on Your Roof
Think about anything that pokes through your roof: a vent pipe, a chimney, a skylight. Each one is a potential entry point for water. The flashing and sealant around these objects are your roof's first line of defense, but they don’t last forever.
Here are the primary culprits you need to inspect with a fine-tooth comb:
- Plumbing Vent Boots: These are the rubber collars that seal the plastic pipes sticking out of your roof. After years of sun exposure, the rubber gets brittle, cracks, or pulls away from the pipe, creating a perfect funnel for rainwater.
- Chimneys: That complex system of metal flashing where your chimney meets the roof is a notorious leak source. Look for rusted, bent, or separating pieces of flashing. Also, check the mortar on the chimney itself for any cracks.
- Skylights: They bring in beautiful natural light, but skylights are essentially controlled holes in your roof. Check for cracked or deteriorating sealant around the glass and frame, as well as any damaged flashing at the base.
- Attic and Exhaust Vents: Just like plumbing vents, these need sealed flashing to keep water out. Inspect them for cracks, missing fasteners, or sealant that has peeled away from the shingles.
A common mistake is to only check the sealant. I once traced a persistent leak to a plastic attic vent that had a hairline crack in the housing itself—something the homeowner had missed completely. Always inspect the entire component, not just the seal.
The need for precise leak identification is a big deal. The global market for roof water leak detectors hit about USD 1.5 billion in 2023 and is projected to nearly double by 2033. This shows just how critical early detection is. You can learn more about the roof water leak detector market and the tech involved. Your hands-on inspection serves the same purpose: stopping a small issue before it gets big.
Other High-Risk Zones to Check
Beyond things sticking through your roof, a few other areas are known for causing trouble. These spots are all about water flow and where debris likes to pile up.
To make it easier, here's a quick look at the most frequent sources of roof leaks and what signs of failure to watch for.
Common Roof Leak Hotspots
| Hotspot Location | Common Cause of Leak | What to Look For |
|---|---|---|
| Roof Valleys | Debris buildup (leaves, pine needles) causes water to back up and seep under shingles. | Piles of debris, damaged or rusted valley flashing, and granule loss on shingles in the valley. |
| Ice Dam Areas | In colder climates, melting snow refreezes at the eaves, forcing water up under the shingles. | Look for signs of water stains on the fascia boards or soffits below the roof edge. |
| Missing or Damaged Shingles | Creates a direct path for water to reach the underlayment. | Obvious gaps where shingles should be, or shingles that are cracked, curled, or lifting. |
By methodically examining each of these common culprits, you stop just searching for a leak and start performing a targeted diagnostic inspection. This focused approach is the key to successfully finding the source and getting one step closer to a solid fix.
Let’s be honest. Even with the best intentions and a healthy dose of DIY spirit, there comes a point where you need to put down the tools and pick up the phone.
Knowing when to call in a professional roofer isn't admitting defeat. It's making a smart, strategic decision to protect your safety and your home's structural integrity. Sometimes, the answer is simple: your roof is just too dangerous for an amateur to be poking around on.
Obvious Safety Red Flags
Certain situations scream "pro-only" right from the get-go. If your roof has a particularly steep pitch—basically, anything you can't comfortably and safely walk on—just don't. The same goes for any roof more than a single story high. The risk of a fall increases dramatically, and it’s simply not worth it.
You also have to consider the roofing material itself. Some materials are a minefield for the inexperienced.
- Slate or Clay Tiles: These are beautiful, but they're also incredibly fragile and expensive to replace. Walking on them without specialized training will almost certainly cause more damage than you’re trying to fix.
- Metal Roofs: While incredibly durable, metal can be as slippery as an ice rink, even when it’s bone dry. Professionals use very specific techniques and safety gear to navigate them safely.
When Your Best Efforts Just Aren't Enough
Beyond the immediate safety concerns, there are other clear signs that you’ve hit the limits of your DIY investigation. Maybe you've thoroughly checked the attic, inspected all the usual suspects around vents and flashing, and even done a water test with the garden hose. But the source of that pesky leak? Still a complete mystery.
This happens more often than you'd think, especially with complex roof designs or when water decides to travel in bizarre, unpredictable ways before showing up on your ceiling. A professional has seen it all before and comes equipped with specialized tools, like infrared cameras, that can trace elusive leaks completely invisible to the naked eye.
Here’s a critical takeaway: recognize when you're dealing with widespread damage. If your inspection uncovers large areas where the roof decking feels soft and spongy, or you see significant rot, a simple patch isn't going to cut it. This points to a much bigger, more systemic problem that absolutely requires a professional assessment and likely a major repair.
When you do make that call, being prepared can speed things up immensely. Tell the roofer exactly what you’ve seen—the location of the stains inside, what you found (or didn't find) in the attic, and the results of your water tests. This focused information gives them a huge head start, helping them pinpoint the problem faster and get your home protected from the next downpour.
Your Top Roof Leak Questions Answered
Even after you’ve tracked down the source of a leak, a lot of questions can start swirling. It's completely normal to feel a bit overwhelmed when you're figuring out what to do next, especially when it comes to repairs and insurance.
Let's cut through the confusion. I'll tackle some of the most common questions homeowners ask to give you the clear, straightforward answers you need to move forward with confidence.
How Much Does a Minor Roof Leak Repair Cost?
The honest answer? It really depends. The cost to fix a "minor" leak can swing wildly based on what’s actually causing it, where it is on your roof, and what kind of roofing material you have.
For a simple, straightforward fix—like sealing a cracked pipe boot or swapping out a handful of damaged shingles—you might be looking at a cost somewhere between $150 and $500.
However, if the problem is a bit more involved, like repairing compromised chimney flashing or replacing a rotted section of the underlying roof deck, the price can easily jump into the $500 to $1,500 range, or even higher. Because prices can vary so much, your best bet is always to get a few quotes from trusted, local roofers. That’s the only way to know you’re getting a fair price for your specific situation.
When you're dealing with water damage inside your home from a roof leak, insurance is often the next thing on your mind. It's so important to understand the crucial differences between flood and homeowners insurance to know exactly what your policy covers.
Can I Use Sealant as a Permanent Fix?
I get this question all the time. While grabbing a tube of roof sealant or caulk can feel like a quick win—and it’s a great temporary patch in an emergency—it is absolutely not a permanent solution.
Think of sealant as a first-aid bandage, not a long-term cure. These products just aren't built to withstand the constant beating from sunlight and temperature swings. Over time, they will break down, crack, and fail.
A proper, lasting repair nearly always means replacing the entire failed part, whether that's a shingle, a piece of flashing, or a vent boot. Relying on sealant for the long haul can actually make things worse by trapping moisture underneath, which speeds up rot and can lead to serious structural damage.
Does One Leak Mean I Need a New Roof?
This is the big fear for most homeowners, but take a deep breath—the answer is usually no. A single, isolated leak on a roof that's otherwise in decent shape, especially one that's less than 15 years old, can almost always be repaired without needing a full replacement.
But there are exceptions. If you're playing whack-a-mole with leaks popping up in different spots, or if your roof is getting close to the end of its typical lifespan (generally 20-30 years for asphalt shingles), then a full replacement might actually be the smarter, more cost-effective move. An experienced roofer can give your roof a full inspection and help you weigh the long-term pros and cons of a repair versus a total replacement.
When you need definitive answers and reliable solutions, trust the experts. For over 30 years, Paletz Roofing and Inspections has provided homeowners across South Florida with honest assessments and durable repairs. If you're dealing with a leak, don't wait for the problem to get worse—contact us today for a free quote and professional inspection. Find out more at https://paletzroofing.com.