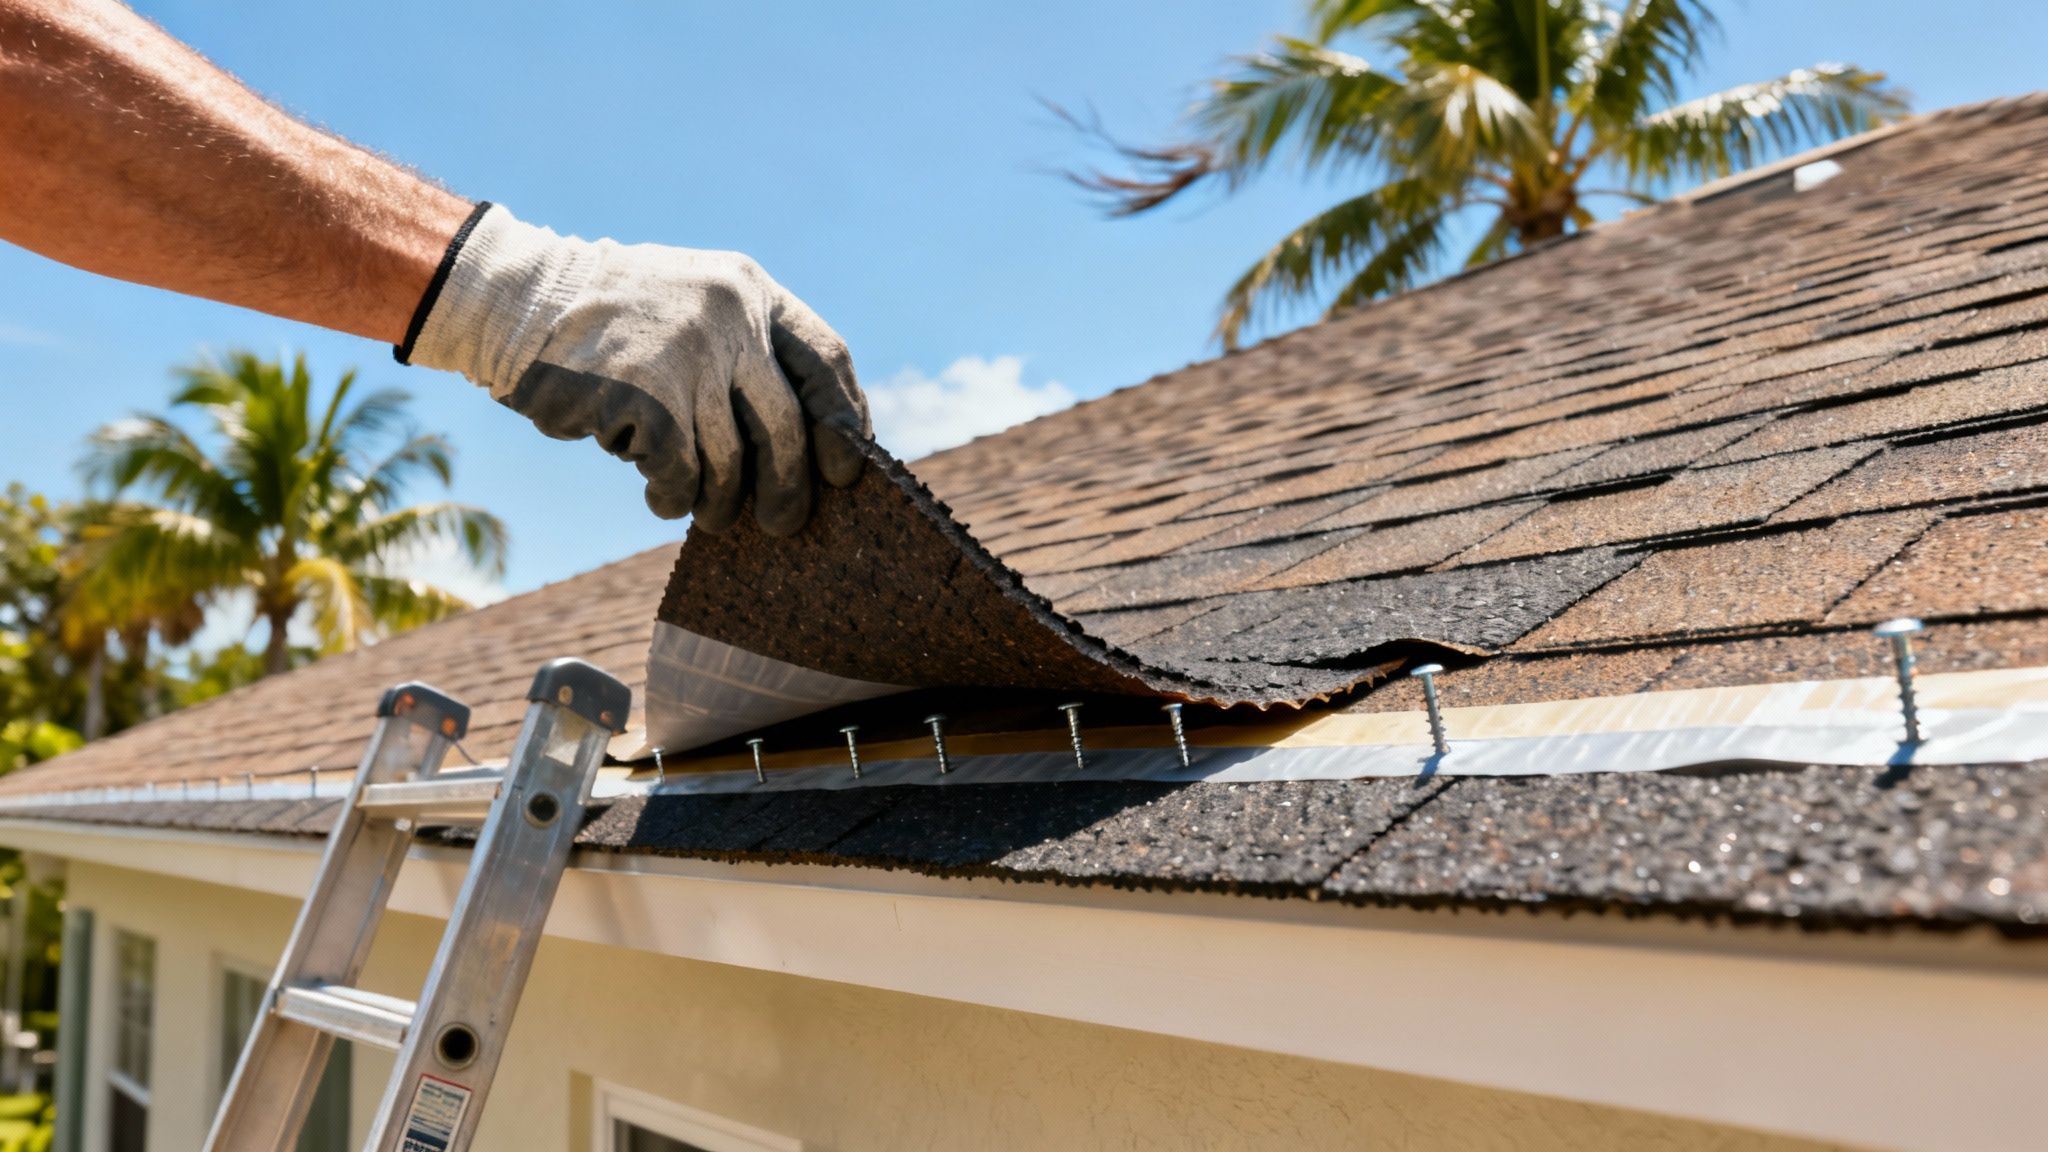
Once the wind dies down after a Coconut Creek storm, taking a few minutes to scan your roof can stop a small problem from turning into a major leak. Look for simple clues—curled edges, missing granules, or split tabs—while standing securely on a stable ladder.
Quick Roof Check For Wind Lifted Shingles
Give each roof plane a one-pass sweep from eaves to ridge. That first glance tells you whether you need a closer look or a temporary cover.
Keep your smartphone within reach to capture geotagged photos. Clear timestamps and locations make claims with insurers much smoother.
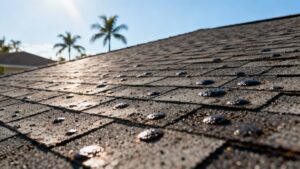
- Curling Edges along eaves that trap water
- Granule Deposits piling up in gutters after gusty winds
- Torn Or Lifting Tabs at shingle corners
- Valleys where wind pressure often pries shingles loose
Capture photos immediately to build a robust insurance record
Common Roof Indicators
These quick checks help you speed through your assessment and dodge hidden water intrusion. For example, homeowner Lisa in Lyons West spotted 6 lifted shingles and filed her claim within hours.
Check out our detailed damage photo guide for more immediate insights.
Stay tuned for hands-on fixes and long-term repair tips in the next section.
Understanding Wind Damage On Shingles
I’ve walked countless Coconut Creek rooftops after storms and noticed one thing: high winds don’t lift shingles at random. They zero in on seams and adhesive strips along the edges. As roofs age and the factory seal weakens, those vulnerable spots become invitation-only entry points for gusts.
Over time, asphalt shingles develop weak points where the sealant has weathered away. Poor nailing patterns or lower-grade materials only make wind uplift easier. In my experience, a roof is only as strong as its installation.
Common Failure Modes
- Curling Edges where wind finds small gaps and pries up tabs
- Granule Loss that exposes the felt layer to rain and UV damage
- Torn Tabs which peel back under pressure and lift whole sections

After a heavy gust, those three issues consistently top the list of defects during post-storm inspections in Coconut Creek.
Wind damage here isn’t just a nuisance. When gusts climb above 120 mph, roughly 30 – 50% of local shingle roofs end up needing major repairs or a full re-roof. For more on these findings, check out the official data here.
High Wind Ratings And Roof Age
Most modern asphalt shingles boast 110 – 130 mph wind ratings on the package. But here’s the catch: as soon as a roof hits the 15-year mark, real-world performance often falls below those numbers.
Roof age often correlates with a 50% increase in shingle failure during severe gusts
That stat alone can help you decide when it’s time for a proactive upgrade, rather than waiting for leaks or blow-offs.
Wind Speed Impact On Shingle Damage
This table shows how different wind speed ranges correlate with the probability of significant shingle damage requiring repairs.
| Wind Speed (mph) | Damage Probability (%) |
|---|---|
| 0 – 70 | 5 – 15 |
| 70 – 100 | 20 – 40 |
| 100 – 120 | 50 – 70 |
| Above 120 | 75 – 90 |
Even winds around 100 mph can spell trouble for an aging roof, with up to 70% of shingles at risk. Tracking both wind ratings and roof age will help you stay one step ahead of the next storm.
Conducting Post-Storm Roof Inspection
I still remember the morning after that sudden squall rolled through. From my driveway, I could spot curling shingle edges and a drift of granules in the gutters. It was clear this wasn’t a quick glance job—it called for a systematic check.
Begin from the ground. Look for:
- Curled tabs trapping rainwater at the roof edge
- Granule deposits in downspouts or valleys
- Loose or missing tabs that flutter in the breeze
A careful walkthrough often reveals what insurance adjusters overlook.
Ground Level Survey
Armed with a smartphone and a sharp eye, document every oddity. Timestamped photos with descriptive notes can be a lifesaver when it’s time to file a claim.
Keeping images organized in clearly labeled folders or a simple spreadsheet streamlines communication with adjusters. Trust me, they appreciate the clarity.
Close-Up Inspection
Climbing the ladder, I slip on gloves and eye protection before testing shingle adhesion. A thin, flat tool under a corner will tell you if the seal is holding.
Then I slip into the attic. Damp insulation or rusty nail heads can point to slow leaks you’d never see from the roof deck.
- Assign each roof section a unique code
- Capture both wide-angle and close-up shots for every code
- Note the issue type and precise location beside each image
This photo-tagging method turns a mountain of pictures into an easy-to-navigate report.
Wind Speed And Shingle Performance
Even roofs built to withstand 110 mph can start to shift once winds hit 70–80 mph, and by 100 mph, shingles can fail catastrophically. To dig deeper, explore Florida’s wind speed maps and their impact on roofs:
| Wind Speed | Typical Effect |
|---|---|
| 70–80 mph | Initial shingle tab lifting |
| 100 mph | Noticeable shingle loss |
| 110 mph | Design rating for top brands |
Florida Wind Speed Maps offer more context on these figures.
Here’s a snapshot from wind speed data showing storm impacts on shingles

The graphic above shows how pressure can overwhelm sealant strength and lift shingles.
Next Steps
- Download our free checklist to ensure no section gets missed.
- Store tagged photos in a cloud folder for quick access.
- Share your full report with Paletz Roofing and your insurer without delay.
Attic Inspection
Once the roof deck is checked, move inside. A hidden leak can start as a faint stain:
- Discolored rafters or trusses
- Patches of mold or that telltale musty scent near vents
- Clumps of wet or shifted insulation
Documentation Tips
- Label each photo with the area, date, and issue type
- Keep backups in email drafts and cloud storage
- This digital trail can cut days off your claims process
When To Call A Professional
Even the most thorough DIY inspection has its limits. A certified roofer can verify your findings, provide a detailed report, and recommend the right repairs.
For a deeper dive into the process, check out the Paletz Roofing Inspection Checklist.
Securing Lifted Shingles With Temporary Fixes
When you can’t get a roofer out right away, those wind-lifted shingles around Coconut Creek become an open invitation for rainwater. A well-executed DIY patch won’t replace a full repair, but it will keep moisture at bay until the pros arrive.
Once you’ve mapped out your approach on the ground, gather these essentials:
- Low-stretch roofing tape, rated UV-resistant and high-temp
- #8 gauge stainless-steel nails to prevent rust stains
- A heavy tarp (at least 10×12 feet) for full coverage
- Battens and a rubber roller for firm adhesion
- Ladder stabilizer and non-slip gloves
“I learned the hard way that overtightening nails cracked my shingles,” says one homeowner.
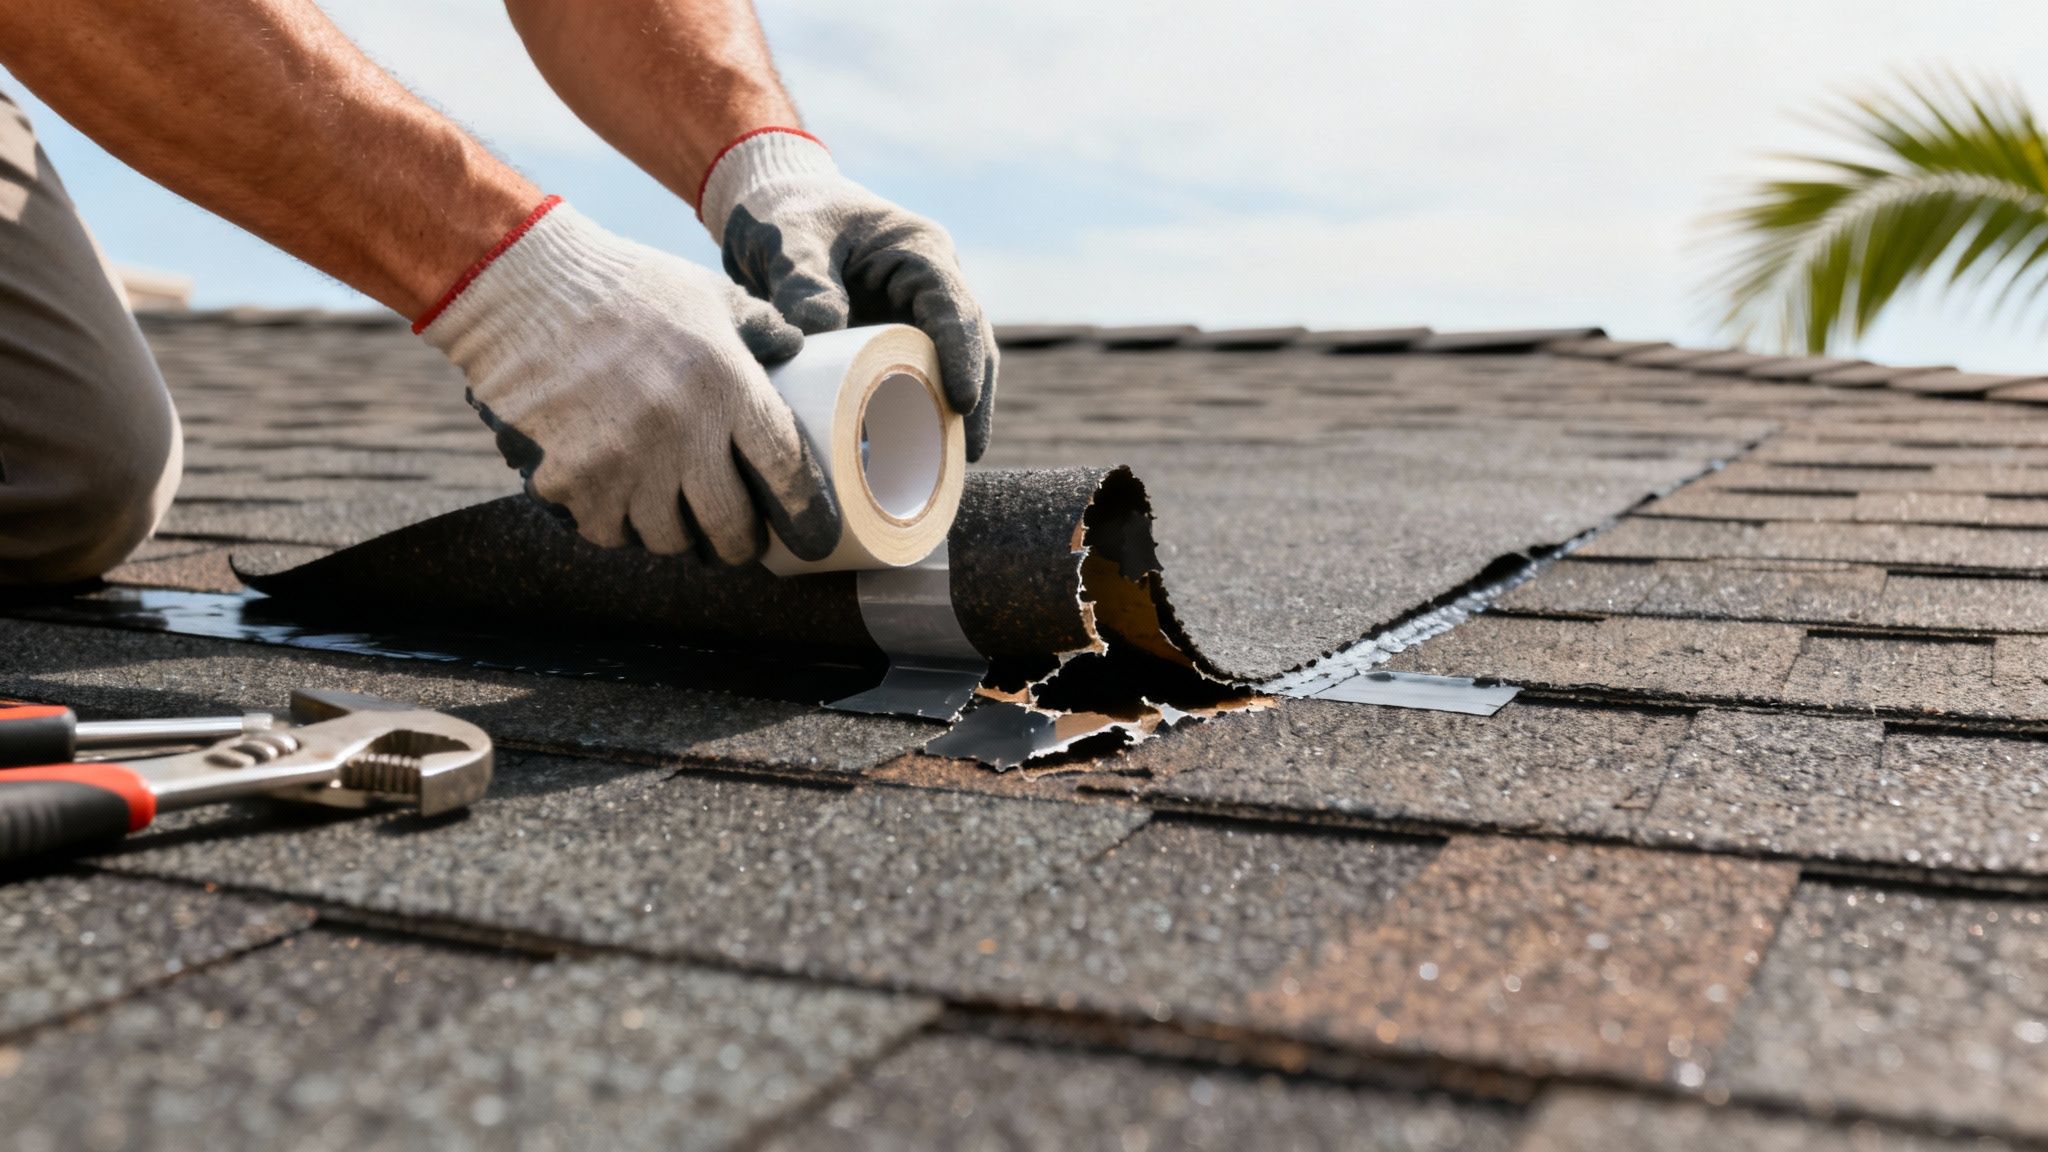
Applying Roofing Tape Under Shingles
Gently lift the curled edge with a flat bar. Cut a piece of tape just wider than the shingle tab and slide it under the lift. Then, press down firmly with your roller, working from center outwards to avoid trapping any moisture.
- Gently pry up each shingle tab
- Cut tape to match the shingle’s width
- Slide the tape under the lifted edge
- Roll with a rubber roller to seal out moisture
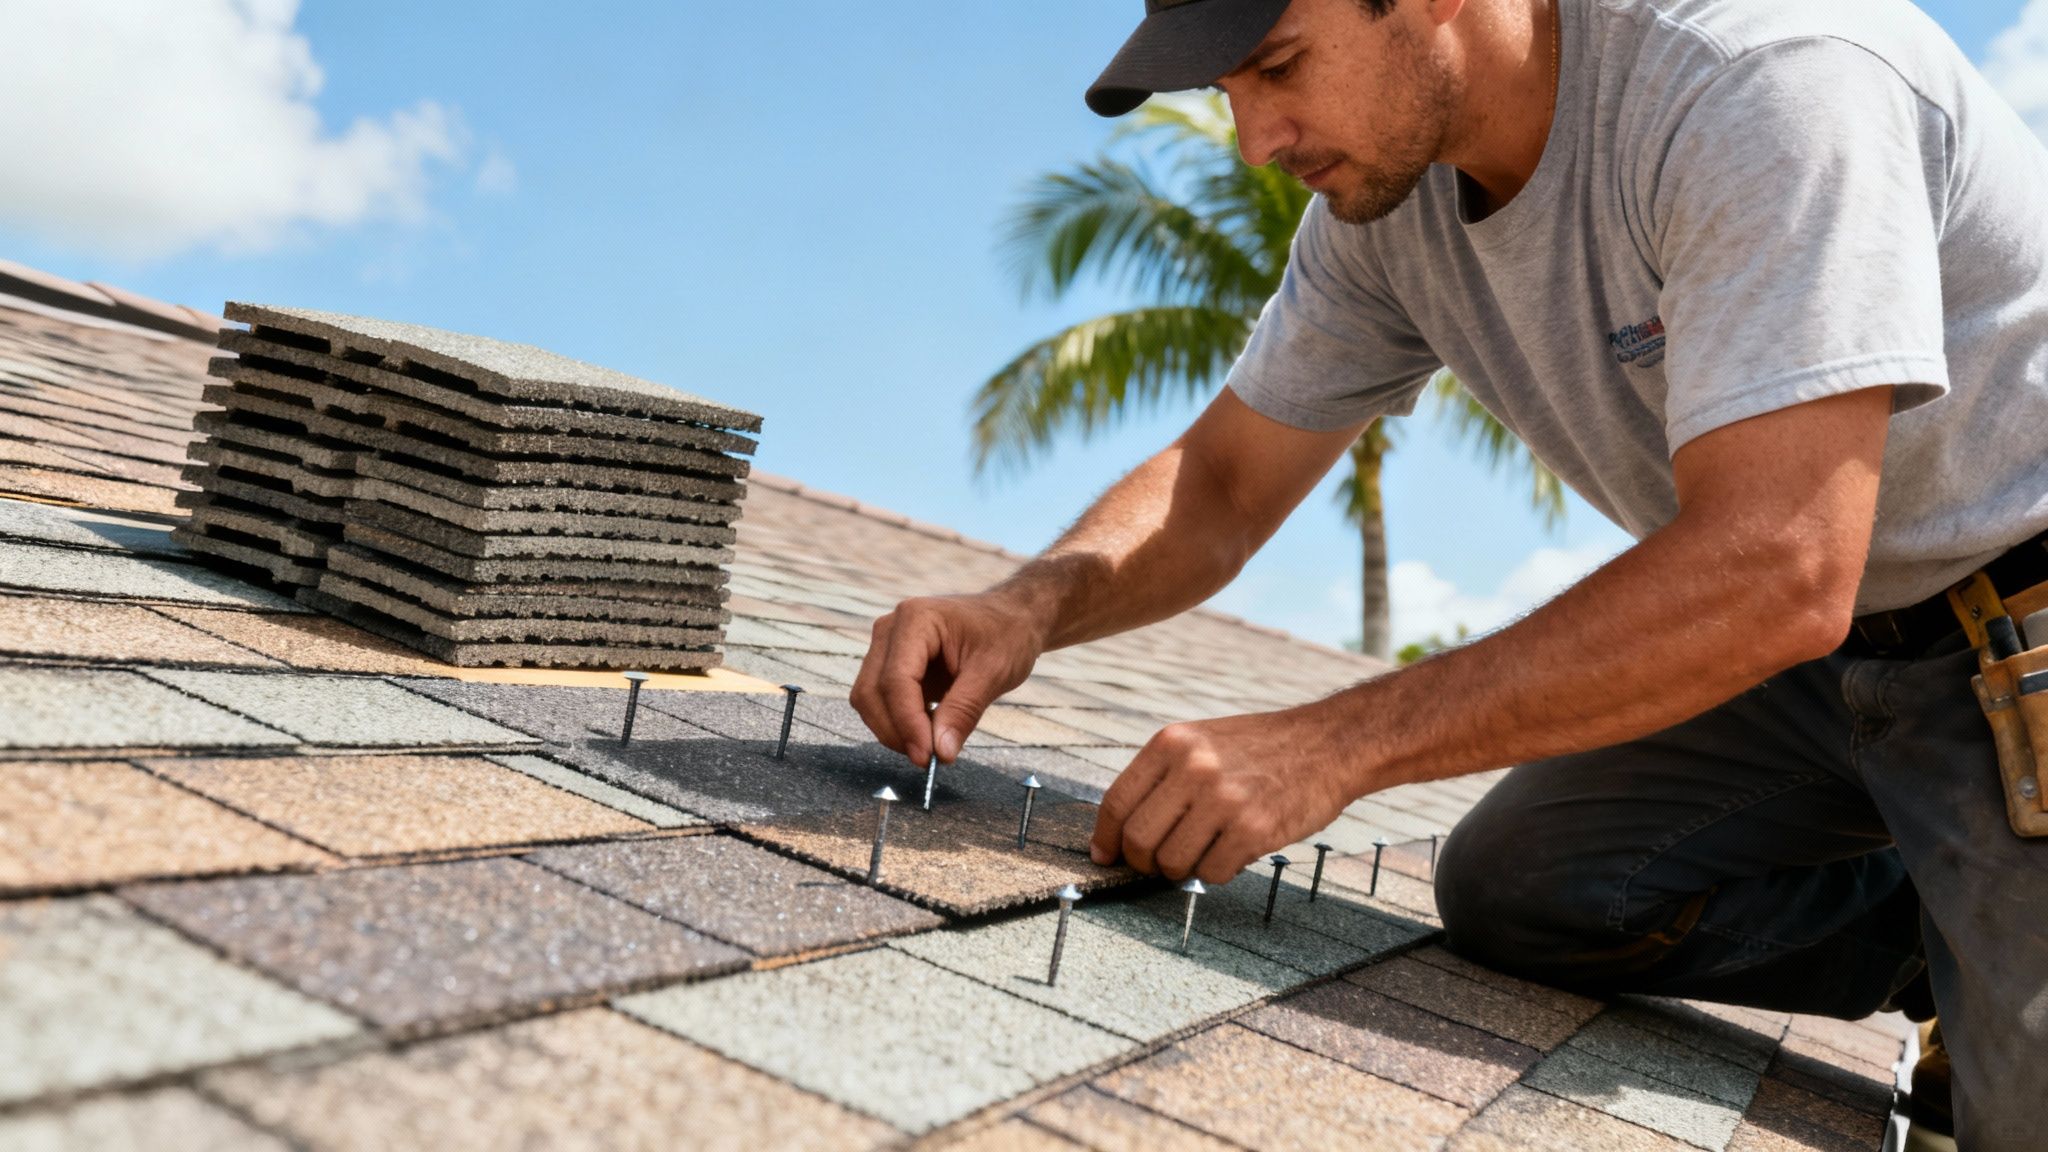
Nailing Edges Securely
Choose stainless-steel nails that mimic the original pattern. Drive them just above the seal strip, sinking each head flush without bending the shingle tabs. This simple step restores much of the panel’s wind resistance.
- Place nails every 6 inches along seams
- Drive flush to prevent bent tabs
- Use a depth gauge for consistent nail-head height
Laying Tarps Correctly
Drape your tarp from the ridge down to the drip edge. Secure battens over the edges, making sure you nail only into wood. Finish by tucking the top edge under flashing and sealing with outdoor-grade caulk.
- Drape tarp over the peak and smooth down
- Position battens along edges, nailing into wood only
- Seal top edges under flashing with outdoor-grade caulk
Read also Check out our detailed patch photos Homeowner Shingle Tape Guide
In one case, these targeted actions kept a family’s attic dry for 2 weeks before a full repair crew arrived. Remember to inspect your temporary fixes daily and always stick to proper ladder safety.
Safety Tips
Working at height demands extra care. Before climbing up, double-check your fall protection and secure a spotter at the base of the ladder. Keep hands free by using a tool belt and avoid leaning too far off center.
- Wear a harness when working above 12 feet
- Inspect ladder feet and footwear for slip resistance
- Keep a spotter to hold the ladder steady
- Secure tools in a belt to maintain three points of contact
Test each repair gently before moving on.
These temporary measures are just that—temporary. Schedule a full assessment with Paletz Roofing soon to prevent further damage.
Permanent Repair Strategies For Lifted Shingles
When high-speed gusts peel shingles away, a quick slap-on patch only delays the real headache. You need a repair that locks everything back into place, layer by layer, so you’re not chasing leaks after the next Coconut Creek blow.
Properly executed, a permanent fix restores both the underlayment and the shingles themselves—saving money and stress down the road.
Selecting High-Wind Shingles
Over the years, I’ve seen three categories stand out when wind speeds climb past 100 mph. Each balances cost against longevity in its own way:
| Shingle Type | Cost per Sq Ft | Warranty (Years) | Wind Rating |
|---|---|---|---|
| Asphalt | $1–$3 | 15–20 | Up to 110 mph |
| Architectural | $3–$5 | 20–25 | Up to 130 mph |
| Synthetic | $4–$7 | 30+ | Up to 150 mph |
A project last season had us swap out budget shingles for a synthetic blend—after a 140 mph gust tore right through the old roof. That upgrade still looks rock-solid.
Correct Nailing Patterns And Nail Placement
Restoring sealant pressure is half the battle. Overdriven or rusty nails leave gaps where wind pries shingles loose again.
• Remove old fasteners and check the felt beneath for rips.
• Drill pilot holes just above the seal strip—this prevents wood splitting.
• Drive #12 gauge stainless or hot-dipped galvanized nails flush with the shingle, spacing them about 4 inches apart.
Proper nail placement can boost wind resistance by 35%, something I’ve verified during on-site wind testing.
Before you nail, walk the deck. Soft spots or water stains often signal a need to address the plywood beneath.
Replacing Damaged Sheathing
Occasionally, the deck itself takes the brunt of water intrusion. Rather than strip the entire roof, I cut out only the bad section.
• Scan with a moisture meter—readings over 18% usually mean rot.
• Sagging panels or dips underfoot confirm weakened support.
• Peeling or mold growth at the edges indicates delamination.
Once you remove the bad ply, fit a new panel snugly against the joists. Nail every 6 inches along edges, then seal all seams with a 4-inch peel-and-stick underlayment.
For local expertise on materials and wind-zone rules, talk to professional roofing services in Broomfield.
Code Compliance And Wind Zones
In Coconut Creek (Zone 2), the Florida Building Code mandates shingles rated for at least 130 mph uplift. Always verify labels before you order.
Architectural styles often hit that mark out of the box, while top-end synthetic options exceed 150 mph by design. Matching your budget to the required wind rating will steer your final decision.
Finish these repairs now and you’ll head into the next storm season confident that your roof will hold.
Managing Insurance Claims And Professional Repairs
Documenting post-storm damage can make or break your claim on wind-lifted shingles in Coconut Creek. Clear, time-stamped photos paired with detailed reports give adjusters less room for doubt.
- Detailed roof inspection reports with dates and notes showing storm impact
- High-resolution photos highlighting lifted shingles and granule loss
- Contractor estimates outlining repair scopes and labor rates
“Our adjuster almost denied the claim until we showed roof age data paired with storm photos,” recalls homeowner Erica.
The screenshot below shows how wear and tear versus storm damage is analyzed by carriers.
This graph highlights the most common exclusions and shares tips on prepping solid evidence. Learn more about storm versus age damage findings on FloridaRoof.
Insurance carriers often question whether wind-lifted shingles stem from storm forces or normal roof aging. They may deny or reduce claims by citing wear and tear exclusions, so regular roof assessments are crucial.
Navigating the complexities of claims requires understanding how the industry operates. Explore insurance industry specifics for additional context.
How To Appeal Claim Denials
If you receive a lowball offer, start by reviewing your policy’s exclusions. Then gather contractor reports that counter any age-related arguments.
- Compare policy clauses against the damage you’ve documented
- Provide a certified roofer’s detailed report
- Request a second inspection or independent appraisal
- Escalate to state insurance regulators if necessary
Knowing when to call a professional can save time. Contact Paletz Roofing and Inspections for a certified evaluation. Their experts negotiate fair labor rates and help you avoid Coconut Creek’s peak roofing season delays.
Scheduling inspections and repairs early in the season can help you avoid backlogs and could reduce labor premiums by up to 15 percent, lowering overall costs.
Frequently Asked Questions
Taking early action on wind-lifted shingles around Coconut Creek can save you headaches down the road. Here are some common concerns and practical tips:
-
What Are the First Signs My Shingles Have Lifted After a Storm?
Look for shingles with curled or raised edges, a buildup of granules in your gutters, or loose tabs that flutter when the wind blows. -
How Long Can I Rely on Emergency Fixes Before They Fail?
A well-secured tarp or high-quality roofing tape can last days to weeks. Still, make it a habit to check the area daily and arrange permanent repairs within two weeks. -
When Should I Involve an Insurance Adjuster Versus a Roofing Contractor?
Snap clear photos of every damaged section right away and file them with your insurer. If there’s any pushback on your claim, bring in a certified roofer’s inspection report to back you up. -
Can I Negotiate Pricing with Contractors During Peak Season?
Absolutely. Gathering multiple quotes and grouping projects in the same neighborhood often leads to more competitive bids when crews are busiest.
Early documentation often tips the scales in your favor when filing claims.
Next Steps After Damage
Don’t wait for the next gust of wind to cause more trouble. Reach out to a trusted roofing professional who can confirm your assessment and deliver a permanent solution.
Ready to safeguard your roof? Contact Paletz Roofing and Inspections for fast, reliable service.