
That moment your heart sinks—you've spotted a water stain on the ceiling. Or worse, a steady drip… drip… drip… into your living room. When you find a ceiling leak in your Oakland Park home, what you do in the first 30 minutes can literally save you thousands of dollars in repairs. The key is to act fast and focus on three things: contain the water, protect your belongings, and document everything.
Your Immediate Action Plan for a Leaking Ceiling
Discovering a leak is stressful, but a calm, step-by-step response will make all the difference. Right now, your only job is damage control. Don't even think about climbing into the attic to find the source just yet—that comes later. First, you need to manage the immediate threat.
Grab the nearest bucket or a large pot and stick it directly under the drip. If the water is splashing out, toss an old towel into the bottom of the bucket. It’ll deaden the sound and stop the splatter.
Now, if the ceiling is bulging or sagging, you've got a more serious problem brewing. That bulge is a pocket of water putting immense pressure on your drywall. It could collapse at any moment, and you do not want to deal with that mess.
Protect Your Home and Possessions
With the drip contained, it's time to get everything valuable out of the splash zone. Water is incredibly destructive and moves fast, ruining furniture, flooring, and electronics in its path.
- Move Your Valuables: Get any furniture, rugs, and electronics out of the room. If something is too big or heavy to move, cover it completely with thick plastic sheeting.
- Soak Up the Spills: Use old towels or a mop to get any standing water off the floor immediately. The faster you act, the better your chances of preventing warped floorboards or ruined carpet padding.
- Consider a Relief Hole: I know this sounds crazy, but if your ceiling is sagging, you need to release that pressure. Place your bucket under the lowest point of the bulge and carefully poke a small hole with a screwdriver. A controlled drain is far better than an uncontrolled ceiling collapse.
Safety First: If the leak is anywhere near light fixtures or electrical outlets, head straight to your circuit breaker and shut off the power to that area. Water and electricity are a lethal mix. Don't take any chances.
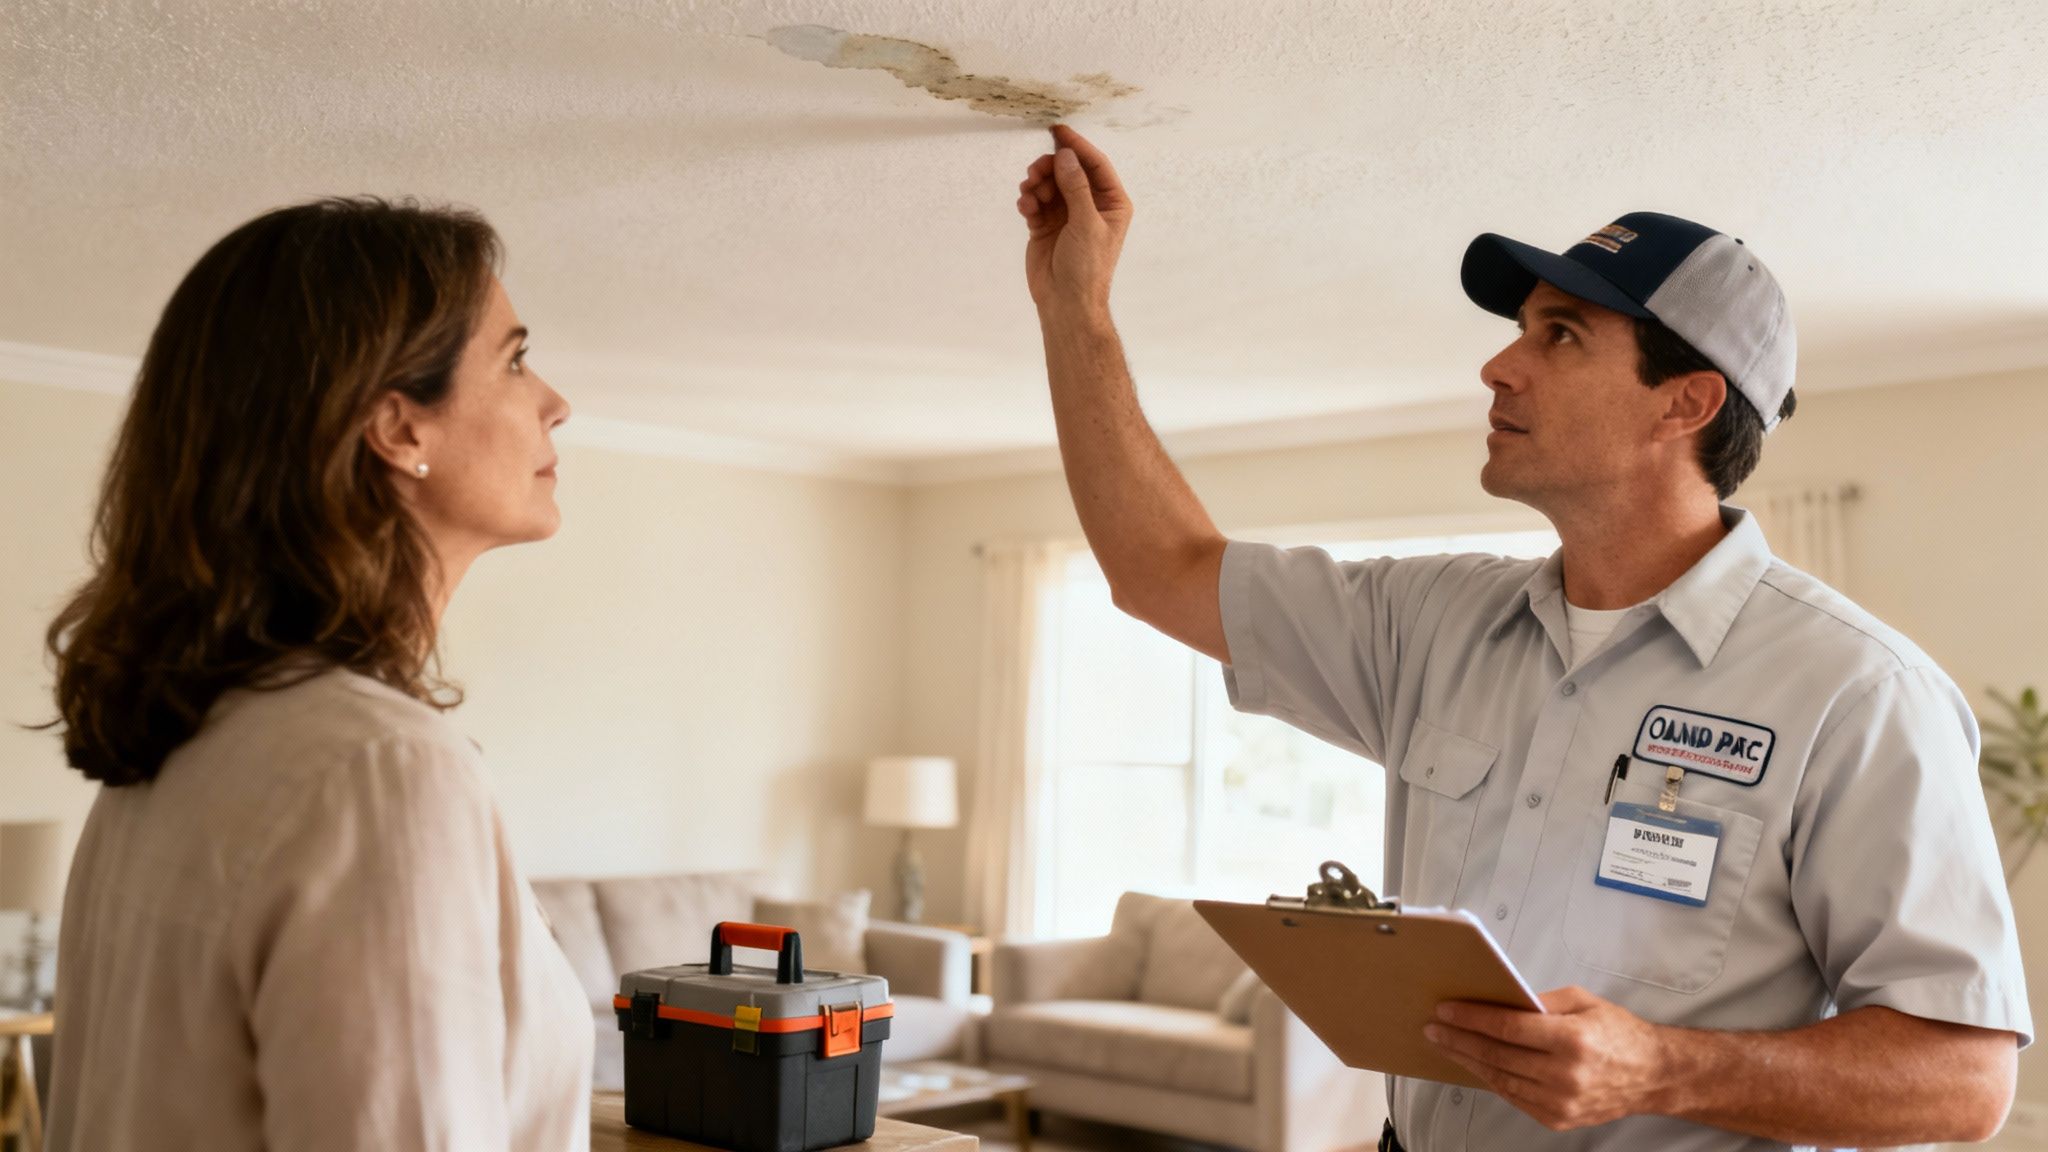
Document Everything for Insurance
Before you do anything else, pull out your smartphone and start documenting. This is absolutely critical for your insurance claim. You need to capture everything exactly as you found it.
Take clear photos and videos of the dripping water, the damaged spot on the ceiling, any puddles on the floor, and anything that got wet. Get shots from multiple angles—close-ups and wider views—to show the full extent of the problem.
This visual guide breaks down the first three critical actions every homeowner should take.
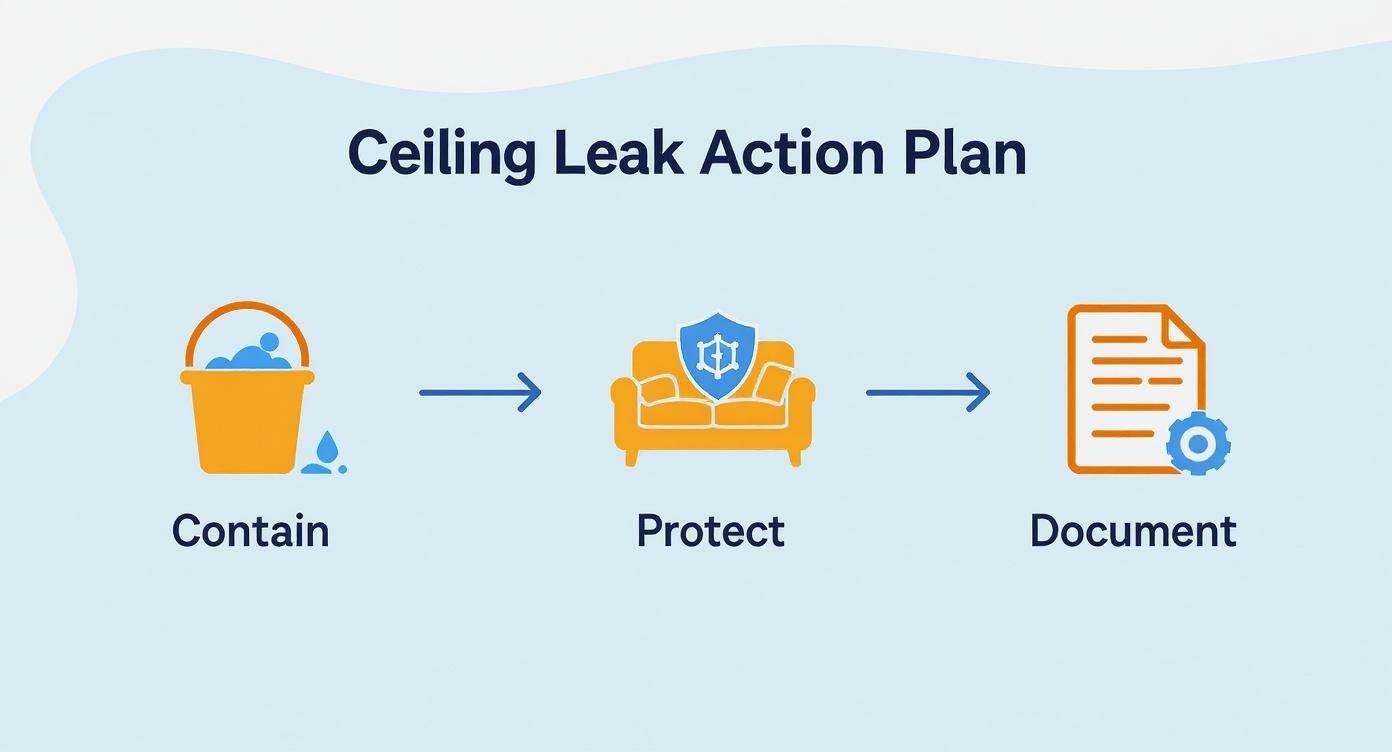
Think of it this way: getting the immediate situation under control by containing the water, protecting your stuff, and documenting the mess gives you a solid foundation. Only then can you move on to finding and fixing the root cause.
When you're in the middle of a home emergency, it's easy to forget a step. This quick checklist is designed to guide you through those first chaotic 30 minutes after you find a leak.
Emergency Leak Response Checklist
| Action Step | Why It Matters | Pro Tip |
|---|---|---|
| Place a Bucket | Immediately contains the water, preventing it from spreading and causing more extensive damage to floors and subfloors. | Lay a towel inside the bucket to eliminate splashing and the annoying dripping sound. |
| Move or Cover Valuables | Protects your furniture, electronics, and personal items from irreversible water damage and potential mold growth. | Use thick plastic sheeting for items you can't move. Don't use cloth covers, as water will just soak through them. |
| Shut Off Power | Prevents electrical shorts, fires, or the risk of electrocution if water comes into contact with wiring or fixtures. | If you're unsure which breaker controls the affected area, it's safest to turn off the main breaker until a pro arrives. |
| Puncture a Sagging Ceiling | Relieves the immense water pressure on the drywall, preventing a sudden and destructive ceiling collapse. | Use a small screwdriver or nail. A small, controlled hole is much easier to patch than a huge collapsed section. |
| Document with Photos/Videos | Creates crucial evidence for your insurance claim, making the process smoother and increasing your chances of full coverage. | Get videos of the active dripping and photos from multiple angles, including any damaged belongings. |
Following these steps methodically will help you manage the crisis effectively, minimize the overall damage, and prepare you for the next phase: getting professional help.
How to Pinpoint the Source of a Ceiling Drip
Water is a tricky traveler. That spot where you see a drip on your ceiling? It's often just the final exit point, not the actual source of the problem. Gravity and your home's construction can guide water along rafters, pipes, and wiring for a surprising distance before it finally soaks through your drywall.
This means you need to put on your detective hat.
The first clue is the water itself. Is it clear, or is it discolored? Brownish or yellowish stains almost always point to a roofing issue, where water is picking up dirt and debris as it seeps through shingles and wood.
On the other hand, if the water is perfectly clear and the drip seems to happen at specific times—like right after someone showers upstairs—you're likely dealing with a plumbing problem. The location and timing of the leak are your best initial clues for where to start looking.
Investigating Common Culprits in Your Home
Before calling in a professional for a water dripping from ceiling Oakland Park issue, doing a little preliminary investigation yourself can save a lot of time and help you explain the problem clearly. You'll want to start with the most likely sources based on where the leak is.
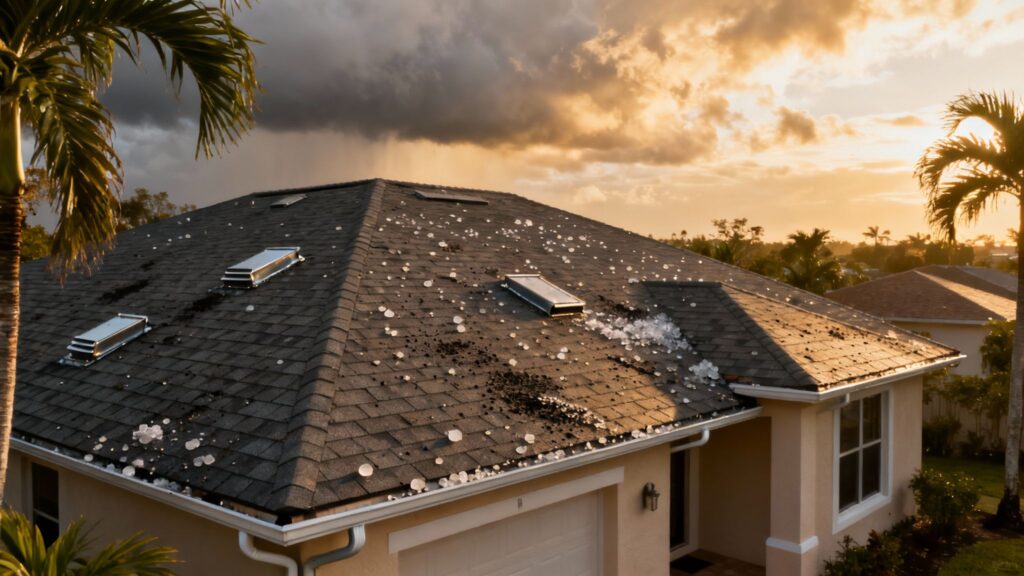
For any leaks on your top floor, the roof is always the prime suspect. Pay close attention to any areas where the roof is penetrated:
- Vents and Pipes: The flashing and seals around plumbing vents, exhaust fans, and chimneys are incredibly common failure points.
- Valleys and Edges: Areas where two roof planes meet (valleys) or along the edges are naturally prone to wear and tear.
- Damaged Shingles: Look for any cracked, curling, or missing shingles. These are basically an open invitation for water to get in.
If the leak is on a lower floor or directly below a bathroom, your focus should shift to plumbing. Check for any signs of moisture around toilets, under sinks, and near shower or tub fixtures. A slow, persistent leak from a pipe can go unnoticed for months until it finally saturates the subfloor and appears on the ceiling below.
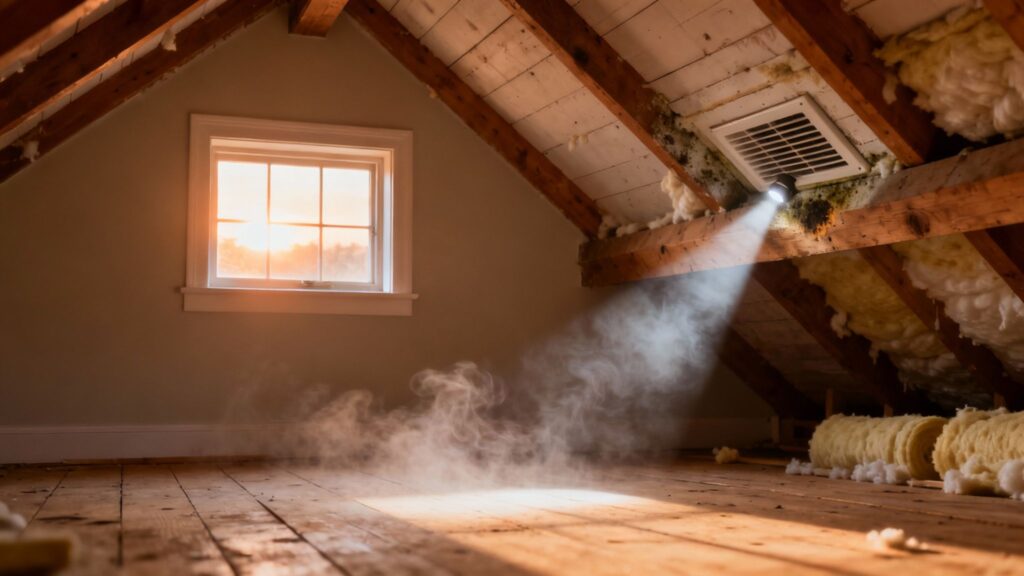
The Attic Inspection
If you can get into your attic safely, it’s the best place to find definitive evidence. Before you go up, grab a good, powerful flashlight. Head to the area directly above the ceiling stain and start looking for any signs of water intrusion.
You probably won't find a big puddle. Instead, you're looking for damp or discolored insulation, dark stains on the wood rafters or the underside of the roof decking, or even signs of mold and mildew. Following these water trails back can often lead you directly to the point of entry. Visual evidence like this is exactly what a roofer needs to understand the scope of the problem.
Tracing a leak can be frustrating, but patience is absolutely key. The goal is to follow the evidence—water stains, dampness, and discoloration—backward from the drip to the origin point. This systematic approach is the most effective way to solve the puzzle.
Ignoring a "small" drip is a mistake that can lead to some pretty significant consequences. According to the U.S. Environmental Protection Agency, the average household leak can waste nearly 9,400 gallons of water annually. In a place like Oakland Park, where humidity and storms are a fact of life, this water can quickly lead to structural damage and mold growth, with average water damage repairs costing over $5,000.
Finding the source is the most critical first step. For a deeper dive into methods you can use around your property, this guide on how to detect water leaks in your home provides some excellent additional strategies. Once you've gathered your clues, you’ll be ready to take the next step.
Temporary Fixes to Prevent Further Damage
Once you’ve figured out the general area of the leak, the next big priority is damage control. You need to stop more water from getting in while you wait for a professional roofer to arrive. These are temporary measures, not permanent solutions, but they're absolutely essential for preventing a small water dripping from ceiling Oakland Park issue from snowballing into thousands of dollars in repairs.
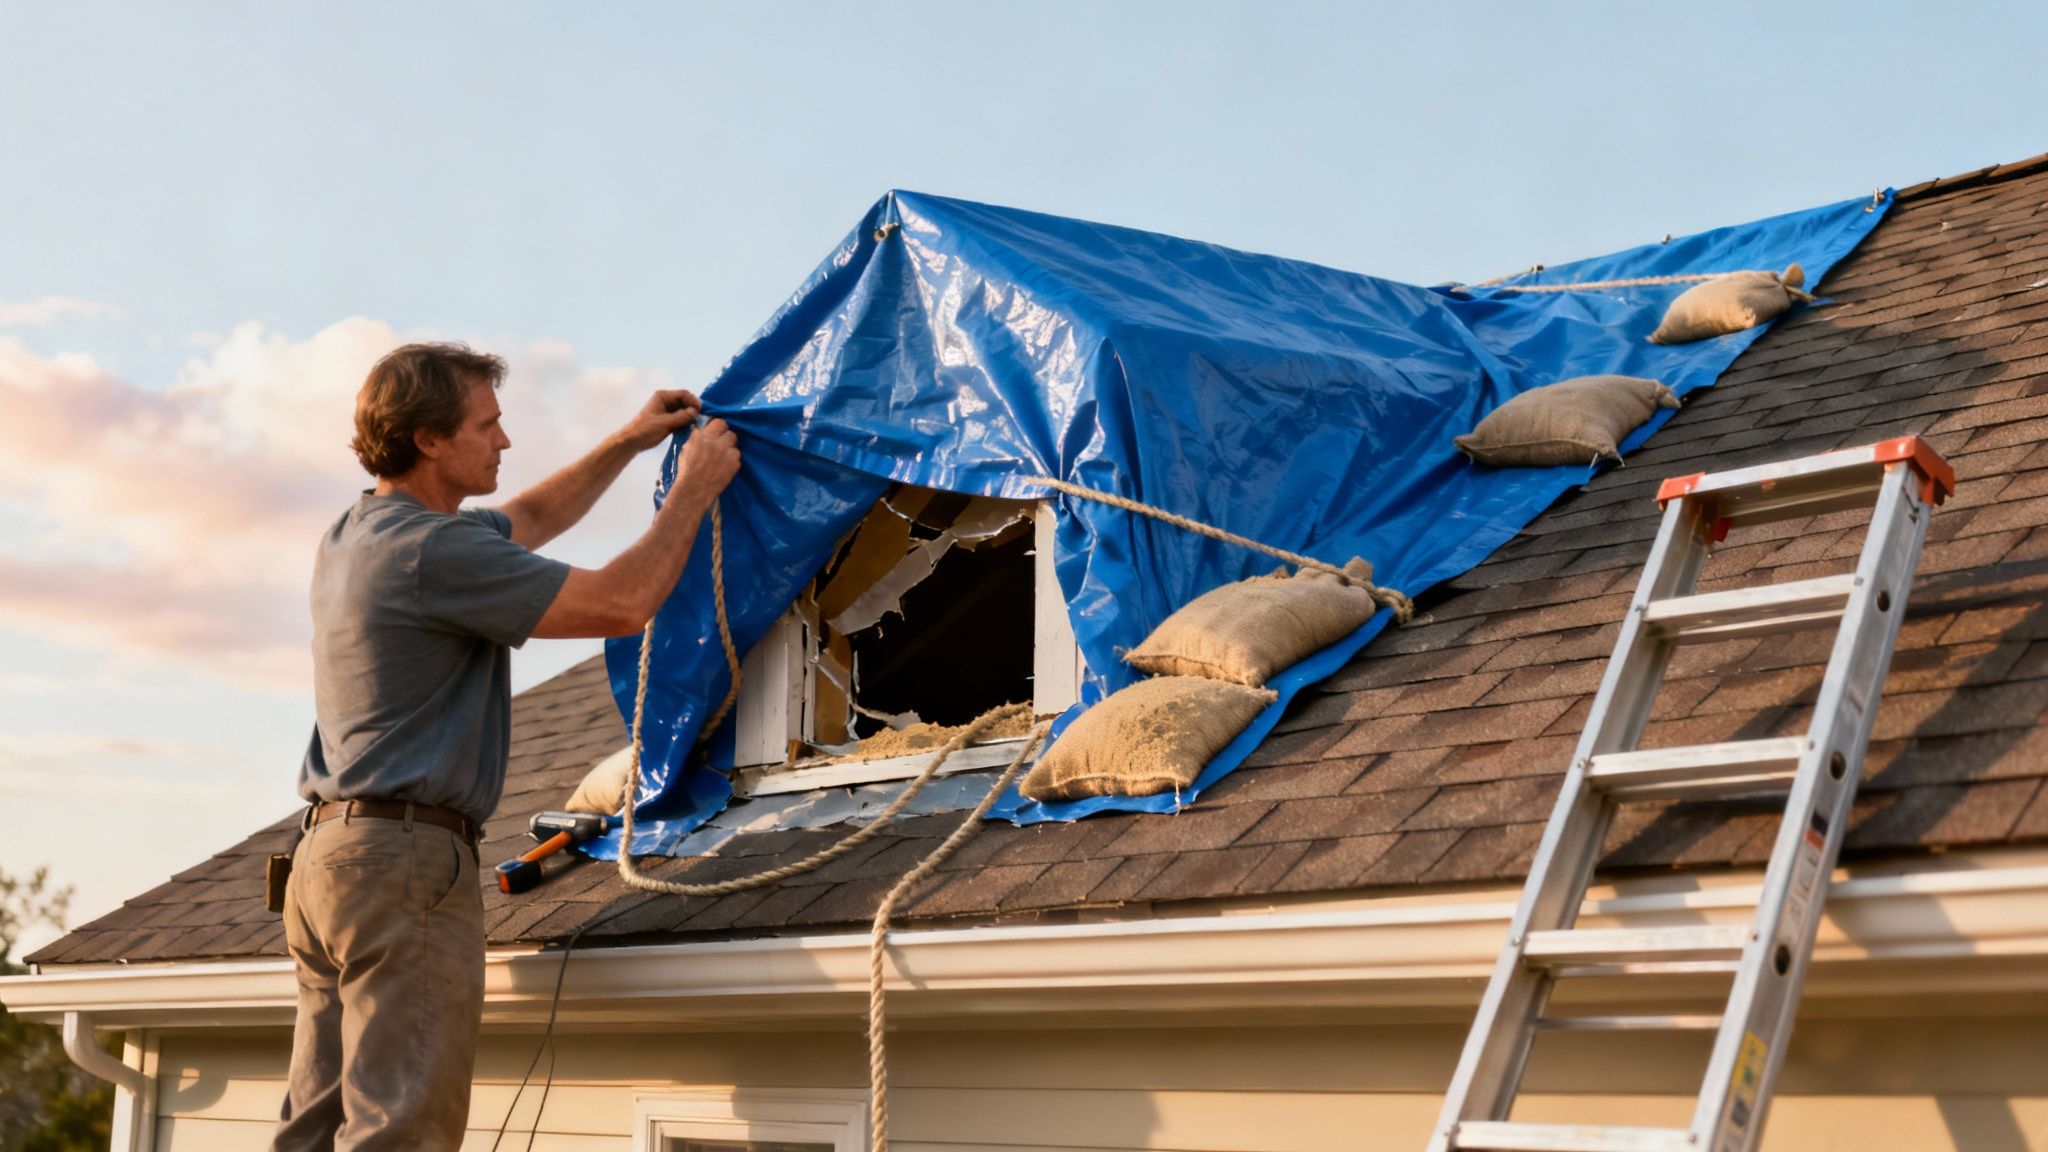
If the leak is definitely coming from your roof, a heavy-duty tarp is your best friend—especially with the sudden downpours we get here in Oakland Park. Your goal is to cover the damaged section completely. Don't just cover the hole; extend the tarp at least four feet up past the roof's peak and a few feet over each side. This overlap is key to making sure water can't sneak underneath.
Creating an Emergency Roof Patch
Securing a tarp without causing more problems is crucial. The last thing you want to do is start hammering nails into your roof, which can just create more leaks. A much safer bet is to use sandbags or even just heavy, weighted boards to hold the edges down. I've seen homeowners lay a couple of 2x4s over the peak of the roof (on top of the tarp, of course) and weigh them down securely. It works.
A few pro tips on this:
- Choose a Thick Tarp: Go for a 6-mil or thicker polyethylene tarp. Anything flimsier will get shredded by the wind and rain.
- Work Safely: Never, ever get on a roof during a storm or when it’s wet. If you aren't completely comfortable with heights, it's smarter to manage the drip from inside and just wait for a professional.
- Secure All Edges: If you can, tuck the lower edge of the tarp under the shingles. If not, make sure it’s weighed down firmly so the wind can’t get under it and turn it into a sail.
This temporary shield can buy you precious time, keeping your home dry until a roofer can make a permanent fix. It’s a simple, effective way to stop the immediate threat.
Handling Interior Leaks and Ceiling Bulges
What if your detective work pointed to a plumbing problem instead? Your options are different. For a tiny pinhole leak in a pipe you can actually reach, a temporary pipe clamp or a good amount of epoxy putty can stop the drip right away. You can grab these at any hardware store, and they're a quick fix to halt the water flow.
Crucial Reminder: Let's be clear—these are stopgap measures. Epoxy and clamps aren't designed for long-term use, especially on pipes with water pressure. Think of them as a bandage that will hold for a day or two while you get a plumber on the line.
Now for the really scary part: the sagging, water-filled ceiling. That "bubble" is a clear sign that a lot of water is trapped, and your drywall is on the verge of collapsing. You have to relieve that pressure.
First, place a large bucket directly under the lowest point of the bulge. Then, take a screwdriver or even a sturdy nail and carefully puncture the center of the bubble. This creates a controlled drain, which is much better than the ceiling tearing open on its own and making a huge mess. Being able to visualize different water damage scenarios can help you prepare for whatever you might find.
Choosing a Reliable Repair Pro in Oakland Park
Once you've managed to get the immediate crisis under control, your next move is easily the most important one: picking the right professional. Whether the culprit is a failing roof or a busted pipe, the quality of the repair will dictate your long-term peace of mind. Hiring the wrong person can feel like a nightmare, leading to recurring leaks, even more damage, and money down the drain.
Finding someone you can trust to handle a water dripping from ceiling Oakland Park emergency takes more than a quick online search. You need a contractor who is licensed, insured, and has a proven track record right here in South Florida. The stakes are just too high to leave it to guesswork.
Vetting Your Potential Contractors
Before you even think about getting estimates, you need to do a little homework. Any reputable contractor will have their credentials in order and be happy to share them. This initial screening is your first line of defense, weeding out the unqualified or shady operators right away.
Here’s what you absolutely must verify:
- Florida State License: Make sure they hold a current, valid license for roofing (CCC) or plumbing (CFC). You can and should verify this on the Florida Department of Business and Professional Regulation website. It only takes a minute.
- Liability Insurance: This is what protects your home from any accidental damage that might happen during the repair. Ask for a certificate of insurance, and don't feel shy about calling the insurance company to confirm the policy is active.
- Worker's Compensation: This one is just as crucial. It protects you from being held liable if one of their employees gets hurt on your property.
A contractor who hesitates or gives you the runaround on any of this is an immediate red flag. A true professional gets it—these credentials are all about building trust and protecting everyone involved.
Never, ever hire a contractor based on a low price alone. A bid that comes in significantly lower than others is a huge warning sign. It often means they're cutting corners on materials, using unskilled labor, or skipping critical steps in the repair process.
Asking the Right Questions
With a shortlist of properly vetted pros, it’s time to get detailed quotes. The goal here isn't just about comparing prices; it's about understanding the value and scope of what each contractor is offering.
A thorough contractor will provide a detailed, written estimate that outlines exactly what work they'll do, the specific materials they'll use, and the total cost. When you speak with them, be ready with some questions. Ask about their experience with projects just like yours in the Oakland Park area and see if they can provide local references you can actually call.
It's also a good idea to discuss the materials they recommend and the warranties they offer on both the products and their own labor.
Comparing these answers will quickly reveal who truly understands the problem and offers the most robust solution. For example, a detailed roof inspection can uncover underlying issues far beyond the obvious leak. You can get a sense of what a professional check-up involves by reviewing examples of comprehensive roofing assessments so you know what to expect. Taking the time to make an informed choice now ensures the job gets done right the first time, saving you from major headaches down the road.
Comparing Local Repair Services
Getting quotes can be overwhelming. This table breaks down what you should be asking and what kind of answers you want to hear—versus the ones that should make you hang up the phone.
| Question to Ask | What a Good Answer Looks Like | Red Flag Answer |
|---|---|---|
| "Can you provide your Florida license number and proof of insurance?" | "Of course. Here is my license number, and I can have my insurance agent email you the certificate directly." | "Don't worry about that, we're covered." or any kind of hesitation. |
| "Have you handled leaks like this in Oakland Park before? Can you provide references?" | "Yes, dozens. I can give you the numbers for a few clients in your area who had similar issues." | "We do this all the time." (without offering proof or specifics) |
| "What specific materials do you plan to use and why?" | "We'll use [Specific Brand/Type] shingles because they have a great warranty and hold up well to the Florida sun." | "We use the best stuff." or vague, non-specific answers. |
| "What warranties do you offer on your labor and the materials?" | "The materials come with a 25-year manufacturer's warranty, and we provide a 5-year warranty on our workmanship." | "The materials have a warranty." (without mentioning their own labor guarantee) |
| "Will you provide a detailed, itemized quote in writing?" | "Absolutely. Our quote will break down the costs for labor, materials, and permits so you know exactly what you're paying for." | "I can give you a total price right now." or a quote on a napkin. |
| "How will you protect my property (landscaping, driveway, etc.) during the repair?" | "We'll lay down tarps to protect your plants and siding, and we use a magnetic sweeper to clean up all nails when we're done." | "We're careful." or a blank stare. |
Using these questions as a guide will help you see past the sales pitch and identify the truly professional, reliable contractor who will solve your problem for good.
Once the immediate chaos of a dripping ceiling is under control, you'll shift into the recovery phase. This part has two main goals: navigating the insurance claim and making absolutely sure this headache doesn't happen again. Filing a claim for water damage can feel like a mountain of paperwork, but if you've got the right documents and a good handle on your policy, it's a much smoother climb.
Most standard homeowner's insurance policies are designed to cover damage that is sudden and accidental. Think of a pipe that bursts out of nowhere or roof damage from a nasty storm that just rolled through. What they almost never cover is damage from gradual leaks or a clear lack of maintenance—like that slow drip from a faucet you've been ignoring for months.
Building a Strong Insurance Claim
The success of your claim really boils down to the quality of your documentation. Those photos and videos you snapped in the first few moments? That's your best evidence, right there. Insurance companies need to see the initial mess to get an accurate picture of the damage.
To really strengthen your case, you'll want to create a detailed log of everything that happened.
- Timeline of Events: Jot down the exact date and time you first spotted the leak.
- Detailed Notes: Write out every single step you took, from grabbing a bucket to calling a professional roofer.
- Inventory of Damage: Make a list of every item that was damaged. Furniture, electronics, rugs, personal belongings—everything. If you can dig up receipts, even better.
This level of detail shows the insurance company that you acted quickly and responsibly to minimize the damage, which is a huge plus in their eyes. Before you file, it's also a good idea to familiarize yourself with the common insurance claim denial reasons to avoid any pitfalls.
Here's a pro tip: Your insurance adjuster isn't just looking at the water stain on your ceiling; they're investigating the cause of the leak. A professional report from your roofer that pinpoints a sudden, unforeseen failure can be the most critical piece of your entire claim.
Proactive Maintenance to Prevent Future Leaks
Honestly, the best way to handle a ceiling leak is to stop it from ever starting. Think of proactive maintenance not as an expense, but as a smart investment in your home and your own sanity. For those of us in Oakland Park, that means getting ahead of our relentless sun and torrential downpours.
A simple, consistent maintenance routine can catch those tiny issues before they spiral into a full-blown water dripping from ceiling Oakland Park catastrophe.
Start by getting your roof inspected twice a year, ideally in the spring and fall. You're looking for cracked or missing shingles, worn-out flashing around vents and pipes, and any other obvious signs of wear. Inside the house, give the hoses on your washing machine, dishwasher, and refrigerator a quick check every few months. These are notorious failure points.
And finally, for goodness sake, clean your gutters. When gutters get clogged, water has nowhere to go but back up under the edge of your roof, where it can cause rot and leaks. A little bit of attention a couple of times a year truly goes a long way in protecting your biggest asset.
Answering Your Lingering Questions About Oakland Park Ceiling Leaks
Even after you've managed to stop the drip, the questions start flooding in. I get it. Dealing with a water dripping from ceiling Oakland Park situation is stressful, and you need straight answers to make smart decisions for your home and your wallet. Let's tackle some of the most common concerns I hear from homeowners.
The first thing on everyone's mind is usually the cost. The final bill can swing wildly, from a couple hundred bucks for a quick patch to thousands if the damage is widespread. It all boils down to the source of the leak, how much water damage you're looking at, and the materials needed for a proper fix. Replacing a few blown-off shingles is one thing; tearing out and replacing soggy drywall, insulation, and framing is a whole different ballgame.
How Fast Does Mold Really Grow?
Another huge worry is mold, and it's a valid one. Here in Florida's humidity, mold can start taking hold on damp surfaces in just 24 to 48 hours. This is why moving fast isn’t just about stopping the water—it's a race against a potential health hazard taking root in your home.
Getting the area bone-dry is just as important as the repair itself. This usually means more than just a few towels. We often have to bring in industrial-grade fans or dehumidifiers to pull every last bit of moisture out of the wood, drywall, and insulation.
A mistake I see all too often is when people only fix the damage they can see. If you don't completely dry out the structure behind the wall or above the ceiling, you're basically rolling out the welcome mat for mold, which will cause much bigger headaches down the line.
Is My Homeowners Insurance Going to Cover This?
Now for the million-dollar question: will insurance pay for it? It's complicated. Most policies will cover damage that is "sudden and accidental"—think a pipe bursting out of nowhere or a storm ripping a hole in your roof.
However, they almost always deny claims for damage that comes from neglect or poor maintenance. If that leak started because your shingles have been worn out and cracking for years, you'll likely be paying out of pocket. This is exactly why getting regular roof inspections is so valuable. It creates a paper trail showing your roof was in good shape and that you've been proactive about upkeep.
At the end of the day, your best defense is a combination of swift action and preventative care. By containing the leak right away, taking plenty of pictures, and calling in a pro you trust, you can keep the damage and the stress to a minimum. Once it's all fixed, putting a simple maintenance plan in place can help make sure you never have to deal with a surprise like this again.
When you need fast, reliable help for a leaking ceiling in South Florida, trust the experts at Paletz Roofing and Inspections. With over 30 years of experience, we can handle any emergency repair and protect your home from further damage. Contact us today for a free quote and peace of mind. Find out more at https://paletzroofing.com.