
A commercial building's roof is its primary defense against the elements, protecting valuable assets, equipment, and personnel. Yet, it's often an "out of sight, out of mind" component until a minor issue evolves into a catastrophic failure. Proactive maintenance, centered around a systematic inspection process, is the most effective strategy to prevent costly repairs, operational downtime, and premature roof replacement. This comprehensive commercial roof inspection checklist provides a structured framework for facility managers, property owners, and maintenance professionals to conduct thorough and repeatable assessments.
By following this guide, you will gain actionable insights into evaluating every critical component of your roofing system. We will move beyond a simple visual scan, delving into specific areas like membrane integrity, drainage efficiency, flashing details, and structural soundness. The goal is to identify potential vulnerabilities before they escalate, ensuring the long-term health and performance of your investment. Just as a detailed guide on must-do vehicle inspection checklist items helps prevent unexpected breakdowns, this checklist is designed to safeguard your property.
This article details the essential steps, from initial documentation review to the final report, equipping you with the knowledge to either perform a more informed self-inspection or to better understand a professional roofer's assessment. We will cover:
- Critical Inspection Points: What to look for on the roof surface, drainage systems, and structural supports.
- Safety & Tools: Necessary precautions and equipment for a safe and effective inspection.
- Maintenance Recommendations: Actionable steps to address common findings and extend your roof's lifespan.
1. Roof Membrane Integrity Assessment
The roof membrane is your building's primary shield against the elements. A thorough Roof Membrane Integrity Assessment is the most critical component of any commercial roof inspection checklist because it directly evaluates this first line of defense. This step involves a meticulous, hands-on examination of the entire roof surface to identify any signs of failure or wear that could compromise its waterproofing capabilities and lead to catastrophic leaks.
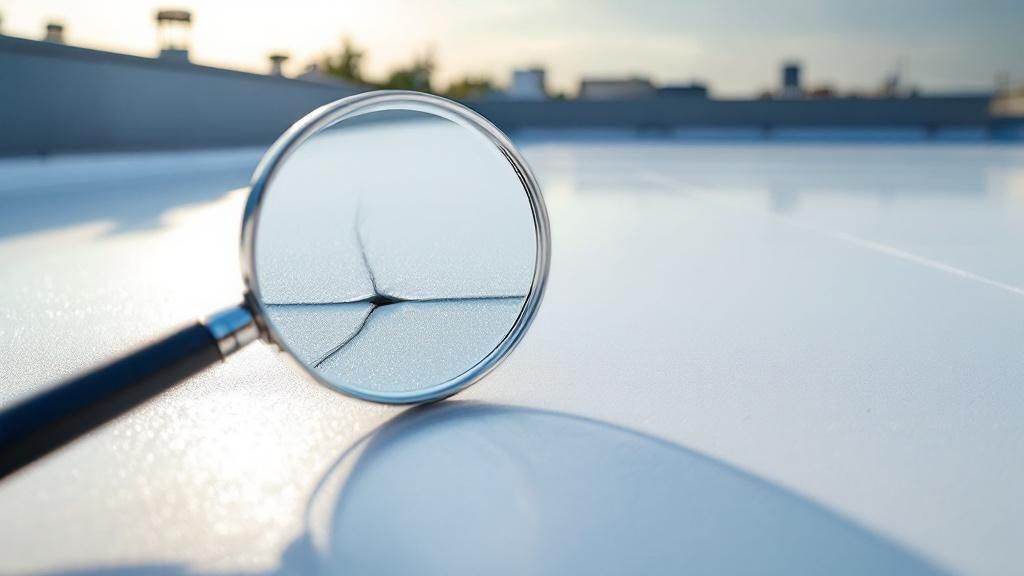
This assessment goes beyond a simple glance. It is a detailed investigation into the material's condition, searching for punctures, tears, seam separations, blisters, and signs of weathering. Early detection of these issues is crucial for preventing minor problems from escalating into major structural damage, interior water damage, and costly operational disruptions.
Common Membrane Failures by Type
Different roofing materials exhibit unique signs of distress. A comprehensive inspection requires knowing what to look for on your specific roof type:
- TPO/PVC (Thermoplastic Olefin/Polyvinyl Chloride): Inspectors will probe heat-welded seams, which are common failure points. They also check for punctures from dropped tools or foot traffic, and look for signs of surface cracking or crazing from UV exposure.
- EPDM (Ethylene Propylene Diene Monomer): The focus here is on adhesive-based seam integrity. Inspectors look for seam peeling or separation, shrinkage that pulls the membrane away from edges, and a chalky or faded appearance indicating UV degradation.
- Modified Bitumen: This assessment targets granule loss, which exposes the underlying asphalt to damaging UV rays. Inspectors also search for alligatoring (cracking that resembles alligator skin), blisters, and open seams on torch-applied or cold-applied systems.
Actionable Inspection Tips
To get the most out of your membrane assessment, follow these professional tips:
- Schedule During Dry Conditions: A dry, well-lit surface makes it significantly easier to spot subtle flaws like small punctures or fine cracks.
- Utilize Infrared Thermography: An infrared scan can reveal what the naked eye cannot. It detects temperature variations on the roof surface, pinpointing areas where trapped moisture is present beneath the membrane, even before a leak is visible inside.
- Document Everything: Use high-resolution photographs and detailed notes to document every identified issue. This creates a clear record for repair planning and future inspections.
- Focus on High-Stress Zones: Pay extra attention to areas around HVAC units, vents, drains, and skylights. These penetrations and high-traffic zones are statistically more prone to developing leaks.
2. Drainage System Evaluation
A building's drainage system is the critical infrastructure responsible for safely and efficiently removing water from the roof. A comprehensive Drainage System Evaluation is a non-negotiable part of any commercial roof inspection checklist because even a perfectly intact roof membrane can fail if water cannot escape. This inspection involves a detailed review of all components, including internal drains, scuppers, gutters, and downspouts, to ensure they are clear, functional, and capable of handling heavy rainfall.
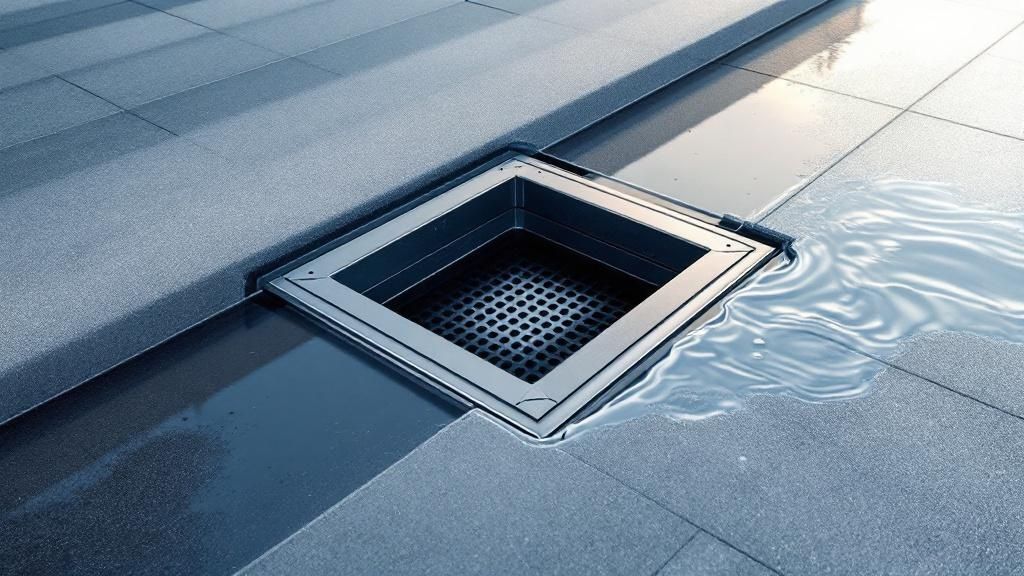
Neglecting roof drainage leads to ponding water, which adds immense weight and stress to the building's structure. This standing water also accelerates the deterioration of roofing materials, nullifies warranties, and dramatically increases the likelihood of leaks. A thorough evaluation identifies blockages and system failures before they can cause widespread damage, protecting the structural integrity of your asset.
Key Drainage Components and Common Issues
Effective water management relies on several components working in concert. An inspector will assess each element for specific signs of failure:
- Internal Drains & Strainers: The primary focus is on blockages from leaves, dirt, trash, and even animal nests. Inspectors check that strainer domes are present and securely fastened to prevent large debris from entering the pipes and causing clogs deep within the building's plumbing. They also look for cracks in the drain bowl or seal failures where it connects to the roof membrane.
- Scuppers & Collector Boxes: These outlets through parapet walls must be clear and unobstructed. Inspectors check for corrosion, bent metal that restricts flow, and failed seals around the scupper opening, which are common points of water infiltration into the wall structure.
- Gutters & Downspouts: This inspection looks for sagging, disconnected sections, and corrosion that can lead to leaks or collapse. Gutters must be free of debris and have a proper slope to direct water effectively toward the downspouts, which are also checked for blockages at their base.
Actionable Inspection Tips
To ensure your drainage system is functioning optimally, implement these professional strategies:
- Perform a Water Test: After clearing debris, conduct a controlled water test to observe flow. Pouring water around drains and gutters helps confirm there are no hidden clogs and that water moves efficiently without backing up.
- Clear All Debris First: Before any assessment, thoroughly clear leaves, sediment, and trash from all drains, scuppers, and gutters. A system cannot be properly evaluated if it is already obstructed.
- Verify Overflow Systems: Check that secondary overflow drains or scuppers are in place and unobstructed. These are legally required in many areas and act as a crucial failsafe if the primary system clogs during a severe storm.
- Inspect All Seals and Flashings: Meticulously examine the flashing and seals where drainage components integrate with the roof membrane. Any gap, crack, or peel-back is a direct pathway for water to get beneath your roof.
3. Flashing and Penetration Analysis
While the main roof field provides broad protection, the most common sources of leaks are found at transitions and penetrations. A thorough Flashing and Penetration Analysis is a non-negotiable part of any commercial roof inspection checklist because it focuses on these highly vulnerable points. This involves a detailed examination of every area where the roof membrane is interrupted, such as around HVAC units, vents, pipes, skylights, and where the roof meets a parapet wall.
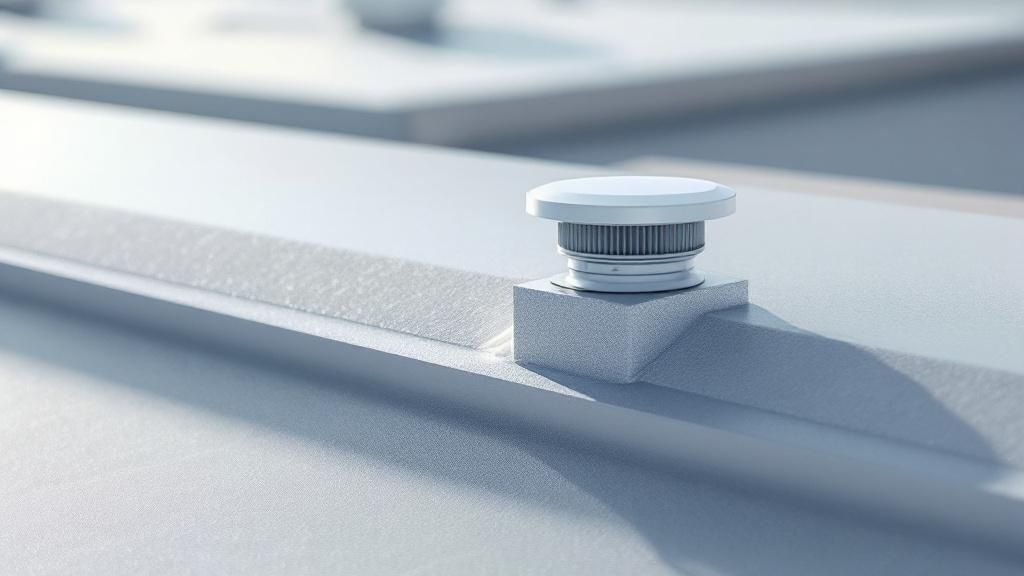
These areas experience significant stress from building movement, thermal expansion and contraction, and direct exposure to the elements. According to guidelines from the National Roofing Contractors Association (NRCA), improper flashing installation is a leading cause of premature roof failure. This step meticulously inspects the seals, counter-flashing, and termination bars that are designed to create a watertight transition, ensuring they remain intact and effective.
Common Failure Points by Location
Flashing failures can manifest differently depending on their location and function. An inspector must recognize these specific signs of distress to prevent water infiltration:
- HVAC Units & Vents: Inspectors look for gaps in the sealant around equipment curbs, deteriorated rubber boots on pipe jacks, and corrosion on metal flashing components. For a restaurant, failed flashing around a kitchen exhaust can allow grease and water to seep into the roof assembly, causing rapid degradation.
- Parapet Walls: This inspection focuses on the integrity of the wall coping, termination bars, and counter-flashing. Gaps, cracked mortar, or sealant failure here can allow water to get behind the membrane and travel into the building's walls.
- Skylights & Drains: The focus is on the corner seals and the bond between the flashing material and the skylight frame or drain bowl. Damaged or poorly sealed skylight flashing is a frequent cause of chronic leaks in warehouses and retail spaces.
Actionable Inspection Tips
To conduct an effective analysis of flashing and penetrations, adhere to these professional recommendations:
- Check Sealant Adhesion: Go beyond a visual check. Gently press on sealants and caulking to test for brittleness, cracking, or loss of adhesion. Proper sealant should be firm but flexible.
- Look for Water Intrusion Clues: Search for subtle signs of water entry, such as rust stains running down from metal components or white, chalky mineral deposits (efflorescence) on walls below the flashing, which indicate past water intrusion.
- Inspect from Inside and Out: Where accessible, examine penetrations from the building's interior. Stains, drips, or daylight visible from below are definitive signs of a flashing failure that needs immediate attention.
- Examine Lap Joints: Ensure all metal flashing lap joints are correctly oriented to shed water, not catch it. Seams should be tightly sealed and free of any openings that could allow wind-driven rain to penetrate.
4. Structural Support Assessment
While the roof membrane protects from the outside, the structural support system ensures the entire roof assembly remains stable and secure. A Structural Support Assessment evaluates the core components holding your roof up, including the decking, joists, and beams. This part of a commercial roof inspection checklist is vital for identifying underlying issues that could compromise the building's safety and integrity.
This assessment moves beyond the surface to look for signs of stress, deterioration, or damage that threaten the roof's load-bearing capacity. Issues like sagging, deflection between joists, or waterlogged decking can go unnoticed from the exterior but pose a significant risk. Identifying these problems early prevents catastrophic failures, especially under heavy loads from snow, water, or new rooftop equipment.
Key Areas of Structural Concern
The specific components under review depend on the building's construction, but the evaluation focuses on common failure points. An inspector will assess these areas from both the rooftop and, where accessible, from the building's interior.
- Roof Decking: The inspector will check for sagging, soft spots when walked upon, and signs of moisture saturation. On a metal deck, this includes looking for rust and corrosion, while a wood deck is checked for rot and deterioration. A grocery store, for example, might need a full deck replacement after an inspection reveals widespread moisture damage from a slow, long-term leak.
- Joists and Beams: This involves looking for visible sagging, cracking, or twisting in the support beams. In a warehouse, a structural assessment following a heavy snow season could lead to beam reinforcement to handle future snow loads safely.
- Support Columns and Foundation: The inspection also considers how the roof structure interacts with the rest of the building. Signs of foundation settlement can translate to stress and separation in the roof's structural supports, requiring complex repairs.
Actionable Inspection Tips
A thorough structural evaluation requires a keen eye for detail and an understanding of building mechanics.
- Look for Interior Water Stains: Discoloration or stains on the ceiling tiles or underside of the deck are direct indicators of a leak that has penetrated the membrane and is now affecting structural components.
- Check Fastener Integrity: Examine the fasteners securing the decking to the joists. Look for signs of corrosion, back-out, or improper installation, as these can weaken the entire system's uplift resistance.
- Monitor Existing Cracks: If small cracks are present in beams or support walls, they should be documented and monitored over time to see if they are expanding, which indicates ongoing structural stress.
- Consult a Structural Engineer: For older buildings, buildings that have been significantly modified, or if any major red flags are found, a professional structural engineer should be brought in for a detailed analysis.
5. Insulation System Inspection
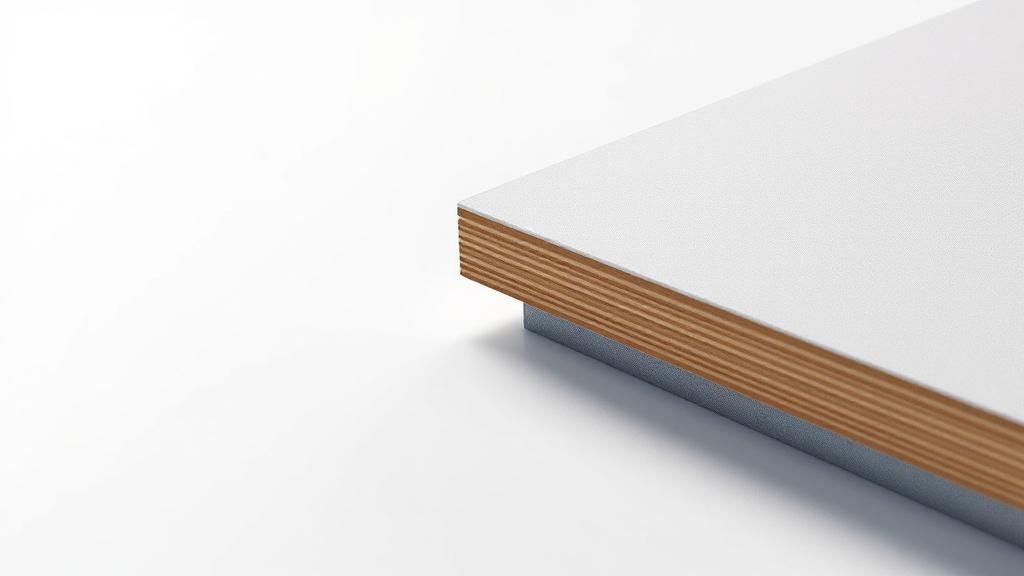
Your roof's insulation system is the unseen workhorse responsible for thermal performance and energy efficiency. A comprehensive Insulation System Inspection is a vital part of any commercial roof inspection checklist because it assesses the material's ability to regulate building temperature, prevent condensation, and support the overlying roof membrane. This process involves evaluating the insulation for moisture, compression, and proper installation.
This evaluation is far more than just a surface-level check. It is a critical investigation to find hidden issues that directly impact your operational costs and the longevity of the entire roofing assembly. Degraded, wet, or compressed insulation loses its R-value, leading to significant energy loss, potential mold growth, and structural stress on the roof deck.
Common Insulation Failures and Their Impact
Different insulation issues can compromise your building's performance and lead to costly repairs. A thorough inspection identifies these problems before they escalate:
- Moisture Intrusion: This is the most damaging issue. When insulation becomes wet, it loses its thermal resistance and can become a breeding ground for mold and mildew. Saturated insulation is also heavy, adding significant dead load to the roof structure. An inspector will look for soft, spongy areas underfoot and use infrared scanning to detect trapped moisture.
- Compression and Displacement: Foot traffic, improperly stored materials, or poor installation can compress insulation boards, creating low spots where water can pond. Displaced or shifted boards create thermal bridges, which are gaps that allow heat to escape or enter freely, drastically reducing energy efficiency.
- Degradation: Over time, some insulation materials can break down, crumble, or shrink. This material degradation creates voids within the roof system, diminishing its structural support and thermal performance.
Actionable Inspection Tips
To ensure your insulation is performing optimally, incorporate these professional techniques into your inspection:
- Use Infrared Thermography: An infrared camera is the best tool for a non-destructive insulation assessment. It quickly identifies thermal anomalies that indicate wet insulation, air leaks, or thermal bridging without needing to cut into the roof.
- Take Core Samples: In areas where infrared scans or physical inspection suggests a problem, taking a core sample provides definitive proof. This involves cutting a small section of the roof system to directly examine the insulation layers for moisture content and condition.
- Check for Proper Installation: Verify that insulation boards are tightly butted together with no gaps. Ensure the material is not compressed around fasteners or penetrations, which can reduce its effectiveness and create weak points.
- Quantify Energy Impact: Understanding the financial implications of poor insulation is crucial. Using an Industrial Energy Consumption Calculator can help you model the potential energy savings that would result from repairing or replacing compromised insulation, providing a clear ROI for the project.
6. Safety Systems and Accessories Review
Beyond waterproofing, a commercial roof serves as a critical workspace for maintaining HVAC units, communication equipment, and other rooftop systems. A Safety Systems and Accessories Review is a vital part of any commercial roof inspection checklist because it ensures the roof is not only functional but also safe for anyone who needs to access it. This review involves a detailed evaluation of all roof-mounted safety equipment and access points to verify compliance with OSHA standards and prevent accidents.
This assessment confirms that all safety components, from guardrails to access ladders, are in sound condition and function as intended. Neglecting these systems exposes building owners to significant liability and puts maintenance personnel at risk. Verifying the integrity of these components is a non-negotiable step in responsible facility management and is heavily mandated by regulations from bodies like OSHA and ANSI.
Key Safety and Accessory Components
A comprehensive inspection must cover all accessories that facilitate safe and efficient roof use. Inspectors look for different points of failure on each component:
- Guardrails and Parapet Walls: The inspection focuses on the stability of the entire system. Inspectors check for loose or corroded fasteners, bent or damaged rails, and ensure the height meets the minimum requirements set by OSHA. For parapet walls, the structural integrity and flashing are key points of examination.
- Fall Protection Anchors: These are life-saving devices. The review must confirm their certification is current, as many standards require annual inspection by a qualified person. Inspectors will also check for corrosion, secure attachment to the roof structure, and proper placement according to the engineered fall protection plan.
- Ladders and Hatches: Access points must be secure. The inspection involves checking for rusted rungs, loose mountings, and a functioning locking mechanism on roof hatches. The area around the hatch is also inspected for signs of leaks or membrane damage.
- Walkway Systems: These designated paths protect the roof membrane from foot traffic. An inspector verifies that walkway pads are secure, not curled or cracked, and provide a non-slip surface. They also ensure the walkways create a clear, safe route to all essential equipment.
Actionable Inspection Tips
To ensure your roof’s safety systems are compliant and effective, apply these professional recommendations:
- Verify Certifications: Always check the logbooks and tags for fall protection anchors and horizontal lifelines. Ensure they have been inspected and certified annually by a competent person as required by OSHA and ANSI standards.
- Inspect All Metal Components: Meticulously check all metal elements, including rails, ladders, and anchor points, for rust, corrosion, or physical damage. Pay close attention to welds and bolted connections, as these are common failure points.
- Confirm Secure Mounting: Physically test the stability of guardrails and ladders. Gently push and pull on them to ensure they are firmly attached to the building structure and do not wobble or feel loose.
- Document and Tag Unsafe Equipment: If any safety device is found to be non-compliant or damaged, it should be immediately documented, photographed, and tagged "Do Not Use" until it can be repaired or replaced by a qualified professional.
7. Ponding Water and Slope Analysis
Water is the number one enemy of any commercial roof, and ponding water acts as a magnifying glass for potential problems. A Ponding Water and Slope Analysis is a critical part of a commercial roof inspection checklist because it evaluates how effectively your roof sheds water. This inspection identifies areas where water accumulates for more than 48 hours after rainfall, indicating issues with the roof's slope, drainage system, or underlying structure.
Left unaddressed, ponding water accelerates the degradation of roofing materials, adds significant weight that can strain the building's structure, and promotes the growth of vegetation and algae. Systematically identifying these areas is essential to prevent premature roof failure, structural damage, and costly leaks. This analysis moves beyond simple leak detection to address a root cause of widespread roofing issues.
Common Causes of Ponding Water
Ponding water is rarely a single-point failure; it often signals a more systemic problem. A professional inspection will investigate several potential causes to determine the most effective solution:
- Inadequate Slope: Many "flat" roofs are not perfectly flat and should have a slight, intentional slope (typically at least ¼ inch per foot) to direct water toward drains. If the original design was flawed or construction was imprecise, water will inevitably collect in low spots.
- Structural Settling: Over time, a building's foundation or structural supports can settle, causing sections of the roof deck to sag. This creates depressions where water can accumulate, a common issue in older or larger warehouse-style buildings.
- Clogged Drainage Systems: The most frequent and easily fixable cause is blocked drains, scuppers, or gutters. Debris like leaves, dirt, and windblown trash can quickly obstruct drainage points, causing water to back up across the roof surface.
Actionable Inspection Tips
To effectively analyze and mitigate ponding water, incorporate these expert strategies into your inspection routine:
- Inspect 48 Hours After Rain: The industry standard for defining "ponding" is water that remains on the roof 48 hours after a rain event. Schedule your inspection accordingly to accurately identify persistent problem areas.
- Mark and Map Low Spots: Use a chalk line or temporary spray paint to outline the perimeter of any ponding areas. Photograph these marked zones and map them on a roof diagram to track their size and severity over time.
- Consider Tapered Insulation: For chronic ponding due to poor slope, installing a tapered insulation system is a highly effective solution. This creates a positive slope by design, directing water efficiently to drains without requiring major structural changes.
- Evaluate Structural Load Capacity: Before adding materials like roof leveling compound or extra layers of roofing to correct a slope, a structural engineer must verify that the roof deck can handle the additional weight.
8. Documentation and Maintenance Records Review
A physical inspection tells you the current state of a roof, but a Documentation and Maintenance Records Review tells you its entire life story. This crucial step involves a comprehensive analysis of all existing paperwork related to the roof, including original installation contracts, manufacturer warranties, past inspection reports, repair invoices, and maintenance logs. This historical context is invaluable for a complete commercial roof inspection checklist, providing a baseline that informs the physical assessment and helps predict future performance.
This review allows an inspector to understand what issues have occurred previously, what materials were used for repairs, and whether the roof has been maintained in compliance with warranty requirements. It can reveal chronic problem areas, highlight the effectiveness of past solutions, and establish the remaining lifespan of warranties. Neglecting this step is like a doctor diagnosing a patient without looking at their medical history; you only get part of the picture.
Leveraging Historical Data for Strategic Decisions
A well-organized file of roof documents is more than just paperwork; it is a strategic asset. By analyzing this data, facility managers and building owners can make informed, proactive decisions instead of reactive, costly ones.
- Warranty Claim Success: A municipal building successfully filed a warranty claim for premature membrane failure because its facility manager had meticulous records of bi-annual maintenance, proving they had met all manufacturer requirements for warranty preservation.
- Maintenance Program Optimization: A corporate facility manager reviewed five years of repair invoices and noticed recurring leaks near a specific set of rooftop HVAC units. This data prompted a targeted reinforcement of flashings in that area, preventing future leaks and optimizing the maintenance budget.
- Proactive Replacement Planning: A healthcare system used its comprehensive roof records to track the age and condition of roofs across multiple campuses. This allowed them to accurately forecast replacement needs and budget for capital expenditures years in advance, avoiding unexpected financial strain.
Actionable Inspection Tips
To ensure your documentation serves as a powerful tool, follow these professional practices:
- Go Digital: Scan and maintain digital copies of all roof-related documents in a secure, cloud-based folder. This prevents loss from physical damage and ensures easy access for all stakeholders.
- Track Warranty Compliance: Create a simple checklist or spreadsheet to track all maintenance activities required by your manufacturer's warranty. Note the date of service, work performed, and the contractor's name to ensure coverage remains intact.
- Create Standardized Reports: For streamlined and professional documentation, ensure you are using a comprehensive roof inspection report template to record all findings. This creates consistency across inspections, making it easier to compare data over time.
- Photograph Everything: Insist that contractors provide high-resolution photos before, during, and after any repair or maintenance work. A visual record is undeniable proof of the work completed and the conditions observed.
8-Point Commercial Roof Inspection Checklist Comparison
| Inspection Type | Implementation Complexity 🔄 | Resource Requirements ⚡ | Expected Outcomes 📊 | Ideal Use Cases 💡 | Key Advantages ⭐ |
|---|---|---|---|---|---|
| Roof Membrane Integrity Assessment | Moderate – requires skilled inspector and sometimes specialized techniques | Moderate – inspection tools plus possible infrared thermography | Early damage detection, roof lifespan extension, warranty preservation | Waterproofing maintenance, warranty compliance | Prevents costly water damage, maintains envelope integrity |
| Drainage System Evaluation | Moderate – involves physical access and possible specialized testing | Moderate – requires drainage testing tools and safe roof access | Ensures water evacuation, prevents ponding and structural damage | Roof drainage maintenance, code compliance | Prevents ponding, reduces ice dam risk |
| Flashing and Penetration Analysis | High – detailed, often limited access, and expert knowledge needed | Moderate – visual and some access equipment | Identifies leak-prone areas around penetrations | Leak prevention at penetrations, HVAC, skylights | Mitigates highest leak risks, maintains interior protection |
| Structural Support Assessment | High – may require invasive testing and structural engineering expertise | High – engineering consultation, possible destructive testing | Ensures load capacity, occupant safety, prevents failures | Load-bearing verification, older/critical buildings | Prevents structural failure, maintains safety |
| Insulation System Inspection | Moderate to High – may involve invasive tests and moisture detection | Moderate to High – thermography, moisture meters, core sampling | Identifies moisture, thermal inefficiencies, extends roof life | Energy efficiency improvements, moisture control | Saves energy, prevents condensation damage |
| Safety Systems and Accessories Review | Moderate – specialized knowledge of safety codes and equipment | Moderate – compliance testing and inspections | Ensures OSHA compliance, worker safety during roof access | Maintenance work, code compliance | Reduces liability, protects workers |
| Ponding Water and Slope Analysis | Moderate – may require multiple weather-dependent assessments | Moderate – slope measurement tools, repeated site visits | Detects water accumulation issues, identifies structural settling | Roof drainage optimization, structural health | Prevents premature roof failure, lowers maintenance |
| Documentation and Maintenance Records Review | Low to Moderate – requires detailed records review and analysis | Low – relies on documentation access | Warranty preservation, predictive maintenance planning | Warranty claims, maintenance scheduling | Protects warranties, identifies recurring issues |
Final Thoughts
Navigating the complexities of commercial property management requires a proactive and meticulous approach, especially when it comes to your building's most critical shield: the roof. This comprehensive commercial roof inspection checklist was designed not just as a list of items to tick off, but as a strategic framework to empower you. By moving beyond a cursory glance and adopting a detailed, systematic inspection process, you transform roof maintenance from a reactive expense into a strategic asset management practice.
The core takeaway is that a roof is not a single entity but a complex system of interconnected components. The integrity of the roof membrane is just as crucial as the functionality of your drainage system. The security of flashing around HVAC units is as vital as the condition of the underlying structural supports. Neglecting one area inevitably compromises the others, leading to a cascade of potential failures that are far more costly and disruptive to repair than to prevent.
From Checklist to Action Plan: Key Takeaways
The true power of this checklist emerges when you use it to build a dynamic action plan. Let’s distill the most critical insights from our detailed guide into actionable next steps:
- Embrace Proactive Scheduling: Don't wait for a leak to appear on a tenant's ceiling. Implement a semi-annual inspection schedule, ideally in the spring and fall, to catch potential issues before they escalate. This predictable routine is the foundation of effective roof asset management.
- Documentation is Your Best Defense: A detailed inspection is only as valuable as its documentation. Your reports, complete with high-resolution photos, detailed notes, and specific measurements, are not just records. They are crucial tools for budget forecasting, insurance claims, and holding contractors accountable for their work.
- Prioritize Drainage and Slope: In regions like South Florida, water is the primary adversary. Consistently evaluating drainage systems, clearing blockages, and addressing areas of ponding water should be your highest priority. Even a minor slope issue can lead to significant water damage over time, compromising insulation and weakening the roof deck.
- Don't Overlook the "Small" Details: Flashing, sealants, and penetration points are often the first points of failure. These seemingly minor components bear the brunt of thermal expansion and contraction. A meticulous analysis of these areas during every inspection will prevent the majority of common leaks.
Key Insight: A successful commercial roof inspection is a blend of science and strategy. It requires the technical knowledge to identify deficiencies and the strategic foresight to prioritize repairs, plan for future capital expenditures, and extend the functional lifespan of your roofing asset.
Mastering this approach provides undeniable long-term benefits. You move from a state of constant worry about unexpected leaks and emergency repairs to a position of control and confidence. A well-maintained roof, verified through a diligent commercial roof inspection checklist, directly contributes to higher property values, lower operational costs, and enhanced tenant satisfaction. It protects not just the physical structure but the financial viability of your investment.
Ultimately, this guide is about shifting your perspective. View your commercial roof not as a static, passive covering, but as a dynamic system that requires regular, informed attention. By implementing this detailed checklist, you are investing in the longevity, safety, and profitability of your entire property. You are making a clear statement that you value prevention over panic and strategy over surprise.
When it comes to protecting your commercial investment in Broward, Miami-Dade, or Palm Beach County, leave nothing to chance. For a professional, thorough assessment that utilizes an expert commercial roof inspection checklist, trust the certified professionals at Paletz Roofing and Inspections. We provide the detailed insights and actionable reports you need to manage your roofing assets with confidence. Visit Paletz Roofing and Inspections today to schedule your comprehensive evaluation.