
That sinking feeling you get when you spot a sagging ceiling in your Pembroke Pines home is completely justified. It’s more than just an eyesore; it's often the first warning sign that a much bigger problem is quietly unfolding overhead. Here in South Florida, the relentless combination of high humidity and torrential downpours puts our homes to the test, creating the perfect storm for ceiling damage.
No matter how small it seems, a sag is almost always a symptom of either excess moisture or a structural problem that demands immediate attention.
Understanding Why Your Ceiling Is Sagging
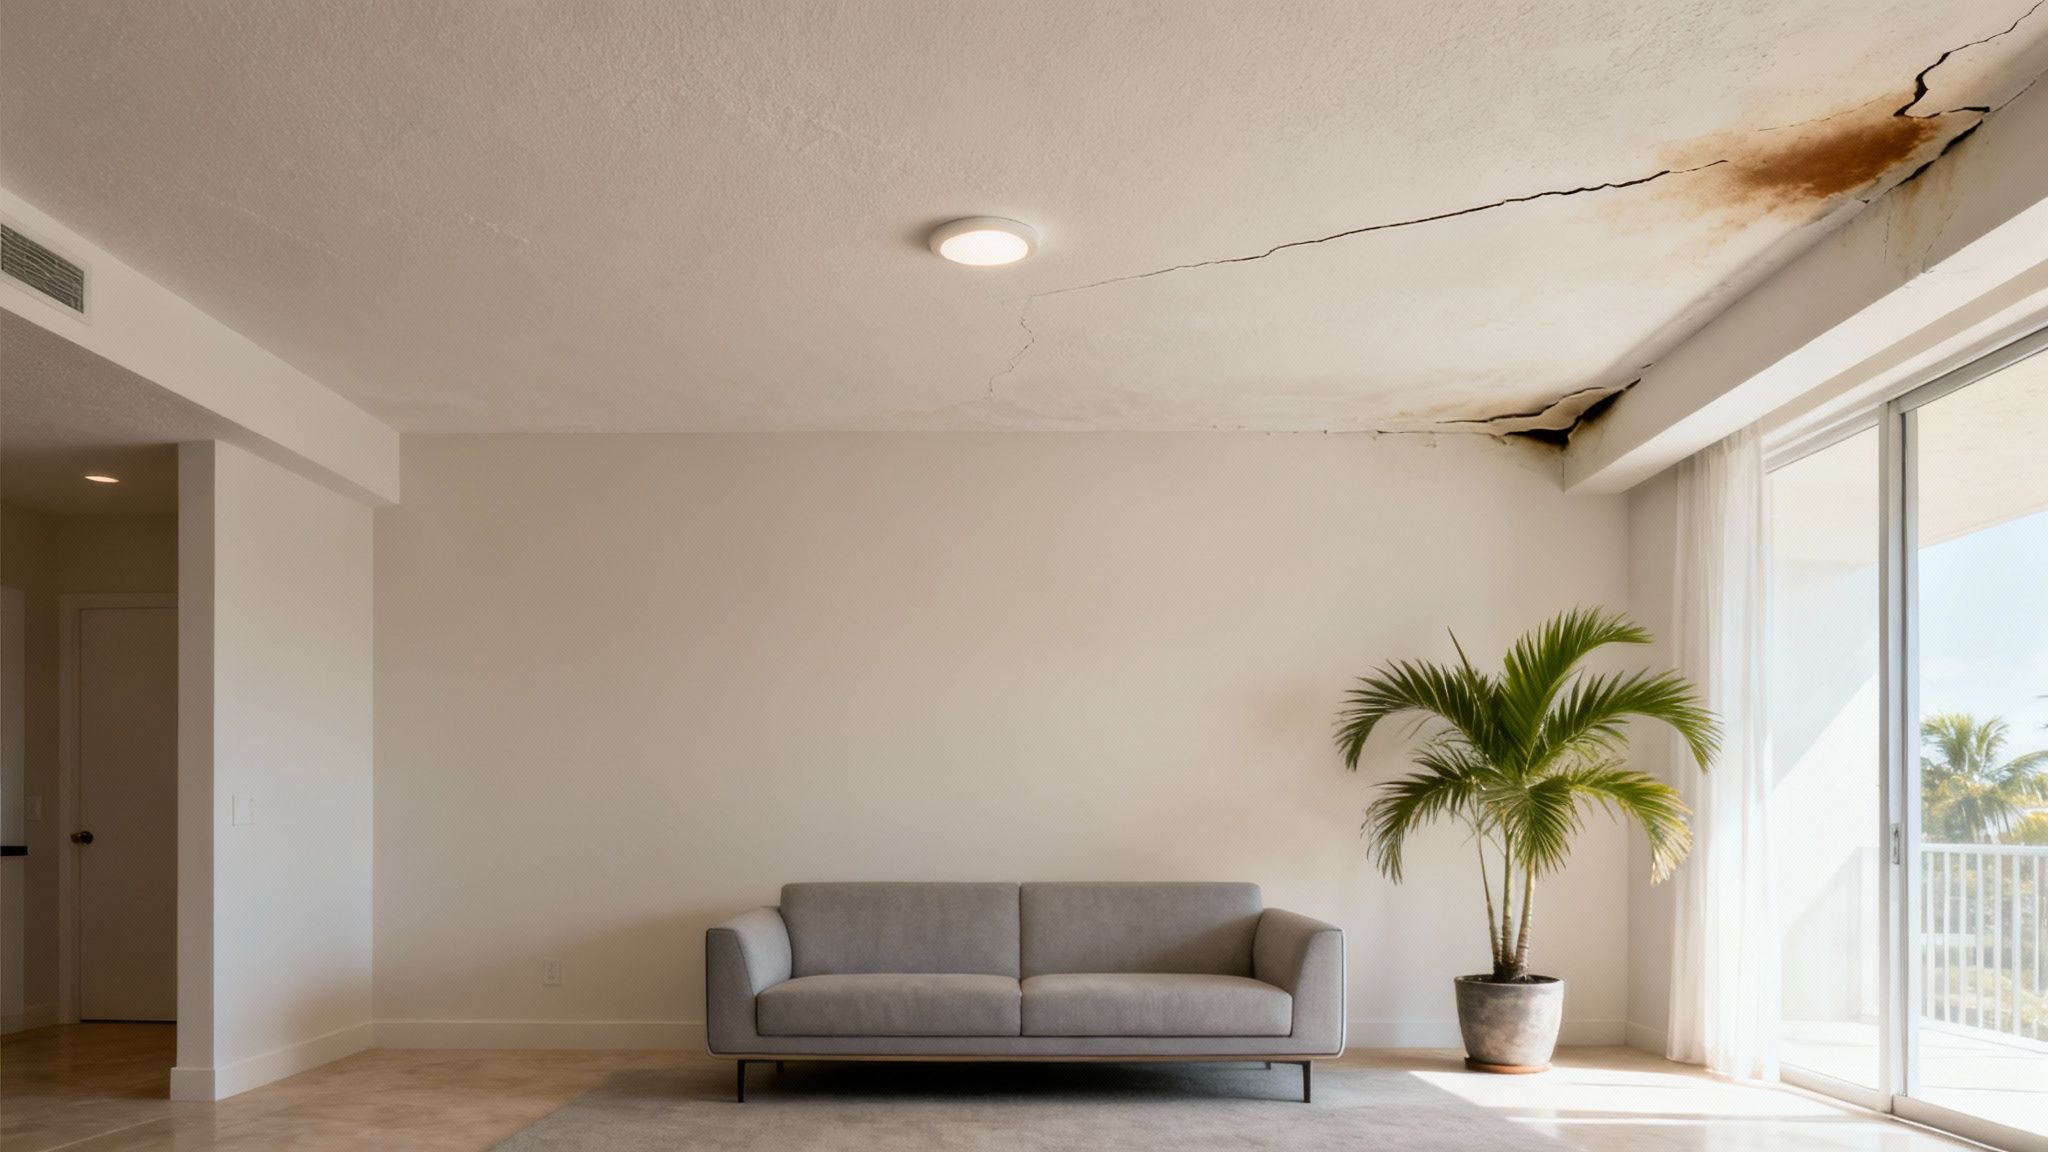
Think of a sagging ceiling as your home's cry for help. It’s a clear signal that something has compromised its structural integrity. Your ceiling's drywall is a lot like a stiff piece of cardboard—when it's dry and properly supported, it stays flat and strong. But the moment it gets wet, it loses all its rigidity.
Drywall acts like a sponge, absorbing moisture and becoming incredibly heavy. This added weight from water saturation is usually far too much for the fasteners and framing to handle. Gravity simply takes over, causing the material to bow, stretch, and eventually droop downward. This is, by far, the most common reason for a sagging ceiling in Pembroke Pines, where our climate is constantly looking for ways to let moisture in.
Common Triggers for Ceiling Damage
While water is the primary villain, a few specific culprits are usually behind the scenes. Pinpointing the source is the first step toward a permanent fix.
- Roof Leaks: Even a tiny breach in your roof can let a surprising amount of water into the attic. That water soaks the insulation and drips directly onto the drywall below, starting the sagging process.
- Plumbing Failures: A leaky pipe from an upstairs bathroom or a malfunctioning AC unit in the attic can be a slow but steady source of moisture, gradually weakening the ceiling over weeks or months.
- High Humidity: Pembroke Pines' thick, humid air can be a problem on its own. If your attic or ceiling cavities have poor ventilation, moisture can build up and slowly compromise the drywall's strength.
The Impact of Heavy Rainfall
The link between our local weather and ceiling damage is impossible to ignore. A heavy downpour can easily overwhelm an older or compromised roofing system, leading to sudden and severe leaks.
In one documented case, an intense rainstorm in Pembroke Pines caused a major ceiling collapse in an apartment building. A roof leak had allowed water to completely saturate the drywall and insulation, and the weight became too much to bear. You can read more about how heavy rains impact local structures to get a better sense of the risks.
A sagging ceiling is more than a cosmetic flaw; it’s a clear indicator that a hidden problem, typically involving water, is actively damaging your home. Addressing the root cause is the only way to ensure a safe and lasting repair.
This guide will walk you through exactly how to identify these causes, figure out how bad the damage is, and find the right solution for your home.
Uncovering the Root Causes of Ceiling Sag
A sagging ceiling is almost never a sudden event. It’s more like a slow leak in a tire—the pressure builds quietly behind the scenes until the visible evidence is impossible to ignore. To get a permanent fix for a sagging ceiling in your Pembroke Pines home, we have to play detective and find the real culprit. Just patching the drywall is like bailing water from a boat with a hole in it. You’re only treating the symptom, not the cause.
The reasons ceilings give out in South Florida are often tied directly to our unique climate. Between the intense sun, tropical downpours, and suffocating humidity, our homes are constantly under stress. By understanding the usual suspects, you can get a much better idea of what’s happening right above your head.
The Number One Culprit: Water Intrusion
By a long shot, excess moisture is the single biggest reason ceilings fail. Drywall, the material used in most modern ceilings, has a gypsum core that acts just like a sponge. When water gets in, it soaks it up, gets incredibly heavy, and loses all its structural strength. Gravity takes over from there, pulling the waterlogged material down.
This water can sneak in from several places, and each one leaves its own set of clues:
- Aging or Damaged Roofs: Your roof is your home's first line of defense. A single missing shingle, a cracked tile, or failed flashing is all it takes for rainwater to seep into the attic, soak the insulation, and start dripping onto the ceiling below.
- Hidden Plumbing Leaks: Sometimes, the problem is inside the house. A slow-dripping pipe from an upstairs bathroom or a clogged AC drain line in the attic can release water for months. This is especially true when you discover shower leaks through the ceiling, creating a serious issue you only notice when the ceiling starts to bow.
- Clogged Gutters: When gutters are jammed with leaves, rainwater has nowhere to go. It backs up, overflows, and often works its way under the roof's edge and into your attic or wall cavities.
Here in South Florida, water damage from aging roofs is a huge contributor. Residential roofs in our climate often have a lifespan of just 10 to 15 years, depending on the material. Putting off repairs can dramatically increase the damage and costs, as the constant water intrusion weakens drywall and creates the perfect environment for dangerous mold growth.
Structural Failures and Other Hidden Dangers
While water is the usual offender, sometimes the problem is with the ceiling's support system itself. These issues are almost always more serious and demand immediate professional attention. A sagging ceiling could be the first warning sign of a deeper structural weakness that puts your home's safety at risk.
A ceiling sag is your home's early warning system. Ignoring it allows the underlying problem—whether it's a leak or a structural issue—to worsen, leading to more complex and expensive repairs down the line.
Figuring out the specific structural cause is critical. Here are a few possibilities that are all too common for homes here in the Pembroke Pines area.
- Termite Damage: Subterranean termites are a relentless threat in South Florida. These pests can quietly chew through the wooden ceiling joists, weakening them until they can no longer hold the weight of the drywall.
- Improper Installation: Sometimes, the problem goes all the way back to construction. If the ceiling joists were spaced too far apart or the wrong thickness of drywall was used, the ceiling simply doesn't have enough support and will start to sag over time under its own weight.
- Foundation Shifting: The ground beneath our homes isn't always static. Gradual settlement can cause the house's frame to shift, putting immense stress on structural parts. This movement can lead to cracks in walls and ceilings and, in severe cases, cause joists to pull away from their supports.
Common Causes of Sagging Ceilings in Pembroke Pines
To figure out what’s causing your ceiling to sag, you need to look for clues. Different causes leave behind different telltale signs. By carefully observing the damaged area, you can narrow down the potential sources before you even pick up the phone.
This table breaks down the most common culprits, what to look for, and how quickly you should act.
| Cause | Key Warning Signs | Typical Urgency Level |
|---|---|---|
| Roof or Plumbing Leak | Yellow or brown stains, peeling paint, active dripping | High |
| Structural Issue | Sagging with no water stains, new cracks appearing | Very High |
| Age or Poor Installation | A long, uniform bow across the center of the room | Medium |
Start by looking for any discoloration. Faint, yellowish-brown stains are the classic sign of a slow, on-and-off water leak. Use your nose, too—a persistent musty smell is a dead giveaway for hidden moisture and potential mold.
If you see no stains at all, the problem is more likely structural. Look for new cracks forming where the ceiling meets the walls, as this can signal that the framing itself is shifting or failing. This process of elimination, from the most likely cause to the most serious, will help you diagnose what's happening in your Pembroke Pines home.
How to Assess the Severity of the Damage
So, you’ve spotted a sagging ceiling. That sinking feeling in your stomach is normal, but the first question on your mind is probably, "How bad is this, really?"
Not every sag is a five-alarm fire signaling imminent collapse, but you absolutely can't afford to ignore it. Learning how to safely size up the situation is key. It helps you decide if you can keep an eye on it for a bit or if you need to get a Pembroke Pines pro on the phone, stat.
Think of yourself as a first responder for your own home. Your job isn't to fix it right now, but to safely gather enough intel to make the right call. The good news? You don't need any fancy tools for this initial check—just your eyes and some common sense from a safe distance.
Your Visual Inspection Checklist
First thing's first: stand back and take in the whole scene. Whatever you do, don't stand directly underneath the sag, especially if it looks severe or you can see any moisture. The goal here is to document the problem without becoming part of it.
Here’s a quick checklist to run through from a safe spot in the room:
- Measure the Droop: How far is the ceiling actually hanging down? A slight bow of less than an inch might be an old, stable issue. But if you’re looking at a sag of several inches, that’s a massive red flag. It means something heavy is pushing down, or the structure is failing.
- Note the Size of the Area: Is it a small, contained spot—maybe the size of a dinner plate? Or does the sag stretch across a huge portion of the room? A widespread sag almost always points to a bigger, more serious problem.
- Check for Discoloration: Do you see any ugly yellow, brown, or dark stains? Those are the classic calling cards of water damage. A stain that looks and feels damp means you have an active leak. If you see a dry, tide-marked ring, it might be from a leak that was fixed long ago.
- Look for Active Dripping: Is water actually beading up or dripping down? An active leak is an emergency. You need to call for help right away to stop the damage from spreading.
- Listen for Sounds: Get quiet for a moment and just listen. In really bad cases, you might hear creaking, cracking, or popping noises. Those sounds can mean the drywall is literally tearing away from the ceiling joists or that the wooden structure is under serious stress.
This simple decision tree can help you put the pieces together, guiding you from that first glance at the sag to what's likely causing it.
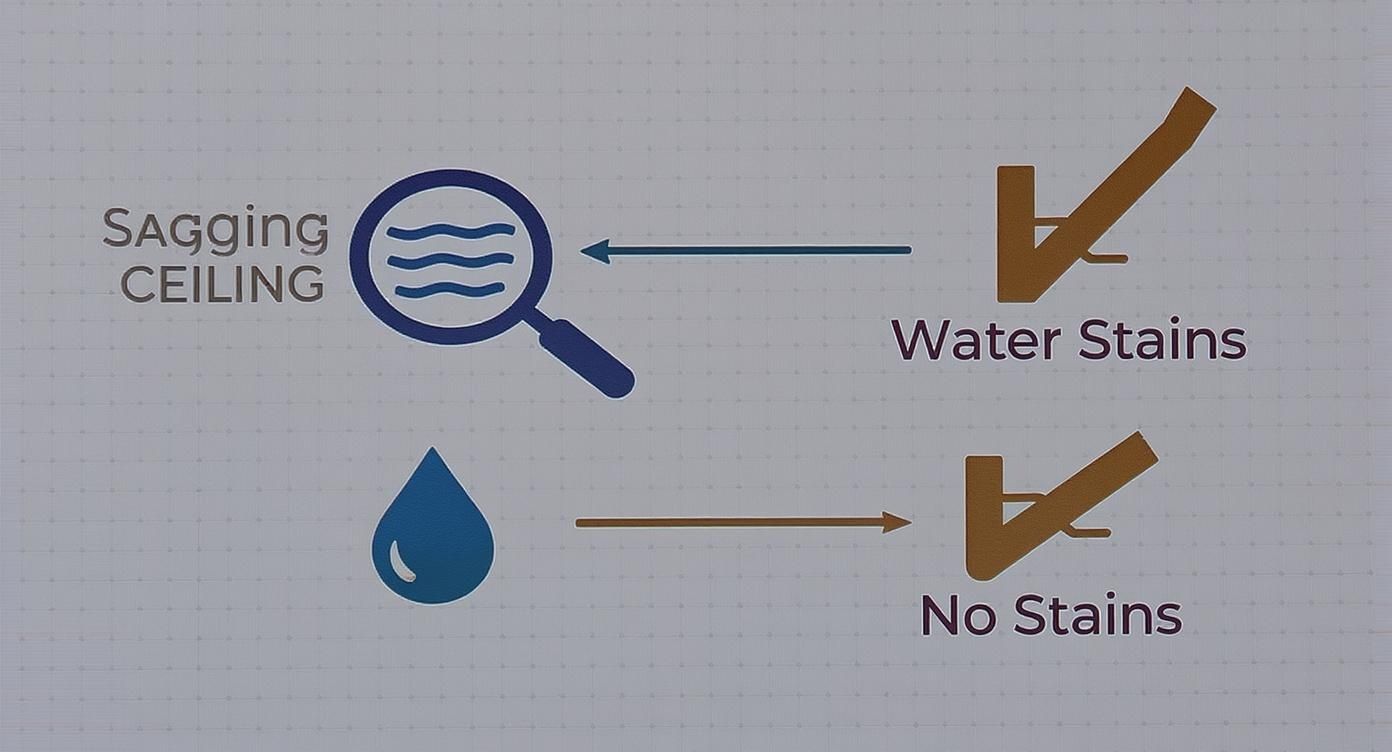
The biggest takeaway here is that water stains are your most important first clue. They immediately tell you which path to go down to find the root cause.
The Traffic Light System for Ceiling Sags
To make it even simpler, think about your ceiling's condition using this "traffic light" system. It's a straightforward way to turn what you've observed into a clear plan of action.
Green Light: Monitor with Caution
This is a small, stable sag (less than an inch) with zero discoloration or signs of moisture. It could easily be a leftover quirk from a past repair or just the house settling. While it’s not an emergency, it's still smart to have a professional from a company like Paletz Roofing and Inspections take a peek during your next routine home maintenance check.
A green-light situation is obviously the best-case scenario, but don't get complacent. In Florida's humidity, small issues have a way of becoming big ones if you're not paying attention.
Yellow Light: Schedule a Professional Assessment
Here, you're looking at a more noticeable sag. It might be larger, or maybe you see some faint, dry water stains. This usually points to a slow or intermittent leak that needs to be hunted down and fixed. It’s not a "drop everything" emergency, but you should definitely get a contractor on the phone within a few days to keep it from getting worse.
Red Light: Immediate Danger – Call a Professional Now
This is the real deal. Any of the following signs immediately put you in the red-light category:
- A large, deep sag that seems to be getting bigger.
- You can see water dripping, or the drywall looks visibly wet.
- You hear any cracking or popping sounds coming from above.
- Big cracks are starting to form where the ceiling meets the wall.
If you spot any of these red-light signs, safety is your only priority. Get everyone out from under that part of the ceiling, rope it off so no one wanders in, and call an emergency repair service in Pembroke Pines immediately. To get a truly comprehensive evaluation of what's going on, getting independent building inspections can also provide invaluable insight. This framework takes the guesswork out of a stressful situation and gives you a clear path forward.
Choosing the Right Ceiling Repair Method
Once you've figured out why your ceiling is sagging and how bad it is, the next step is moving from detective work to taking action. Deciding on the right repair can feel a little overwhelming, but it really boils down to one simple question: Is this a job I can safely handle myself, or is it time to bring in the pros?
The answer hinges entirely on the root cause and just how much damage you're looking at. For most cases of a sagging ceiling in Pembroke Pines, calling a professional isn't just a good idea—it's essential for a safe, permanent fix. The stakes are just too high, especially with South Florida's humidity waiting to exploit any weakness in a patch-up job.
DIY Fixes for Minor Issues
Let's be honest: truly DIY-friendly ceiling repairs are pretty rare. They're almost always limited to minor, cosmetic issues that have nothing to do with moisture or the ceiling's structure.
Here are a couple of scenarios where a confident DIYer might be able to tackle the job:
- Securing Loose Drywall Tape: If you see a perfectly straight, linear crack where the paper tape is peeling, it might just be a joint that's worked loose as the house settled. This can sometimes be fixed by re-taping and re-mudding the joint.
- Fixing Nail Pops: These are those little round bumps or cracks caused by drywall screws backing out a tiny bit. They're cosmetic and can usually be fixed by driving a new screw nearby and patching the small blemish.
But even with these simple-sounding fixes, there’s a huge catch. You have to be 100% certain there's no hidden moisture or structural problem making the tape peel or the nail pop. Without that certainty, your DIY fix is just a band-aid on a much bigger problem.
Professional Repair Techniques Explained
When you’re dealing with a real sag caused by water damage or a structural problem, professional techniques are the only way to go. A qualified contractor in Pembroke Pines has the right tools, the experience, and the safety know-how to handle these complex jobs correctly.
There are two main approaches a pro will take, depending on the level of damage.
Method 1 Propping and Re-Securing Existing Drywall
This is the less invasive option, and it's a good fit when the drywall panel itself is still in solid shape but has simply pulled away from the ceiling joists. This can happen in older homes or if the original installers were a bit stingy with the fasteners.
Here’s how it generally works:
- Support the Ceiling: The contractor builds a temporary support—often called a "deadman" or T-brace—to gently push the sagging drywall back up flat against the joists.
- Add New Fasteners: With the panel pressed firmly back into place, they drive in new, longer drywall screws to create a super-strong bond. The pros know the exact pattern and depth needed to secure the sheet without punching through it.
- Finish the Surface: After it's re-secured, the old screw holes are filled, and the ceiling gets re-textured and painted for a seamless, invisible finish.
This method is perfect for large, even sags where the drywall hasn't been wrecked by water. It saves the existing material, which means less waste and often a lower final bill.
Method 2 Full Replacement of Damaged Sections
When water is the villain—which is the story for the vast majority of sagging ceilings in Pembroke Pines—the damaged drywall is a lost cause. Waterlogged drywall is weak, incredibly heavy, and a perfect breeding ground for mold. In this situation, cutting out and replacing the bad section is the only real solution.
The contractor will carefully cut away the damaged portion, look inside the ceiling cavity for any mold or structural issues, and then fit in a brand-new piece of drywall. If you want to see what this kind of water damage can look like, we have an example in our gallery of completed roofing and repair projects. This careful process ensures every bit of compromised material is gone for good.
The Importance of a Professional Assessment
Trying to choose between these methods isn't a guessing game for a homeowner. A professional inspection is absolutely critical to see what's really going on. A contractor can spot things you can't, like hidden mold growing in the dark ceiling cavity or termite-damaged joists that need to be reinforced before any new drywall goes up.
Attempting a fix without this expert assessment can lead to a repair that fails in a few months or, much worse, leaves a dangerous structural problem hiding over your head. Making the right call from the start ensures your home is safe and gives you a lasting solution that can handle our local climate.
Breaking Down Ceiling Repair Costs in Pembroke Pines
Figuring out the potential cost is a huge part of planning any home repair, and dealing with a sagging ceiling is no exception. The final bill for fixing a sagging ceiling in Pembroke Pines isn’t some single, fixed number you can just look up. Think of it less like buying something off the shelf and more like commissioning a custom job—the price really depends on the unique situation happening right over your head.
A few key variables will shape the final price tag. The size of the damaged spot is the most obvious one; patching a little three-foot section is going to be worlds cheaper than replacing an entire living room ceiling. But honestly, it's the root cause that often plays an even bigger role in the total expense. Fixing a sag from an old drywall job is one thing, but tackling one caused by a major roof leak is a whole different ballgame.
Core Factors That Shape Your Final Bill
When a contractor puts together an estimate, they're really calculating a mix of labor, materials, and just how complex the job is. A straightforward cosmetic fix can be quick and relatively painless on the wallet. But when they start opening things up and find hidden issues, that’s when time and expenses can start to climb.
Here are the main cost drivers:
- Extent of Damage: Is this a small, contained sag, or a widespread problem eating up a huge chunk of the ceiling? The more square footage that has to come down and go back up, the higher the cost. Simple as that.
- Root Cause Complexity: Fixing a sag from a hidden plumbing leak means you need a drywall expert and a plumber. This immediately adds another layer of complexity and cost compared to a simple structural issue.
- Mold Remediation: If water damage has led to mold growth inside the ceiling—a super common problem here in humid South Florida—that’s a hard stop. The mold has to be professionally and safely removed before any new drywall goes in. That’s a specialized service with its own price tag.
The total cost of a ceiling repair is directly tied to the severity of the underlying problem. A small patch might only cost a few hundred dollars, but extensive repairs involving water damage and mold can easily run into the thousands.
Visualizing Potential Repair Costs
To give you a clearer picture, it helps to look at costs based on different repair scenarios. While these are just ballpark figures, they offer a realistic starting point for what you might expect to pay for a professional ceiling repair in the Pembroke Pines area.
Just remember, local labor rates and the specific materials chosen will always make these numbers move around a bit.
Here’s a breakdown to help you get a handle on potential costs for your project.
Sample Sagging Ceiling Repair Costs in Pembroke Pines
| Repair Scenario | Estimated Cost Range | Key Cost Factors |
|---|---|---|
| Minor Drywall Patch | $300 – $750 | Small area (under 4×4 ft), no structural issues, minimal re-texturing |
| Moderate Water Damage | $750 – $2,500 | Medium area, replacing wet drywall, minor leak repair |
| Extensive Structural Repair | $2,500 – $6,000+ | Large area, replacing joists, major leak repair, mold remediation |
At the end of the day, the only way to know the true cost is to get a detailed, written quote from a licensed and insured local contractor. This step empowers you to budget correctly and understand exactly what you’re paying for, making sure you get a safe and durable fix for your home.
Proactive Maintenance to Prevent Future Ceiling Damage
Let’s be honest—the best repair for a sagging ceiling is the one you never have to make. Once you’ve dealt with an immediate problem, the smartest thing any homeowner can do is shift focus to prevention. Think of proactive maintenance as a wellness plan for your home; it’s all about catching small issues before they snowball into costly disasters.
Here in Pembroke Pines, our homes are constantly under assault from the subtropical climate. The intense sun, torrential rain, and suffocating humidity are always looking for a weak spot. A simple, consistent maintenance routine is your best defense to protect your property and sidestep the stress and expense of future ceiling damage.
Your South Florida Home Maintenance Checklist
Staying one step ahead of problems doesn't mean dedicating your weekends to home repair. It just takes a bit of consistency. By regularly checking a few key areas, you can dramatically lower the risk of water intrusion—the undisputed number one cause of sagging ceilings.
Here’s a straightforward checklist designed for the unique challenges we face in South Florida:
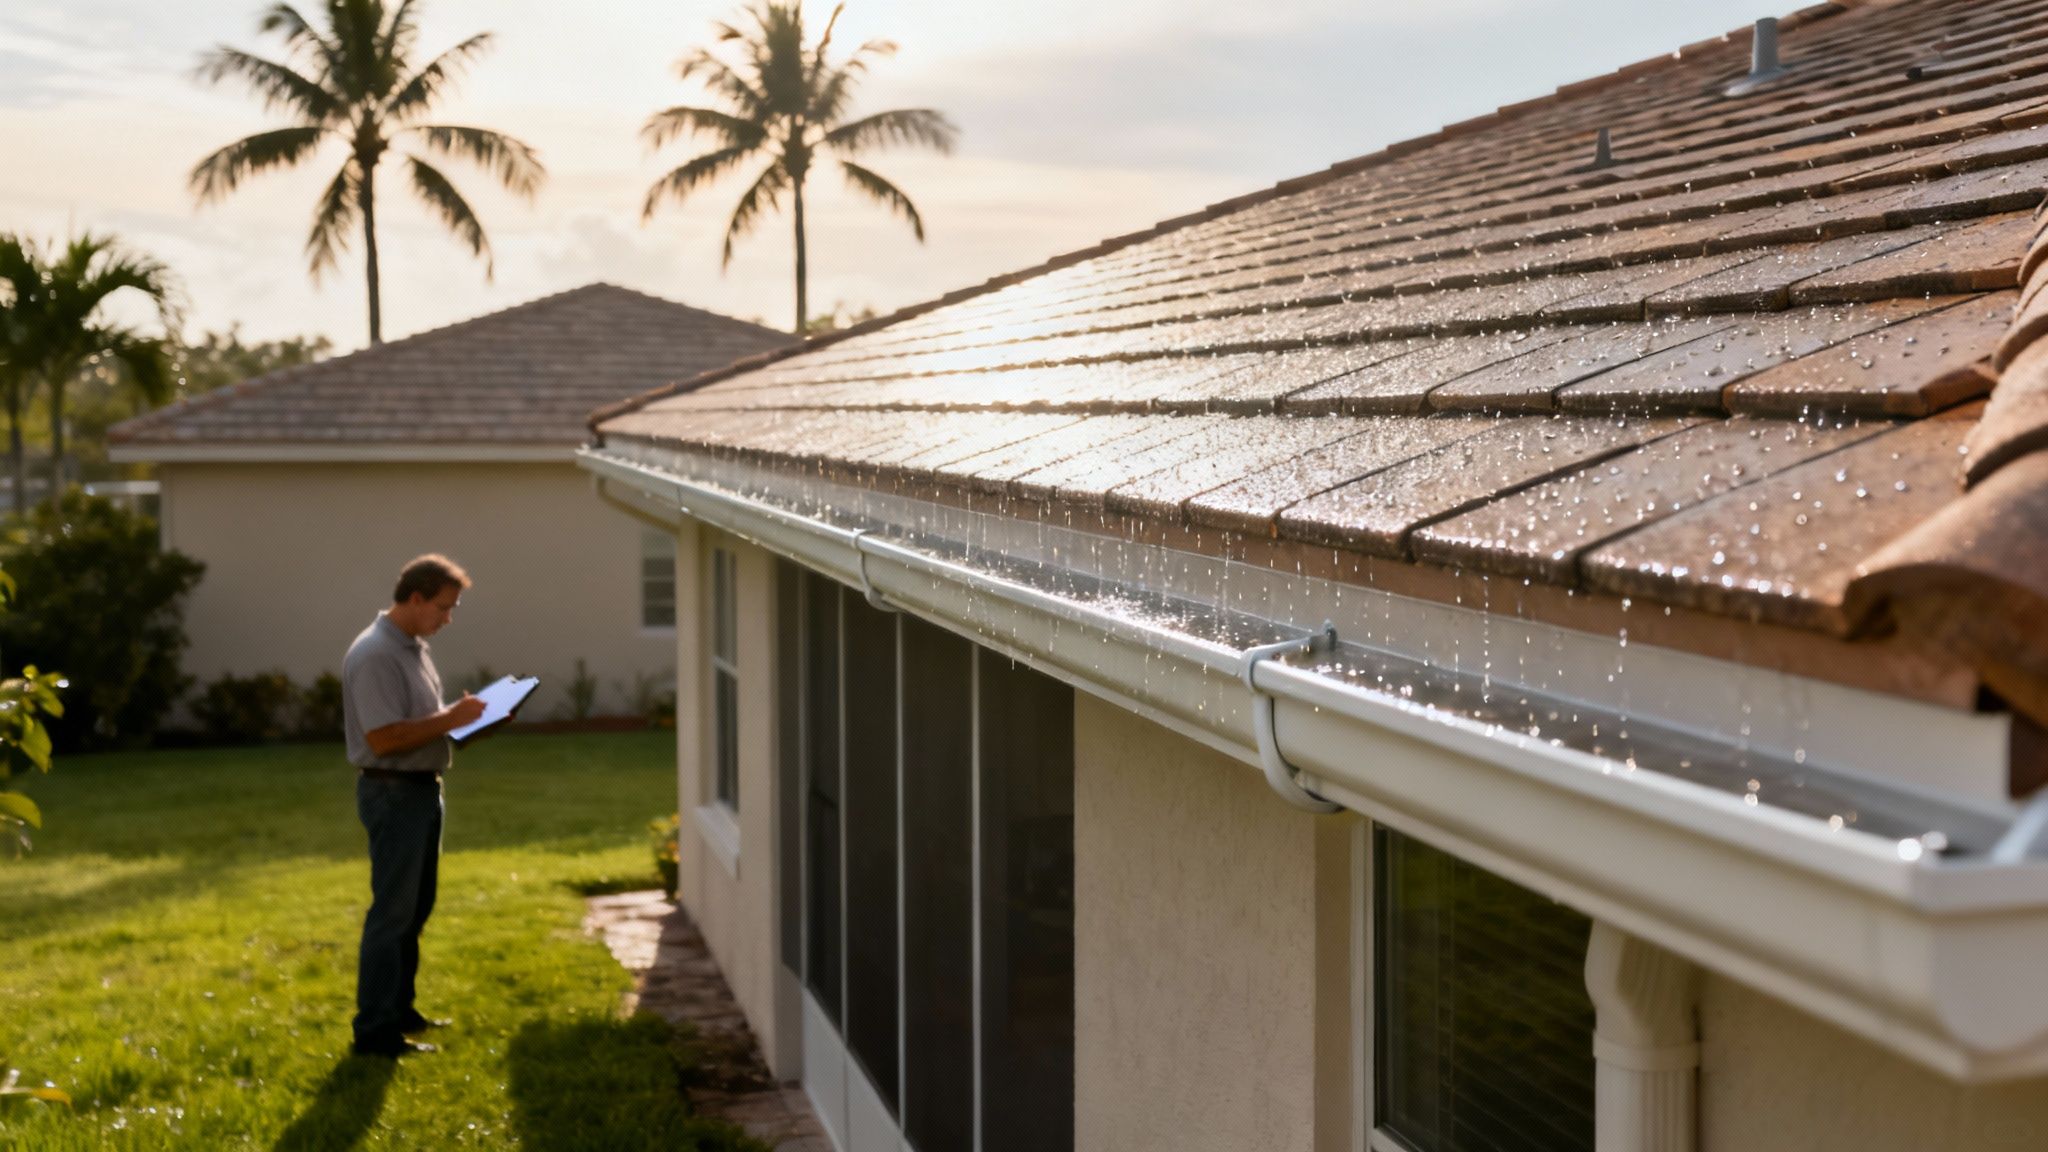
- Inspect Your Roof Seasonally: Your roof is your home's primary shield. At least twice a year, and always after a major storm, do a quick visual inspection from the ground. Look for any shingles that are missing, cracked, or curling up at the edges, as these are open invitations for water.
- Keep Gutters Clean and Clear: Clogged gutters are a classic recipe for roof leaks. When rainwater can't flow away, it backs up, seeps under the roof's edge, and soaks everything from the fascia to your attic insulation. Clean them out every few months, especially during our rainy season.
- Monitor Indoor Humidity: Don't forget about moisture from the inside. High indoor humidity can lead to condensation building up inside your walls and ceiling cavities. Running a dehumidifier during the muggiest months helps protect your drywall's integrity from the inside out.
If you want a detailed look at what a healthy, well-maintained roof should look like, you can browse through the photos in our completed roofing projects gallery. It’s a great reference for spotting potential problems during your own inspections.
Watching for Structural Shifts
Beyond water damage, gradual changes in your home’s foundation can also put stress on your ceiling. While it's less common, it’s a factor worth keeping on your radar in our region.
The ground beneath our homes isn't always static. Gradual geologic shifts can affect a building’s foundation, leading to subtle structural stress over time.
Subsidence, which is the slow sinking of the ground, is a known risk for buildings throughout South Florida. This movement is tied to our area's unique geology, where layers of sand within the limestone can create instability. While Pembroke Pines hasn't been flagged as an extreme hotspot, the shared geology means homeowners should stay vigilant. Keeping an eye on small cracks forming in your walls can be an early warning sign of this type of settlement, giving you the chance to act before it becomes a major problem.
Your Top Ceiling Repair Questions Answered
When you’re staring up at a drooping or damaged ceiling in your Pembroke Pines home, a lot of questions probably run through your mind. It’s a stressful situation, but getting clear, straightforward answers can help you figure out your next move. Here’s what homeowners like you ask us most often.
How Fast Do I Really Need to Fix a Sagging Ceiling?
The honest answer? It completely depends on why it's sagging. If you spot active dripping, see the sag growing noticeably larger by the hour, or hear any cracking or groaning sounds, that’s an emergency. Get everyone out from under that area right away and call a professional. No hesitation.
On the other hand, a small, stable sag that isn't wet to the touch gives you a bit more breathing room. You can monitor it, but don't ignore it. Here in South Florida, the high humidity is notorious for turning minor issues into major headaches over time. Scheduling an inspection sooner rather than later is always the smart play.
If you even suspect an active water leak or a structural problem, don't wait. A fast response to a sagging ceiling in Pembroke Pines is your best bet to prevent a total collapse and keep repair costs from spiraling.
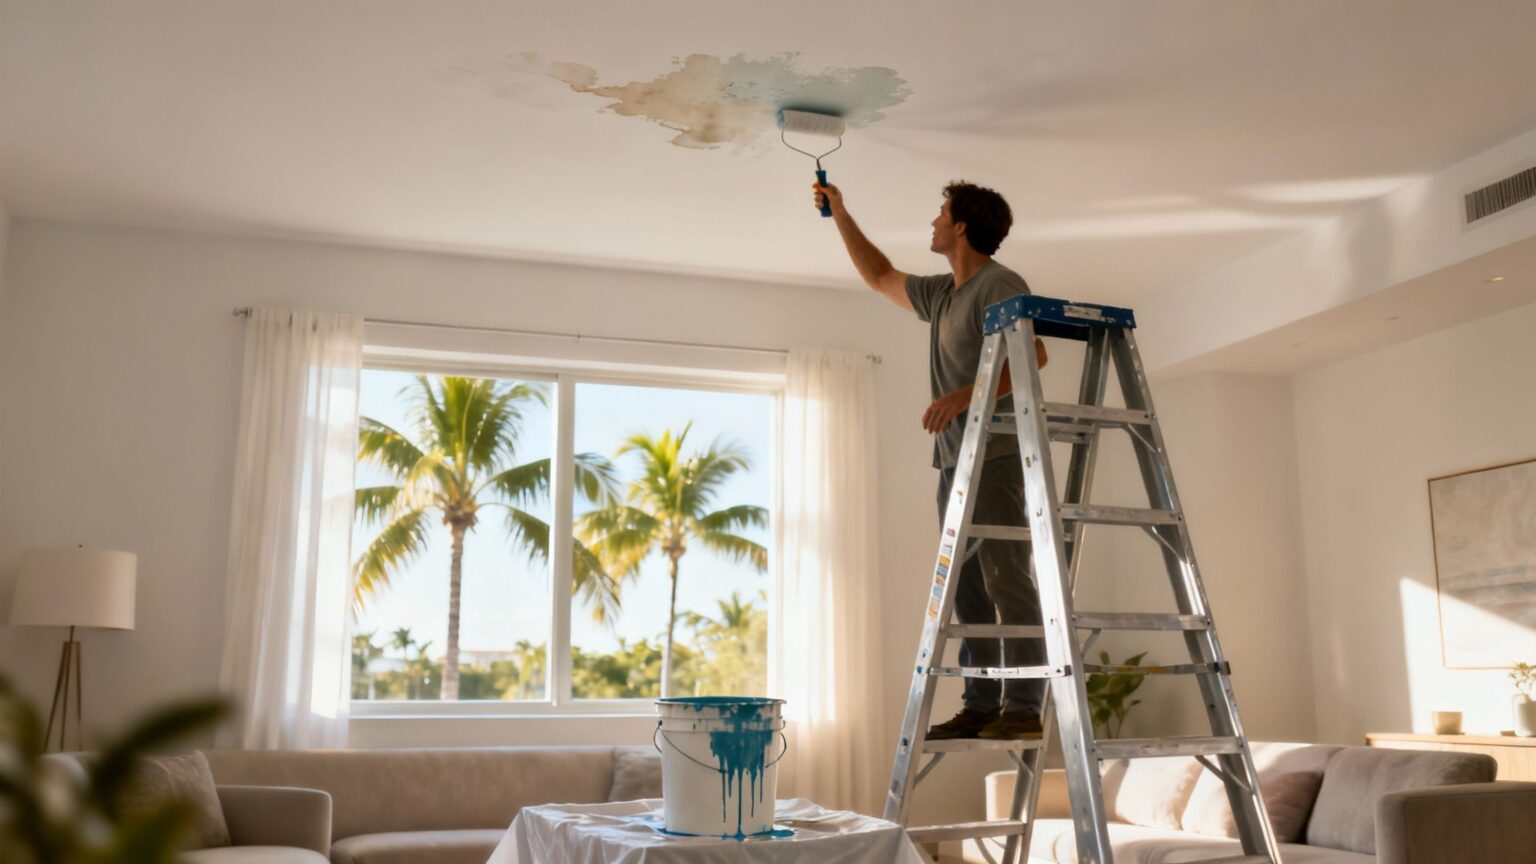
Can I Just Slap Some Paint Over Ceiling Water Stains?
Painting over a water stain is like putting a bandage on a broken arm. It hides the ugly part, but it does absolutely nothing to fix the actual problem. That stain is a big, brown warning sign that moisture is getting in somewhere.
Unless you track down and fix the source of that leak, water will just keep soaking the drywall from the other side. That lingering moisture is a perfect breeding ground for dangerous mold and will eventually weaken the material until the ceiling gives way. Always fix the leak first, cut out and replace the damaged drywall, and then you can think about painting.
Will My Homeowners Insurance Cover This Sagging Ceiling?
This is the big question, and the answer almost always comes down to your specific policy and what caused the damage in the first place. Generally, insurance policies are designed to cover damage from a sudden and accidental event—think a pipe bursting overnight or a tree branch crashing through during a storm.
Where coverage gets tricky is with damage from gradual problems. A slow, undetected leak that’s been dripping for months or issues caused by a lack of routine maintenance are typically not covered. The best thing you can do is pull out your policy documents and call your agent directly to get a clear picture of what your plan covers.
If you're dealing with a sagging ceiling, don't let the problem get worse. Reach out to Paletz Roofing and Inspections for a professional assessment. We’ll give you a reliable repair plan to keep your home and family safe. Find out more at https://paletzroofing.com.