Putting a new roof on your property is a huge undertaking. It’s not just about nailing down some shingles; it's a carefully orchestrated project that protects your home’s very structure and can seriously boost its value. Think of it as creating a custom-fit, weather-resistant shield through smart design, proper material selection, and expert installation.
Your Blueprint for a Successful New Roof

Building a new roof is one of the most critical investments you’ll ever make for your property's long-term health and safety. This guide is your project blueprint, breaking down the entire journey into clear, manageable steps so you can feel confident in your decisions.
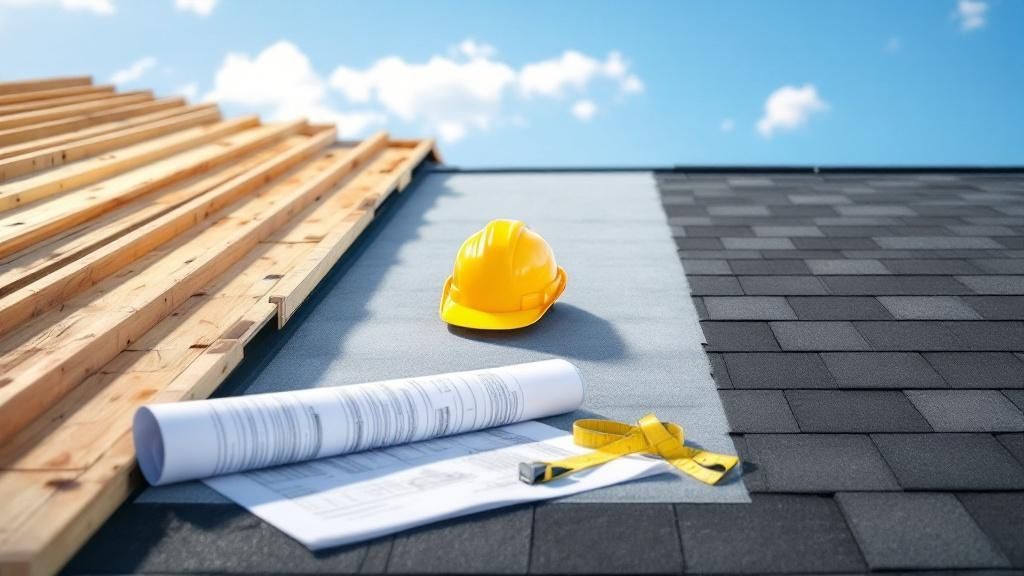
Every successful roof project starts with a solid plan. A set of comprehensive construction drawings acts as the ultimate roadmap, detailing every piece of the design. This helps you get a firm grip on the technical, financial, and logistical moving parts required to build a roof that will last for decades.
Understanding the Scope of the Project
When you decide to build a new roof, you’re stepping into a massive industry filled with skilled professionals. The U.S. roofing industry is a major economic force, currently valued at around $56.7 billion and on track to blow past $60 billion soon.
With almost 99,000 roofing contractor businesses out there, finding the right partner for your project is absolutely crucial.
A new roof isn't just a replacement; it's a completely new system engineered from the decking up. Unlike a simple re-roofing job that lays new shingles over old ones, new construction ensures every component is sound, properly installed, and up to current building codes.
Key Stages of New Roof Construction
A successful roof installation is a multi-layered process. Each phase builds on the last, and getting them all right is the only way to end up with a cohesive, resilient structure that you can count on.
- Design and Planning: This is where it all begins. You’ll choose the roof style, pitch, and materials that best fit your home’s architecture and stand up to your local climate.
- Permitting and Compliance: Before any work starts, you have to get the necessary local permits. This step ensures your new roof meets all current safety standards and building codes. No skipping this one.
- Material Selection: This is a big one. Choosing between asphalt, metal, tile, or other options will have a huge impact on your roof's durability, appearance, and long-term maintenance needs.
- Installation and Inspection: This is the hands-on phase where the pros bring the plan to life. Once the work is done, inspections are performed to guarantee the quality of the workmanship.
Designing a Roof Built for Your Home and Climate
The design phase is where a new roof goes from being a simple covering to a high-performance system. This is the stage where long-term success is really decided, engineering a roof that works perfectly with your home’s structure and the local weather—it's about so much more than just picking a color.
Think of it like choosing the right tires for a car. You wouldn't put racing slicks on a truck you're taking off-road. In the same way, your roof has to be designed with a specific purpose in mind, whether that’s shedding heavy snow in the mountains or resisting hurricane-force winds on the coast.
This part of the process is a partnership between your vision and a contractor’s technical know-how. Get it right, and you get a roof that's both beautiful and tough as nails. Skimp on the design, and you’re setting yourself up for leaks, poor energy efficiency, and repairs that could have been avoided.
The Critical Role of Roof Pitch
One of the first things we look at is the roof pitch, which is just a roofer's term for the slope or angle of the roof. This isn't just about looks; it's a critical feature that determines how well the roof gets rid of water, snow, and debris. We measure pitch as a ratio, like 4/12, which means the roof rises 4 inches for every 12 inches it runs horizontally.
Different pitches have their own strengths and weaknesses:
- Low-Slope Roofs (Below 3/12): You see these on a lot of modern-style homes and commercial buildings. Because water drains so slowly, they need specialized waterproofing membranes to stay dry. They’re definitely not the right choice for places that get a ton of snow or rain.
- Conventional-Slope Roofs (4/12 to 9/12): This is the sweet spot for most residential homes. It’s sloped enough to shed water easily but not so steep that it’s impossible to walk on for maintenance. This pitch works with almost any material, from standard asphalt shingles to metal panels.
- Steep-Slope Roofs (Above 9/12): Great for making a statement and for dumping snow and rain in a hurry. The downside? They're trickier and more expensive to install and repair, simply because they are so difficult to work on safely.
Engineering for Structural Loads
A roof has to hold up more than just its own weight. It needs to be engineered to handle the absolute worst your local environment can throw at it—what we call the live load. This includes the crushing weight of a heavy snowstorm, the immense force of high winds, and even the weight of a few workers making repairs.
For instance, a roof in South Florida has to be designed to stand up to hurricanes, which means very specific nailing patterns and structural tie-downs. Up north, that same roof design would be a disaster; it needs to be framed to support several feet of wet, heavy snow without even thinking about buckling. This is where a structural engineer often steps in to do the calculations and make sure the framing is strong enough for whatever mother nature has in store.
A well-designed roof system doesn’t just protect you from the elements; it actively manages them. Proper structural design prevents catastrophic failures during extreme weather events, safeguarding both your property and your family.
Designing an Effective Ventilation System
Finally, there’s a crucial design element that’s easy to overlook: ventilation. A properly balanced ventilation system creates a steady airflow from intake vents (usually under the eaves in the soffits) to exhaust vents (up near the peak). This constant circulation is absolutely vital for the health of your roof and your entire house.
Without good airflow, heat and moisture get trapped in the attic. In the summer, that trapped heat can bake your shingles from below and drive up your cooling bills. In the winter, warm, moist air from inside your home can condense on the cold underside of the roof deck, leading to mold, rot, and destructive ice dams. A smart ventilation design keeps the attic temperature close to the outside air, helping your roofing materials last longer and making your home more energy-efficient.
Choosing Materials for Longevity and Performance
Picking the right materials for your new roof construction is a lot like choosing the engine for a new car. It doesn't just define the look—it dictates the power, endurance, and long-term reliability of the whole system. This decision is always a balance between durability, aesthetics, and your budget, directly influencing how your roof will hold up for decades to come.
It's tempting to focus on the upfront price tag, but the real win is in understanding the cost-to-value ratio of each option. The cheapest material today might not be the most cost-effective over a 30-year span once you factor in maintenance, repairs, and potential replacements. A smart choice now saves a world of money and headaches down the road.
Comparing Popular Roofing Materials
The material you choose is your home's primary shield against the elements. Every option brings a unique mix of benefits to the table, from the classic appeal of tile to the modern resilience of metal. Getting a handle on these differences is the key to making a confident investment in your property's future.
Here are a few of the most common and effective materials we see in modern roofing:
- Architectural Asphalt Shingles: These are the go-to choice for residential roofing, and for good reason. They hit a sweet spot between cost, durability (lifespans often hit 25-30 years), and aesthetic versatility, convincingly mimicking more expensive materials like slate or wood.
- Standing-Seam Metal: Known for its incredible longevity, a well-installed metal roof can easily last 50 years or more with very little upkeep. It offers superior resistance to wind, fire, and moisture, making it a fantastic investment, especially in harsh climates.
- Classic Clay and Concrete Tiles: With unmatched beauty and a lifespan that can stretch beyond a century, tile roofing is a premium choice. It's incredibly durable and fire-resistant, but it's also heavy, which means your home's structure might need extra support.
- Modern Composite Materials: These engineered products blend plastics, polymers, and recycled materials to create a lightweight yet tough alternative. They can replicate the look of natural slate or cedar shakes without the high cost and maintenance headaches.
To make this easier, here's a side-by-side look at how these common materials stack up.
Roofing Material Comparison Guide
This table breaks down the most common roofing materials across the factors that matter most, helping you find the right fit for your property's needs and your budget.
| Material Type | Average Lifespan (Years) | Cost per Square Foot ($) | Key Advantages | Key Disadvantages |
|---|---|---|---|---|
| Architectural Shingles | 25-30 | $5 – $9 | Affordable, versatile appearance, widely available, easy to install. | Shorter lifespan than others, susceptible to wind and storm damage. |
| Standing-Seam Metal | 50+ | $10 – $18 | Extremely durable, energy-efficient, low maintenance, high wind resistance. | Higher upfront cost, can be dented, installation is specialized. |
| Clay & Concrete Tile | 100+ | $12 – $25+ | Exceptional lifespan, fireproof, aesthetically pleasing, low maintenance. | Very heavy (may require structural reinforcement), brittle, high cost. |
| Composite/Synthetic | 40-50 | $9 – $15 | Mimics natural materials, lightweight, durable, often made from recycled content. | Higher cost than asphalt, newer technology with less long-term history. |
Ultimately, this comparison shows there's no single "best" material—only the best one for your specific project.
The Rise of Sustainable and Smart Roofing
Technology is pushing the boundaries of what a roof can do. Property owners are increasingly looking for materials that not only protect their buildings but also contribute to energy efficiency and sustainability. This shift is fueling some serious market growth.
The global roofing market was valued at around $214 billion in 2023 and is projected to climb to about $280 billion by 2029. A huge driver of this growth is the demand for eco-friendly and high-performance systems. Solar roofing, for instance, is expected to see demand jump by approximately 15% annually. These numbers paint a clear picture: consumers are prioritizing long-term value and green technology. You can discover more roofing industry trends and see what they mean for homeowners.
Choosing a roofing material is no longer just a structural decision; it's an environmental and financial one. Modern options can actively lower your energy bills and reduce your home's carbon footprint, turning your roof into a functional asset.
Innovative Options for the Modern Home
Beyond the traditional choices, several forward-thinking materials are delivering exceptional long-term savings and performance. These options are especially relevant for property owners looking to get the absolute most out of their investment in new roof construction.
Two standout innovations are:
- Solar Tiles and Shingles: These systems build photovoltaic technology directly into the roofing material itself. The result is a seamless, powerful, energy-generating system. While the initial investment is higher, they can dramatically reduce or even completely wipe out electricity bills over their lifespan.
- Cool Roof Systems: These roofs are designed with materials that have high solar reflectivity, basically bouncing sunlight and heat away from the building. This simple concept can lower roof surface temperatures by over 50°F, which significantly cuts down on air conditioning costs—a game-changer in sunny climates like South Florida.
Making the right choice means weighing all these factors against your specific needs, your home's architectural style, and your local climate. By carefully thinking through the longevity, maintenance, and overall value of each material, you can build a roof that provides superior protection and performance for many years to come.
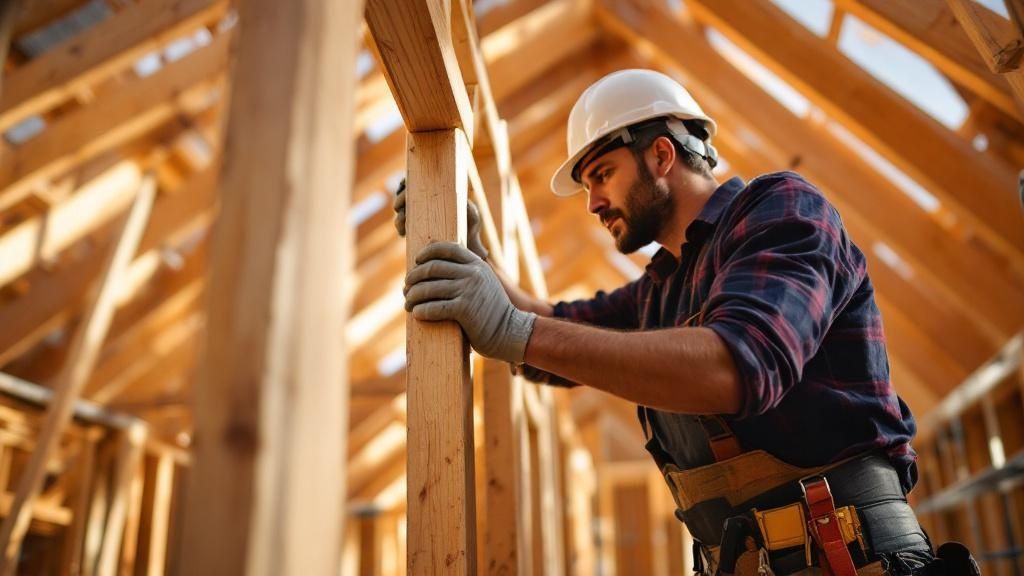
Understanding the Installation Process Step by Step
Watching your new roof construction come to life is an exciting part of any building project. But really understanding what’s happening and why it's happening empowers you to spot quality work when you see it. Think of the installation process as building a multi-layered shield for your home—each step is critical, and a single mistake can compromise the entire system.
The whole sequence, from prepping the site to nailing the last shingle, is a carefully choreographed dance of skill and precision. Contractors often rely on the best construction scheduling software tools to keep these complex projects on track.
For you, the property owner, knowing these stages demystifies the process. It transforms you from a bystander into an informed partner, able to appreciate the craftsmanship involved.
Preparing the Foundation for Your New Roof
The first boots on the ground are all about preparation. This is more than just dropping off materials; it's about safeguarding your property. Good crews will meticulously lay down heavy-duty tarps to protect your landscaping, siding, and windows from the inevitable mess.
Next up is the "tear-off"—the removal of any old roofing. This is where the real foundation of your roof is revealed: the decking. Usually made of plywood or OSB (oriented strand board), this wooden surface is what every other layer will be attached to.
The tear-off is a moment of truth. It's when contractors often find nasty surprises like soft or rotted decking from old leaks. Fixing this is non-negotiable. Building a new roof on a compromised deck is like building a house on a cracked foundation—it’s just asking for trouble.
Once the old roof is gone and any necessary deck repairs are made, the crew sweeps the surface clean. You need a pristine canvas before the real waterproofing work begins.
Building the Waterproof Barrier
With a solid, clean deck ready to go, the focus shifts to creating a truly watertight barrier. This starts with installing a drip edge, a simple but essential piece of metal flashing that runs along the eaves. Its job is to kick water away from your fascia and directly into the gutters.
The next layer is the underlayment. Forget the old tar paper you might be picturing. Today's synthetic underlayments are the gold standard, offering incredible tear resistance and far superior water protection. This sheet is rolled out across the entire roof deck, acting as your second line of defense against any moisture that might find its way past the shingles.
This is how all those critical waterproofing layers come together to form a protective shield over the raw wood decking.
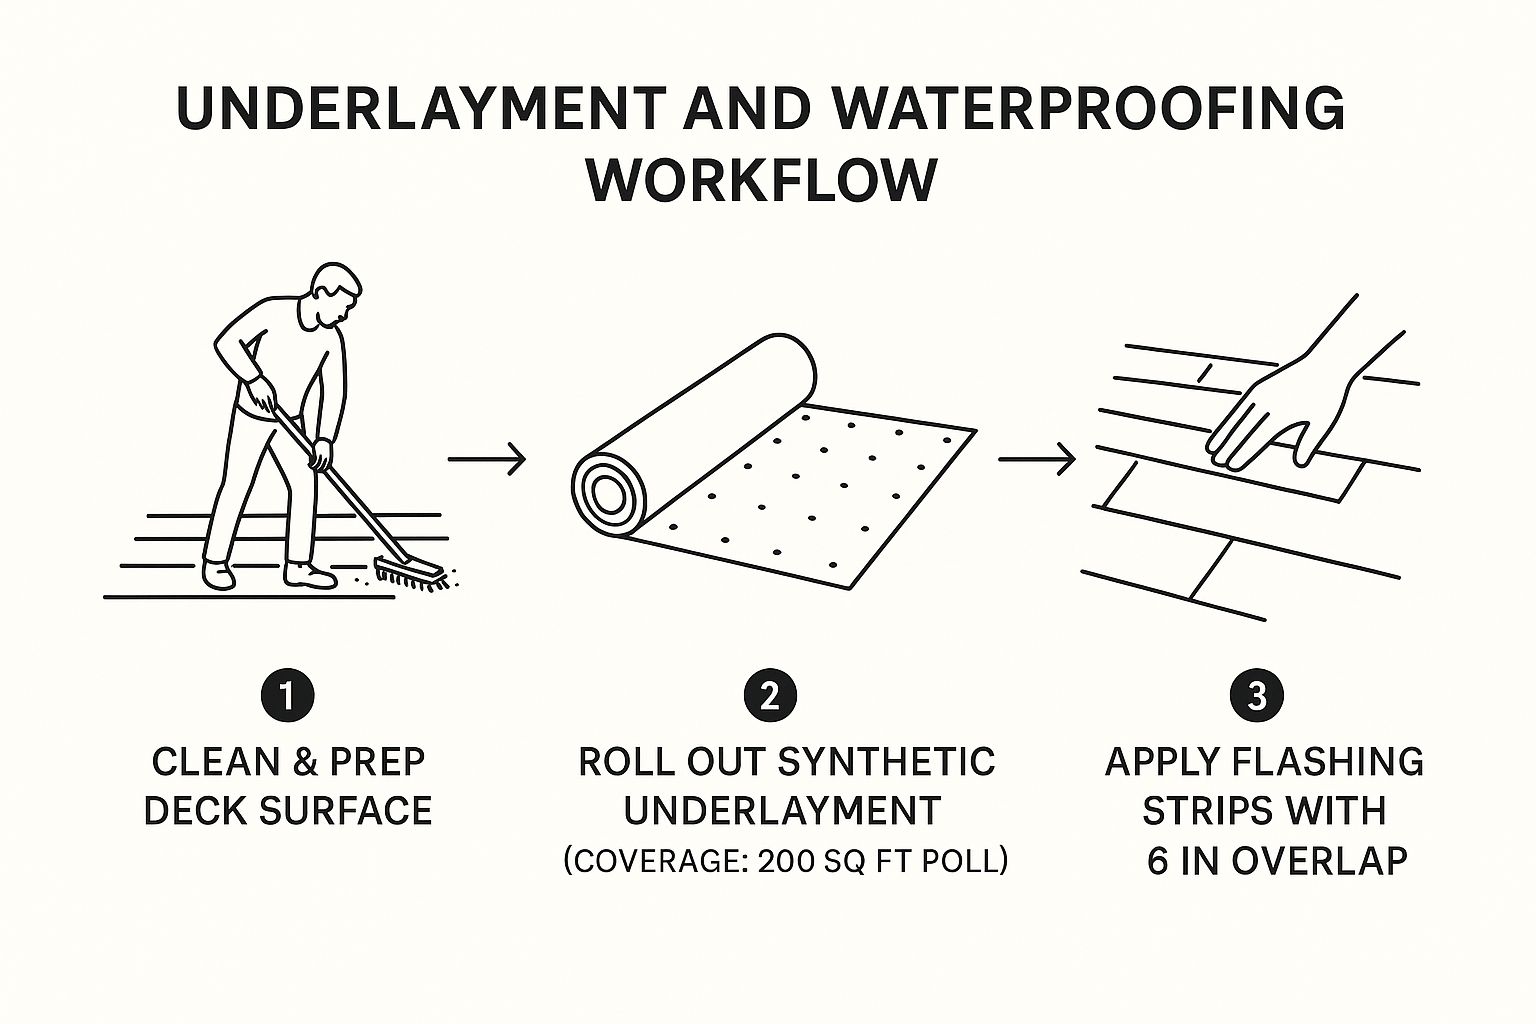
As you can see, every piece, from the underlayment to the flashing, is designed to overlap and integrate, creating a seamless barrier before a single shingle is laid.
Finally, crews install specialized flashing around the roof’s weak spots. These custom-bent pieces of metal seal the gaps around chimneys, vents, and skylights—the places where leaks are most likely to start.
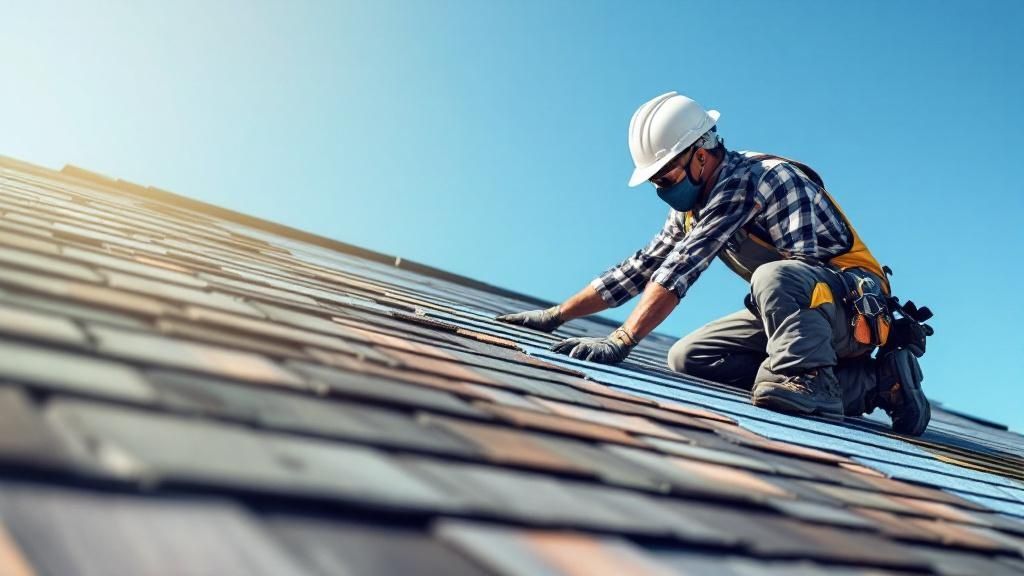
Installing the Final Roofing System
This is the main event, the stage where your new roof finally starts to look like a roof. Whether you chose asphalt shingles, standing seam metal, or classic clay tiles, the crew will start at the bottom edge of the roof and work their way up.
If you have shingles, the nailing pattern is everything. Manufacturers have strict guidelines on the number and placement of nails required to meet wind-resistance ratings. Skimping here can void your warranty and lead to shingles blowing off in the first big storm. A pro crew knows this and nails every shingle with precision.
The job isn't done until the finishing touches are perfect:
- Ridge Cap Installation: Special shingles are installed along the peaks (ridges) and hips of the roof. This seals these high-stress joints and gives the roof a clean, finished profile.
- Ventilation System: To ensure a healthy attic, exhaust vents are cut in near the ridge. These work in tandem with soffit vents to create the airflow that prevents moisture and heat buildup.
- Final Cleanup: A good crew leaves the site cleaner than they found it. They’ll clear all construction debris from your property and run magnetic rollers through the yard to pick up stray nails.
The project concludes with a final quality inspection. The foreman will walk the entire roof, checking every detail to ensure every seal is tight and every component is installed to the highest possible standard.
How to Hire the Right Roofing Contractor
You can plan the perfect design and choose the best materials, but none of it matters without the right team doing the work. The contractor you hire is single-handedly the most important factor in a successful roofing project. A true professional ensures your new roof construction goes off without a hitch, while the wrong choice can turn a major investment into a costly nightmare.
Finding that perfect partner isn't about luck; it's a methodical process. This is more critical than ever, with the global roofing market projected to hit around USD 132.5 billion. North America is driving a huge chunk of that demand, meaning there are more companies out there than ever before. With so many options, you need a clear game plan to vet the contenders.
Verifying the Non-Negotiables
Before you even think about looking at a quote, every contractor you consider must clear a few essential hurdles. These are the absolute, must-have credentials that shield you from liability, outright fraud, and shoddy work. Think of this step as your first line of defense, filtering out the amateurs from the start.
Your initial checklist should be simple and direct:
- State Licensing: Is the contractor fully licensed to operate in your state? This isn't just a piece of paper; it proves they've met the minimum standards for knowledge and sound business practices.
- Comprehensive Insurance: Ask to see proof of both general liability insurance and worker's compensation. Liability covers any damage to your property, and worker's comp protects you from being sued if a crew member gets injured on your site.
- Manufacturer Certifications: The best roofers often carry special certifications from the material manufacturers themselves, like GAF or Owens Corning. This means they’ve been trained to install those specific products correctly—a requirement that can make or break your material warranty.
Never, ever take someone's word for these things. A legitimate pro will have no problem providing you with physical or digital copies of their license and insurance certificates. If they hesitate, that's a massive red flag.
As you do your homework, pay attention to a company's online footprint. A professional website and a solid grasp of modern digital marketing for roofers are often good signs of a well-run, customer-focused business.
Asking the Right Questions
Once you have a shortlist of qualified candidates, it's time to start the interviews. The goal here is to get a feel for their process, their real-world experience, and how they communicate. You need to move beyond "How much?" and ask questions that reveal how professional they truly are.
Here are a few essential questions to get you started:
- Do you use subcontractors? You need to know exactly who will be working on your property. This is a crucial question for accountability.
- How do you handle surprises, like finding rotted decking? Their answer tells you a lot about their experience, contingency planning, and how they manage change orders.
- What's your process for protecting my property and cleaning up the site? A detailed response shows they respect your home and landscaping.
- Can you provide a fully itemized quote? A vague, lump-sum estimate is a bad sign. You need a clear breakdown of all costs, including materials, labor, and permits.
- What kind of warranty do you offer on your workmanship? This is completely separate from the manufacturer's material warranty and shows how much confidence they have in their own crew's work.
By following this structured approach, you can move past the sales pitches and confidently choose a roofing contractor who will be a reliable partner for your entire construction project.
Navigating Building Permits and Inspections
Let's talk about the part of a roofing project that makes most people groan: building permits. Dealing with the local building department can feel like a bureaucratic headache, but it's one of the most critical steps for any new roof construction.
Think of a permit less as a hurdle and more as an insurance policy on your investment. It’s the official check-and-balance system that ensures your contractor is building your new roof to current safety codes, protecting your property and everyone inside it.
This process guarantees your contractor follows the local rulebook—a detailed set of requirements covering everything from specific nailing patterns for high-wind zones to the right kind of underlayment for our climate. Without that official oversight, you're just taking their word for it. Skipping this step is a high-stakes gamble you don't want to take.
Why Permits Are Non-Negotiable
A building permit is simply the official green light from your local government to start construction. It means an expert has reviewed the plans for your new roof and confirmed they meet the established building codes designed to ensure structural integrity and weather resistance.
Here in South Florida, those codes are especially tough. They’re written with hurricane-force winds and torrential rain in mind. A permit is your proof that the roof isn't just being built, it's being engineered to stand up to the unique challenges our region throws at it.
The Permit Application and Inspection Journey
Your roofing contractor will almost always handle the entire permit process from start to finish. Still, knowing the roadmap helps you stay in the loop and make sure everything is moving along as it should.
- Application Submission: Your contractor puts together a detailed package for the local building department. This isn't just a simple form; it includes architectural drawings, specs on every material being used, and structural calculations.
- Plan Review: A municipal plan examiner—someone who lives and breathes building codes—goes over the submission with a fine-tooth comb. They're checking for correct material choices, proper attachment methods, ventilation plans, and more.
- Permit Issuance: Once the plans get the thumbs-up, the department issues the permit. Now, work can legally begin.
- Scheduled Inspections: An inspector will visit the job site at key moments. They might do an "in-progress" inspection to check the roof decking and underlayment before it's covered up. Then they'll come back for a final inspection to sign off on the finished roof.
Cutting corners on the permit process can backfire spectacularly. You could be hit with hefty fines, work-stoppage orders, or even be forced to tear off a brand-new roof. Even worse, an unpermitted roof can become a massive legal and financial nightmare when you try to sell your home or file an insurance claim.
When it's all said and done, that signed-off permit is your documented proof that the roof was built right and built legally. It’s a vital safeguard that delivers true, long-term peace of mind.
Your Top Questions About New Roof Construction
Even with the best plan in hand, a big project like a new roof always comes with questions. Getting straight answers is the best way to feel confident before the first hammer swings, making sure there are no surprises down the line. We’ve rounded up the most common questions we hear from homeowners and property managers just like you.
Think of this as the final check of your project blueprint before breaking ground. Nailing down these details gives you peace of mind and helps set the right expectations for everything, from the initial quote to the final nail.
How Long Does a New Roof Project Take?
The timeline for a new roof really depends on a few key things: the size of the building, how complicated the design is, the materials you pick, and—of course—the weather. For a typical single-family home, the crew will likely be on-site for three to seven days.
But that's just the hands-on part. The whole process, from planning and ordering materials to getting the right permits, can take several weeks. A few things can stretch out that on-site timeline:
- Complex roof designs with lots of valleys, dormers, and steep pitches always require more time.
- Specialty materials like slate or tile demand a more careful, meticulous installation process.
- Unforeseen structural repairs, like finding and replacing rotted decking after the old roof is torn off.
- Bad weather is the biggest wild card and can cause major delays for both safety and quality.
What Is the Best Time of Year for Installation?
The sweet spot for a new roof installation is any time you can count on dry, moderate weather. For most parts of the country, that means late spring through early fall is your best bet. Consistent, mild temperatures are especially important for materials like asphalt shingles, which need warmth to seal properly and form that watertight bond.
If you can avoid it, scheduling work during the rainy season or in the dead of winter isn't ideal. Too much moisture or freezing temperatures can really mess with the quality of the installation and cut down on the lifespan of your brand-new roof.
A new roof isn't just a repair—it's a serious investment that pays you back. Remodeling reports consistently show that homeowners can get back a huge chunk of the cost when they sell. Plus, a new roof gives your home a major facelift and improves energy efficiency, which are huge selling points for buyers.
How Do I Create an Accurate Budget?
Putting together a solid budget for a new roof is about more than just the price of the shingles. A realistic budget has to cover all the materials, the contractor's labor, any local permit fees, and the cost of hauling away all the old debris.
Here's the most important tip: always build in a contingency fund of 10-20% of the total estimated cost. You absolutely need this buffer for those nasty surprises you can't see until the old roof comes off, like damaged decking or weak structural supports. The best way to get a firm handle on your numbers is to get at least three detailed, itemized quotes from reputable, licensed roofing contractors.
At Paletz Roofing and Inspections, we bring over 30 years of hands-on experience to every new roof we build in South Florida. Our certified experts are ready to give you a detailed, transparent quote and answer every last one of your questions. Protect your investment with a roof built to last—visit us at https://paletzroofing.com to schedule your free estimate today.